A Comprehensive Solution Manual: Windows Rainmeter Problems Decoded

A Comprehensive Solution Manual: Windows Rainmeter Problems Decoded
Rainmeter lets you personalize your Windows desktop with unique skins and widgets. It helps in tweaking everything from clock skins to system resource usage widgets.
However, if you’re new to this tool and struggling with issues like Rainmeter not opening or crashing frequently, you’re not alone. Let’s look at several troubleshooting methods to solve any Rainmeter issues on Windows.
Common Rainmeter Problems on Windows
There are various issues that a newbie may experience while setting up Rainmeter. This guide will provide several general ways to fix common errors. These errors include:
- Rainmeter refusing to open in Windows.
- Rainmeter crashes without warning, and at seemingly random times.
- Rainmeter freezing when you apply a skin.
- Finally, Rainmeter sometimes does not run when you boot up Windows.
If you’re encountering any of the above, let’s hop into the fixes.
1. Try Out Some General Fixes
We recommend trying out the below fixes if Rainmeter is not working correctly on Windows:
- Restart your system: A system restart can clear out any temporary data that might be causing Rainmeter to crash.
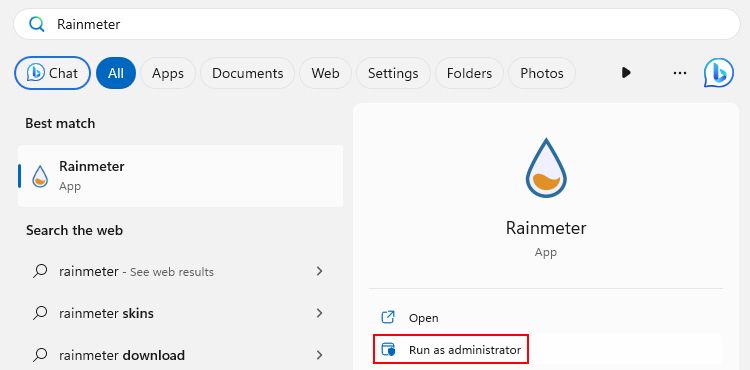
- Launch Rainmeter as an administrator: Before troubleshooting the main issue, try running Rainmeter with administrative permissions. To do so, click the search icon and type Rainmeter.Then, choose the Run as administrator option.

- Uninstall a recently applied skin: Have you recently installed a Rainmeter skin onto your desktop? It is possible that the skin may be the root cause of all your issues. To check this, uninstall the skin and restart Rainmeter.
After applying the general fixes, check if Rainmeter is functioning normally.
2. Update Rainmeter to the Latest Version
You’ve tried the general fixes, but Rainmeter is still causing trouble. What’s the next step, then? It could be as simple as updating Rainmeter to its latest version.
Here’s how you can update Rainmeter to its latest version:
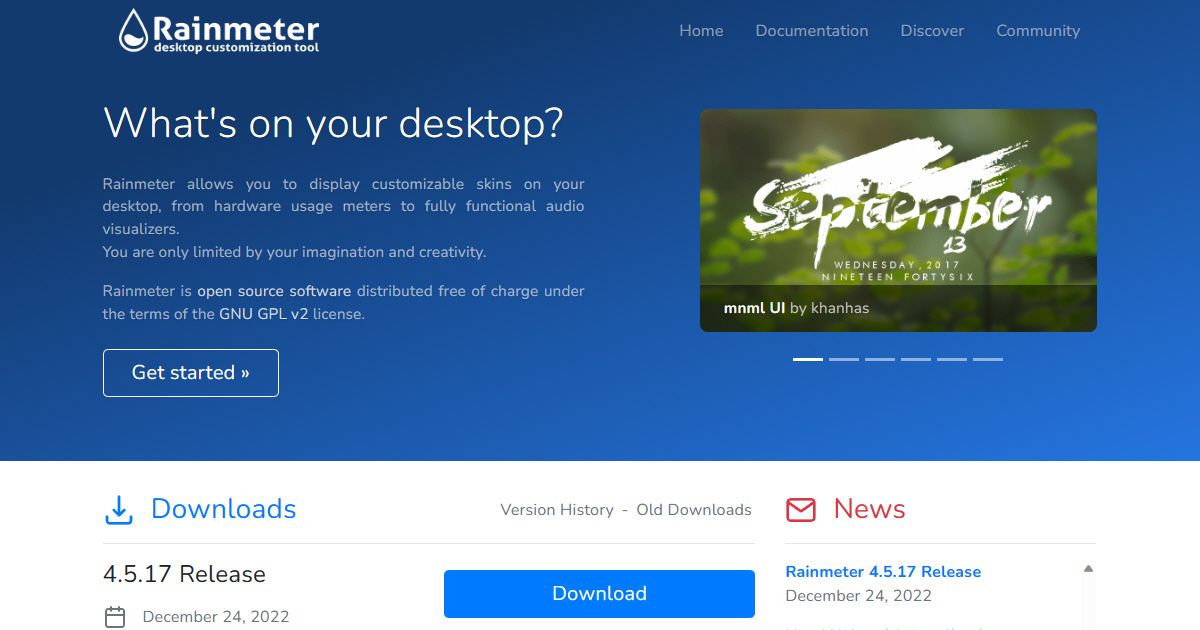
- Open your browser and visit Rainmeter.net .
- On the home page, click the Download button.

- Run the Rainmeter.exe file from your Downloads folder.
- Click OK to proceed with the installation.
- Follow the on-screen instructions to overwrite the current Rainmeter version with the latest one.
3. Disable the Rainmeter Skins Temporarily
Rainmeter is best known for its compatibility with multiple third-party skins . But what if the skin you’re trying to install is the culprit behind the frequent Rainmeter crashes? To check, disable the skins currently active on your desktop.
We suggest turning off the skins individually and taking note of the order in which you unload them. This will help you point out the corrupted skin.
Follow the below-given steps to disable all the Rainmeter skins temporarily:
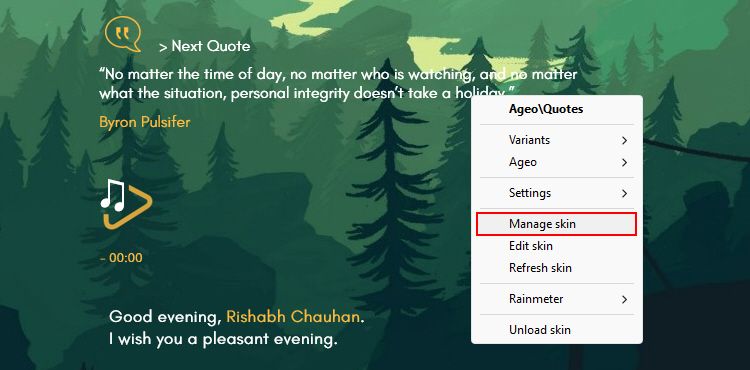
- Right-click on your applied skin and click on Manage skin.

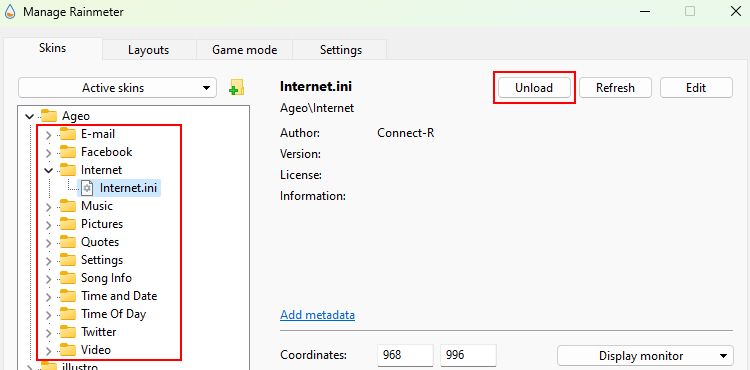
- Within the Manage window, locate the Active Skins tab.
- Under this tab, you’ll find a list of all active skins. Click on Unload for each active skin’s components.

After performing these steps, run Rainmeter and observe if the issues persist. If it runs smoothly, you can start reenabling the disabled skins.
Overall, the skins enhance your Windows desktop’s aesthetics and functionality. However, a poorly coded one can sometimes cause unexpected glitches and crashes. So, don’t let a skin ruin your overall desktop experience.
4. Adjust Rainmeter Startup Settings
Another workaround for your Rainmeter-related issues is by adjusting its startup settings. If Rainmeter is not opening as soon as you unlock your PC after a boot, set the app to start up on every boot.
Here’s how you can adjust Rainmeter’s startup settings:
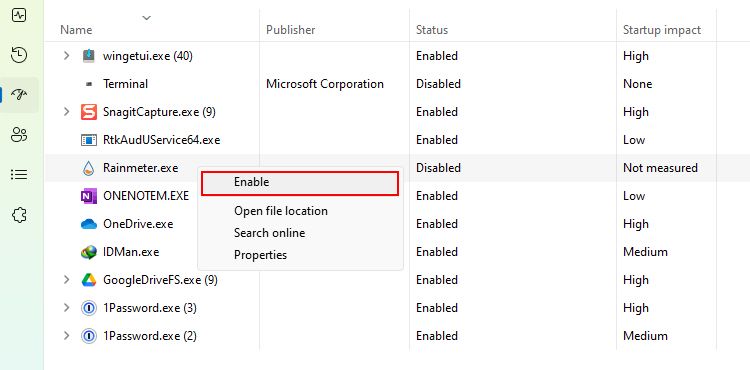
- Launch the Windows Task Manager app .
- Open the Startup apps tab from the left-hand sidebar.
- Under the Name entries, right-click on Rainmeter and select Enable.

- Restart your computer after adjusting the startup settings.
That’s it. These steps should ensure that Rainmeter starts up smoothly with Windows without causing any delay in loading your currently applied skin.
Now that you have a working Rainmeter setup, check out our favorite picks for minimalist Rainmeter skins .
5. Turn Off Hardware Acceleration
Rainmeter sometimes runs slowly or not as efficient as you’d expect. This issue might be due to a Windows feature called Hardware Acceleration.
The Hardware Acceleration feature uses your PC’s GPU (alongside the CPU) to handle the ongoing processes (tasks) in a better way. But sometimes, instead of enhancing the performance, it can lead to performance issues. So, if you’re experiencing issues with Rainmeter’s performance, consider disabling hardware acceleration for now.
Here’s a tip: A quick way to turn off hardware acceleration for Rainmeter is from its settings window. Navigate to Rainmeter > Manage > Settings and uncheck the Use hardware acceleration option.
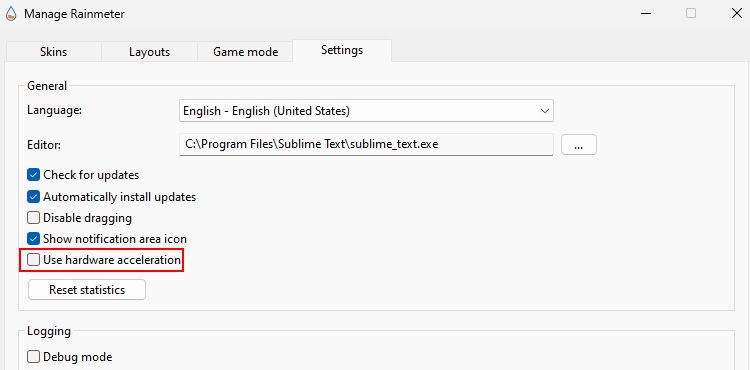
If you’re not in a position to use its settings (because of crashes), try the alternative method using the steps below:
- Open the Windows search bar, type Graphics settings, and click Open.
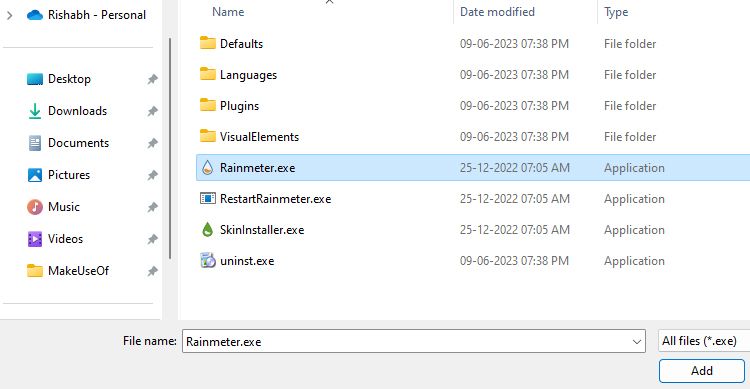
- Click the Browse button and select the Rainmeter.exe file. This file is mainly located inside the C:\Program Files\Rainmeter directory.

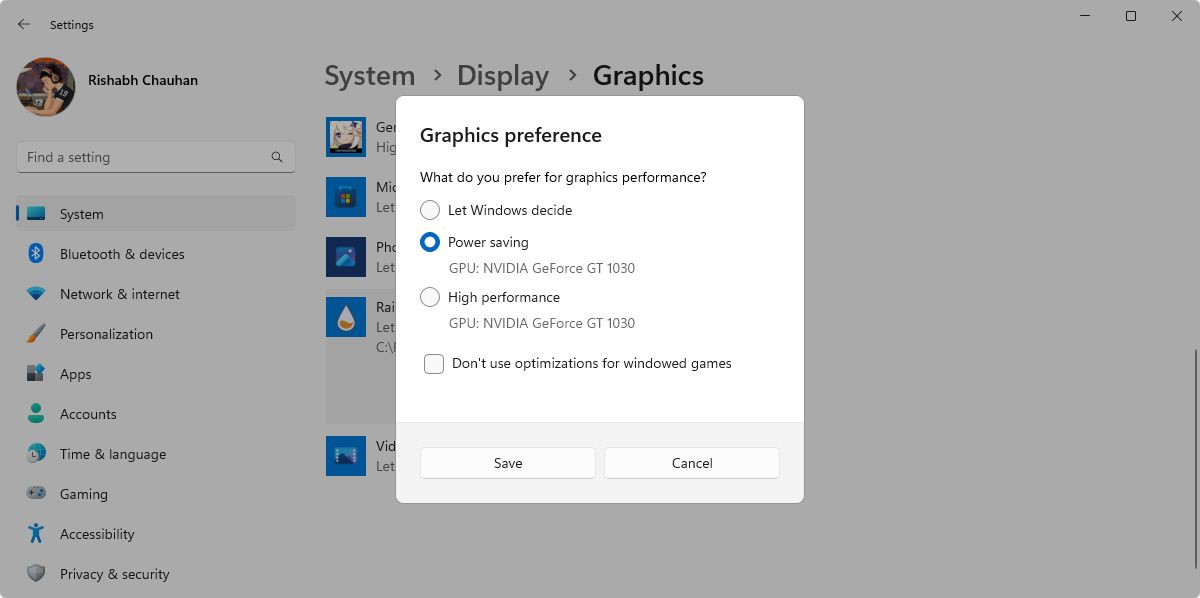
- Once Rainmeter appears in the list, click on Options.
- Change the Graphics preference to Power Saving.
- Click Save to finalize the changes and relaunch Rainmeter to check whether the issues have been resolved.

If turning off hardware acceleration doesn’t fix your issue, enable it back from the same settings and proceed to the following method.
6. Clean Install Rainmeter
If none of the above steps help fix Rainmeter issues, a clean installation is the last resort. A clean installation means uninstalling the app first and then reinstalling it correctly. Once you clean install Rainmeter, it should remove any corrupted or misconfigured files.
Updating Rainmeter is different from clean installing it. After an update, it mainly bumps the version of the software and doesn’t usually affect the core files. At the same time, a clean installation removes all the related app data and settings. So, ensure you do not skip this method!
For uninstalling Rainmeter, we recommend using the free version of Revo Uninstaller . Download it from the given link and use it to remove Rainmeter properly. If you don’t want to rely on a third-party app, follow our how to uninstall Rainmeter guide for an alternate way.
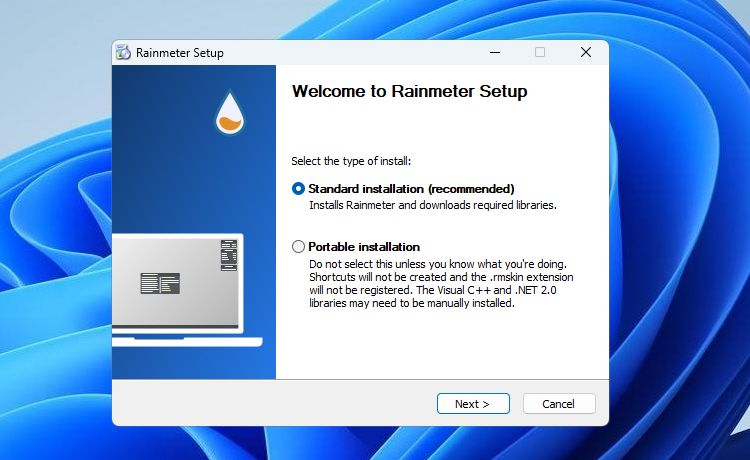
Once you’re done with the previous step, download Rainmeter or run the EXE file you’ve downloaded before (at the time of updating Rainmeter).
Next, go through the entire setup process again and start Rainmeter. Hopefully, a clean install should do the trick for you and fix all your issues.
No More Hiccups While Using Rainmeter on Windows
When it comes to tweaking or personalizing the Windows OS, Rainmeter stands in the first place. There are limitless possibilities that you can explore using Rainmeter.
But undoubtedly, when you can’t even open Rainmeter, what else could be more frustrating? Hopefully, all the solutions above will help you regain your crash-free Rainmeter experience.
Besides, It’s worth mentioning that Rainmeter is not the only option available to you. The Internet has many different options for Windows customization programs. So, do check them out to make your desktop unique.
However, if you’re new to this tool and struggling with issues like Rainmeter not opening or crashing frequently, you’re not alone. Let’s look at several troubleshooting methods to solve any Rainmeter issues on Windows.
Also read:
- [New] Camera & Accessories Guide for Travel Vids for 2024
- 2024 Approved PC/Android Tutorial Successful Facebook Video Sharing
- Enhancing Narratives with Artificial Intelligence: The Power of ChatGPT in Storytelling Techniques
- From YouTube to IGTV Top Methods Unveiled for 2024
- How to Automate Microsoft To Do With IFTTT
- How to Resolve Windows Upgrade Failures and Errors
- How to Setup VirtualBox's Security Features: Secure Boot & TPM
- In 2024, Full Spectrum Analysis Unpacking Adobe's Data Preservation and Alternatives
- In 2024, No Monetary Investment? How to Acquire FCP
- Leverage Cookiebot for Optimized Website Traffic Growth
- Streamlining Tasks: Updating Window 11'S Context Menu
- Understanding AggregatorHost.exe: Windows' Functionality & Safety Concerns
- Title: A Comprehensive Solution Manual: Windows Rainmeter Problems Decoded
- Author: Richard
- Created at : 2025-02-01 17:08:02
- Updated at : 2025-02-02 18:21:02
- Link: https://win11-tips.techidaily.com/a-comprehensive-solution-manual-windows-rainmeter-problems-decoded/
- License: This work is licensed under CC BY-NC-SA 4.0.
