
A Technical Odyssey: Embracing HDR in Windows 11 Environments
A Technical Odyssey: Embracing HDR in Windows 11 Environments
Do you want to enhance the visual experience of your Windows PC? One way to do that is by enabling the HDR option. But what exactly is HDR, and how to enable it?
This article will discuss HDR and how to enable it on Windows. We’ll also explore different fixes that can be useful if HDR isn’t working on Windows 11.
What Is HDR?
HDR, or High Dynamic Range, is the new standard for images and videos. It provides proper exposure to images that were previously not possible with Standard Dynamic Range (SDR). This means that an HDR-enabled monitor can show more details in both the dark and bright parts of an image, ultimately enhancing the viewing experience.
HDR uses higher bit depth to produce more colors on the display. It also increases the peak brightness, which allows for brighter highlights. HDR first became popular among photographers who wanted to properly expose a composition with two subjects having a 13-stop difference in value. But now, it’s being used to produce movies, videos, and even games.

How to Check if Your Computer Supports HDR
HDR-enabled monitors are the go-to option for media-based tasks, whether you’re editing photos or using the best video editing apps . This is because of their accurate color production quality, meaning you can be more confident that the end product will look close to what you see on the screen.
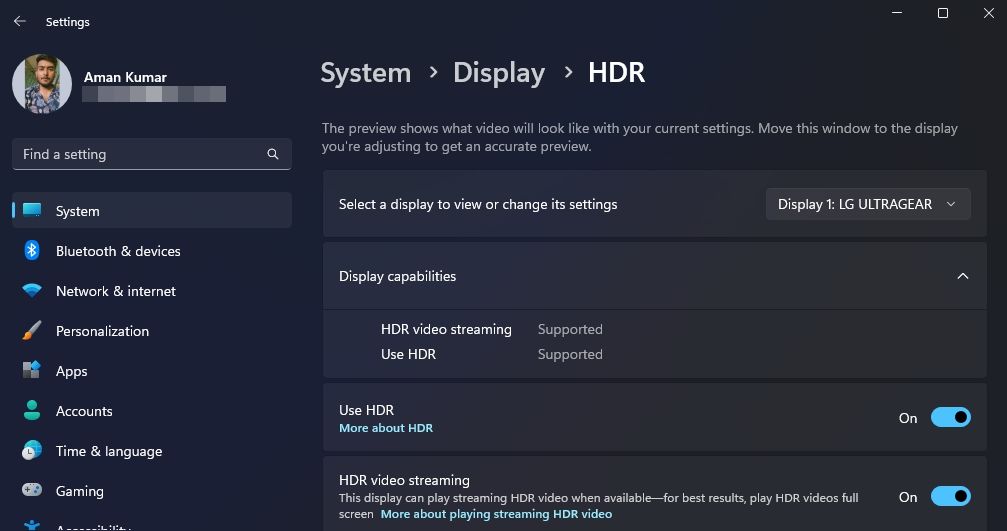
However, not all monitors support HDR. You can check if your monitor supports HDR by following these steps:
- Press Win + I to open the Settings app.
- Select System from the left sidebar and Display from the right pane.
- Click Use HDR.
- Click the drop-down icon next to Display capabilities.
- If HDR video streaming and Use HDR says Supported, your display supports HDR.
OtsAV DJ Pro
 OtsAV DJ Pro
Now that you know if your monitor supports HDR or not, let’s check out how to enable it.
1. Enable HDR Using the Xbox Game Bar
Xbox Game Bar is a gaming overlay that allows you to quickly access features like screen capturing, recording, chatting, and more without having to leave your game. You can also use it to quickly enable HDR on your system. Here’s how:
- Press Win to open the Start Menu.
- Type Xbox Game Bar and press Enter. You can also press Win + G to open the Xbox Game Bar.
- Click the Gear icon at the top.
- Select Gaming features from the left sidebar.
- Check the Use HDR box.
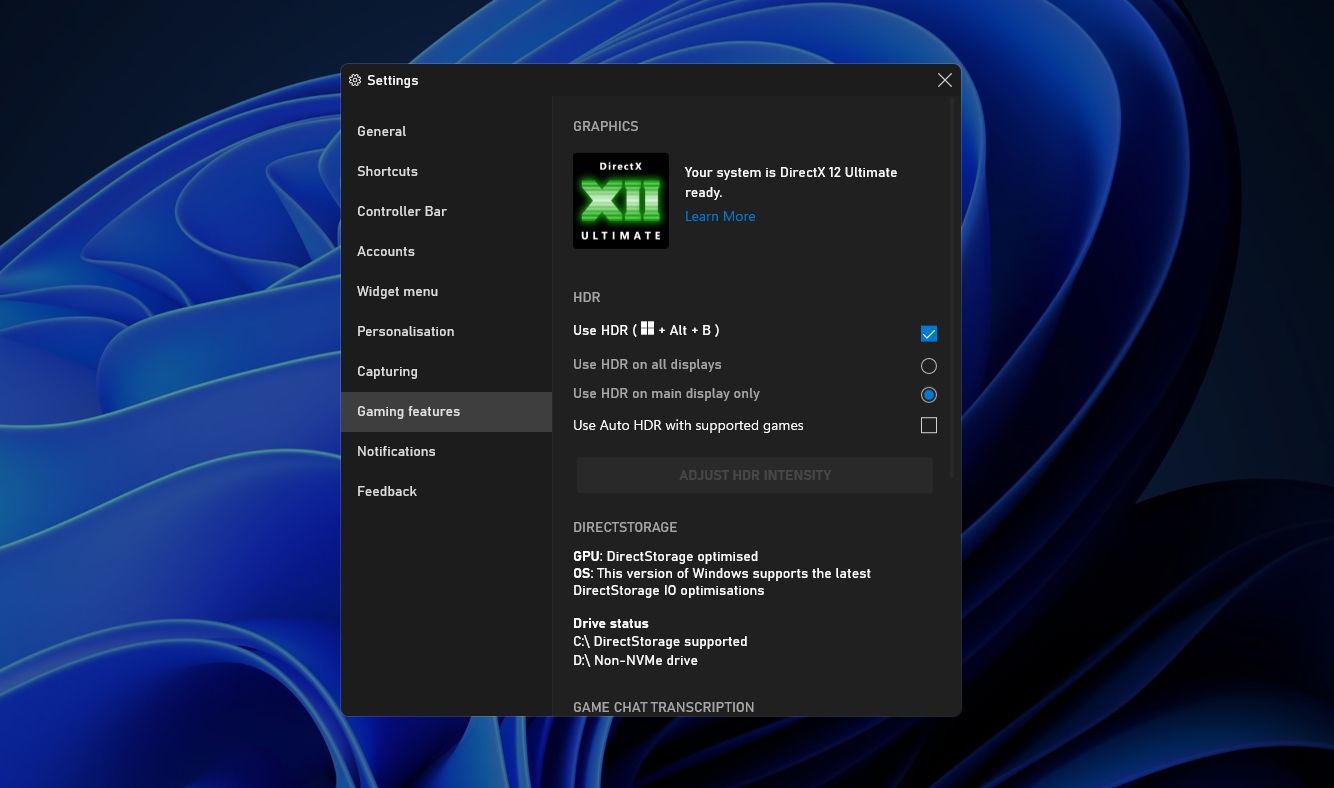
If you are using multiple displays, you can choose between the Use HDR on all displays and Use HDR on main display only options.
You can also check the Use Auto HDR with supported games box, which will configure Windows to automatically enable HDR in games that support it.
2. Enable HDR Using the Settings App
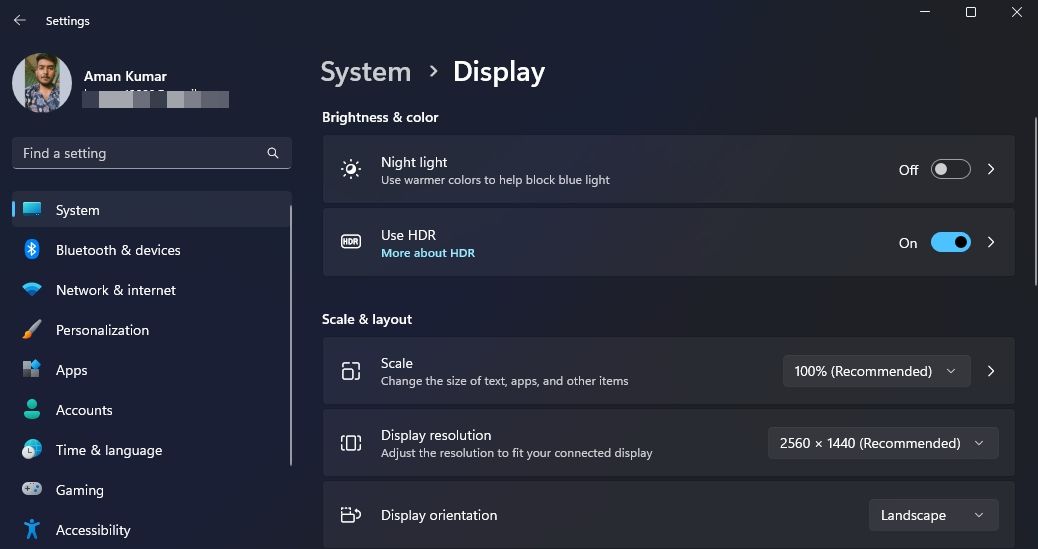
Another quick way to activate HDR on Windows 11 is through the Windows Settings app. Launch the Settings app, choose System from the left sidebar, and Display from the right pane. Then, enable the toggle next to Use HDR to activate HDR on your monitor.
 Easy GIF Animator is a powerful animated GIF editor and the top tool for creating animated pictures, banners, buttons and GIF videos. You get extensive animation editing features, animation effects, unmatched image quality and optimization for the web. No other GIF animation software matches our features and ease of use, that’s why Easy GIF Animator is so popular.
You can also enable Auto HDR to enhance the picture quality of eligible games from SDR to HDR.
Why Is HDR Not Working on Windows 11?
Even if you have enabled HDR, you might notice that it is not working on your Windows PC. This can happen for various reasons, but some of the most common ones are listed below:
- A bug in your Windows version can prevent you from using the HDR feature.
- HDR may not work if your graphics driver is corrupt or outdated.
- You can only enjoy HDR content if your display is connected to your PC using a HDMI 2.0 or DisplayPort 1.4 cable.
Fortunately, it is very easy to troubleshoot this issue and continue using HDR. Here are all the solutions you can try if HDR is not working on Windows 11.
 TubeDigger - online video downloader from mostly any site
1. Restart Your Computer
The first course of action to troubleshoot any Windows issue is to restart your computer. This will help to eliminate any temporary bugs or glitches that may be interfering with the HDR feature and preventing it from working on your computer.
To restart, press Alt + F4, choose Restart from the drop-down menu, and click OK.
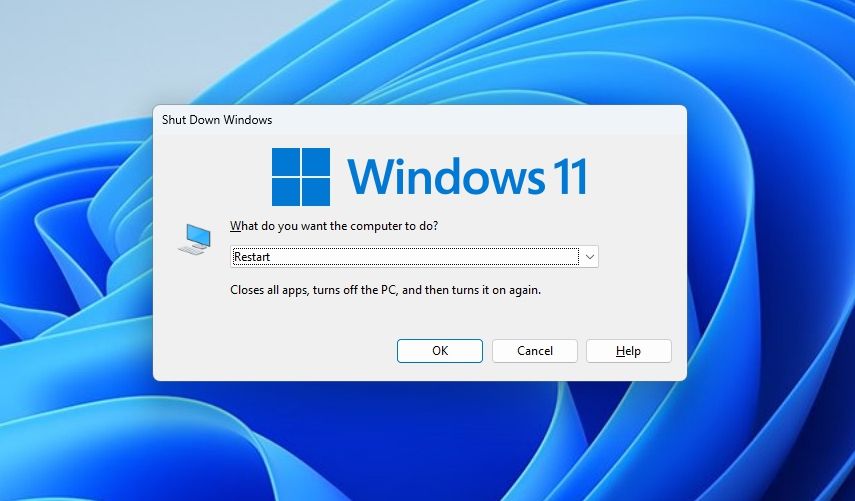

After your computer restarts, check if the HDR feature is working. If not, try the next solution on the list.
2. Eliminate Any Compatibility Issues
You will not be able to use HDR if you are using an unsupported cable to connect your display to your PC. To use HDR, you must use DisplayPort 1.4 or HDMI 2.0 or higher. You must also ensure that your monitor supports HDR10 and has a resolution of 1080p.
If either of these requirements is not met, HDR will not work. In this case, the only solution is to upgrade your hardware.
3. Update Your Graphics Driver
The best way to keep your computer free from graphics-related issues is to regularly download the graphics driver update. To update your graphics driver, launch the Settings app, choose Windows Update from the left sidebar, and click on the Check for updates option in the right pane.
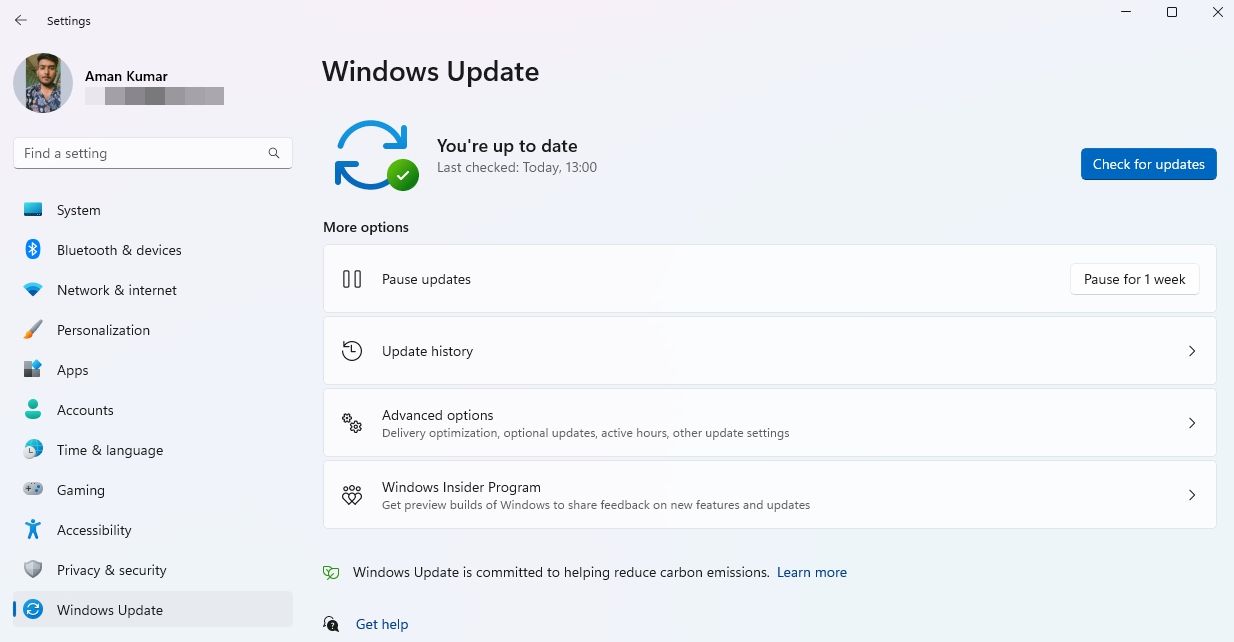
Windows will now look for any available updates for all the installed components, including the graphics driver. If it finds any, it will automatically download and install them without much user input.
Alternatively, you can visit your graphics driver manufacturer’s website to download any available updates for your graphics driver.
Upon successfully updating the graphics driver, restart your computer and check if can use HDR.

4. Uninstall Any Recent Windows Updates
Are you unable to use HDR after updating Windows to the latest build? If yes, a bug or glitch in your Windows version is probably causing the problem.
In this case, uninstalling the recent Windows update can fix the issue. To do that, check our guide on manually uninstalling Windows updates .
Everything You Need to Know About HDR on Windows
HDR, or High Dynamic Range, provides a more realistic and immersive viewing experience on your monitor. It ensures that both the dark and light parts of an image have more details than an SDR image.
However, HDR is not always enabled by default on Windows PCs. Fortunately, you can quickly enable it using the above methods.
This article will discuss HDR and how to enable it on Windows. We’ll also explore different fixes that can be useful if HDR isn’t working on Windows 11.
- Title: A Technical Odyssey: Embracing HDR in Windows 11 Environments
- Author: Richard
- Created at : 2024-08-16 02:03:47
- Updated at : 2024-08-17 02:03:47
- Link: https://win11-tips.techidaily.com/a-technical-odyssey-embracing-hdr-in-windows-11-environments/
- License: This work is licensed under CC BY-NC-SA 4.0.