Activation Procedure for Windows Photo Viewer in Win11

Activation Procedure for Windows Photo Viewer in Win11
Quick Links
- How to Restore Windows Photo Viewer in Windows 10/11 Using the Registry
- How to Disable Windows Photo Viewer in Windows 10 and 11
- Use One Photo Viewer
Key Takeaways
- Microsoft replaced the classic Windows Photo Viewer app in Windows 10 and 11 with the new Photos app.
- Fortunately, you can restore Windows Photo Viewer on your Windows computer using a registry hack.
- Additionally, you could try a third-party Windows Photo Viewer alternative like One Photo Viewer, as it offers a clean UI, better performance, and more features.
Microsoft replaced the classic Photo Viewer app in Windows 10 and 11 with Photos, its modern, feature-rich image viewer. However, if you liked the simplicity of Photo Viewer, here’s how you can bring it back in Windows 10 and 11.
How to Restore Windows Photo Viewer in Windows 10/11 Using the Registry
You can enable the classic Windows Photo Viewer app using a Windows Registry script. The following Windows Registry script reconfigures and enables the Windows Photo Viewer app.
Modifying your Windows Registry involves risk as incorrect modifications can cause your system to malfunction. If you intend to proceed with the steps below, first create a restore point and back up your Windows Registry . This will help you to recover your system if something goes wrong.
- Press Win + R to open the Run dialog. Input notepad and click OK.
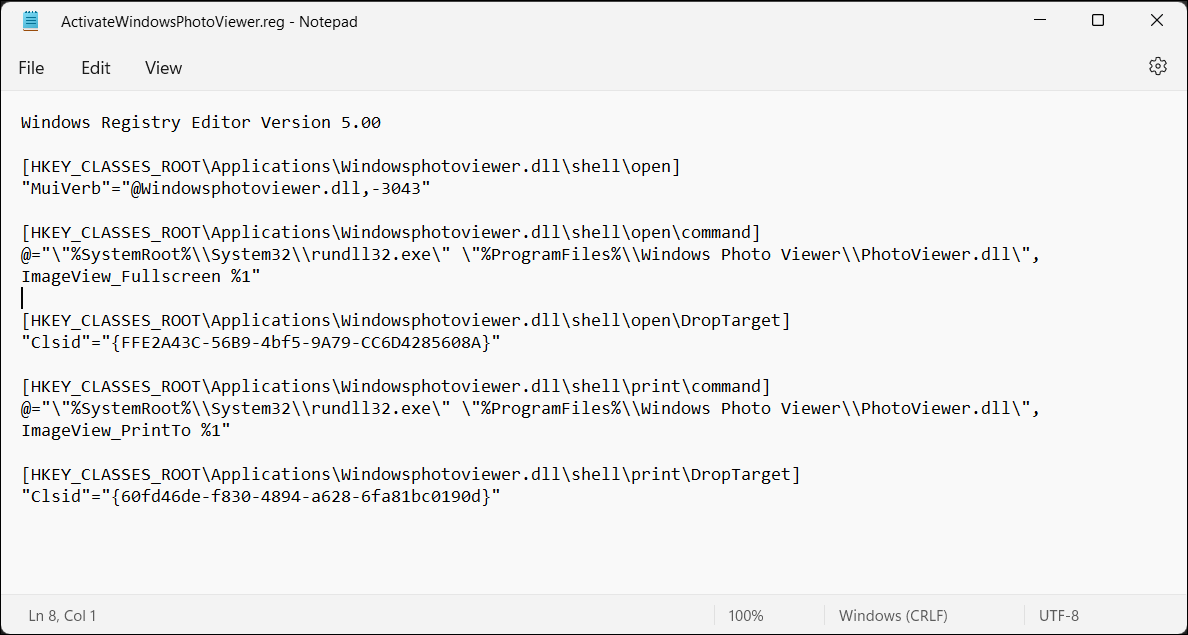
- Copy and paste the following script into the Notepad file. This script activates the Windows Photo Viewer.
Windows Registry Editor Version 5.00 [HKEY_CLASSES_ROOT\Applications\Windowsphotoviewer.dll\shell\open] "MuiVerb"="@Windowsphotoviewer.dll,-3043" [HKEY_CLASSES_ROOT\Applications\Windowsphotoviewer.dll\shell\open\command] @="\"%SystemRoot%\\System32\\rundll32.exe\" \"%ProgramFiles%\\Windows Photo Viewer\\PhotoViewer.dll\", ImageView_Fullscreen %1" [HKEY_CLASSES_ROOT\Applications\Windowsphotoviewer.dll\shell\open\DropTarget] "Clsid"="{FFE2A43C-56B9-4bf5-9A79-CC6D4285608A}" [HKEY_CLASSES_ROOT\Applications\Windowsphotoviewer.dll\shell\print\command] @="\"%SystemRoot%\\System32\\rundll32.exe\" \"%ProgramFiles%\\Windows Photo Viewer\\PhotoViewer.dll\", ImageView_PrintTo %1" [HKEY_CLASSES_ROOT\Applications\Windowsphotoviewer.dll\shell\print\DropTarget] "Clsid"="{60fd46de-f830-4894-a628-6fa81bc0190d}"
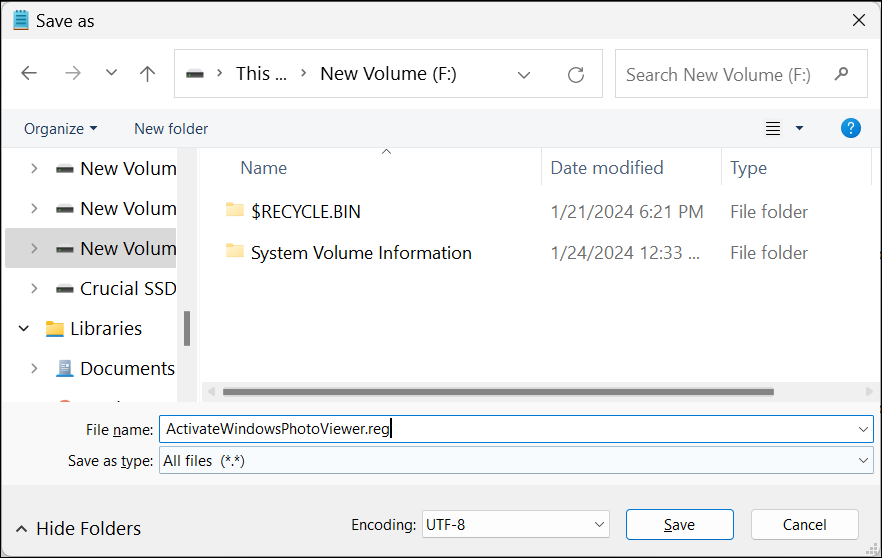
- Press Ctrl + Shift + S to open the Save dialog. Alternatively, go to File > Save As.
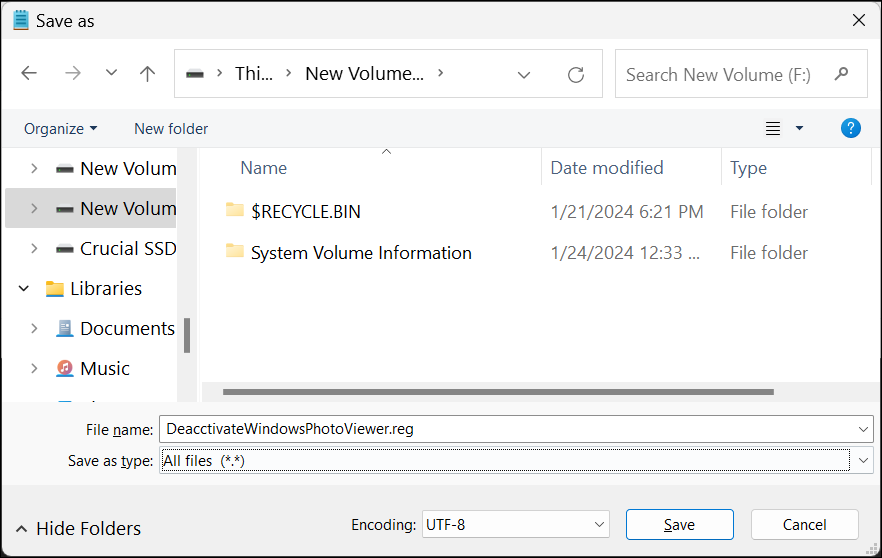
- In the Save as dialog, enter ActivateWindowsPhotoViewer.reg as the file name. Click the Save as type drop-down and choose All Files(*.*). Choose a location and Save the file to your drive.

- Next, open File Explorer, browse to the location where you saved the file, double-click ActivateWindowsPhotoViewer.reg, and then click Yes. When a warning prompt appears, click Yes.
- After the script is executed, you’ll see a success message. Click OK.
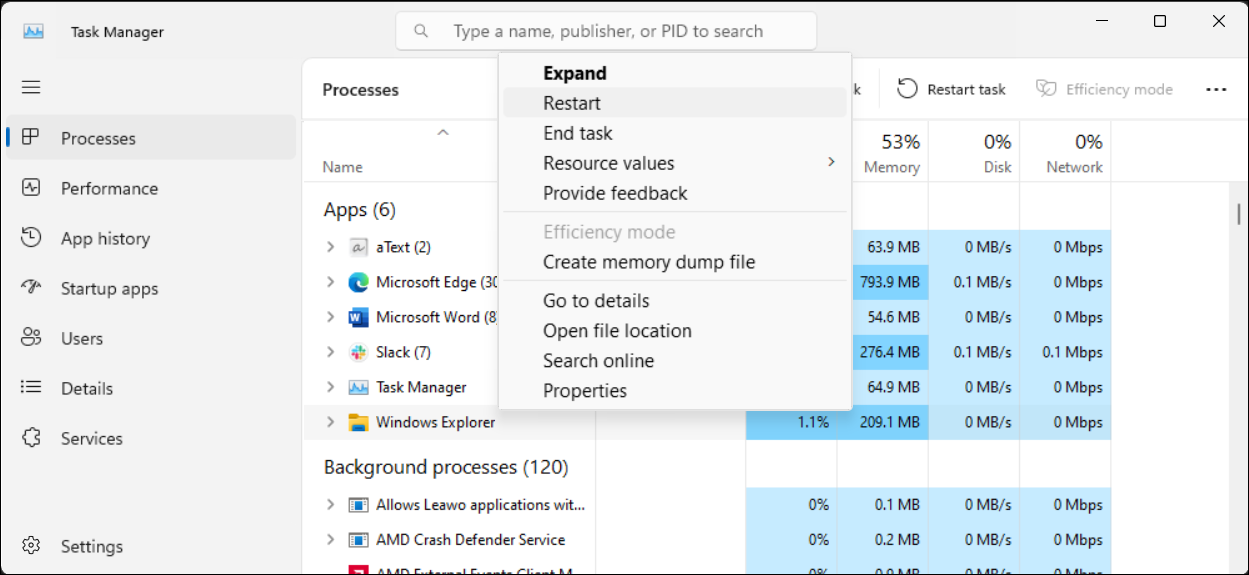
- To apply the changes, press Win + X to open the Windows Power menu and choose Task Manager.
- In the Process tab, find and right-click on Windows Explorer, then click Restart. Your screen may flash momentarily as Windows Explorer restarts.

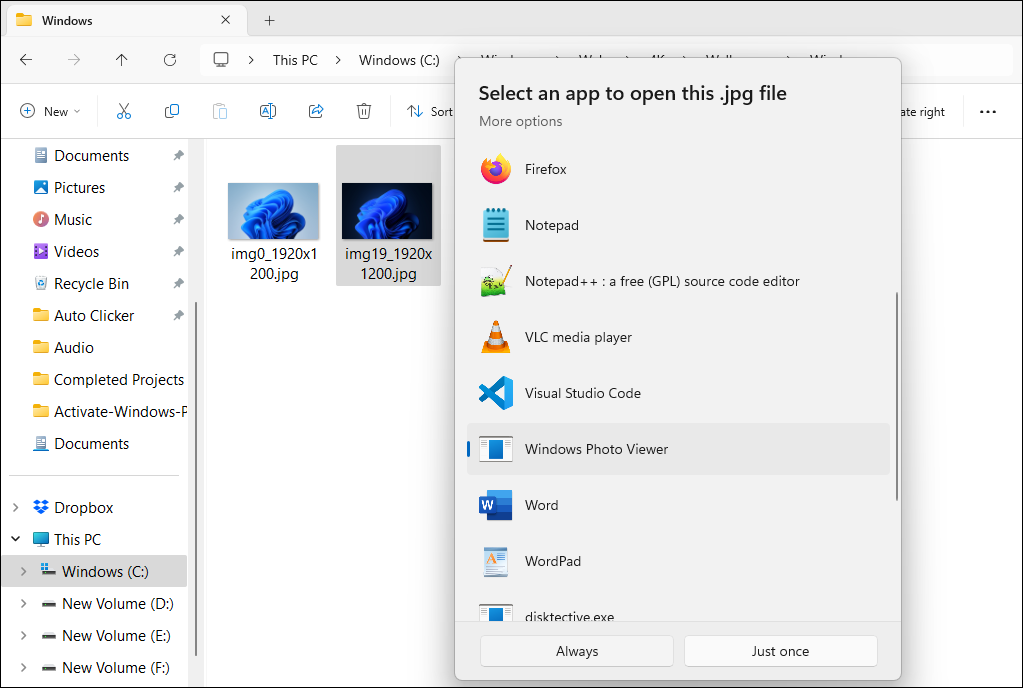
Since Windows Photos Viewer doesn’t have its own .EXE file, but only a .DLL , you can’t open it from the search bar in Windows. Instead, to open pictures in Photo Viewer, right-click on any image in File Explorer, go to Open With > Choose another app, and then scroll down and select Windows Photo Viewer. Choose Just once to open the image. If you select Always, Windows will set Photo Viewer as the default app for that image format.
How to Disable Windows Photo Viewer in Windows 10 and 11
To disable Windows Photo Viewer, you must undo the changes you made earlier to the Windows Registry. It’s worth making a backup again before making the changes. Then:
- Press Win + R to open the Run dialog. Input notepad and click OK.
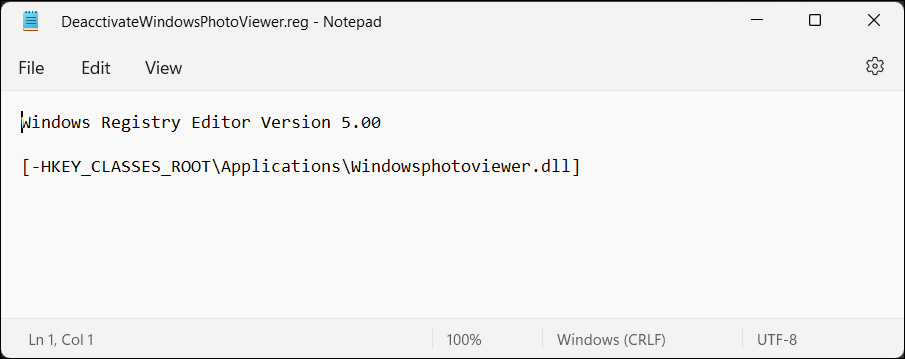
- Copy and paste the following script into the notepad file:
Windows Registry Editor Version 5.00 [-HKEY_CLASSES_ROOT\Applications\Windowsphotoviewer.dll]
- Press Ctrl + Shift + S to open the Save dialog.
- Type DeactivateWindowsPhotoViewer.reg as the file name. Click the Save as type drop-down, choose All files (*.*), then click Save.

- Double-click DeactivateWindowsPhotoViewer.reg to execute the script and follow the on-screen instructions.
Once done, restart Windows Explorer , and the Photo Viewer app will be disabled.
Use One Photo Viewer
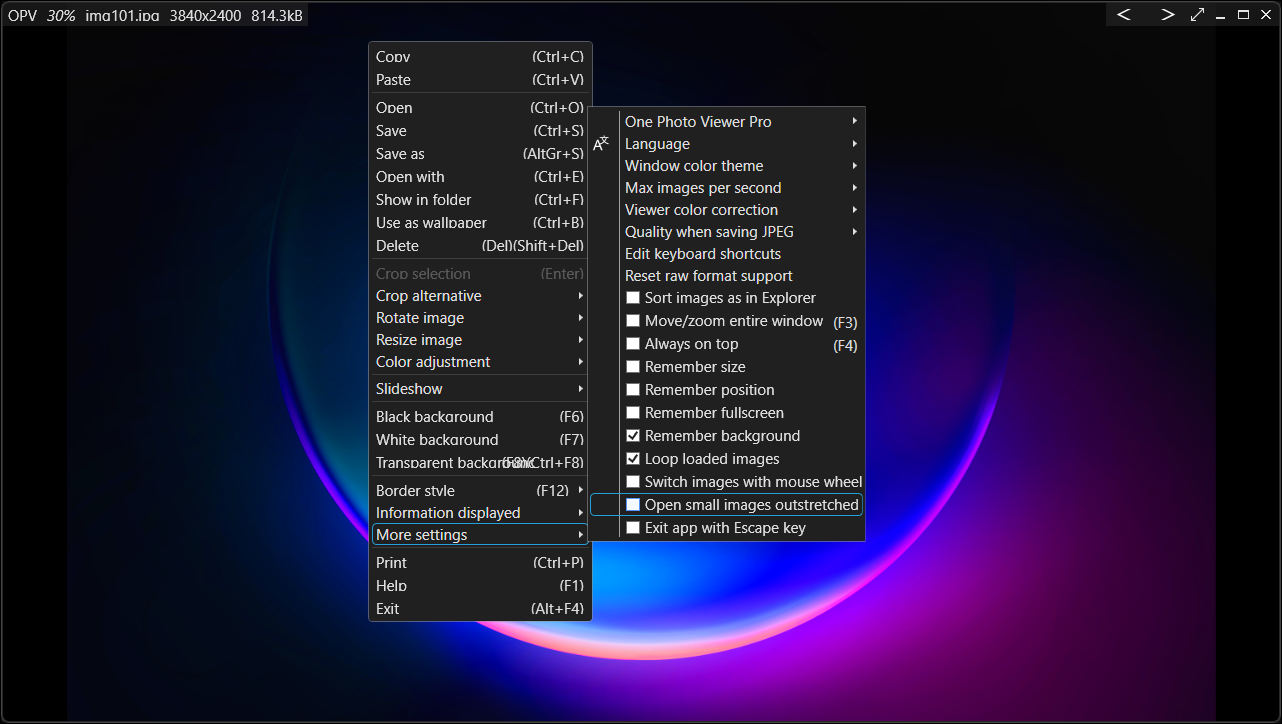
One Photo Viewer is an excellent Windows Photo Viewer and Windows Photos alternative . It’s fast, free, and offers a clean interface by placing all the controls in the context menu, decluttering the toolbar area. Right-click the app interface to view the menu and access all the tools and settings.
One Photo Viewer offers all the bells and whistles you expect of an image viewer, plus more. You can scroll through the images using the arrow keys or the dedicated buttons, zoom in and out, rotate, crop, resize, or adjust colors.
It also supports RAW formats, including HEIC and WEBP animation, a slideshow from a folder or loaded images, custom keyboard shortcuts, and a color correction tool to make quick enhancements. You can also opt for the $3 Pro version to get two additional features: a toolbar for improved functionality and thumbnails for easier navigation.
Download: One Photo Viewer (Free, premium version available)
That said, if you prefer to stick with a native option, give the built-in Windows Photos app another shot. It’s not as bad as you may think upon first use.
Also read:
- [Updated] Accuracy at Hand Editing TikTok's Personal Info for 2024
- 1. Solving Common Screen Issues: Expert Fixes for Incorrectly Displayed Content on Your Monitor - Guided by YL Computing
- 3 Ways to Enable Telnet in Windows 10 & 11
- 4 Ways to Fix a Grayed Out Screen Saver Settings on Windows
- A Comprehensive Guide to Hyper-V Enablement in Win11
- A Guide: Restoring Lost Functionality to Your Windows Tablet Pens
- Balancing Wireless & Cable Networks on Windows Systems
- Boosting PC Speed with Win11 Startup Tweaks
- In-Depth Look at the Budget-Friendly TP-Link Archer C50 Wireless Router
- Recording Your Conversations Made Easy with iOS 18 – Say Goodbye to Third-Party Dependency!
- Time-Lapse Wizardry An Introduction
- Top 8 Best & Free Roku Streaming Channels
- VCRUNTIME140.dll Missing, Program Can't Start on Windows 10 [Solved]
- Title: Activation Procedure for Windows Photo Viewer in Win11
- Author: Richard
- Created at : 2025-02-13 03:07:13
- Updated at : 2025-02-16 02:55:49
- Link: https://win11-tips.techidaily.com/activation-procedure-for-windows-photo-viewer-in-win11/
- License: This work is licensed under CC BY-NC-SA 4.0.
