Addressing Windows Camera's Failed Recordings
Addressing Windows Camera’s Failed Recordings
The Windows Camera app is known for its simplicity and user-friendliness, making it a go-to choice for capturing and preserving memories. However, there are occasions when you encounter problems with the app, like the inability to save photos or videos on your device. This can be particularly frustrating, especially if you intend to share or edit these media files later. Below, we walk you through the steps to resolve issues with the Camera app when it fails to save photos or videos in Windows.
1. Check the Storage Permissions
If your laptop or computer’s camera doesn’t save photos or videos, we recommend starting your troubleshooting journey by ensuring it has sufficient permissions to store data on your device.
Here is how you can quickly do that:
- Press the Win + I keys together to open the Settings app.
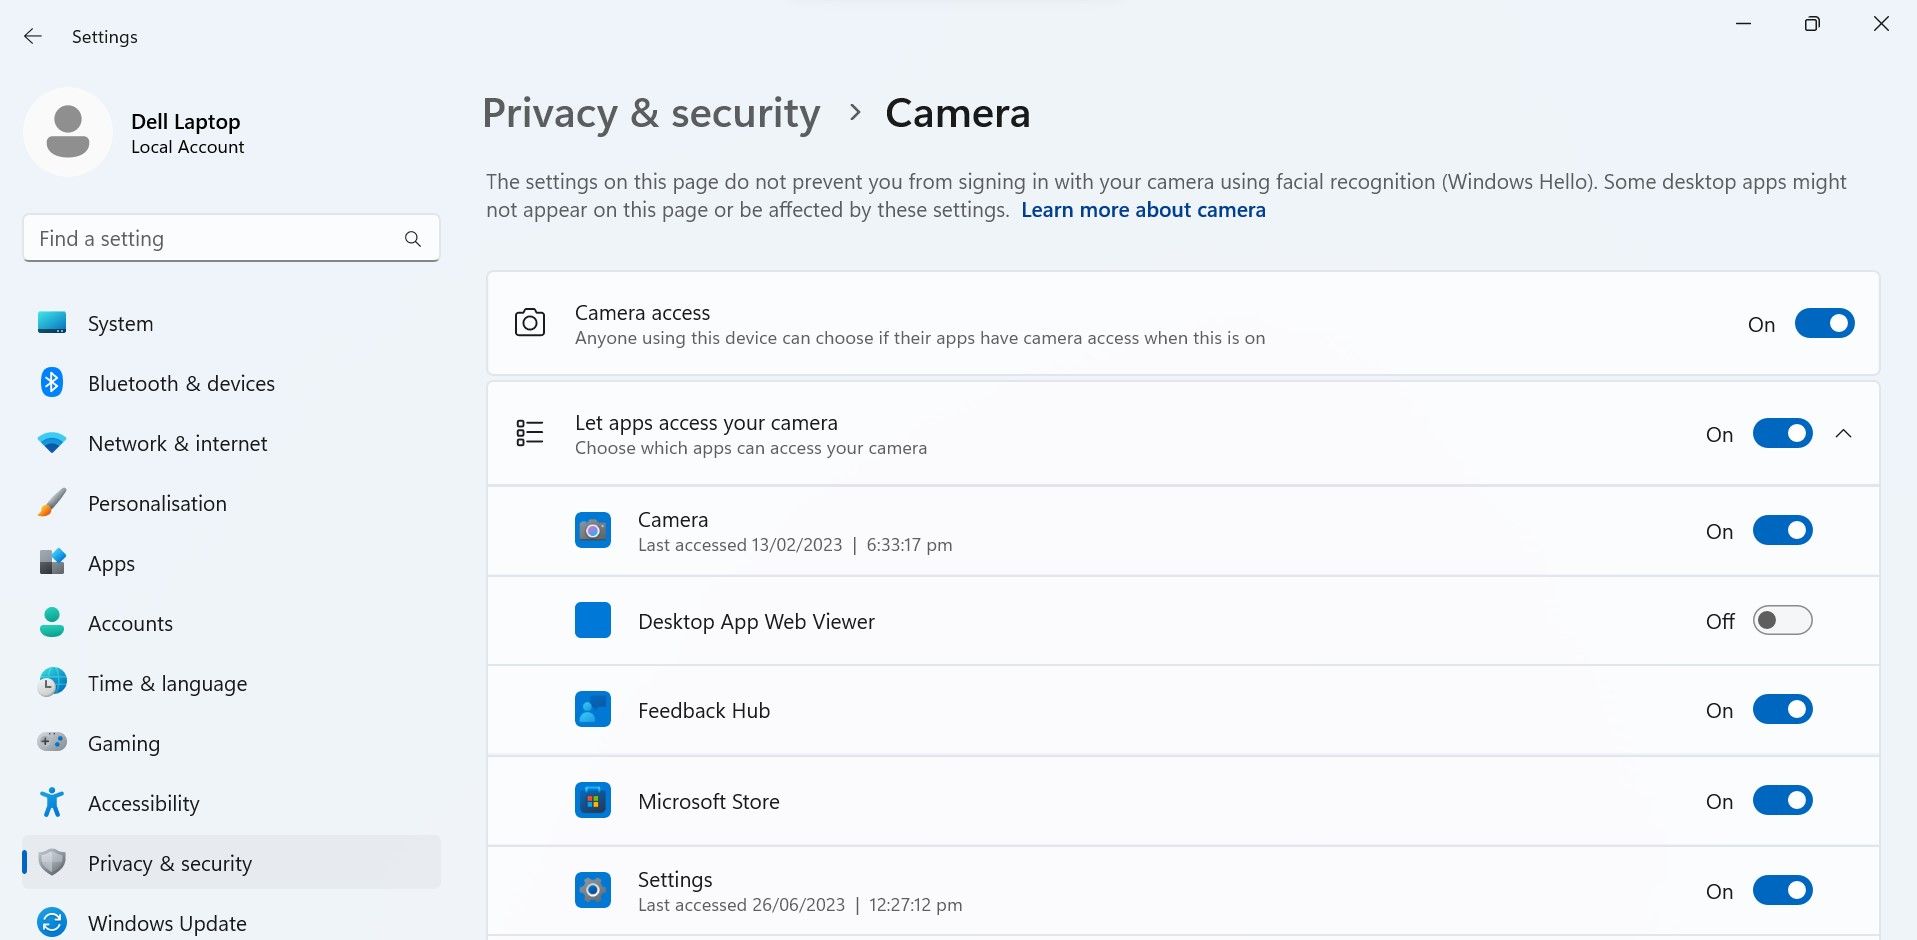
- Choose Privacy & security from the left pane.
- Head over to the App permissions section and choose Camera from the list of options available.
- Turn the toggle on for Camera access. You can now close the Settings app and check if the problem is resolved.

While you are at it, you can also re-add your saved location for storing data and see if that makes a difference.
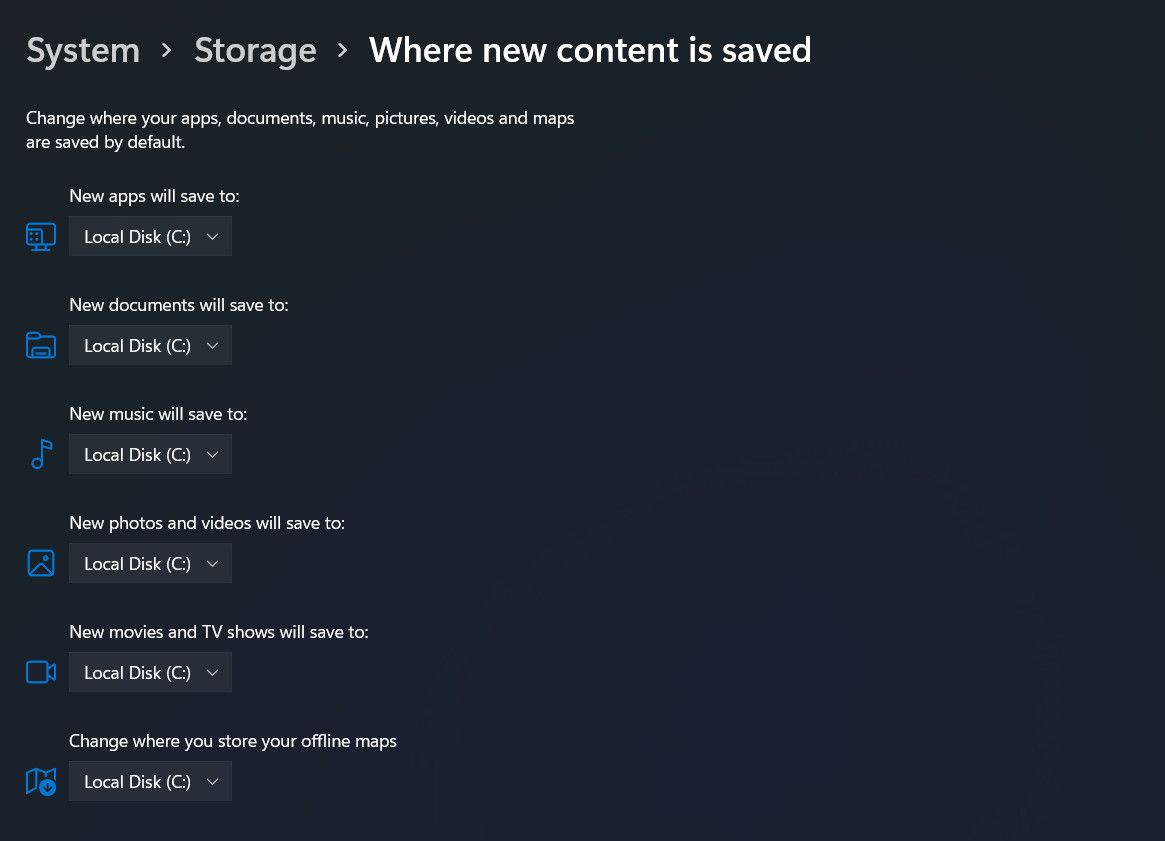
- Open the Settings app and navigate to System > Storage > Where new content is saved.
- Expand the dropdown for “New videos and photos will save to:” and pick another location. For instance, if you have a USB device, pick that.
Here is an alternate way of changing the location:
- Open a Run dialog by pressing the Win + R keys together.
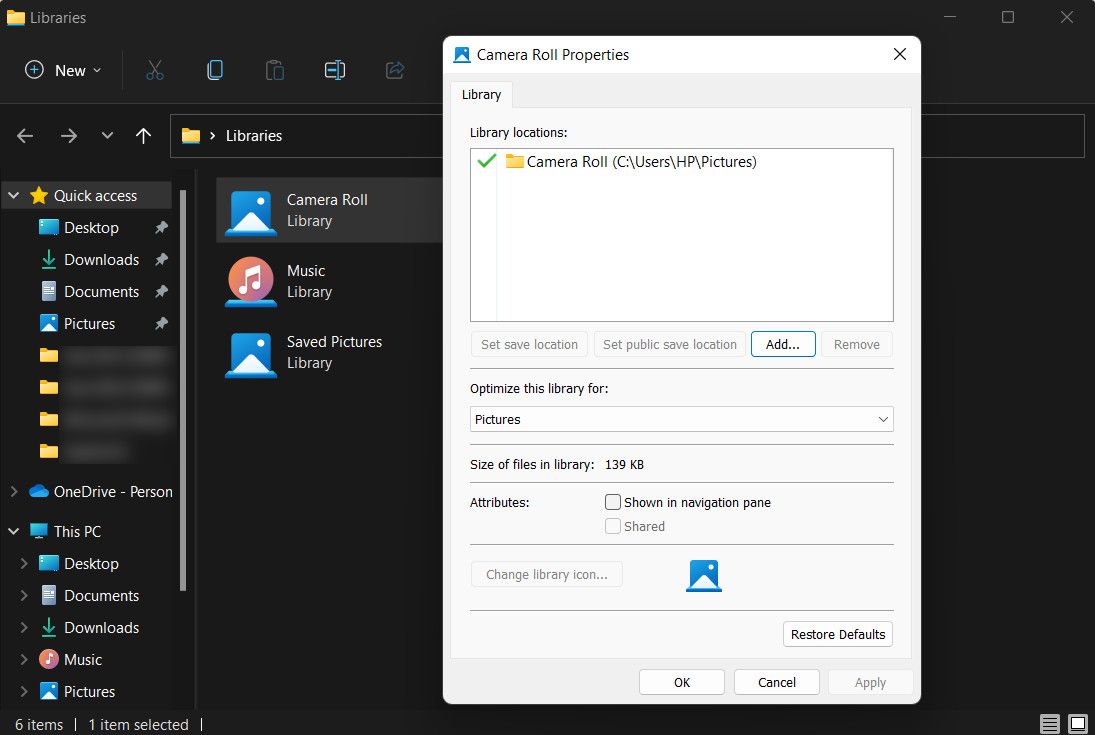
- Type “%APPDATA%\Microsoft\Windows\Libraries” in Run and click Enter. This will launch the libraries section of the File Explorer.
- Right-click on Camera roll and choose Properties from the context menu.
- In the following dialog, click on the Add button.
- Now, add your new preferred location and choose Set Default Save Location.
- Hit Apply > OK to save the changes and check if the issue is resolved.
2. Update the Camera Drivers
Another reason why your camera app might be acting is because of outdated or corrupt drivers. Such issues can be resolved by updating the drivers using either the Device Manager utility or the Windows Update option.
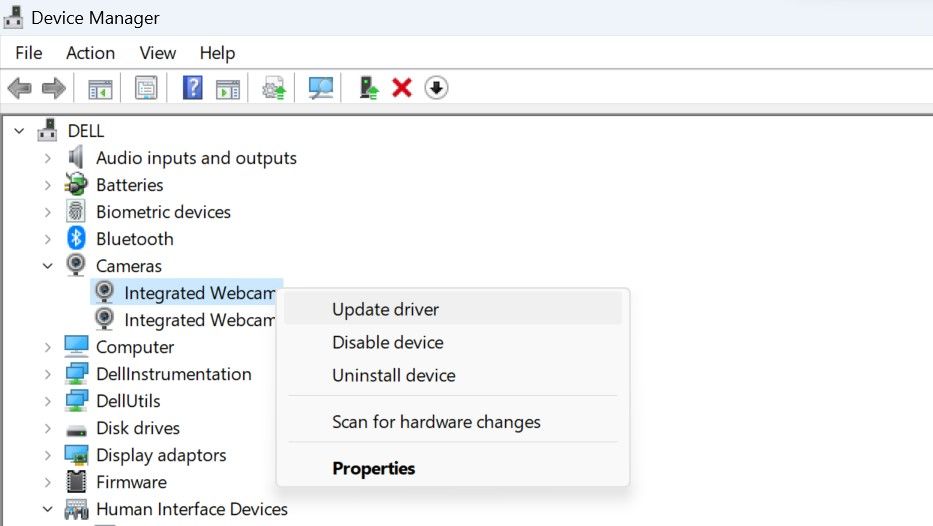
Here is how you can update your camera driver using the Device Manager:
- Press the Win + S keys together to open Windows Search.
- Type “Device Manager” in the search bar and click Open.
- In the following window, expand the Cameras section and right-click on your camera driver.
- Choose Update driver > Search automatically for drivers.
- The utility will now start scanning for an updated version of your driver in the system. If it finds any, follow the on-screen instructions to install it. If it does not, you can click on Search for updated drivers on Windows Update to see if an update is available.
You can also head over to your manufacturer’s website, download an updated version from there, and then install it manually.
3. Repair the Camera App
The camera app itself can be dealing with an inconsistency or a corruption error which might be preventing it from saving photos and videos. To check if this is the case in your situation, you can make use of the repair option for the camera available in the Windows Settings app.
This feature will do the following to help with the problem:
- Scan for any missing or corrupted files and reinstall them
- Check the Windows Registry and app-specific configuration settings to ensure they are correctly configured
- Verify and reconfigure any dependencies critical for the app to function
Follow these steps to repair the app:
- Open the Settings app and choose Apps from the left pane.
- Click on Apps & features.
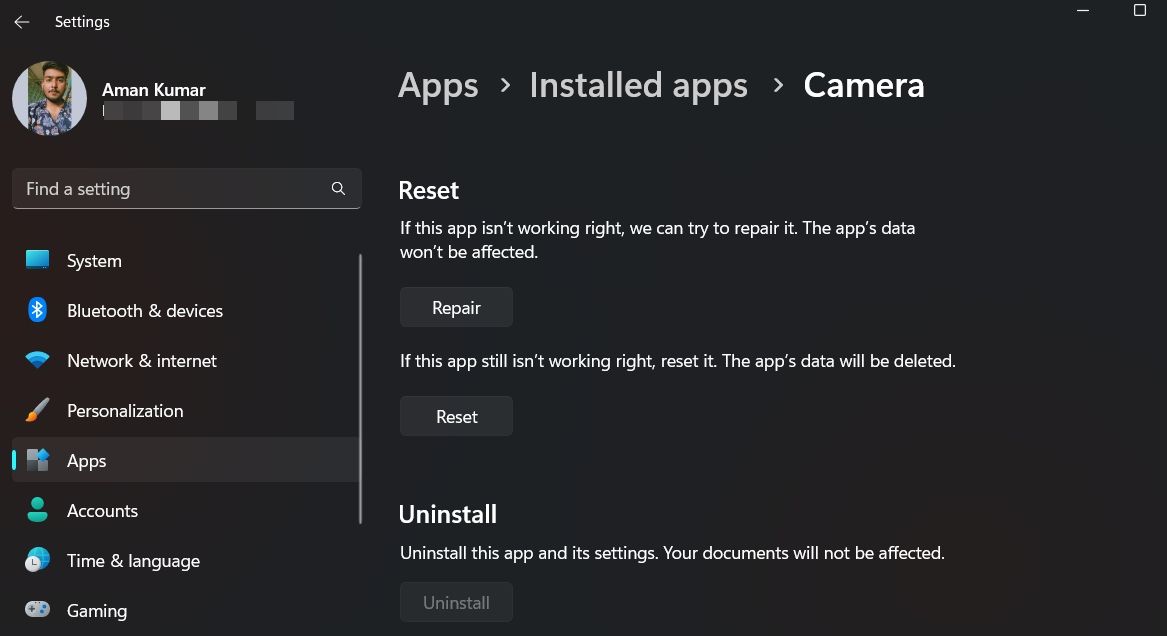
- Head over to the App list section and click on the three dots associated with the Camera app.
- Choose Advanced options from the context menu.
- In the Reset section, click on the Repair button.
- Wait for the process to complete. This may take a while, depending upon the complexity of the underlying problems.
Once the app is successfully repaired, check if the issue is fixed. If the app fails to repair, you should see a “We couldn’t repair this app. Try again in a bit.” In that case, you can try using the System File Checker for a more detailed check of the system, or move to the next method below.
4. Check Your Antivirus and Firewall Settings
Are you using a third-party security program on your Windows device? If so, there is a good chance that the security program is interfering with the operation of the Camera app, preventing it from saving the data.
To determine if this is true, you can disable your antivirus program temporarily . If you are using the security features offered by Windows, you can turn off Windows Security for some time and retry saving your photos and videos.
It is, however, important to note that disabling these programs can make your computer vulnerable to risks, so we recommend turning them back on immediately once you are done.
5. Reset or Reinstall the Camera App
Finally, if the steps listed above have not worked, you can try resetting or reinstalling the camera app as the last resort.
Resetting the app is a less drastic measure that will restore the camera app’s settings to their default values. If this does not fix the problem, you can proceed with a reinstallation, which will essentially remove the existing app from your system.
You can then download and install a fresh copy from the Microsoft Store (or from another trusted source). It will fix any issues with the previous installation that may be causing the problem.
To reset the app, open the Advanced options menu for the Camera app as we described above. Click on the Reset button and follow the on-screen instructions to proceed. To uninstall, launch the Powershell utility as an administrator and execute the following command:
get-appxpackage *Microsoft.WindowsCamera* | remove-appxpackage
Once the command executes, launch Microsoft Store and install the Camera app again.
Capture and Save Your Moments Again on Windows
A malfunctioning Camera app that can’t save your photos or videos can be a real inconvenience, but it is not impossible to fix. Hopefully, the methods above will help you restore your Camera app’s functionality and continue capturing life’s moments with confidence. To prevent this issue from occurring in the future, it is best to keep your camera drivers up-to-date at all times.
Also read:
- Decipher the Riddle of Windows Subsystem for Linux Error Code: 4294967295
- Decoding Policy Management on Windows Systems
- Does He/She Just Ignore or Have I Been Blocked? Uncovering iMessage Secrets
- Easy Hardware Duplication - No Software Needed
- Gmail Not Working on Realme Narzo N55 7 Common Problems & Fixes | Dr.fone
- Guide to Programming Microsoft Office Apps For Exclusive Read-Only Display Mode
- In 2024, Does PokeGo++ still work on Apple iPhone SE/iPad? | Dr.fone
- In 2024, How to Fix Itel P55+ Find My Friends No Location Found? | Dr.fone
- In 2024, Unveiling Profitable Practices for Creating YouTube Trailers
- Navigating Through Windows 11: The Essence of Copilot Key
- Neo QLED Vs. OLED TVs: Decoding the Differences for a Savvy Shopper
- Selecting the Perfect Screen Saver for Win11
- Unraveling the Influence of China's Great Leap Forward on Traditional Culture - Insights by YL Technologies
- Untersuchung Von Festplatten-Klonen versus Bildgenerierung - Gemeinsamkeiten Und Korrekte Anwendungsmethoden
- Updated Pushing Boundaries Top 15 Revolutionary Songs in Rock
- Title: Addressing Windows Camera's Failed Recordings
- Author: Richard
- Created at : 2025-01-24 18:36:43
- Updated at : 2025-01-31 18:03:07
- Link: https://win11-tips.techidaily.com/addressing-windows-cameras-failed-recordings/
- License: This work is licensed under CC BY-NC-SA 4.0.