Boosting Windows 10/11 Functionality: Add DiskSpace Analyzer Menu Feature

Boosting Windows 10/11 Functionality: Add DiskSpace Analyzer Menu Feature
Disk space analyzers are software packages that scan your PC’s storage drive and display visual reports. Such analyzers provide a visual overview of the biggest and smallest folders and files within directories in bytes and percentage terms. File Explorer doesn’t have any such graphical disk space analyzer for scanning specific folders.
RidNacs are Disk Savvy are two disk space analyzer tools that integrate with File Explorer’s context menu. They enable you to analyze disk space by right-clicking folders and selecting their scanning options. This is how you can add and utilize those disk analyzers in Windows 11/10.
How to Add a Visual Disk Space Analyzer Tool to Explorer’s Context Menu With RidNacs
RidNacs is a freeware disk analyzer app with which you can scan whole drives, folders, or removable storage devices (USB sticks). This tool displays storage usage reports with percentage bars that give users a clear picture of what’s hogging the most space. You can add the RidNacs analyzer tool to Explorer’s context menu like this:
- First, open thisRidNacs download page.
- ClickDownload Now to view location options for downloading the software.
- SelectSecure Download (US) orExternal mirror 1 depending on preference.
- PressWin + E to open File Explorer (see how to open File Explorer for more methods) and double-clickRidNacs-2.03-Setup.exe to open the app’s installer.
- Select your preferred language for the software on the drop-down menu and clickOK .
- ClickNext to view the license terms, and select theI accept the agreement option.
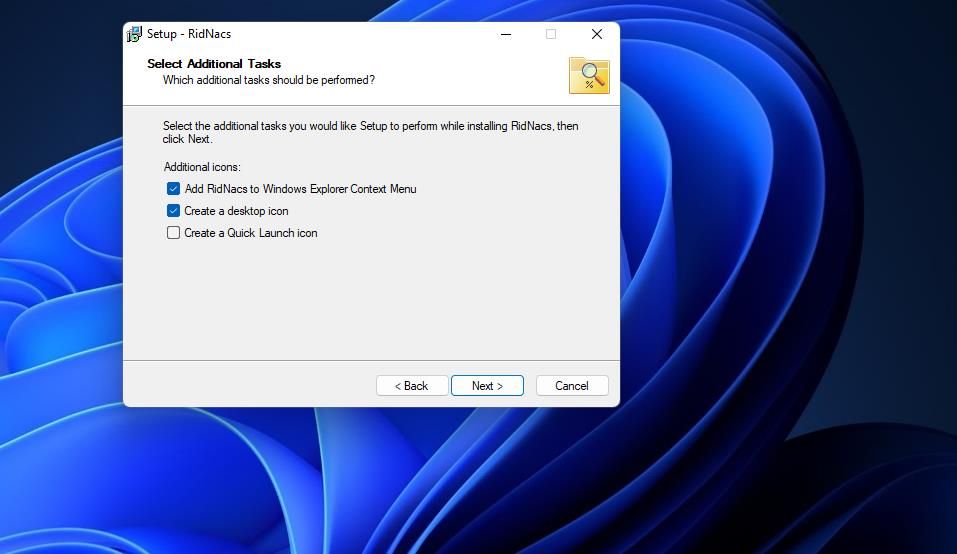
- Keep clickingNext to reach additional task settings. There make sure theAdd RidNacs to Windows Explorer Context Menu checkbox is selected.

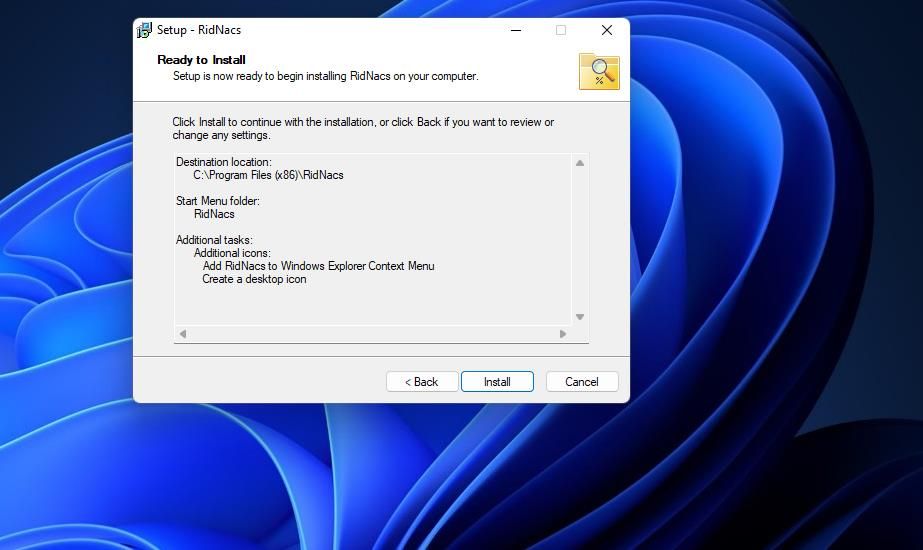
- SelectNext again, and then press theInstall button to proceed with the installation.
Now you start analyzing folder storage space usage on your PC with RidNacs. Open the Explorer file manager window, and right-click a folder to selectShow more options . Click theAnalyze Disk Space Usage with RidNacs option on the classic context menu to start the scan.
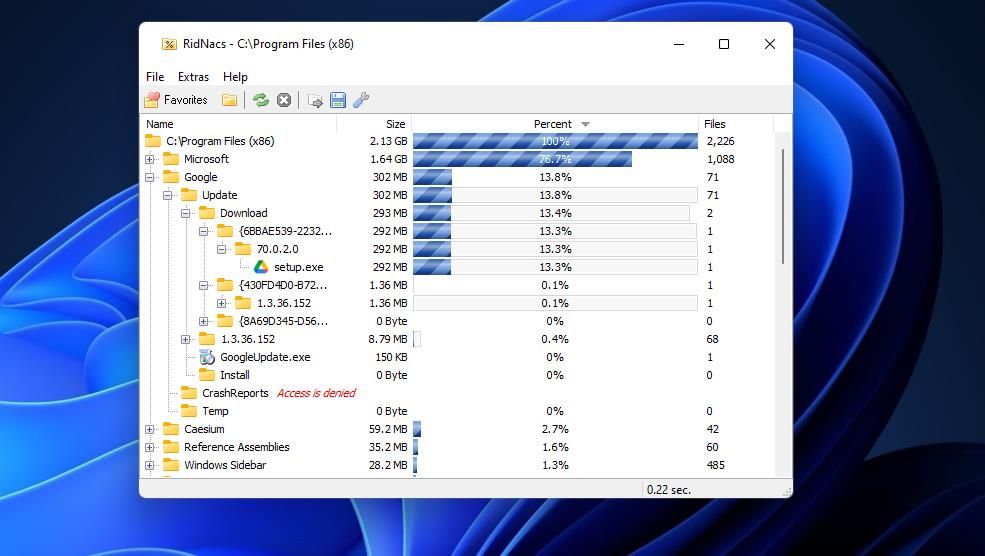
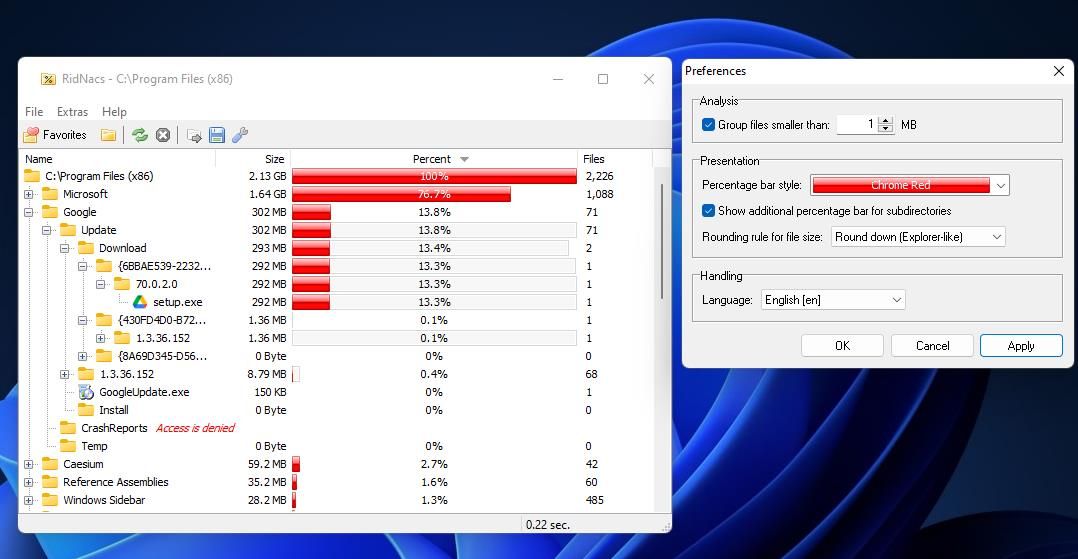
RidNacs will open and display drive storage usage for all subfolders and files within the directory, as shown in the snapshot directly below. The graphical bars there show you the percentage volume of all the subfolders and files within the selected directory. That window also shows the number of files in each subfolder along with standard size details.
You can select other directories or a whole drive to scan within the RidNacs window. To do so, clickFile and theChoose Directory option. Then choose another folder or an entire drive to scan and clickOK .
RidNacs doesn’t have lots of customization settings. However, you can change the percentage bar style. To do so, click thePreferences button. Then select a different color option on the Percentage bar style. SelectApply >OK to save the new bar style setting.
How to Add a Visual Disk Space Analyzer Tool to Explorer’s Context Menu With Disk Savvy
Disk Savvy is a slightly more advanced disk analyzer tool to RidNacs that includes a variety of pie and bar charts for users to view for analyzed folders. However, the freely available unregistered version’s file analysis is restricted to a maximum of 500,000 files. You’ll need to upgrade the software to its $50 pro version to remove that limitation. These are the steps for adding the Disk Savvy tool to File Explorer’s context menu.
- Open theDisk Savvy download page.
- Click the Win 64-BitDownload option for the Disk Savvy v14.7.26 product version.
- Double-clickdisksavvy_setup_v14.7.26_x64.exe .
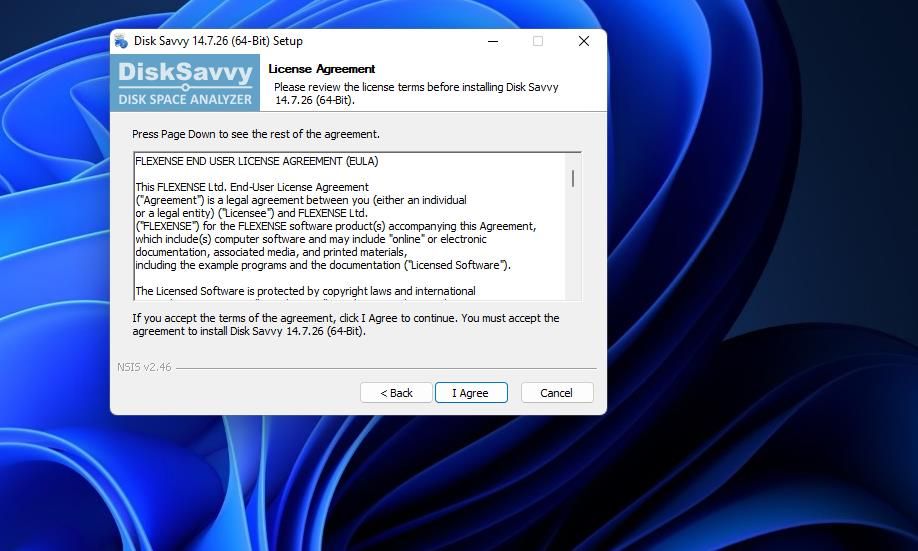
- SelectNext andI Agree to confirm acceptance of the end user agreement.

- Then pressInstall to add the Disk Savvy tool to the Windows context menu.
- SelectNext when installation is complete.
- ClickFinish to exit the Disk Savvy setup window.
Now you can try out the Disk Savvy analyzer utility. Go into File Explorer, and right-click a folder to analyze to selectShow more options >Disk Savvy - Analyze Disk Space . Click theAnalyze button on theDefault Profil e to confirm the selected directory.

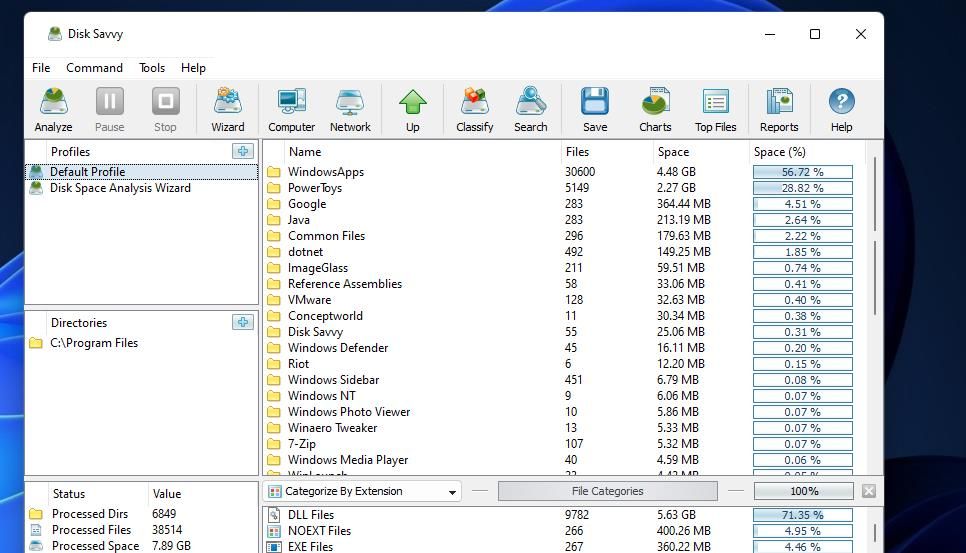
The Disk Savvy window that opens displays similar disk usage info to RidNacs. It includes columns that tell you how many files are in the subfolders, the byte size of each folder and file, and the percentage of their root directory’s total size they amount to. However, Disk Savvy also includes aCategorize by submenu that includes various options for viewing categorized file info.
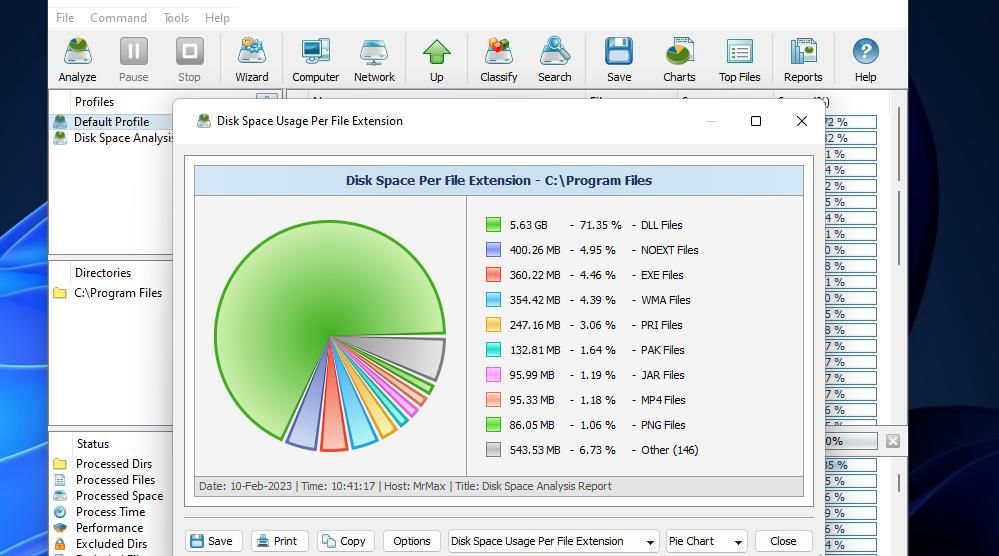
What sets Disk Savvy apart from RidNacs are its bar and pie graph options for viewing disk space usage info. Click theCharts button to access those options. Then you can select an option likeDisk Space Per File Type ,Disk Space Per Directory , andDisk Space Per Extension to view a pie chart like the one below.
Disk Savvy also has a feature that displays all the top (biggest) files within an analyzed folder. To utilize that feature, click theTop Files button. Then select an option likeView Top Images Sorted By File Size orView Top Music Files Sorted By the File Size to see what the biggest ones are.
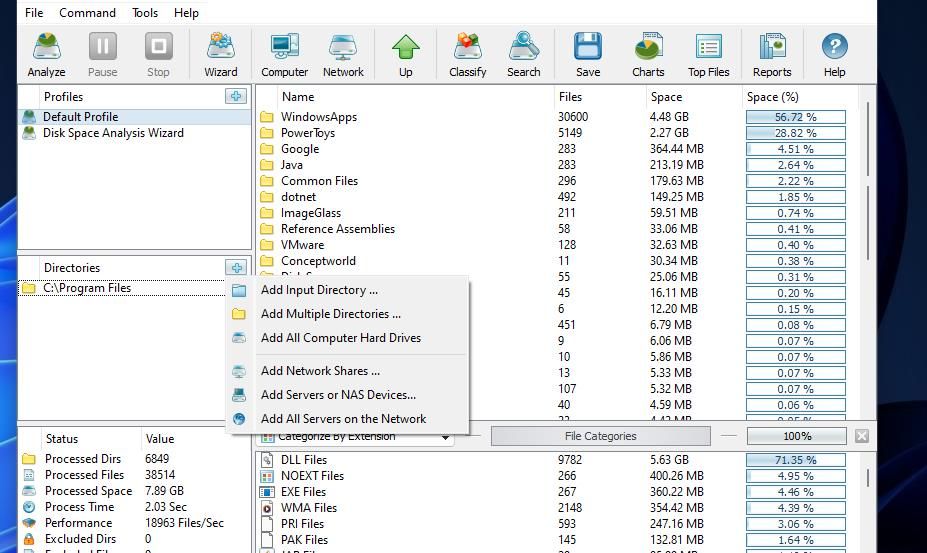
This software can analyze multiple folders at once. To select multiple folders in the Disk Savvy window, clickDefault profiles on the left and the**+** Add input button for directories. Then select theAdd Input Directory option, click theellipsis button, choose a folder to add, and press theOK buttons. ClickAnalyze to scan all selected folders.
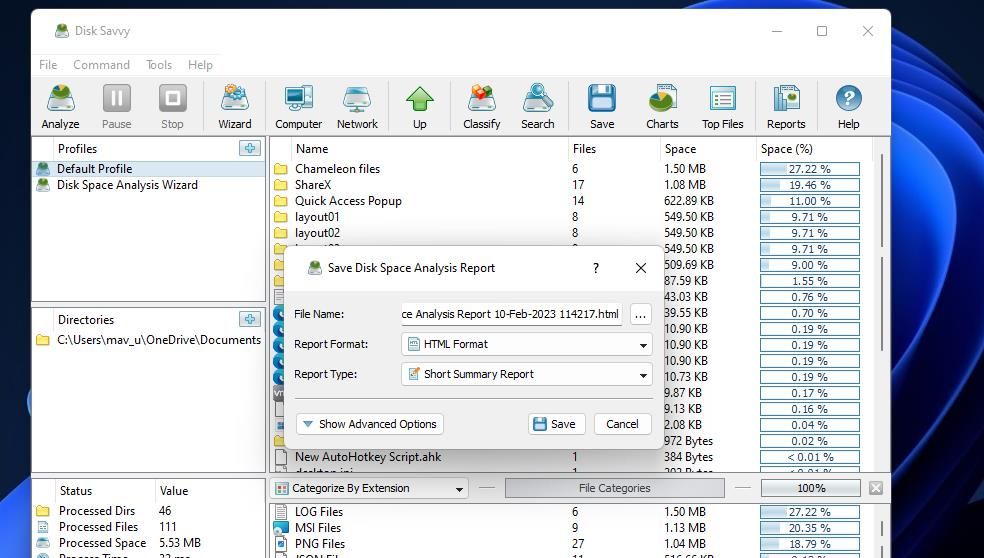
You can save and export disk usage reports to various file formats. To do so, click theSave option. Select a file extension option on theReport format drop-down menu; click theReport type drop-down menu to choose an option there, and press theSave button. You can view the report by opening it from the default Documents folder save location.
Get a Visual Overview of Folder and File Disk Usage in Windows
RidNics and Disk Savvy are useful tools that enable users to quickly analyze disk space usage in selected folders or entire drives. Those context menu utilities give you a comprehensive visual overview of what files and folders are taking up the most space on your hard drive. They’ll come in handy for freeing up drive space through manual user file deletion.
Also read:
- [Updated] 2024 Approved Explore the Depths of Video Clarity - Comprehensive Guide to VCE 2.2
- [Updated] Essential 12 PC Clicker Games to Elevate Gameplay for 2024
- [Updated] Prime Picks The Best in Bike Gaming for 2024
- Catch 'Em All: The Comprehensive Pokémon Go Playbook
- Dive Into Techniques: Preventing Apex Crashes on Windows 11
- Efficient Multitask Management: Cascade Windows with Alt-Tab
- Fixing Unheard Sound From Devices on Microsoft Windows
- How Does the IPad Pro M4 Stack Up Against the MacBook Air M3? An In-Depth Analysis of Capabilities
- In 2024, Top 4 Proven Tactics for Exceptional Loop Videos on IG
- Overcoming High-Definition Screen Scale Glitches
- Reign In Windows: Stop Unwanted Screen Movement
- ScreenMagic Pro The Windows 10 Companion
- Steps to Troubleshoot Ignored NVIDIA/AMD Card
- Strategies to Lower Ntoskrnl.exe Usage
- Transforming App Setup: Utilizing Winstall in the Windows 11 Landscape
- Unleash Creativity Capturing Sims 4 Adventures
- Title: Boosting Windows 10/11 Functionality: Add DiskSpace Analyzer Menu Feature
- Author: Richard
- Created at : 2025-01-13 17:22:03
- Updated at : 2025-01-18 16:02:27
- Link: https://win11-tips.techidaily.com/boosting-windows-1011-functionality-add-diskspace-analyzer-menu-feature/
- License: This work is licensed under CC BY-NC-SA 4.0.
