Briefly Sidestepping Windows 11 Security: A Four-Step Method

Briefly Sidestepping Windows 11 Security: A Four-Step Method
Windows Security is the built-in security app for Windows 11. You should always keep it enabled as it protects your computer from online and offline threats. However, you may come across situations where you might need to disable it.
Whether you want to disable it for personal preference or install an app that’s facing interference by it, here’s how to temporarily disable Windows Security in Windows 11.
1. Temporarily Disable Windows Security Using the Settings App
The Settings app is the central hub of Windows OS, from where you can manage important system settings. You can use it to personalize your computer, change privacy settings, update Windows, and do much more. It’s also one of the places to disable Windows Security on your computer. Here’s how:
- Press theWin + I hotkeys to open theSettings app.
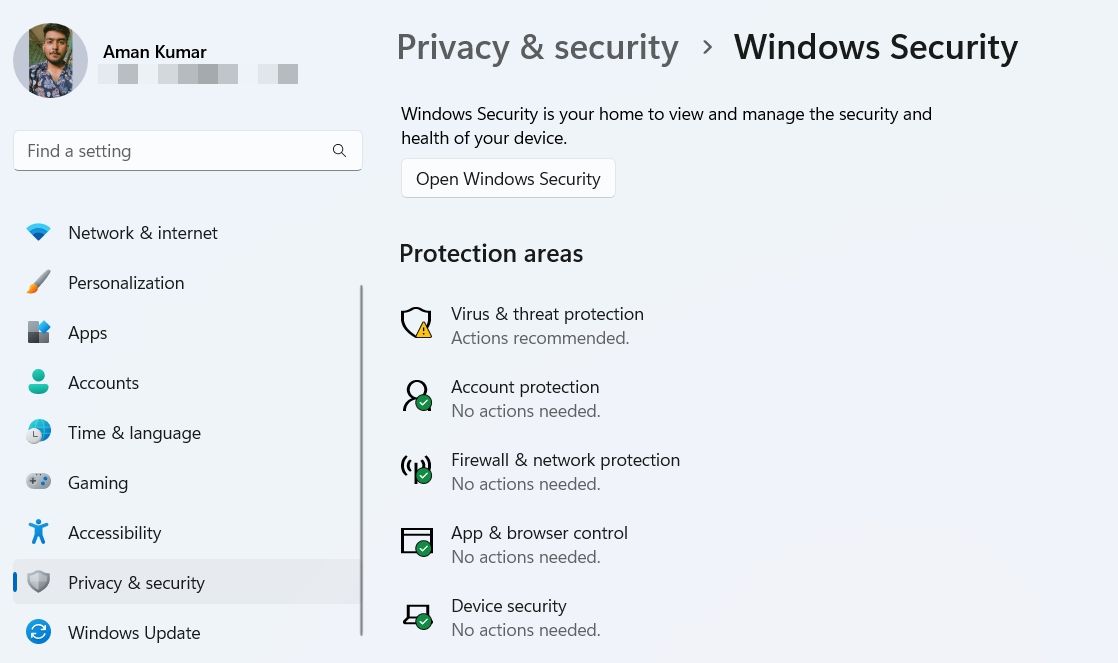
- ChoosePrivacy & security from the left sidebar.
- Click theOpen Windows Security button on the right pane.

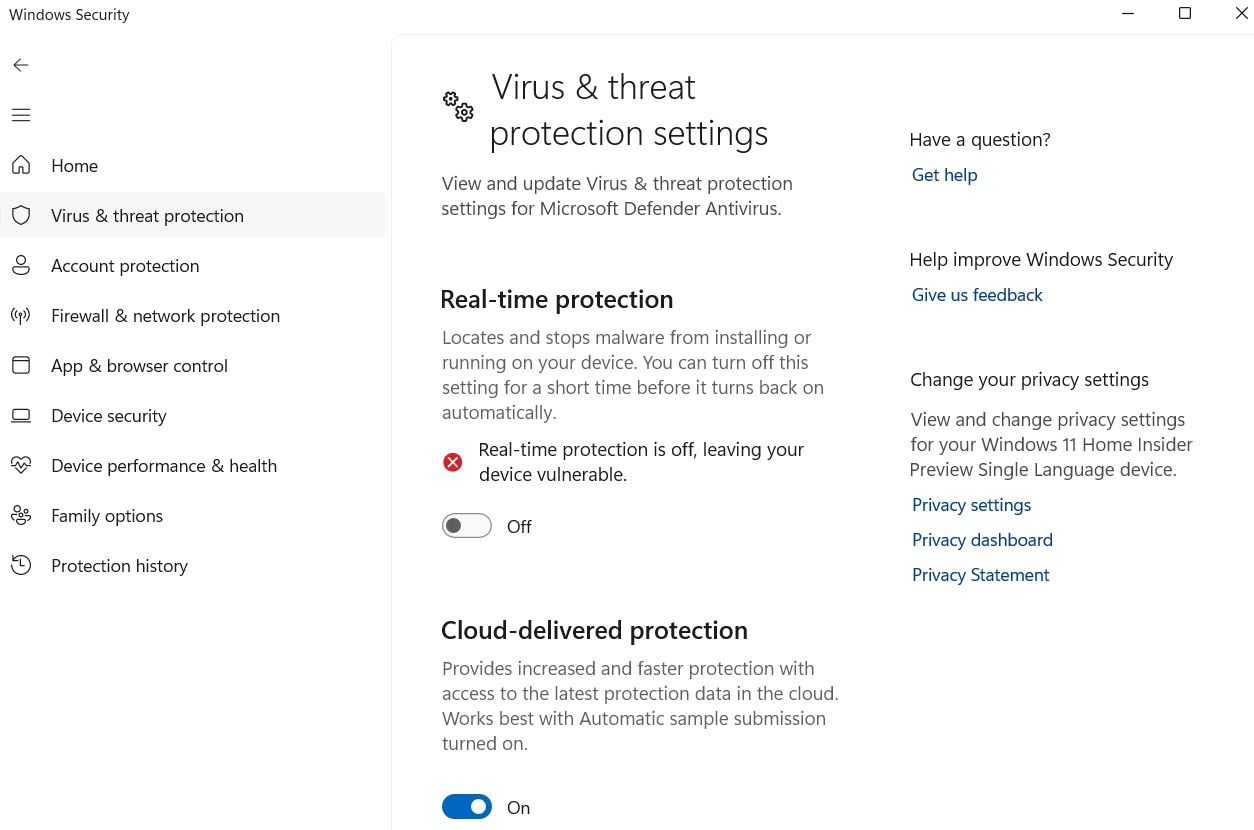
- In the Windows Security app, choose theVirus & threats protection option from the left sidebar.
- ClickManage settings under the Virus & threats protection section.
- Disable the toggle under theReal-time protection option.

2. How to Temporarily Disable Windows Security Using the Registry Editor
Windows Registry is a massive database of important settings and software installed on your computer. You can access and edit that database using a built-in tool called the Registry Editor.
The Registry Editor can also come in handy in temporarily disabling Windows Security. Here’s how to do that:
- Open theStart Menu by pressing theWin key.
- In the search bar, typeWindows Security and press Enter.
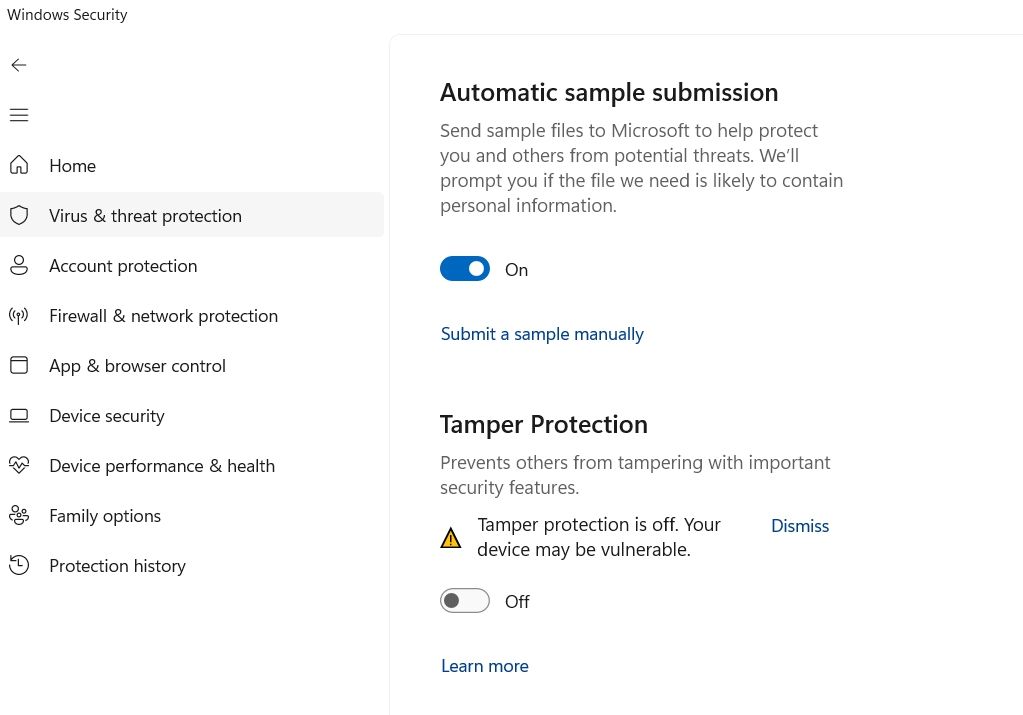
- SelectVirus & threat protection from the left sidebar.
- Turn off the toggle under theTamper protection option.

- ClickYes to the UAC that crops up.
Now it’s time to open the Registry Editor. Check outhow to open the Registry Editor on Windows 11 for steps on how to do this.
- When the Registry Editor opens, navigate to the following location:
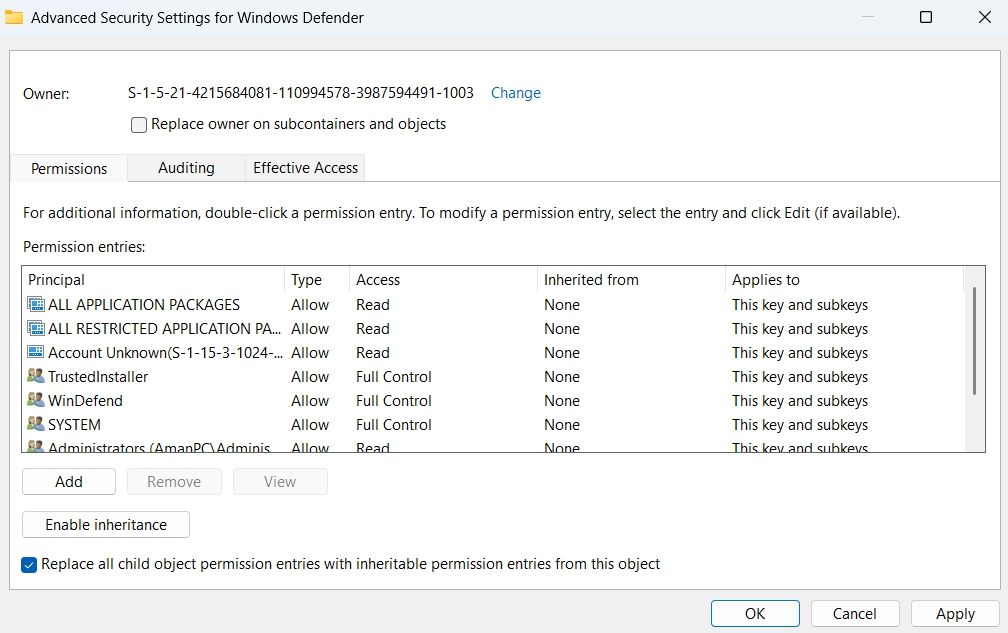
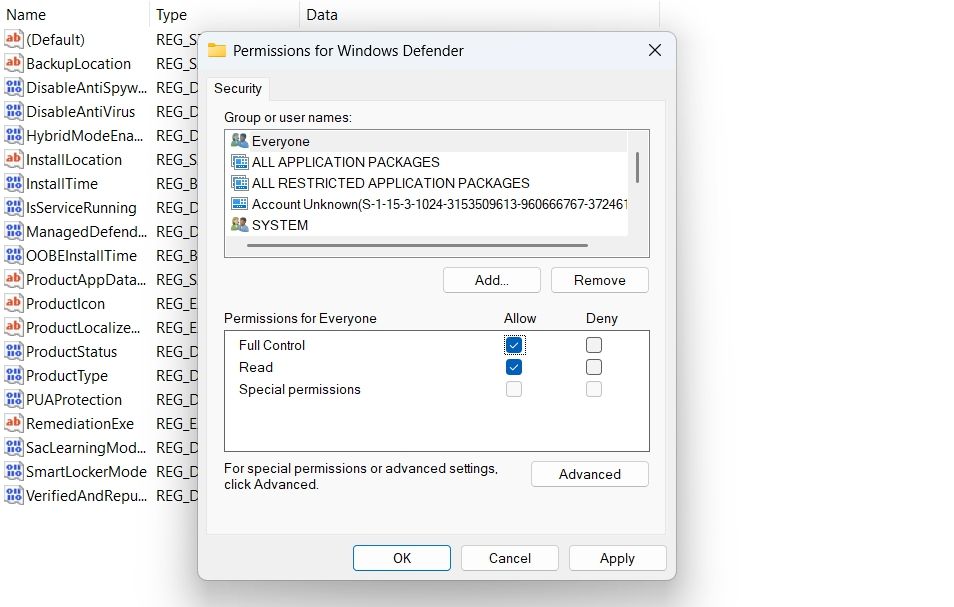
HKEY_LOCAL_MACHINE\SOFTWARE\Microsoft\Windows Defender - Right-click onWindows Defender in the left sidebar and choosePermissions.

- Click theAdvanced options.

4. ClickChange next to theOwner option.
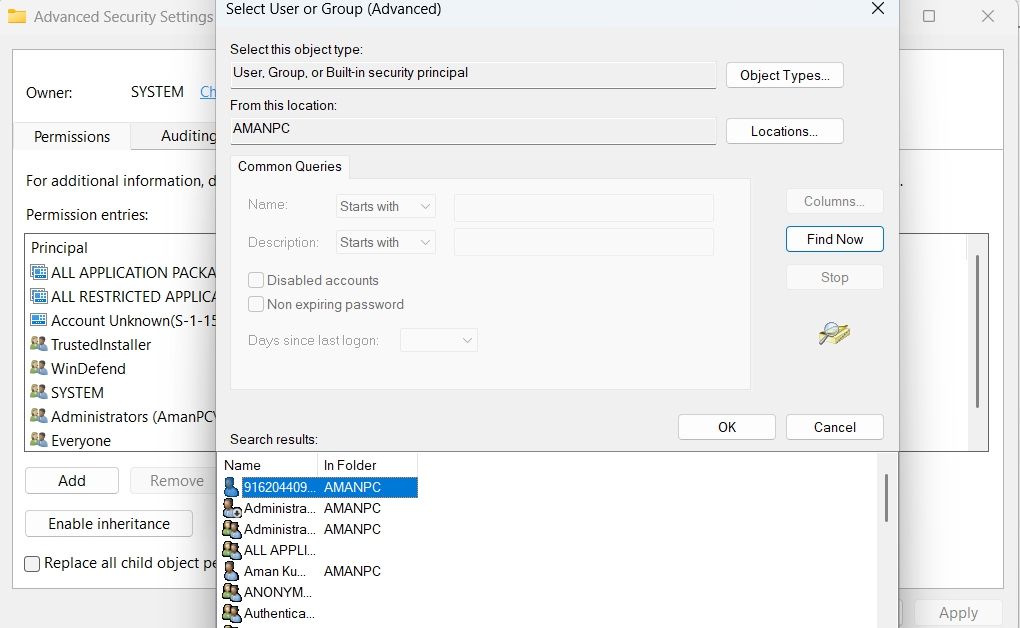
5. In theSelect User or Group window , click theAdvanced button.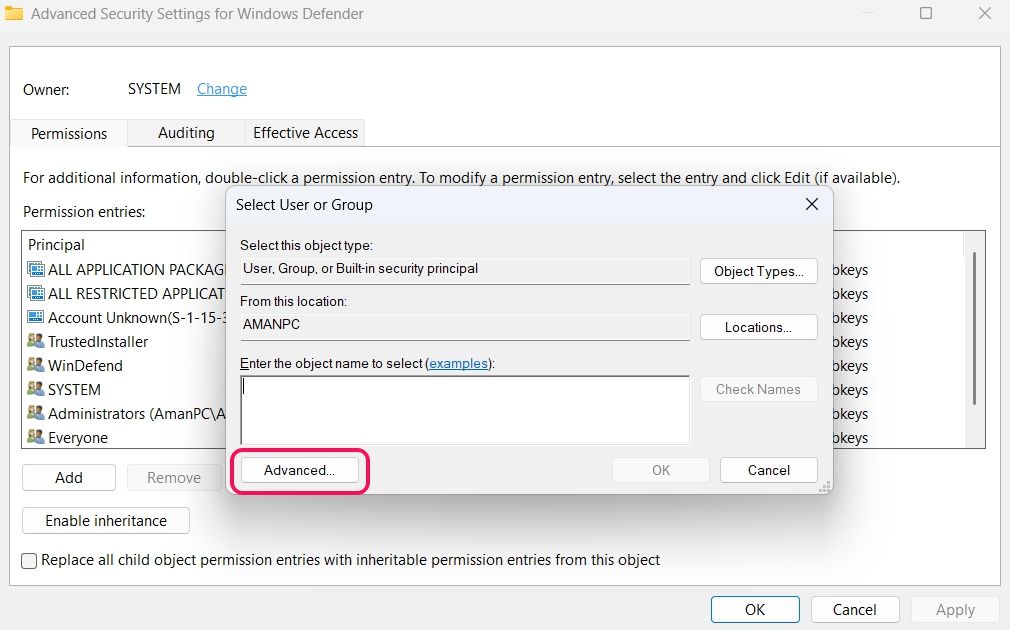
- Click theFind Now button and then select the admin account.

- ClickOK >OK to save the changes.
- Check the Replace all child object permission entries with inheritable permission entries from this object box.

- ClickApply >OK.
- Next, head towards thePermission for Windows Defender window, and check the box next toFull control.

- ClickApply >OK.
- Right-click on the blank space in the right pane, and create threeDWORD (32-bit) Value with the following names:
`DisableAntiVirus
DisableAntiSpyware
ServiceStartStates`
8. Double-click on each value, type1 inValue data, and clickOK.
Restart your computer for the changes to take effect.
3. Temporarily Disable Windows Security Using the Local Group Policy Editor
Another quick way to temporarily turn off Windows Security is through the Local Group Policy Editor. Here’s what you need to do:
- Open the Run dialog box, typegpedit.msc , and clickOK.
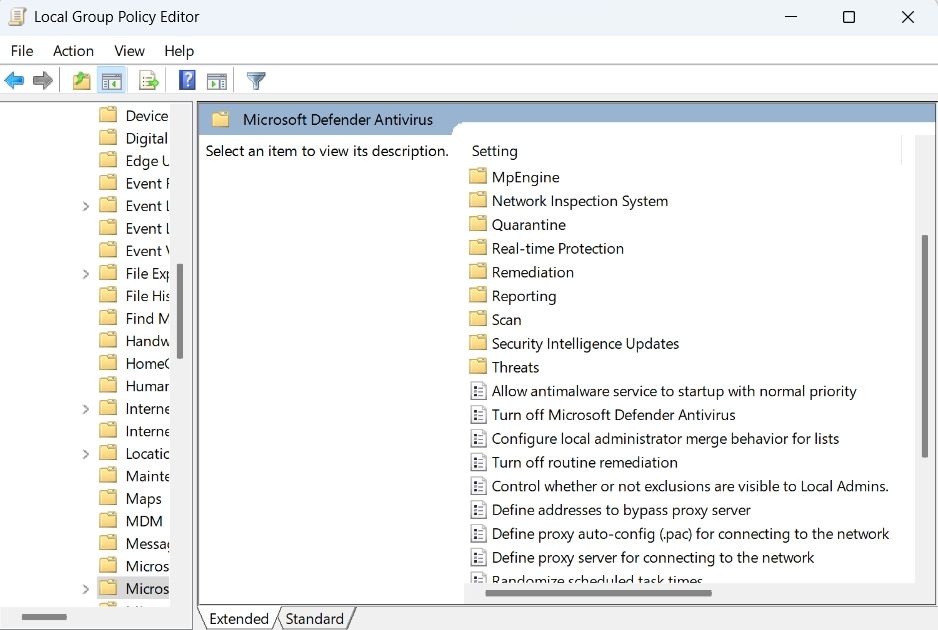
- In the Local Group Policy Editor, navigate toComputer Configuration >Administrative Templates >Windows Components >Microsoft Defender Antivirus .
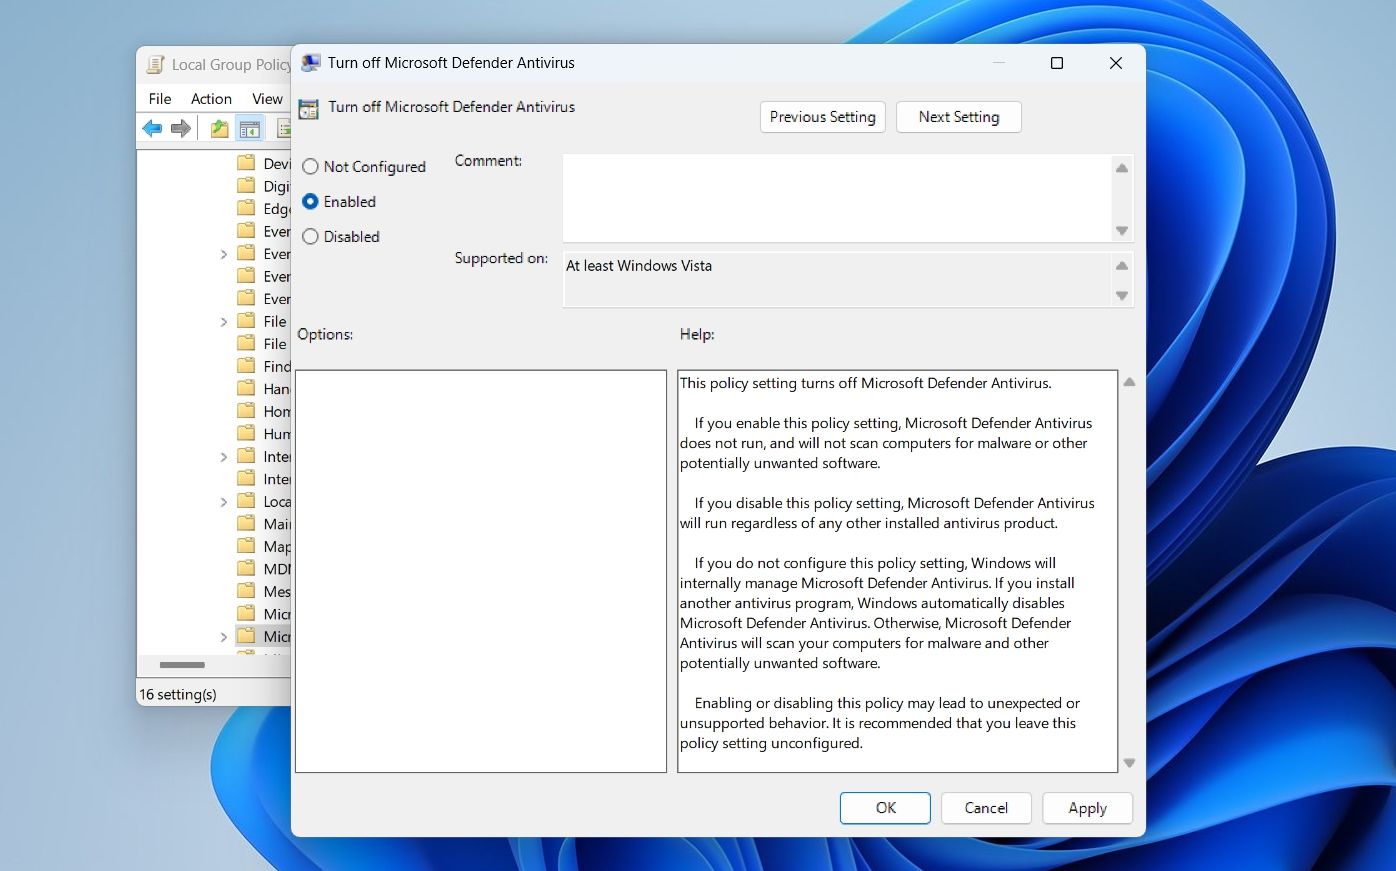
- Double-click on theTurn off Microsoft Defender Antivirus policy.

- ClickEnabled .

- ClickApply >OK.
Once your work is done, you can enable Windows Security by choosingDisabled for the Turn off Microsoft Defender Antivirus policy.
4. Temporarily Disable Windows Security Using Autoruns
Autoruns is a Windows utility using which you can turn off the service responsible for starting Windows Security at startup. Before you use Autoruns, disable Tamper Protection by following the steps in method 2.
Follow the below instructions to disable Windows Security using Autoruns:
- To begin with,download Autoruns on your computer.
- Extract the downloaded file on your computer.
- Next, boot your computer in safe mode (seehow to boot in safe mode on Windows ) and then open the extracted Autoruns folder.
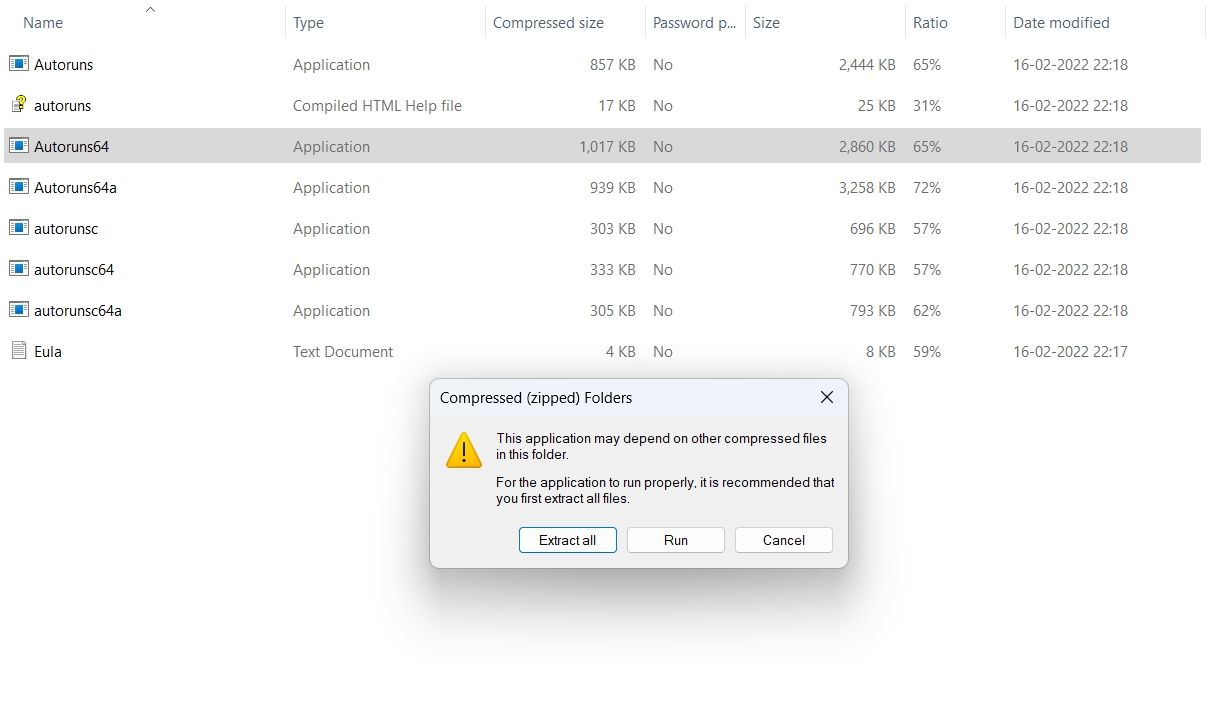
- Double-click on theAutoruns64 file and then chooseRun from the prompt that crops up.

- ClickAgree in theAutoruns Licence Agreement window .
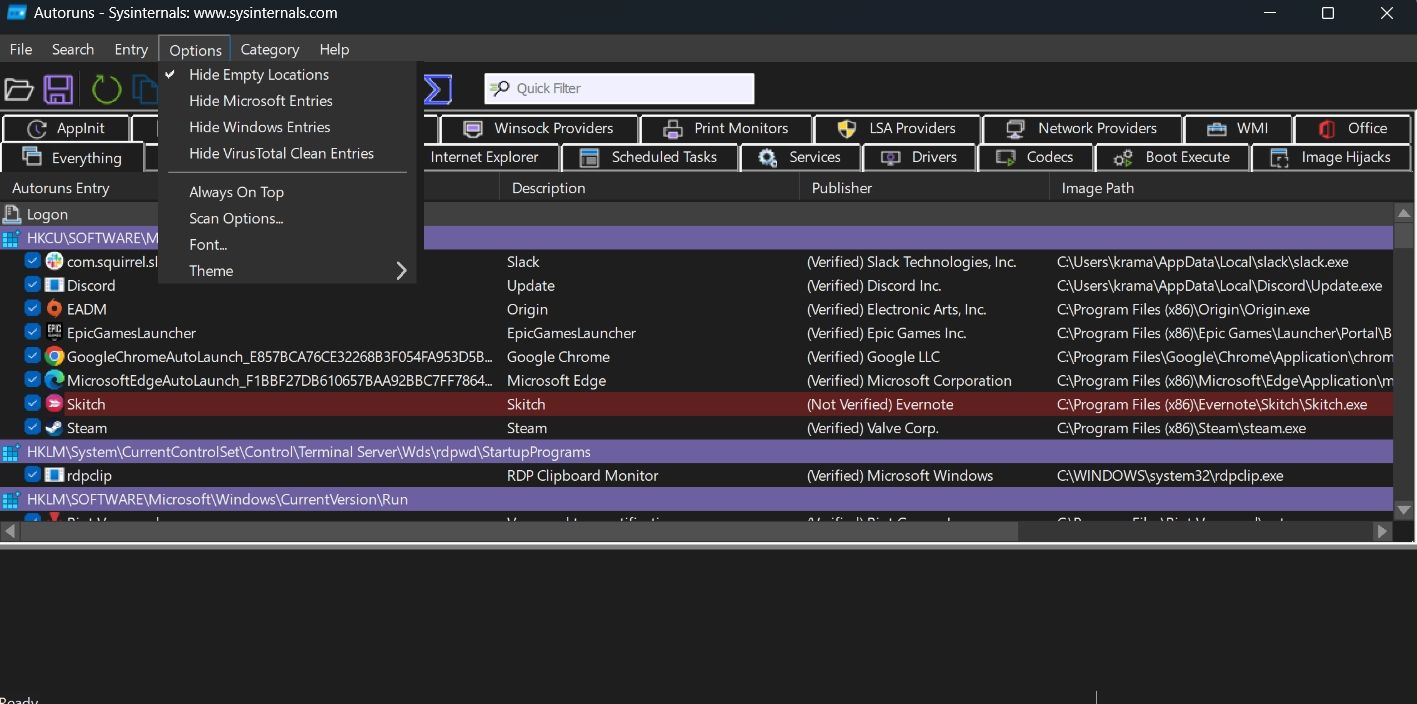
- In the Autoruns window, clickOptions and uncheckHide Windows Entries.

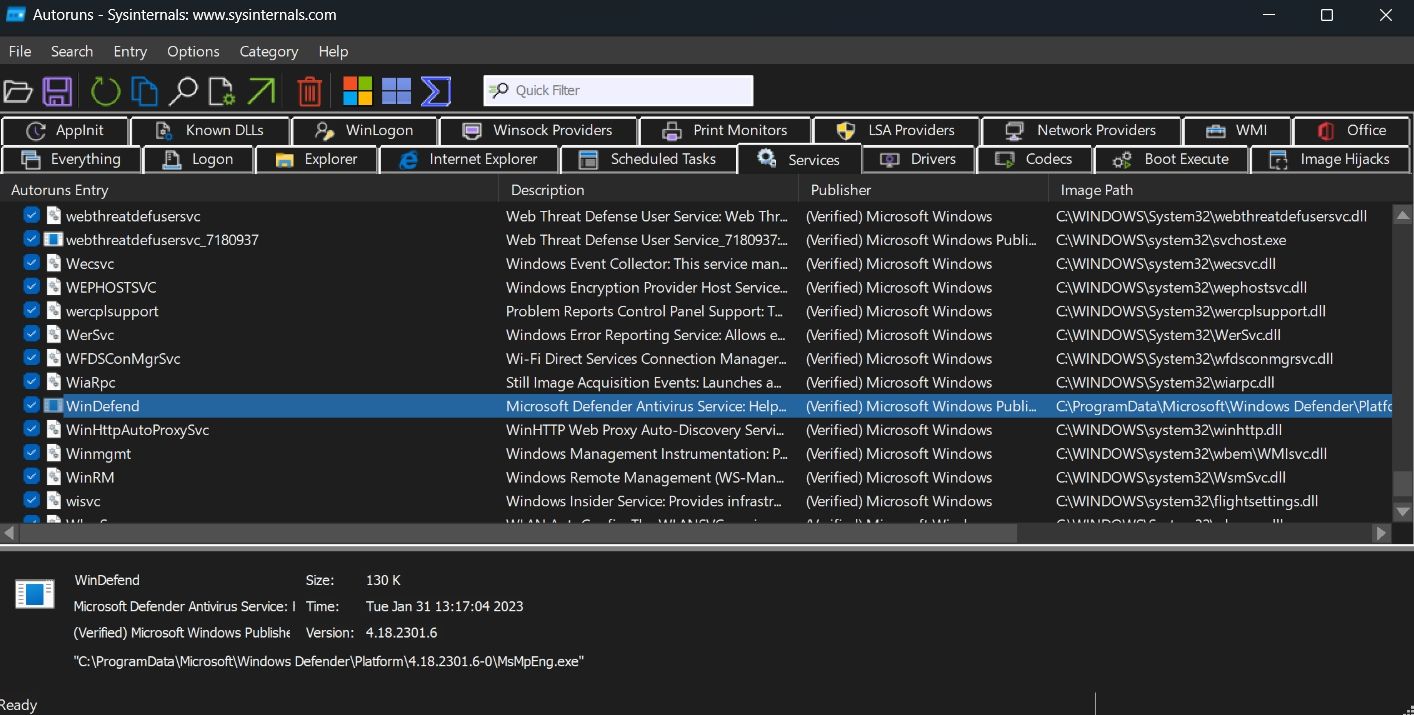
- ClickServices.
- Uncheck theWinDefend box and then close the Autoruns window.

Now, to boot in normal mode, open theSystem Configuration window, selectNormal startup, and thenOK.
Stop Windows Security for a Little While on Windows 11
The new Window Security app ensures you don’t have to install a dedicated antivirus program to safeguard your computer. However, the strict policy of Windows Security can sometimes block the installation of third-party apps on your computer. Fortunately, you can disable Windows Security by following the above methods.
Also read:
- [New] In 2024, Comparing Apowersoft to Alternatives
- [Updated] Quick Tip to Uncover Your Recently Watched Movies on FB
- 2024 Approved Elevating Live Play with Professional Gear Lists
- 2024 Approved Leading Brands for Budget-Friendly, High-Definition Projectors
- 2024 Approved Maximize Your Income Through Strategic Use of YouTube Shorts
- Comprehensive Overview of Internet Protocol Details
- Discover the Terminal's Magic: Five Playful Powers
- Enhancing Browsing Speeds with Microsoft Edge, Win10/W11
- How to Make the Most of Your Apple iPhone 15 Plus Lock Screen with Notifications?
- How to Recognize and Implement Execution Monikers
- In 2024, 3 Ways to Track Xiaomi 14 without Them Knowing | Dr.fone
- In 2024, Sim Unlock OnePlus Ace 2V Phones without Code 2 Ways to Remove Android Sim Lock
- Innovative Approaches to Connecting via Windows 11 RDC
- Methods to Eliminate Spontaneous Key Press Responses
- Title: Briefly Sidestepping Windows 11 Security: A Four-Step Method
- Author: Richard
- Created at : 2025-01-21 20:14:38
- Updated at : 2025-01-24 18:29:06
- Link: https://win11-tips.techidaily.com/briefly-sidestepping-windows-11-security-a-four-step-method/
- License: This work is licensed under CC BY-NC-SA 4.0.
