Conveniently Display Images Within Windows Explorer

Conveniently Display Images Within Windows Explorer
Windows 11’s File Explorer has a tabs feature now. You can open a new location on the disk in a new tab rather than opening a new File Explorer window. Switching between multiple file locations is seamless, all thanks to this feature. But Microsoft isn’t planning to stop here. It wants to completely overhaul the File Explorer.
File Explorer Gallery is one such new feature that Microsoft is testing in the Canary channel. Having a Gallery section will remove the need to browse separate folders to find or preview an image. Want to enable the feature on your system? Let’s begin.
Disclaimer: This post includes affiliate links
If you click on a link and make a purchase, I may receive a commission at no extra cost to you.
What Is the Gallery Feature in Windows File Explorer?
File Explorer’s Gallery feature works exactly like it sounds. It categorically lists all the images on your system in a separate section, so you can find and view all the images in one tab. Android File Explorers have had this feature for quite a long, but Windows seems to care about it now.
This new feature is available in the Windows Insider build version 25300 and above. But Microsoft made a big change to the Insider program by adding a Canary channel. So, any new Canary build will also have this experimental feature. Microsoft adds the new File Explorer based on Windows App SDK, which you can verify by hovering over the “pizza” icon in the File Explorer address bar.
The Gallery section displays images from the Pictures and OneDrive folders and lists them by date. It has nice, rounded corners around each image in the Gallery section, which makes it feel like a part of the overall Windows 11 design. It appears right below the Home option in the left pane.
How to Enable Gallery in File Explorer in Windows 11
Repeat the following steps to enable the new Gallery section in File Explorer:
1. Update to the Appropriate Windows Insider Build
The Gallery section is hidden in Insider builds 25300 and above. If you are a Windows Insider program participant, open and check for the latest Insider builds on your system. Make sure to be in the Dev or Canary channel because this experimental feature is exclusive to these channels only. Or, you can useUUP Dump to download Windows Insider builds without participating in Microsoft’s Insider program .
2. Download ViVeTool
You will also need ViVeTool to enable these experimental features on your system. You candownload ViVetool from GitHub , but make sure that you pick the most recent release. Extract the tool to the C drive and then proceed to the next section.
2. Enabling Gallery in Windows File Explorer
Retrace the following steps to enable the Gallery section on Windows 11:
- PressWin + R tolaunch the Run command box . Typecmd and pressCtrl + Shift + Enter keys at once to open a new Command Prompt window with administrator privileges.
- Now, navigate to the main directory in C drive. Typecd C:\ command and press the enter key.
- Next, type thecd Vivetool command to enter the folder where Vivetool is present in the C drive. It is the main reason why we suggested you extract Vivetool in a convenient location.
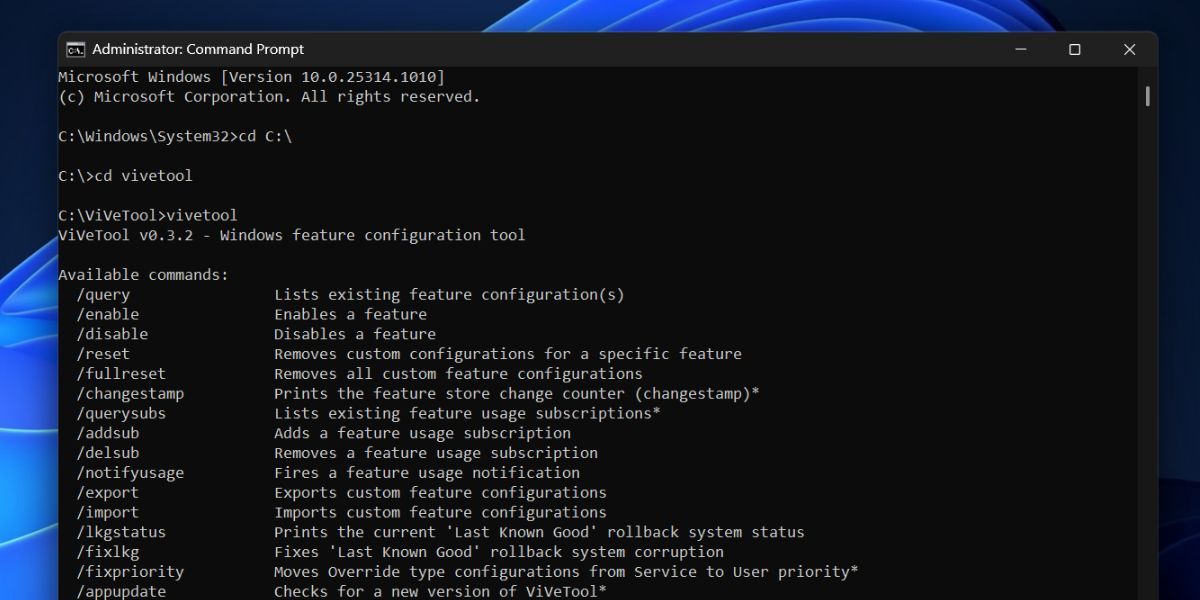
- Type theVivetool command and press enter key to check if the tool is accessible and working. You will see the version of the tool along with the parameters it supports.

- Now, type the following command and press the enter key:
vivetool /enable /id:41040327
6. If the command executes correctly, you will see a “Successfully set feature configuration(s)” message. But don’t close the Command Prompt window. Type the following commands to enable all the Gallery features one by one and execute them.
vivetool /enable /id:40729001 vivetool /enable /id:40731912 vivetool /enable /id:41969252 vivetool /enable /id:42922424 vivetool /enable /id:42295138
7. After running all the commands without any error, typeexit and press the enter key to close the command prompt window.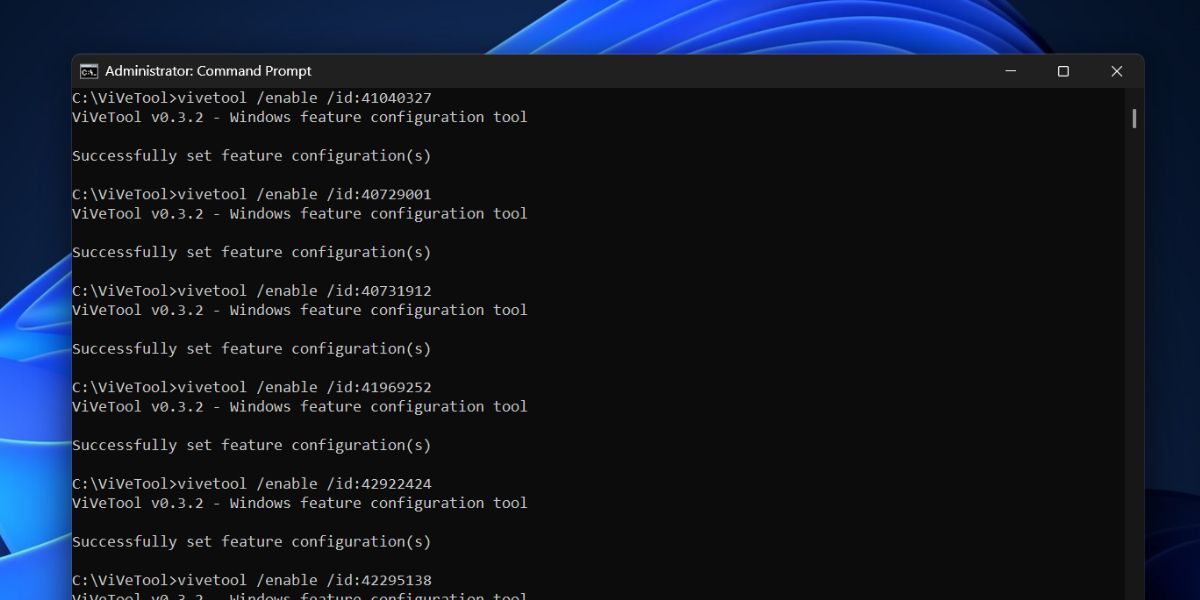
8. Restart your computer for the changes made by Vivetool to take effect.
9. Once your computer boots up, pressWin + E to open File Explorer. You will see a newGallery option in the left pane below theHome option.
How to View the Gallery in File Explorer
You can access the Gallery section by launching File Explorer and clicking on the Gallery option in the left navigation pane. You will see all the images from the Pictures folder and OneDrive folder arranged by modification time (new to old). There is also a handy slider to scroll through the vast image tiles without using the mouse scroll wheel.
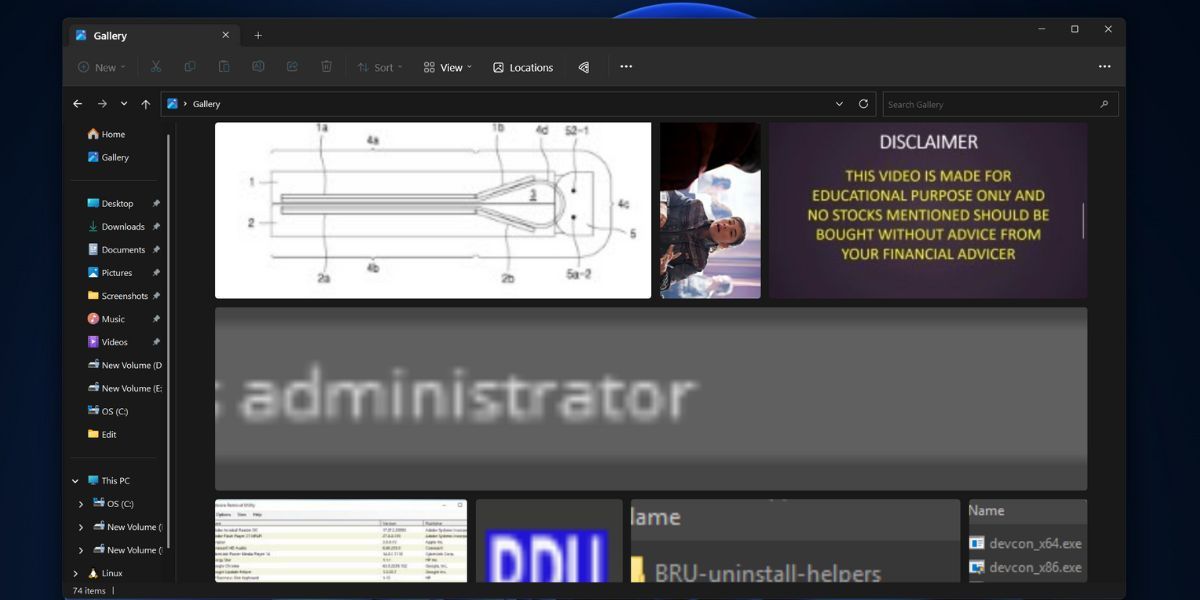
The gallery app allows you to adjust the view of the image tiles to accommodate more or less in a single window. You can use the View option in the menu bar of File Explorer to change the image tile size. If you click on any image, it will open in a separate app window (Photos app or any other app that you use).
How to Add or Remove Locations From Gallery in Windows File Explorer
By default, the Gallery selection displays all the images located in the Pictures folder and OneDrive. But you can add or remove a folder from the Gallery section as well.
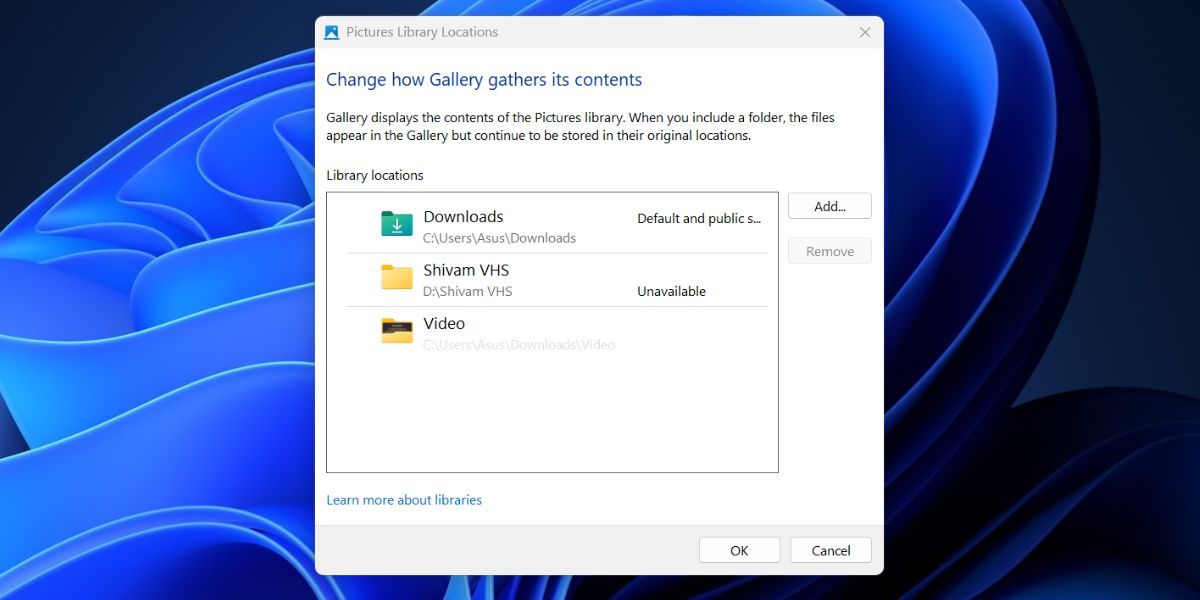
- To add a folder to the Gallery, go to the menu bar and click on theLocations option. A new pop-up window will open and list all the folders that the Gallery section is pulling images from. Click on theAdd button.

- Now select any folder or sub-folder with images and click on theInclude Folder button.
- The selected folder will appear in the list of available folders. Click on theOK button.
- File Explorer gallery will now display the images present inside the newly added folder as well.
To remove a folder from Gallery, repeat the following steps:
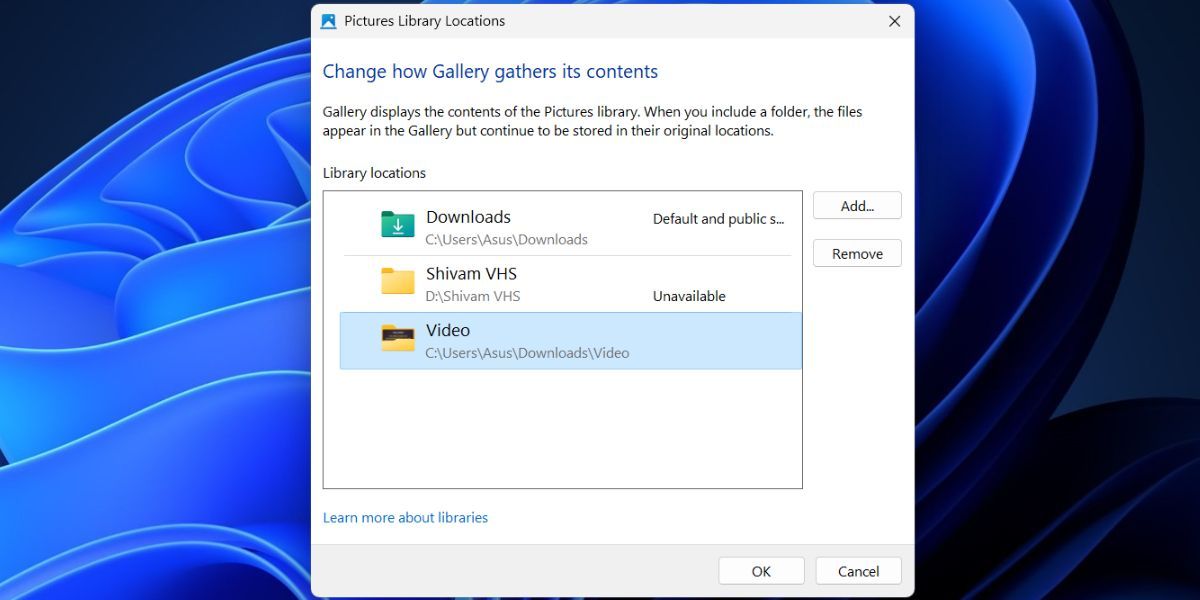
- Open the Gallery section and click on theLocations option in the menu bar.
- You will see the list of all the folders currently included in the Gallery.
- Click on the folder you want to remove to select it. Then click on theRemove button.

- Lastly, click on theOK button to finalize the changes. The Gallery section won’t display any images from the excluded folder from now onwards.
Problems With the Gallery Section in Windows File Explorer
The current preview of the Gallery feature is far from perfect. Firstly, the section works well in finding and categorically listing all the images from the included folders. But the images, despite being big, appear hazy. What’s the point of including a section if the images aren’t visible clearly?
There is also the issue of images opening in a separate tab rather than in the same File Explorer window. If you plan to open the image in another window, you can do it from the image folder as well. So, future builds should include an option to preview the image in the File Explorer window. Otherwise, you are opening two apps to achieve the same thing. The Gallery section cannot list any videos as well and just ignores all the video files.
Find All Your Images in One Place on Windows With Galleries
Adding a Gallery section to File Explorer is a fantastic decision by Microsoft. But the current version is full of kinks we hope that Microsoft irons out before the final preview. If done right, this would make the File Explorer app a powerhouse and reduce dependency on other apps.
Also read:
- [New] DSLR Camera's Stand Against Mirrorless for Videographers
- [New] In 2024, Effortless Snapchat Setup for Mac Enthusiasts
- 「線上免費MPG轉換為MP3 : Movavi 強大、用戶友好的媒體格式改變工具」
- 2024 Approved Apeak Recorder Reviewed Speed, Quality, and Ease of Use Scored
- Cambiar Resolução De Vídeo Online: Top 8 Softwares Mais Populares E Gratuitos
- Convertir Archivo MKV a Formato FLV De Vuelo Sin Coste Con Movavi
- Download & Convert VOB Tracks to Lossless FLAC Format - Quick, Easy and Free!
- Guffaw on Your Phone Hysterical Site Listings for 2024
- In 2024, Fuse Rhythms Into PowerPoint Layouts
- Mastering ChatGPT: Creating an Immersive Text-Based RPG Experience
- Movavi Image Editor - Convert Your WebP Files to BMP Without Charge
- Passo a Passo Simples Para Recuperação De Fotos Antigas - Técnicas Eficazes Do Movavi
- Rip-Proof, Free Online Conversion of M4R to MP3 by Movavi
- Serious Sam nPC Version Crashes? Here's How to Enhance Stability and Frame Rate
- The Artisan's Approach to Gathering Stock Visuals for Use
- Top 12 Applications Pour Améliorer La Qualité De Votre Vidéo
- Understanding and Implementing Website Pinging - Essential Insights & Best Practices
- Title: Conveniently Display Images Within Windows Explorer
- Author: Richard
- Created at : 2024-10-29 16:43:15
- Updated at : 2024-11-01 16:43:12
- Link: https://win11-tips.techidaily.com/conveniently-display-images-within-windows-explorer/
- License: This work is licensed under CC BY-NC-SA 4.0.
