Creating Your Ideal Theme Landscape in Windows 11

Creating Your Ideal Theme Landscape in Windows 11
Windows has inbuilt support for themes in customization settings. While Microsoft doesn’t officially make any new themes as it did before, plenty of options are available on Microsoft Store. If you aren’t satisfied with them, you can also try third-party themes.
Microsoft moved many Control Panel options to the Settings app. So, you need to head over to the Personalization options in the Settings app to apply a new theme. But, do you know that you can do it using multiple other methods? Here’s how:
Disclaimer: This post includes affiliate links
If you click on a link and make a purchase, I may receive a commission at no extra cost to you.
1. Using the Desktop Context Menu
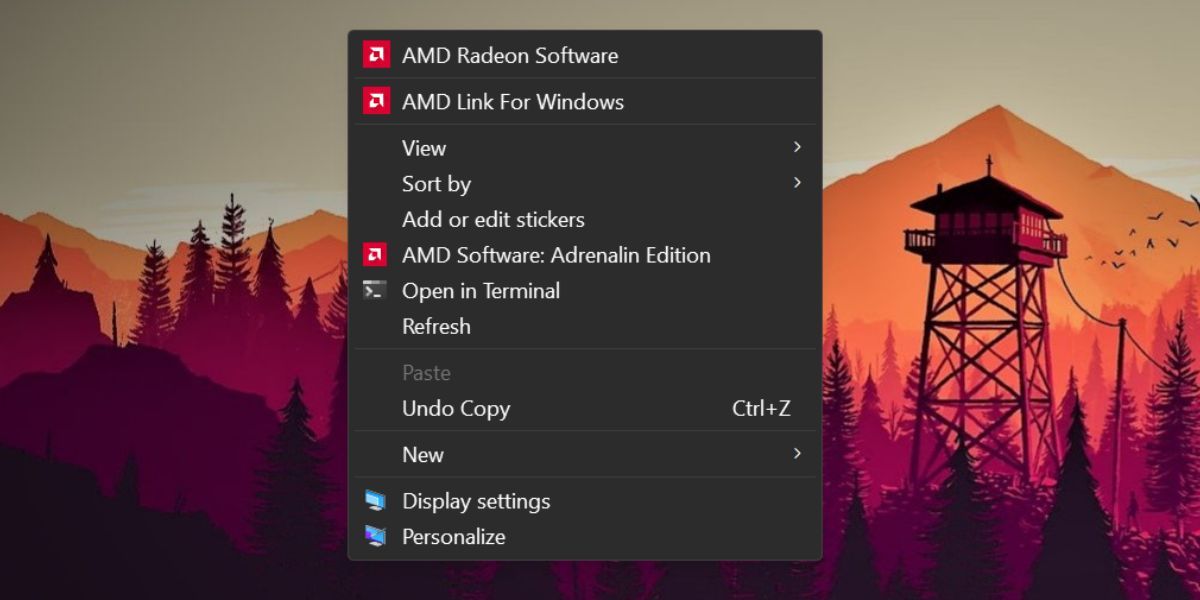
The desktop context menu is the most preferred method to change desktop wallpaper and themes in Windows OS. Windows 11 retains that option in the context menu, and we hope that it doesn’t go away. Here’s how to change the theme using the Desktop context menu:
- Boot up your Windows PC and right-click on the desktop.
- Now, click on thePersonalization option from the context menu.

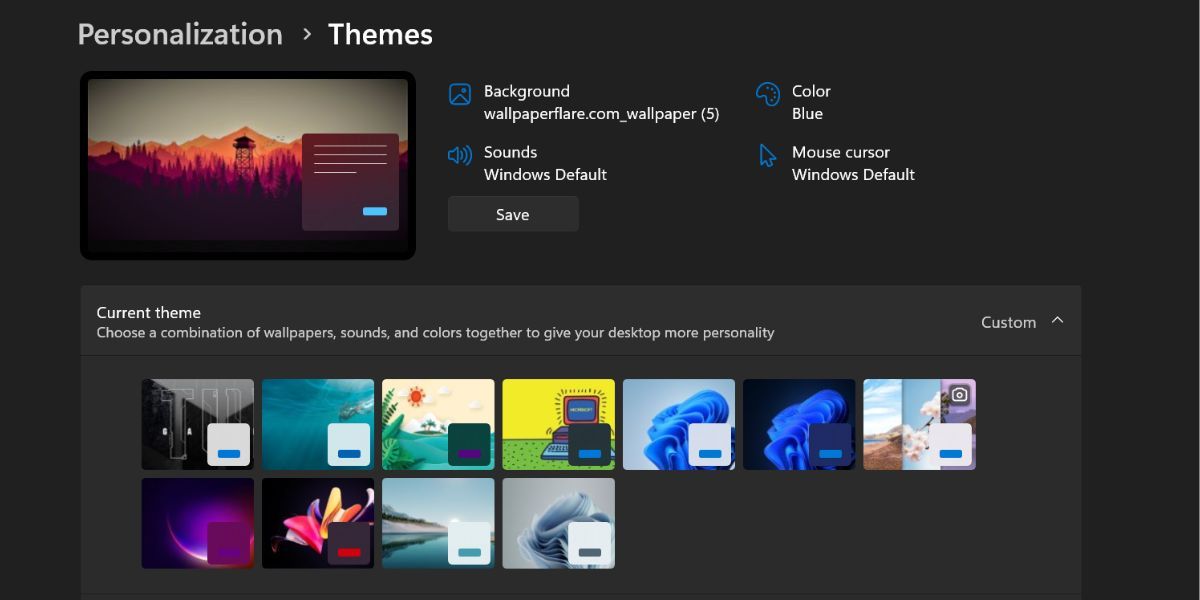
- Scroll down and click on theThemes option.
- Under the Current theme section, click on any of the available themes to apply them to your system.
- Close the settings app.
2. Using the Settings App
Since the desktop context menu redirects you to the Settings app, you can directly open it and change the system theme. Here’s how:
- PressWin + I to launch the Settings app.
- Click on thePersonalization option in the left-hand side menu.
- Scroll down and select theThemes option.

- Now, click on any theme from the section of available themes. You can also apply a high-contrast theme by selecting the Contrast Theme option below.
3. Using the Old Control Panel Personalization Utility
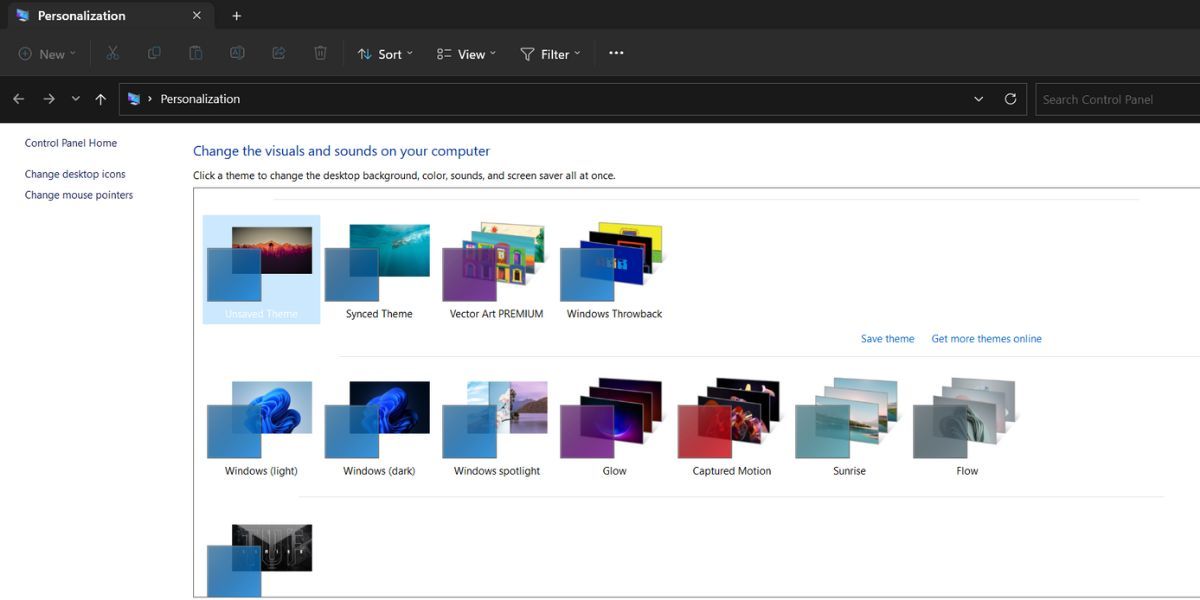
The older version of Windows OS had a control panel personalization utility, using which you could change the themes, color schemes, and wallpapers. Microsoft hid this option in Windows 11, but you can still access it using the run command box. Here’s how:
shell:::{ED834ED6-4B5A-4bfe-8F11-A626DCB6A921}-Microsoft.Personalization
- PressWin + R tolaunch the Run command box . Type the following command and press the enter key.
- The old Personalization utility will launch. Navigate to the themes window and click on any theme to apply it. The utility won’t redirect you to the Settings app.

- Close the Personalization utility window.
4. Using the Run Command Box
You can even skip the hassle to go through layers of the Settings app and can directly launch the theme settings using the Run command box. Here’s how:
- PressWin + R to launch the Run command box. Typems-settings:themes and press the enter key.
- Windows 11 Settings app will launch and directly take you to the themes section.
- Click on any of the available themes to apply and change the current theme.
5. Using File Explorer
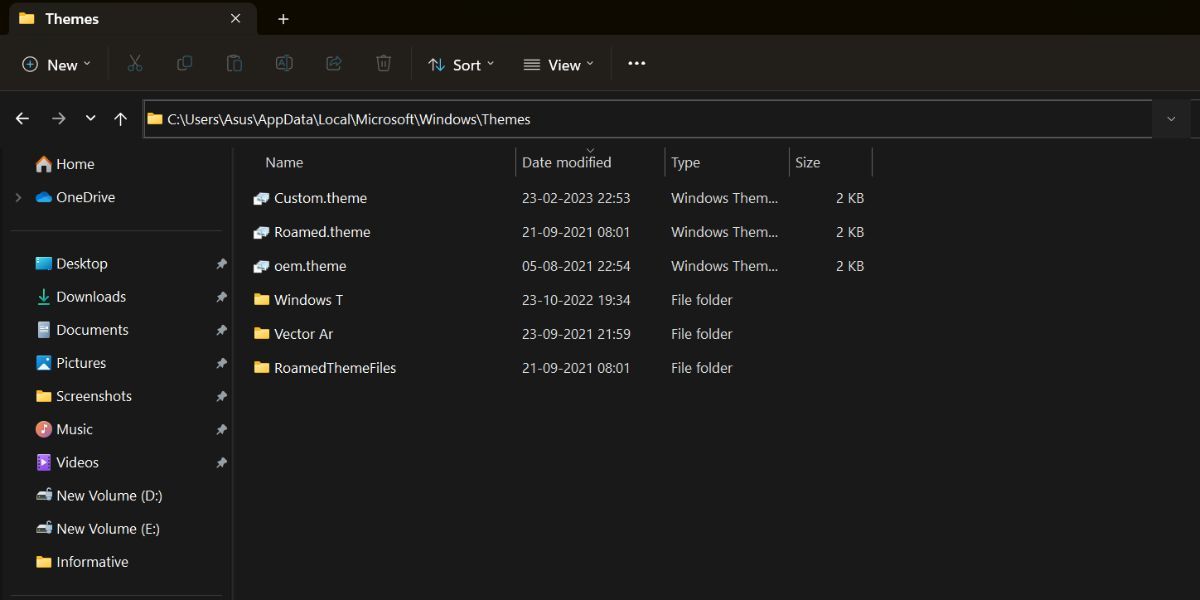
All the installed themes on your Windows 11 system reside in the Windows AppData folder. You can access the folder using File Explorer and then apply any theme on your system. Here’s how:
- PressWin + E tolaunch the File Explorer app .
- Go to the address bar, paste the following path, and press the enter key:%LocalAppData%\Microsoft\Windows\Themes
- You will see a bunch of themes listed here. Double-click on any “.theme” file to apply it to your system.

- There will be a bunch of folders as well. These usually belong to the downloaded themes. Open the folder, and locate the theme file to apply a downloaded theme.
6. Using CMD
You can change the theme in Windows 11 using the command prompt. All you need to do is enter the location of the theme and run it. Repeat the following steps:
- PressWin + X to launch the Power user menu. Scroll down and select theTerminal (admin) option from the menu.
- The Terminal app will launch. Click on the**+** icon to open a command prompt window with admin privileges.
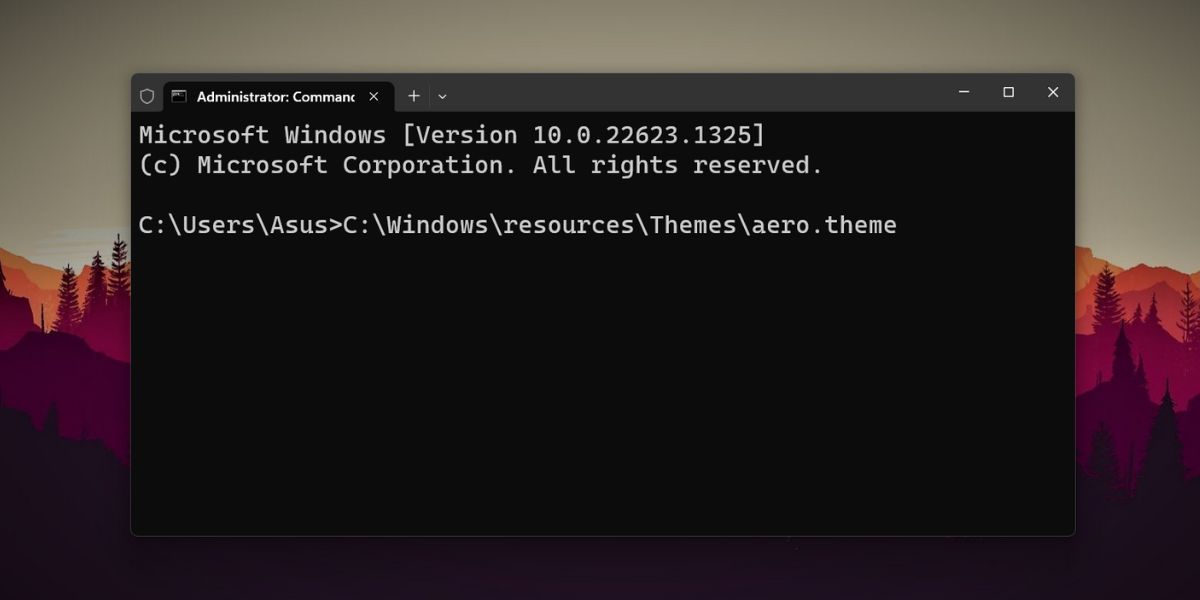
- Now, typeC:\Windows\resources\Themes\aero.theme command and press the enter key.

- Your Windows 11 system will change to the inbuilt aero theme. Similarly, you can replace the name of any other inbuilt theme and apply it.
7. Using a Shortcut
You can apply your favorite theme by creating a shortcut on the desktop. That way, you won’t have to launch the File Explorer or Settings app to change the theme. Here’s how to do it:
- PressWin + E to launch the File Explorer app.
- Navigate to the address bar and type the following path:C:\Windows\resources\Themes\
- Press the enter key to open the Themes folder.
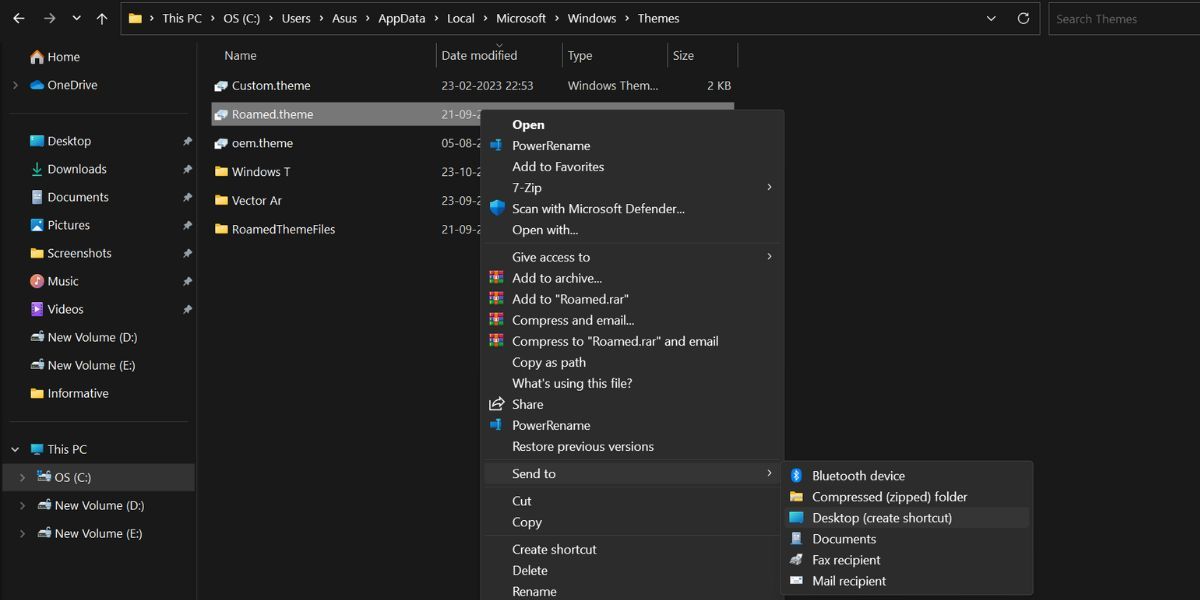
- Now, right-click on a theme and click onShow More options.
- Then click on theSend to option and select theDesktop (create shortcut) option.

- PressWin + D to switch to the Desktop. Make sure to close the Settings app before running the shortcut.
- Double-click on the newly created theme shortcut to apply the theme to your computer
8. Using PowerShell
Like CMD, you can access the theme files from PowerShell and change the theme. Repeat the following steps:
- PressWin + R to launch the Run command box. Type PowerShell in the text input area and pressCtrl + Shift + Enter to launch PowerShell with admin privileges.
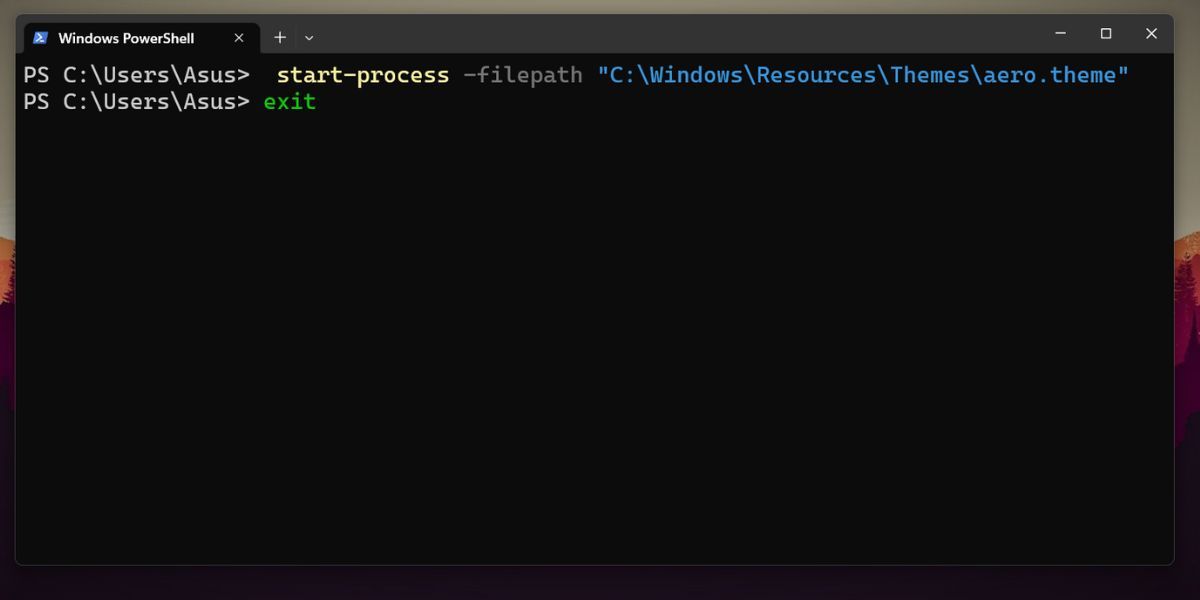
- Now enter the following command and press the enter key:
- start-process -filepath “C:\Windows\Resources\Themes\aero.theme”
- You can replace the “aero.theme” portion of the command with any other theme name. Some of the examples include: “dark.theme” and “spotlight.theme”.

- Typeexit and press enter to close the command prompt.
9. Using a Batch File
You can create a batch file and run it every time someone changes your preferred theme. Moreover, you can place it on the desktop to quickly switch to a theme. Here’s how to do it:
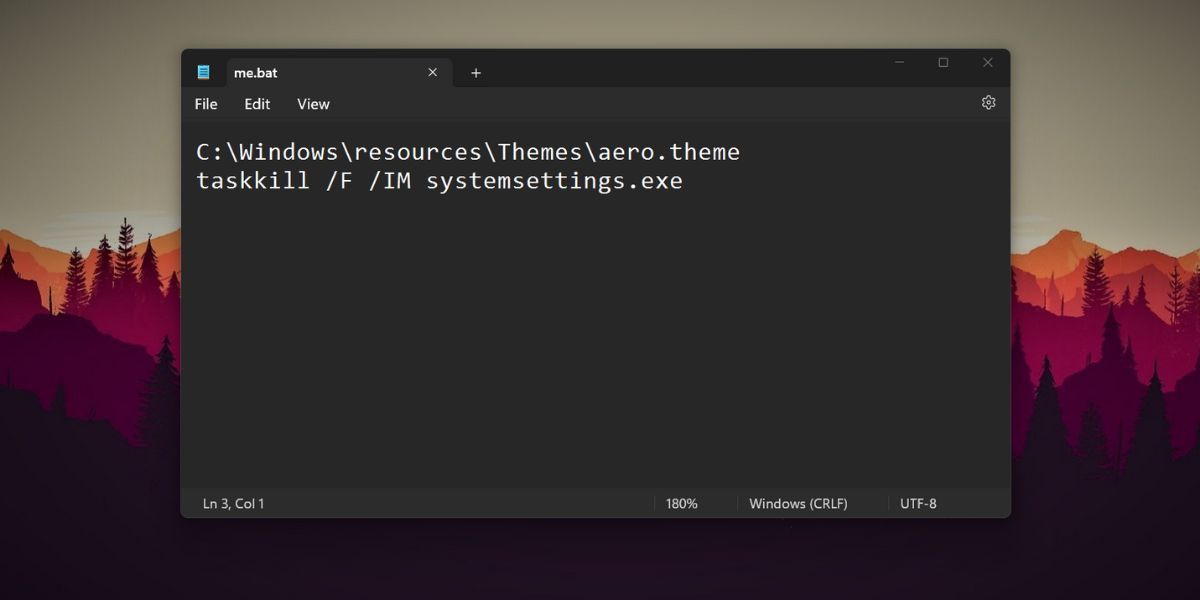
C:\Windows\resources\Themes\aero.theme taskkill /F /IM systemsettings.exe
PressWin + S and type Notepad. Click on the first search result to open the Notepad app.
Now, paste the following script into the Notepad file:
Go to the top menu bar and click onFile > Save as option. Keep the filename aschangetheme.bat , select theAll files option, and save it on the desktop.

Close the Notepad app and Press Win + D to switch to the desktop.
Now, right-click on the changetheme.bat file and select theRun as administrator option.
The file will open a command prompt window, change the theme and close the CMD and System Settings window automatically.
Change Your Windows 11 Themes Like a Pro
Windows 11 stores themes in multiple locations. The simplest way to change the theme is by using the Settings app. But if you want to keep the mouse clicks to a minimum, creating the shortcut of a theme file or running a batch script is better. If you aren’t afraid of the Terminal, the command prompt and PowerShell methods also work like a charm.
Also read:
- [New] Interactive vs Passive Entertainment Twitch vs YouTube
- [Updated] The Rise of Facebook's Quick Vids for 2024
- 免費在線WAV/SWF音訊格式變更者:Movavi 上的方便轉換器選擇
- 如何快速免费地将MP3文件转换为MP4 - Movavi秘技
- Does find my friends work on OnePlus 12 | Dr.fone
- In 2024, Best 10 Chinese Video to English Translator
- In 2024, How to Remove Forgotten PIN Of Your Xiaomi Civi 3 Disney 100th Anniversary Edition
- In 2024, Illuminating the Path to YouTube Success Keyword Research
- In-Depth Analysis of Docooler's 12MP USB Camera - Unveiling the Reality
- Screen Saviors Ranked Top 8 for iOS Filmmaking Apps
- Top Free Video Editing Tools Compatible with Windows 7
- Tutorial De Conversion DVD À AVI: Comment Utiliser Le Programme Movavi Video Converter
- Unlocking Windows 11 Sticky Note Access
- Title: Creating Your Ideal Theme Landscape in Windows 11
- Author: Richard
- Created at : 2024-11-21 16:02:59
- Updated at : 2024-11-27 16:23:47
- Link: https://win11-tips.techidaily.com/creating-your-ideal-theme-landscape-in-windows-11/
- License: This work is licensed under CC BY-NC-SA 4.0.
