
Dealing with VirtualBox's 0X80004005 Failure on Win
Dealing with VirtualBox’s 0X80004005 Failure on Win
VirtualBox is widely used open-source software that allows you to run multiple operating systems on your computer. Sometimes while using the program you may come across the error code E_FAIL (0x80004005). This particular issue prevents you from accessing the software and generally occurs when launching any virtual machine.
Fortunately, there are ways to tackle the issue and continue enjoying the various features of this versatile software.
What Causes Error 0x80004005?
VirtualBox E_FAIL (0x80004005) errors can occur for a variety of reasons. It includes faulty settings in VirtualBox and incompatibilities with third-party applications. Additionally, improper Network Adapter configuration and incorrect configuration files may also cause this issue. The error generally appears after you install a new release of VirtualBox.
Let’s now see how to fix this issue.

1. Disable Hyper-V
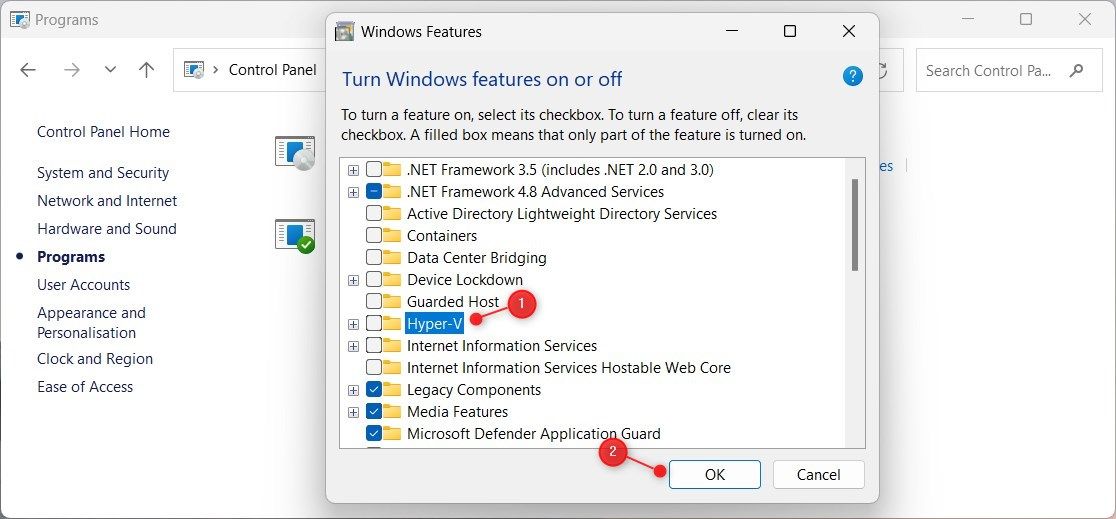
Hyper-V is a hardware virtualization technology from Microsoft that conflicts with VirtualBox, resulting in errors like this. To disable it, follow these steps:
- Open Control Panel (see how to open Control Panel ) and selectPrograms .
- In thePrograms and Features section, click onTurn Windows features on or off .
- UncheckHyper-V in Windows Features and clickOK .
- Next, pressWin + X on your keyboard and selectTerminal (Admin) .
- If the User Account Control window appears, selectYes .
- In the command prompt window, type this command and hit Enter:
bcdedit /set hypervisorlaunchtype off
Now close the window and restart your computer. After that, launch VirtualBox and check if the issue has been resolved.
2. Install the Latest Version of VirtualBox
Installing the latest version is the key to solving many issues and keeping your system glitch-free. Doing so will ensure that all software features and components are up-to-date and operating correctly.
To update your version, follow these steps:
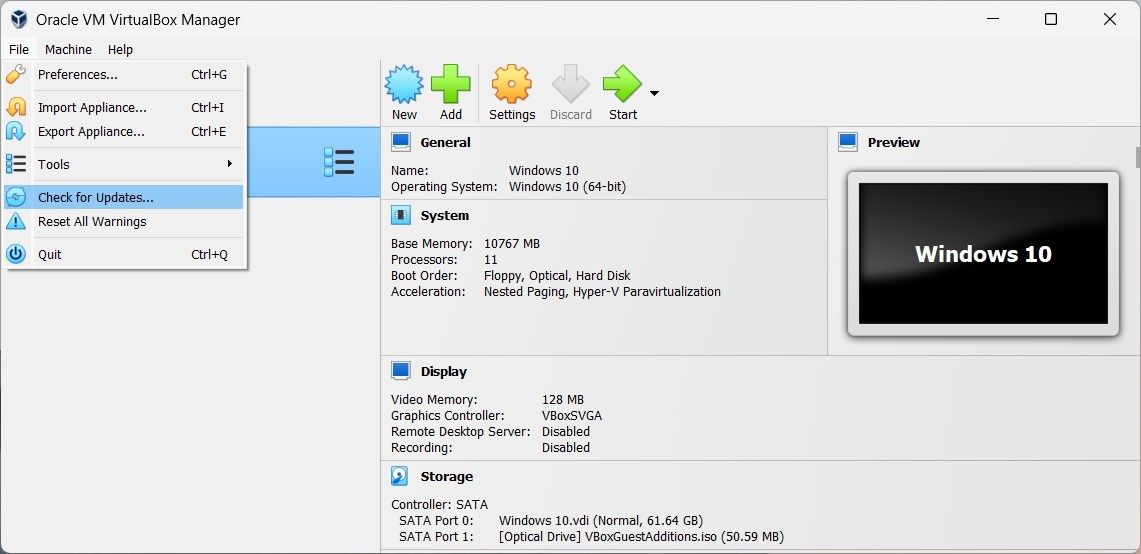
- Search for the VirtualBox Manager app and open it.
- On the top menu, go toFile and selectCheck for Updates . If any updates are available, a pop-up will appear.
- Click on the link to download and follow the onscreen instructions to install the update.
After you perform the installation process, try launching your virtual machine and see if the error has been fixed.
Another way to fix the issue is by renaming the VM XML file. This file includes important settings and configurations related to your virtual machine, which might cause the error. To rename it, follow these steps:
- Open File Explorer (see how to open File Explorer ) and navigate to the following directory:
C:\Users\username\VirtualBox VMs\ - Now locate your virtual machine folder with a suffix of**.xml-prev** .
- Right-click on it, selectRename , and remove the-prev suffix.
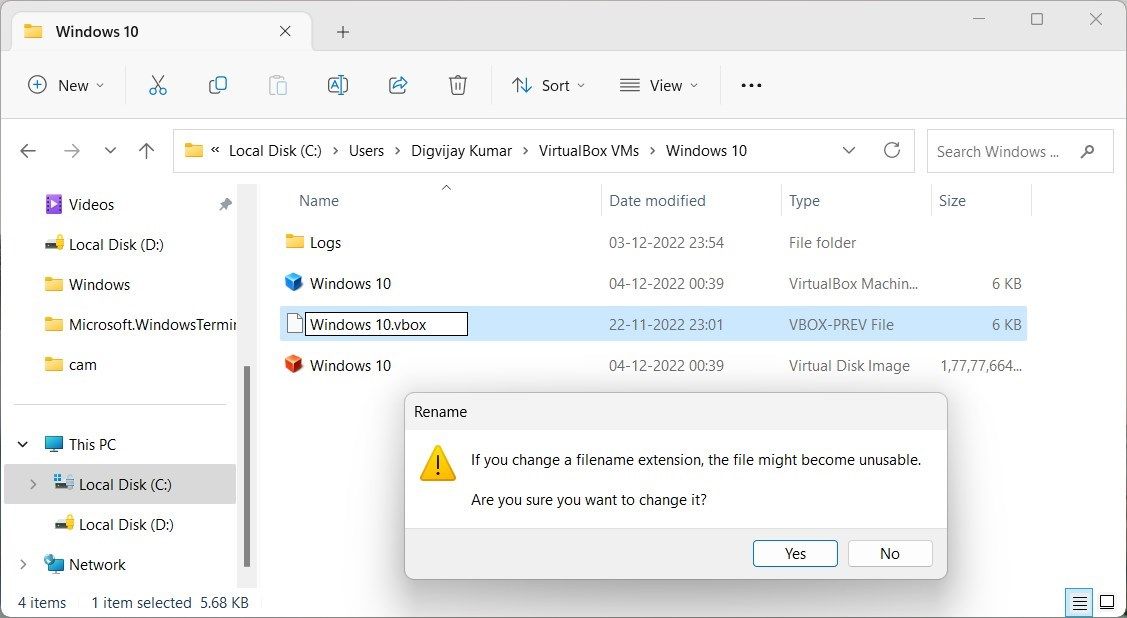

Upon doing so, a confirmation message pops up. ClickYes and relaunch the virtual machine. If the issue persists, move to the next solution.
4. Uninstall Third-Party Applications
Certain third-party applications like antivirus software or other security programs may interfere with VirtualBox and cause this error. Uninstalling them might help resolve the issue.
To do so, follow these steps:
- Open Control Panel and selectPrograms & Features .
- Locate the applications you want to remove and clickUninstall .
After uninstalling the programs, restart your computer, and try running VirtualBox again.
 EmEditor Professional (Lifetime License, non-store app)
5. Try Reinstalling VirtualBox
If none of the above methods work, you may need to reinstall the program. Here’s how to do it.
- Open Control Panel and go toPrograms & Features .
- Right-click on the VirtualBox entry and selectUninstall .
- Follow the prompt to remove it from your system.

Once done, restart your computer. Then head to the official website for Oracle VM VirtualBox and download the latest version . After that, install it, and see if that helps fix the issue.
Fixing the VirtualBox E_FAIL (0x80004005) Error on Windows
While opening the virtual machine, you may encounter the error code E_FAIL (0x80004005) on your Windows PC. This error may be caused by a number of things, such as the VirtualBox app being faulty, Hyper-V blocking access from Virtual or potential hardware difficulties. Read this guide to learn the possible ways to fix this issue.
- Title: Dealing with VirtualBox's 0X80004005 Failure on Win
- Author: Richard
- Created at : 2024-08-16 02:21:20
- Updated at : 2024-08-17 02:21:20
- Link: https://win11-tips.techidaily.com/dealing-with-virtualboxs-0x80004005-failure-on-win/
- License: This work is licensed under CC BY-NC-SA 4.0.