Displaying D: Drive Folder Alongside Existing Paths

Displaying D: Drive Folder Alongside Existing Paths
To access the D: drive, you normally have to open File Explorer, click on This PC in the Navigation pane, and expand the Devices and drives section. With a simple hack, you can add it to the Navigation pane so you can easily access it straight from there. It will require you to tweak the Windows Registry, but don’t worry; we’ll show you an extremely easy way of going about it.
Disclaimer: This post includes affiliate links
If you click on a link and make a purchase, I may receive a commission at no extra cost to you.
Before You Proceed…
We are going to create a Registry file to add the D: drive to the Navigation Pane. This file will make changes to the Windows registry, and you need to be careful not to mess up the Windows Registry . A slip-up could make Windows unusable.
Furthermore, we highly recommend that you learn how to back up and restore the Windows Registry . That way, you have a way of returning it to the state it was in before you made any changes that broke it.
How Do I Add the D: Drive to the Navigation Pane in File Explorer?
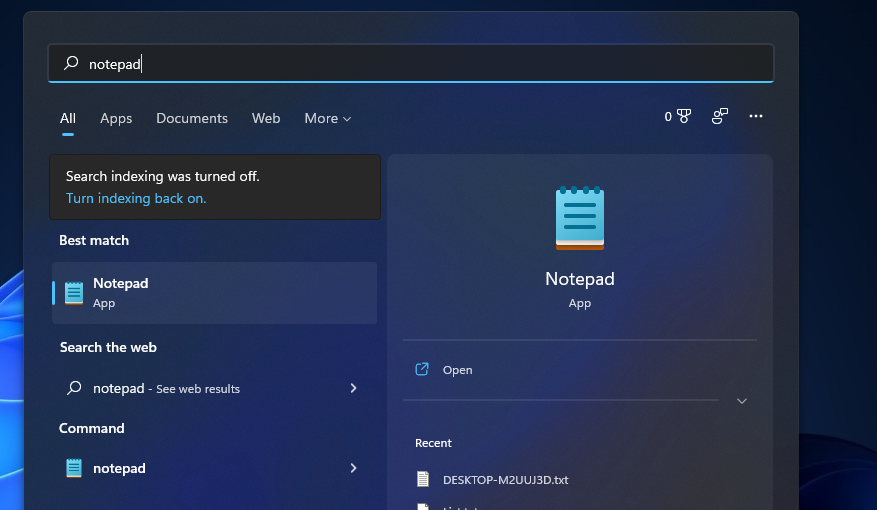
Start by pressing Win + S to bring up Windows Search. Then, type notepad in the Search box, and when Notepad shows up in the search results, click on it to launch it.

Then copy and paste the below text into Notepad:
`Windows Registry Editor Version 5.00
[HKEY_CURRENT_USER\Software\Classes\CLSID{0525388b-89d9-4112-bf4d-2aaccb716a7f}]
@=”D: Drive”
“System.IsPinnedToNamespaceTree”=dword:00000001
“SortOrderIndex”=dword:00000050
[HKEY_CURRENT_USER\Software\Classes\CLSID{0525388b-89d9-4112-bf4d-2aaccb716a7f}\DefaultIcon]
@=hex(2):69,00,6d,00,61,00,67,00,65,00,72,00,65,00,73,00,2e,00,64,00,6c,00,6c,\
00,2c,00,2d,00,33,00,32,00,00,00
[HKEY_CURRENT_USER\Software\Classes\CLSID{0525388b-89d9-4112-bf4d-2aaccb716a7f}\InProcServer32]
@=hex(2):43,00,3a,00,5c,00,57,00,49,00,4e,00,44,00,4f,00,57,00,53,00,5c,00,73,\
00,79,00,73,00,74,00,65,00,6d,00,33,00,32,00,5c,00,73,00,68,00,65,00,6c,00,\
6c,00,33,00,32,00,2e,00,64,00,6c,00,6c,00,00,00
[HKEY_CURRENT_USER\Software\Classes\CLSID{0525388b-89d9-4112-bf4d-2aaccb716a7f}\Instance]
“CLSID”=”{0E5AAE11-A475-4c5b-AB00-C66DE400274E}”
[HKEY_CURRENT_USER\Software\Classes\CLSID{0525388b-89d9-4112-bf4d-2aaccb716a7f}\Instance\InitPropertyBag]
“Attributes”=dword:00000011
“TargetFolderPath”=hex(2):44,00,3a,00,5c,00,00,00
[HKEY_CURRENT_USER\Software\Classes\CLSID{0525388b-89d9-4112-bf4d-2aaccb716a7f}\ShellFolder]
“FolderValueFlags”=dword:00000028
“Attributes”=dword:f080004d
[HKEY_CURRENT_USER\SOFTWARE\Microsoft\Windows\CurrentVersion\Explorer\HideDesktopIcons\NewStartPanel]
“{0525388b-89d9-4112-bf4d-2aaccb716a7f}”=dword:00000001
[HKEY_CURRENT_USER\SOFTWARE\Microsoft\Windows\CurrentVersion\Explorer\Desktop\NameSpace{0525388b-89d9-4112-bf4d-2aaccb716a7f}]
@=”D: Drive”`
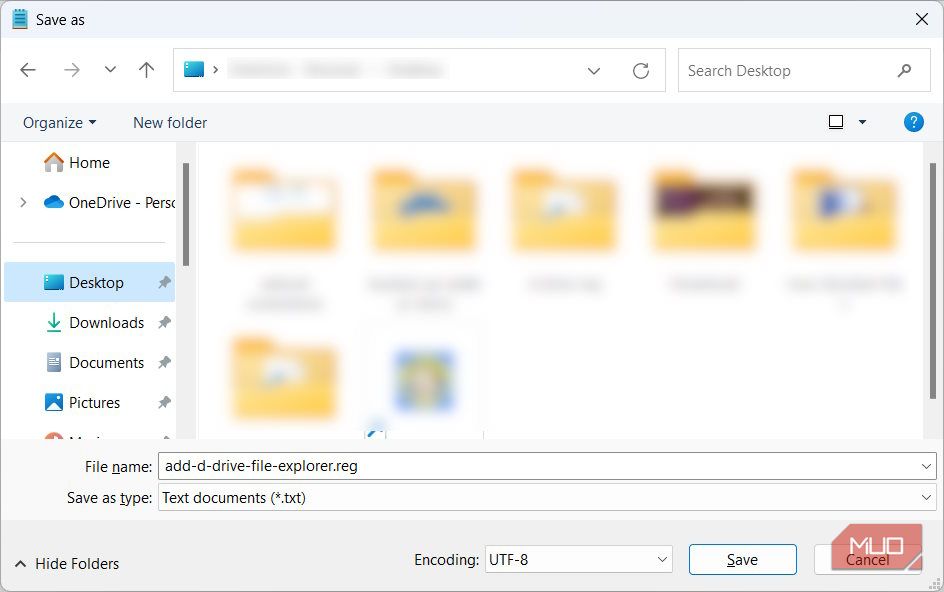
Press Ctrl + S, name the file add-d-drive-file-explorer.reg, and then click Save. Don’t forget to add the REG file extension to let Windows know it’s working with a Registry file.

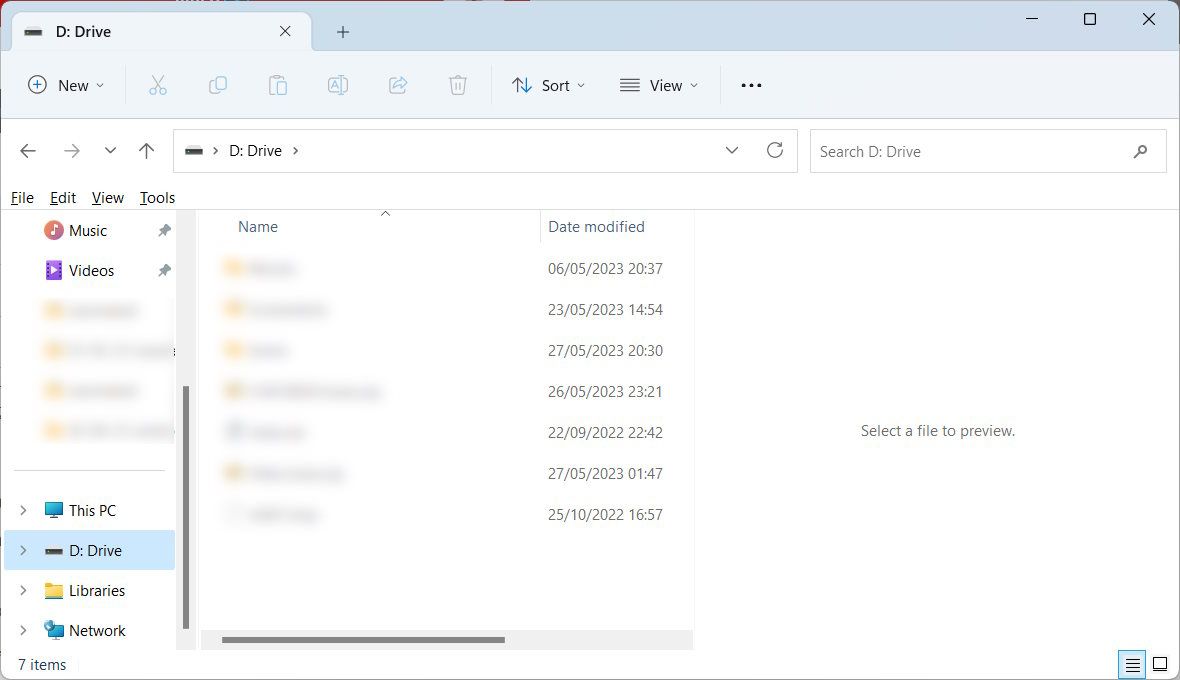
Next, double-click the Registry file you just created and click Yes on the UAC prompt. You’ll then be asked if you want to continue with the merge, so click Yes. Afterward, press Win + E to open File Explorer.

The D: drive should now be visible in the bottom part of the Navigation pane.
How Do I Remove the D: Drive From the Navigation Pane in File Explorer?
To remove the D: drive from the navigation pane, open Notepad and then copy and paste the below text:
`Windows Registry Editor Version 5.00
[-HKEY_CURRENT_USER\Software\Classes\CLSID{0525388b-89d9-4112-bf4d-2aaccb716a7f}][HKEY_CURRENT_USER\SOFTWARE\Microsoft\Windows\CurrentVersion\Explorer\HideDesktopIcons\NewStartPanel]
“{0525388b-89d9-4112-bf4d-2aaccb716a7f}”=-
[-HKEY_CURRENT_USER\SOFTWARE\Microsoft\Windows\CurrentVersion\Explorer\Desktop\NameSpace{0525388b-89d9-4112-bf4d-2aaccb716a7f}]`
Save the file as remove-d-drive-file-explorer.reg. Afterward, double-click the registry file and click Yes on the UAC prompt. When asked if you want to continue with the merge, click Yes again.
Now the D: drive should be gone from the navigation pane in File Explorer.
Create an Easier Way to Access the D: Drive on Your Windows Computer
With this guide, you will remove an extra step when accessing the D: drive on your Windows computer. Once you have created the registry files, adding and removing the D: drive from the Navigation pane will be easy. While the registry files are safe, don’t forget to create a backup of your Registry or a system restore point for good measure.
Also read:
- [New] Elevate Vlogging Effective Use of Jump Cuts for 2024
- [Updated] 2024 Approved Accelerate Your Editing Process with These 5 Tips for OBS
- [Updated] Master Upside-Down and Sideways iPhone Photo Rotation for 2024
- [Updated] Proven Pathways for Cutting-Edge OBS Studio Edits
- CamRecorder Essential Techniques for Gaming Pros for 2024
- Efficiently Shift Your Video Format: From MKV to MP4 (Windows)
- Harnessing the Power of Multi-Group Posts for Greater Engagement
- Here are Some of the Best Pokemon Discord Servers to Join On Realme 11 5G | Dr.fone
- Mark II Unveiled: Small Size, Big Impact - PowerShot G7X
- Overcoming Error Code: 0XA00F425D in Microsoft's Windows Camera App
- Overcoming Windows Upgrade Error: 0XC004F050
- Prevent Error E:8024002E in Updates Process
- Resolving the Elusive Error 0X80073D26 on Windows
- Unveiling AI Computers: Distinctions Explored
- Winning Over Error Code 31: Reconnect to the Internet with Ease
- Title: Displaying D: Drive Folder Alongside Existing Paths
- Author: Richard
- Created at : 2025-02-28 04:08:44
- Updated at : 2025-03-04 21:22:08
- Link: https://win11-tips.techidaily.com/displaying-d-drive-folder-alongside-existing-paths/
- License: This work is licensed under CC BY-NC-SA 4.0.