
Ditch Manual Data Entry: Seamlessly Move Information From Printed Forms Using This Smartphone Technique

Ditch Manual Data Entry: Seamlessly Move Information From Printed Forms Using This Smartphone Technique
Quick Links
Highlights
- Don’t manually retype data—use Excel’s mobile app to quickly scan and edit printed tables.
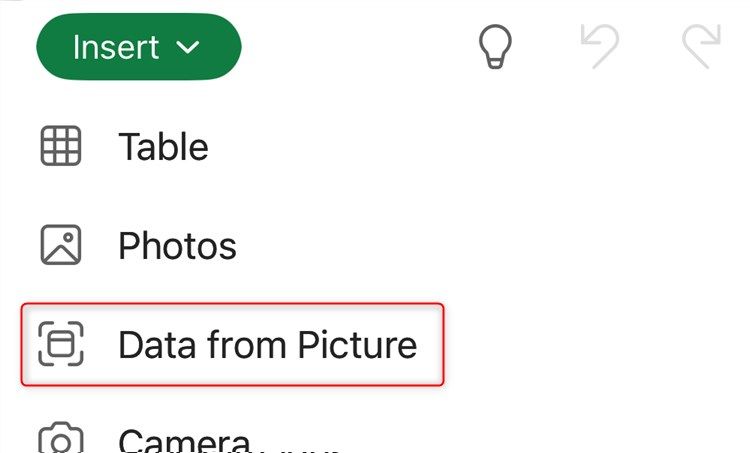
- Open the Insert menu in the app to locate the Data From Picture option.
- Make sure the printed data is separated into individual cells for accurate conversion.
Do you have a printed table or data set that needs to be retyped and edited? Don’t waste time copying it manually into Excel—instead, use a little-known feature in the Excel mobile app to do this in just a few minutes.
Yes, you can scan data onto your computer and edit it there , but having your phone to hand as an instant mini-scanner and letting Excel do the hard work for you is certainly the best way to go. What’s more, PDFs do not always convert accurately into Word documents or Excel spreadsheets, so you’ll end up spending more time on your work if you go down that route.
I’ll use my iPhone 14’s Excel app to show you this process, but you can follow exactly the same process if you’re using the Android Excel app.
Things to Note Before You Start
- For this process to work, the data you capture must be presented with lines separating each cell, row, and column. For example, if you were to convert a page from a novel, all the data you capture would be exported to a single Excel cell.
- If the data you are capturing is handwritten, Excel is less likely to be able to process it and convert it into a spreadsheet.
- The data will be unformatted once exported to your Excel spreadsheet. You’ll need to apply any formatting manually.
- The table doesn’t have to have been created in Excel originally. For example, this will also work if the data comes from a table printed from Microsoft Word.
The Process
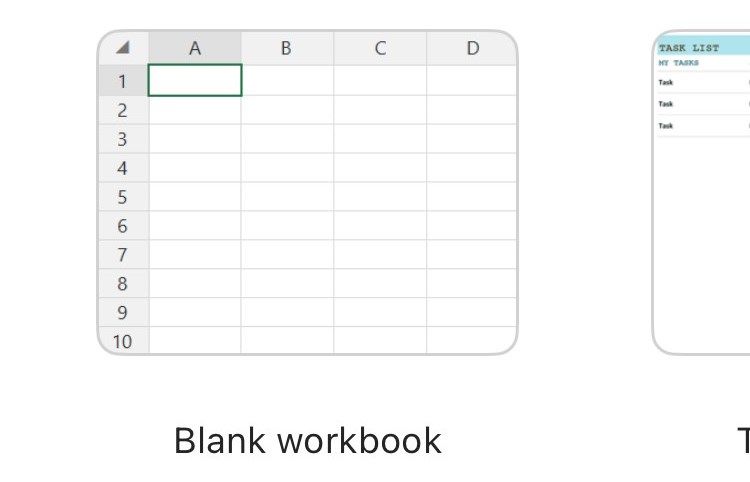
Launch the Excel mobile app and create a blank workbook.
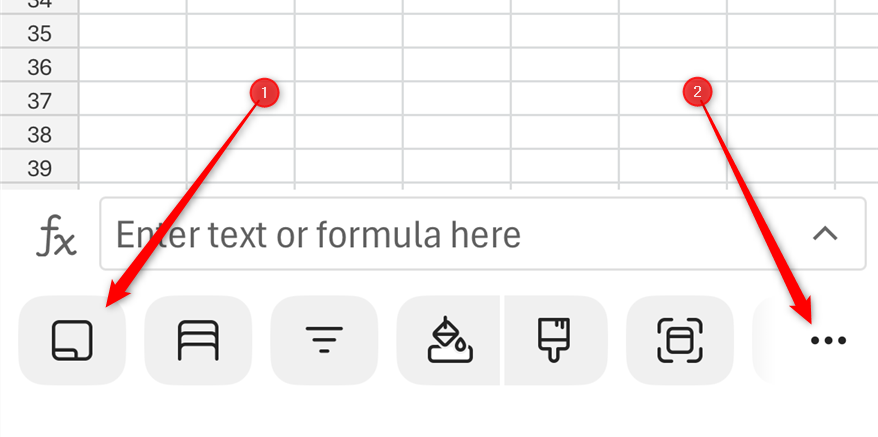
Open the lower ribbon (see icon 1 in the screenshot below), and then tap the three dots in the bottom-right corner (or the down arrow in the same location on an Android device).
Tap the green “Home” drop-down menu and select “Insert.”

Tap “Data From Picture.”
Excel will now prompt you to take a picture of the printed data by automatically opening the camera app. Align your phone with the data you want to capture (make sure you use the alignment guides on your screen), and press the shutter.
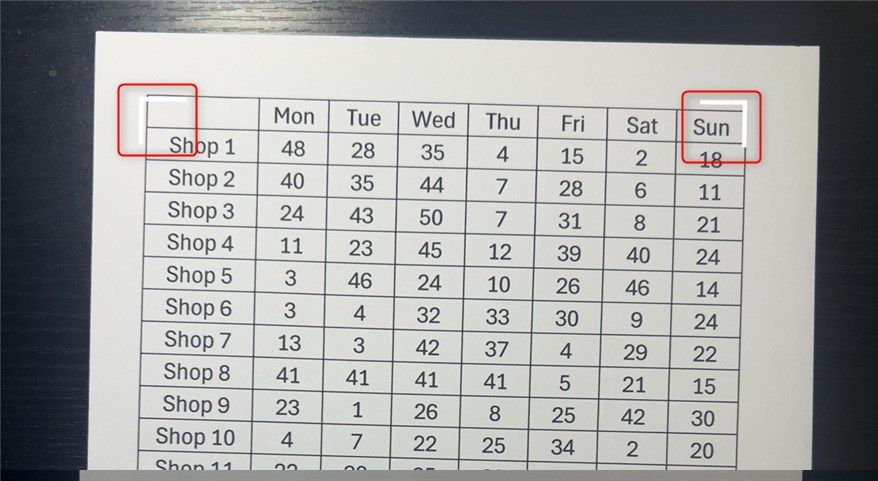
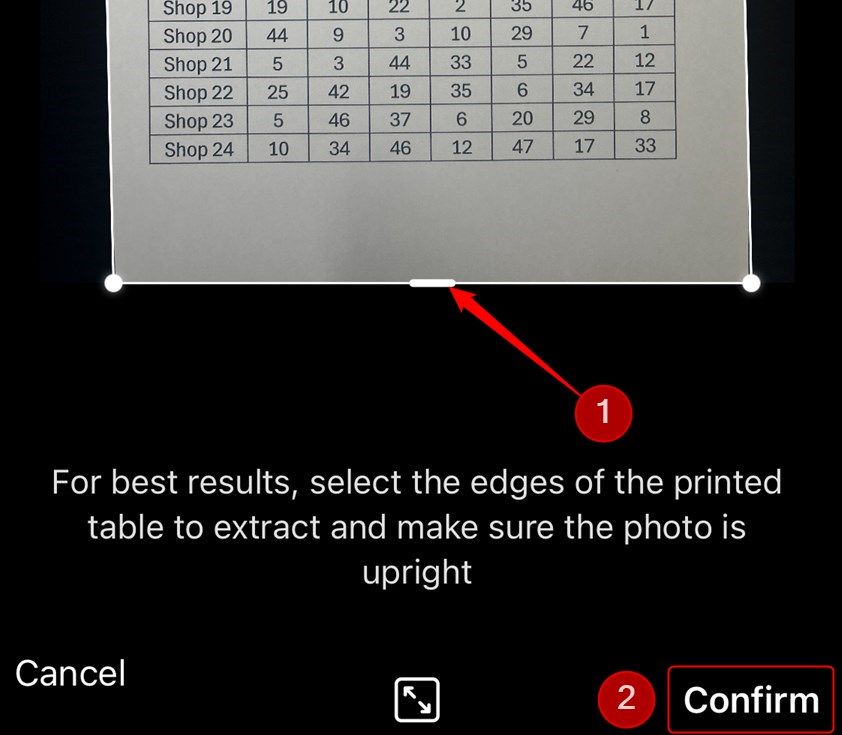
Follow the instructions at the bottom of the screen to crop your image, and click “Confirm” when you’re happy.
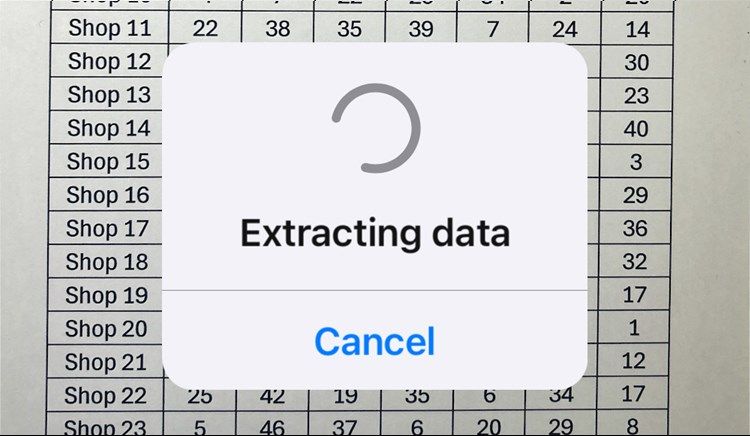
Excel will then begin the process of extracting your data to the app, and this might take a few seconds.
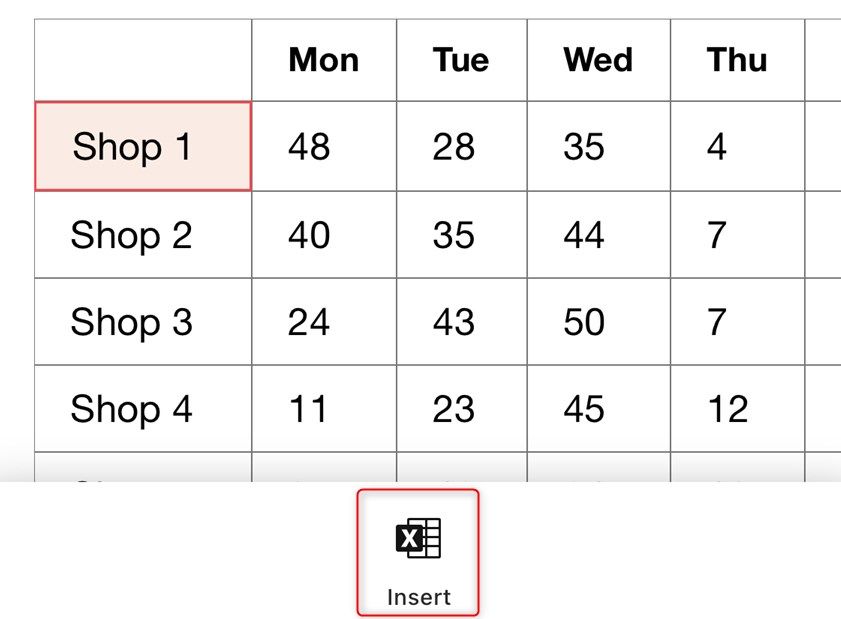
You will then see a preview of the data it has extracted. Any issues that Excel experienced in converting the image to data will be highlighted in red, which you can review in the next step after tapping “Insert.”
Excel will tell you how many items you need to review. If more than one item needs to be reviewed, tap “Review All,” and address each issue manually. Excel will often falsely identify issues when, in fact, the data has been exported accurately. In this case, you can tap “Open Anyway.”

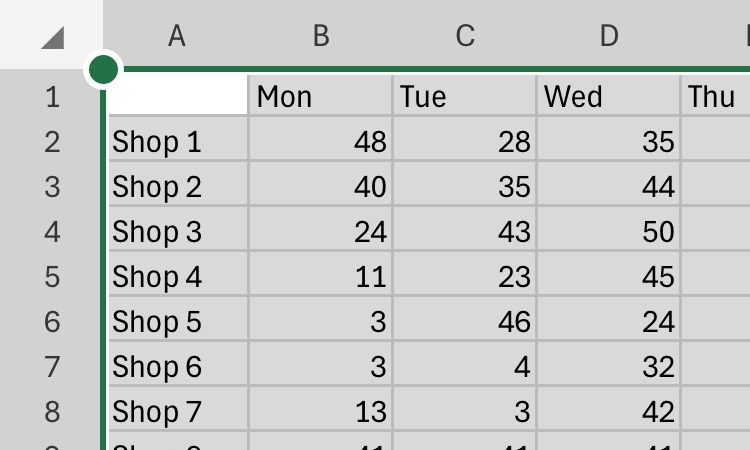
Once complete, you will see the data in the blank spreadsheet you created at the start of the process. You can then reformat the data to your choosing.
If you’re using an iPhone, another similar and equally handy feature is the Live Text tool , which will identify words in an image and convert them into plain text for you to copy.
Also read:
- [New] Become a Pro with 2023'S FREE Templates
- [New] Invigorating Channel Content Best Video Concepts to Inspire Viewers for 2024
- [New] Video Perfection Choosing the Ultimate 5 Enhancers for 2024
- [Updated] Edu-Stream 100 Cutting-Edge Learning YT
- [Updated] Top Handheld Tech to Eliminate Shaky Screenshot Videos
- A Compreenas Guide to Auto and Advanced Camera Exposure Methods for 2024
- Essential Fixes for Non-Starting OBS (Windows)
- Getting Back to Basics: Uninstalling Windows 11 Apps
- Harmonizing Apple and Windows Calendars Effectively
- Resolving Semaphore Deadlock in Win11/10: Timeout
- Time's Unity: Restore Windows Clock Consistency
- Title: Ditch Manual Data Entry: Seamlessly Move Information From Printed Forms Using This Smartphone Technique
- Author: Richard
- Created at : 2024-12-05 16:03:30
- Updated at : 2024-12-06 19:52:52
- Link: https://win11-tips.techidaily.com/ditch-manual-data-entry-seamlessly-move-information-from-printed-forms-using-this-smartphone-technique/
- License: This work is licensed under CC BY-NC-SA 4.0.