
Drive Clearance Ways: Keeping Files on Win11 Safe (Max 156 Chars)
Drive Clearance Ways: Keeping Files on Win11 Safe (Max 156 Chars)
Many users free up space on their Windows 11 PC C: drives by utilizing disk cleanup tools or uninstalling software packages. However, you don’t always have to delete files on a Windows 11 PC to free up drive space. You can instead save drive space to reduce the amount of drive cleaning required.
This is how you can free up C: drive space on a Windows 11 PC without erasing files.
1. Use NTFS Drive Compression
Windows 11 includes a compression option for NTFS drives. Selecting that setting applies compression to user files on a drive by removing redundant data. You can select to apply NTFS compression for your whole C: drive or a single folder. Our guide to enabling NTFS compression on Windows 11 tells you how to select the Compress contents to save disk space option.
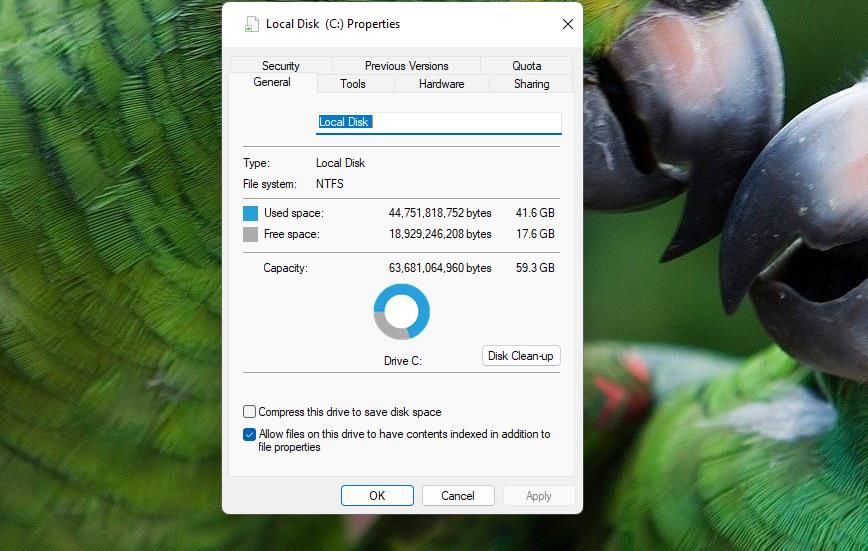
Exactly how much drive space NTFS compression will free up can be variable. If you have many uncompressed user document files on your drive, then NTFS will likely free up at least a few gigabytes of storage space. However, this compression won’t free up so much space if there aren’t many user files on your PC’s drive. The only way to find out is to try it on at least one large folder.
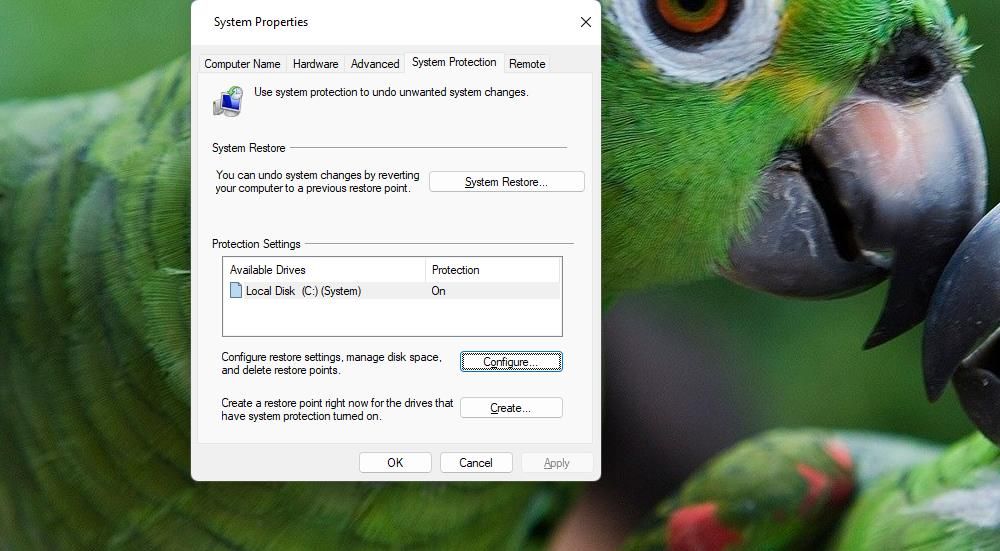
2. Disable System Restore
System Restore is a troubleshooting tool for restoring Windows to saved system snapshots (restore points). Restore points consume gigabytes of hard drive space, even when set to low usage. Disabling System Restore will stop that utility from saving further restoration points, which will free up space on your C: drive in the future. This is how you can disable System Restore:
- Press the search tool’s Windows key + S keyboard key combo.
- Next, enter create a restore point inside your search tool’s text box.
- Click Create a restore point to open a System Properties window.
- Press the Configure button.

- Click the Disable system protection option.
- Select Apply to save the system protection settings.
- Click the System Protection window’s OK option.
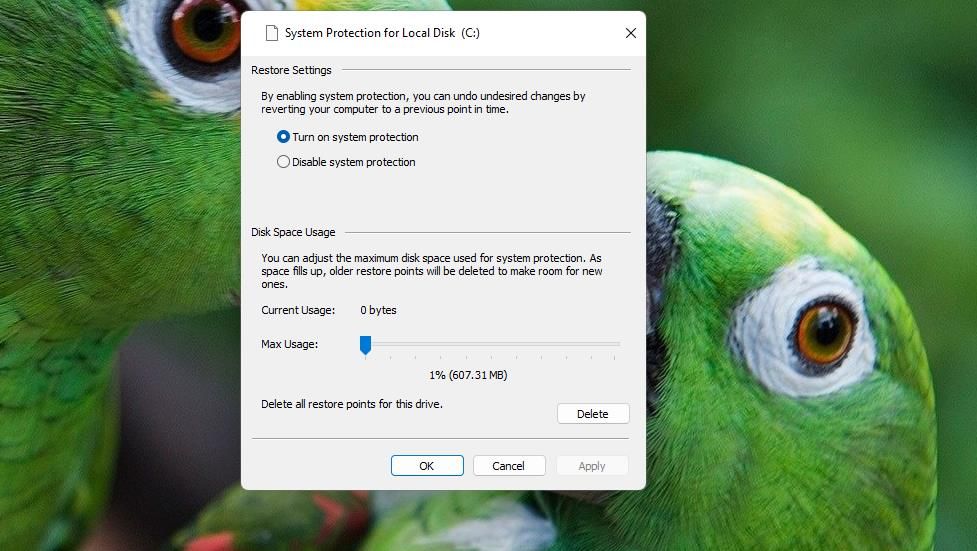
If you prefer to keep System Restore on, you can still at least reduce that utility’s disk usage. To do so, drag the Max Usage bar’s slider left on the System Protection window.
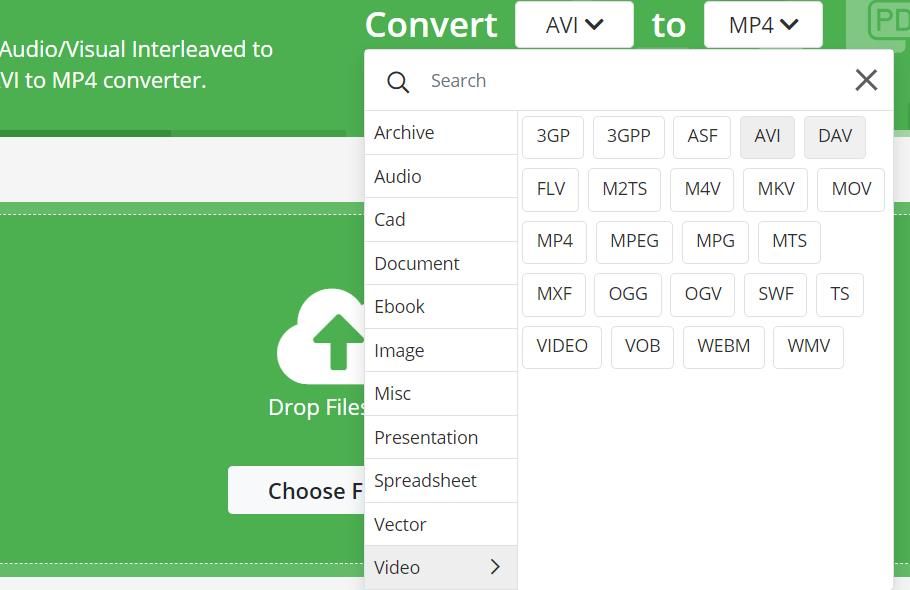
3. Convert Your Saved Video Files Into the MP4 Format
Video files can take up lots of hard drive space, especially for longer clips. If you have lots of AVI and MOV files saved, converting them to the MP4 format will free up some storage space on your hard drive. MP4 is a compressed video format that preserves a good degree of picture quality.
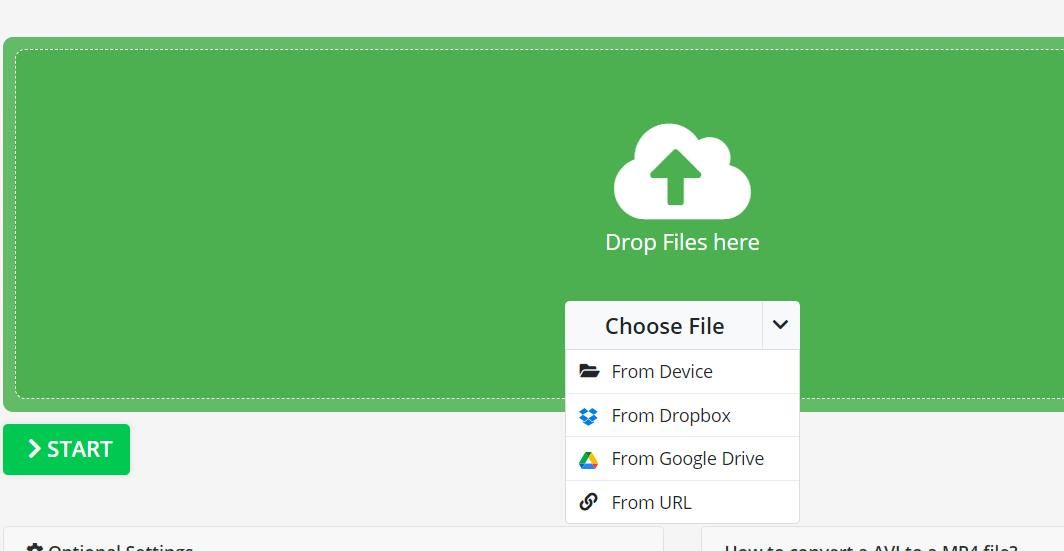
There are many video conversion software packages available for Windows. However, you can also convert videos to MP4 with web apps without installing software. This is how to convert video files to MP4 with the Online-Convert tool:
- Open this Convert video to MP4 app.
- Then click the Convert drop-down menu to select Video.
- Select the format of your current video files.
- Click Choose File > From Device to select one or more videos to convert.
- Press Open to add the selected videos.
- Click Start to convert the video to MP4.
- Select Download to save the converted MP4 videos.
Also, check out some of the options for converting to MP4 within the Online-Convert video conversion tool. You can select from a wide variety of video presets by clicking the Choose a preset drop-down menu. Further down, there’s a Set file size option in which you can input a target size value for the converted video.
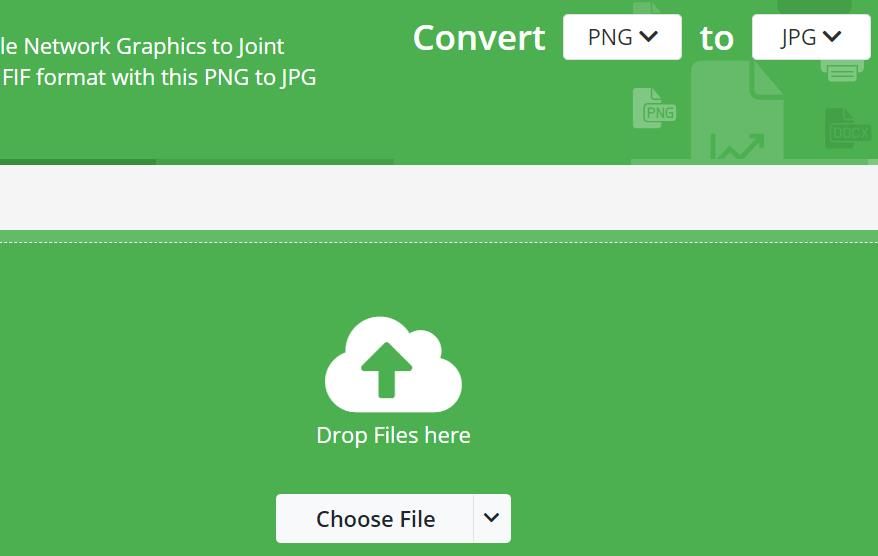
4. Convert Your Saved Image Files Into the JPG Format
JPG is like the image equivalent of the MP4 format with its lossy compression. Image files with the JPG format are typically smaller than the PNG of BMP alternatives. If your C: drive includes many PNG or BMP images, converting them to JPGs will probably also free up a significant amount of storage space.
You can convert image files to JPG with the Online image converter to JPEG app on the Online-Convert site as instructed for the video files in the previous method. To maximize the compression, select the Smallest File option. Alternatively, drag the Quality bar’s slider there left to increase compression.
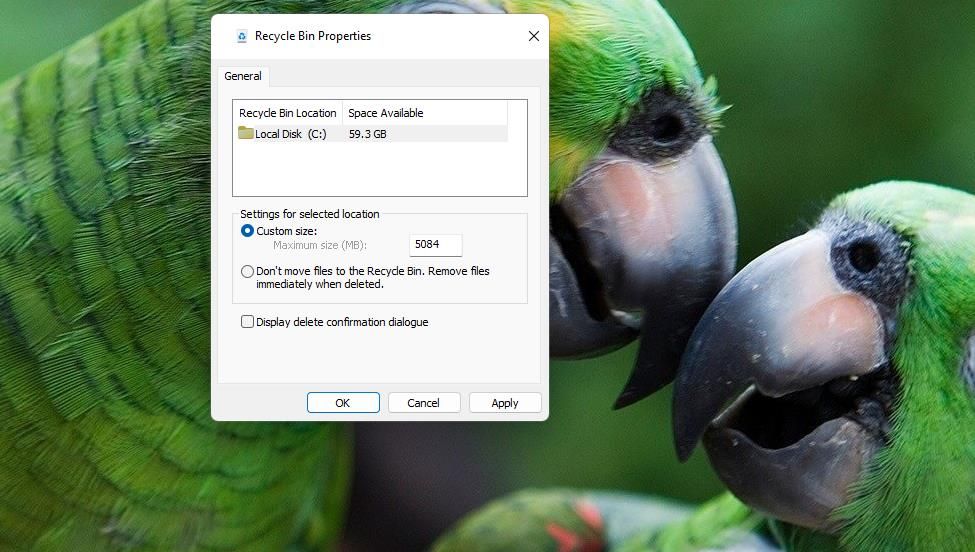
5. Reduce the Recycle Bin’s Size
Windows 11’s Recycle Bin stores deleted files until emptied. You can reduce the maximum amount of space allocated to the Recycle Bin for storing files. This will mean your Recycle Bin will reach max size sooner rather than later, and you’ll need to empty it more often.
You can reduce the Recycle Bin’s size as follows:
- Right-click Recycle Bin on the desktop and select Properties on the context menu that opens.
- Click the Custom size option.
- Input a lower megabyte figure in the Maximum size box (1,000 MBs equals one gigabyte).
- Click Apply and OK in the Recycle Bin Properties window.
6. Create ZIP Archives for Storing Files
ZIP is an archive format that compresses files included in it. ZIP archives are like compressed folders from which you can easily access their contents when needed. Archiving lots of user files lying around on your hard drive within ZIPs will free up drive space. Creating ZIP archives with many videos and images in them could free up lots of drive space.
Windows 11 includes options for creating ZIP archives. You can set up a ZIP with one of the six methods in our article about creating ZIP files on Windows . If you ever need to access an archive’s contents, check out this guide to unzipping ZIP files .
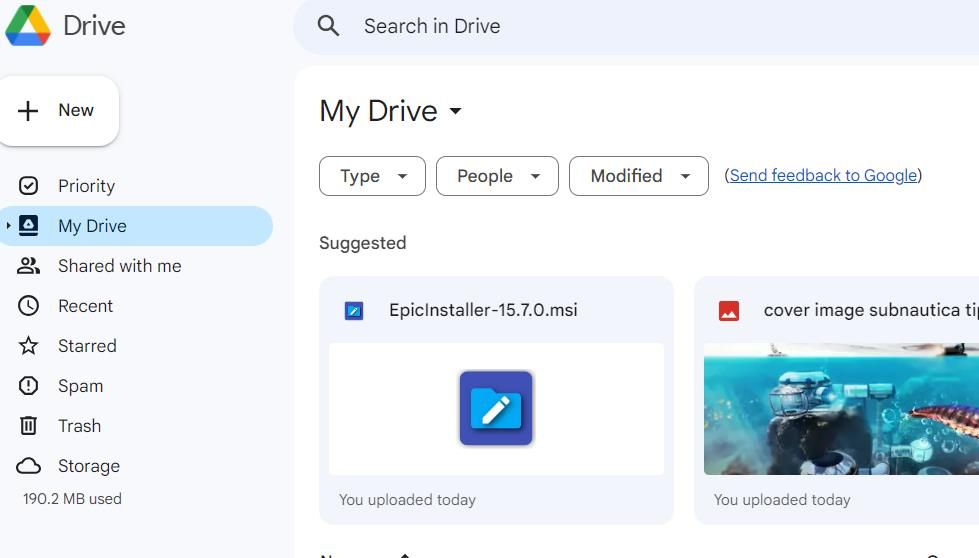
7. Save Files to a Cloud Storage Service
Cloud storage enables you to save your user files with online storage providers. OneDrive, Dropbox, and Google Drive are the big three cloud storage providers that offer free storage ranging from two to 15 gigabytes. OneDrive is the cloud storage included with Windows 11. However, Google Drive offers the most space with 15 gigabytes of free cloud storage.
So, you can potentially free up 15 gigabytes of local storage space by saving user files to Google Drive instead of your PC’s C: drive. You only need to set up a Google Account to get 15 GBs of free cloud storage. Furthermore, adding Google Drive to File Explorer with the app will enable you to access that cloud storage within Windows 11’s file manager.
8. Utilize Third-Party Web Apps and Portable Programs
Installing more software packages consumes the most space on your PC’s C: drive. You can save C: drive space by utilizing the many freely available web apps instead of installing desktop software.
The Google Docs, Slides, and Sheets web apps are decent productivity alternatives to Microsoft Word, PowerPoint, and Excel. Canva is a great online graphics design app. Plus, you can utilize many online image editors and file conversion web apps.

Utilizing portable apps is another good way to save drive space, because you don’t need to install them. You can even run the portable apps from a USB stick instead of your PC’s local drive. To do so, download the files for portable app versions to your USB stick from their websites.
You can also add a portable app menu to Windows 11 with software like LiberKey and SyMenu. The PortableApps program also enables you to install and access many portable apps from a dedicated menu.
Free Up Your Windows Drive Space Without Deleting a Thing
You won’t need to clean your C: drive often if you free up more storage space with the methods above. The compression methods alone could free up many gigabytes of drive storage space on your PC.
Utilizing web and portable apps instead of installing software, disabling System Restore, and saving files to cloud storage will also reduce drive storage usage, which effectively frees up more space.
This is how you can free up C: drive space on a Windows 11 PC without erasing files.
Also read:
- [New] Groundbreiting Recording Solutions for Environmental Films
- 立即在线无偿将MP4转换为3GP:Movavi格式更改器
- Advanced Photography Skills Precision Cropping in Digital Spaces for 2024
- Apply These Techniques to Improve How to Detect Fake GPS Location On Poco X6 | Dr.fone
- ChatGPT Sign-Up Paused: Delving Into the Why and Estimating Next Availability Window
- Free Online MOV to WAV Converter - Moveavee
- Mp4 Para Mp3 Em Segundo Plano: Fácil, Livre E Direto Com O Movavi - Perfeito Para Todos
- Unveiling YouTube's Monetization Process for 2024
- 탁이기 쉬운 영상 조인트 프로세스 | Movavi 대화형 가이드
- Title: Drive Clearance Ways: Keeping Files on Win11 Safe (Max 156 Chars)
- Author: Richard
- Created at : 2025-02-27 23:46:57
- Updated at : 2025-03-04 19:15:43
- Link: https://win11-tips.techidaily.com/drive-clearance-ways-keeping-files-on-win11-safe-max-156-chars/
- License: This work is licensed under CC BY-NC-SA 4.0.