Eliminate 'Not Supported' Errors in Windows: A Quick Guide

Eliminate ‘Not Supported’ Errors in Windows: A Quick Guide
The “no such interface supported” error in Windows occurs when there is an issue with a particular interface or component that a program is attempting to utilize to launch or function. It can occur due to different reasons, such as corrupt system files, a problematic user account, missing DLL files, or a problem with the targeted app itself.
Below, we walk you through the different solutions you can try to fix this issue once and for all.
1. Run a System File Scan
It is common for corrupt files in the system to disrupt the proper functioning of interfaces.
This happens because these files contain essential interface definitions and configurations that allow you to use apps easily. When these files become corrupted, the interfaces may not be recognized or supported, leading to issues like the one at hand.
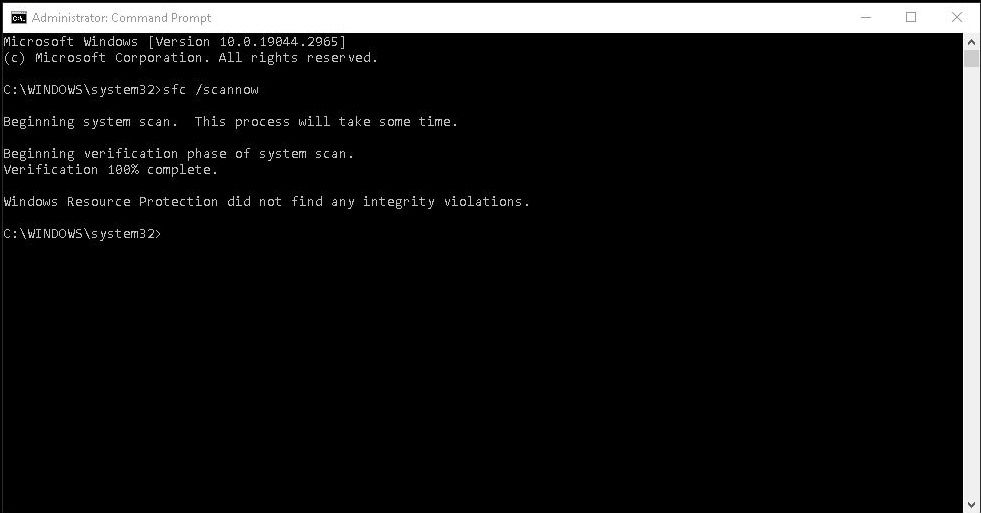
To check if this is the case in your situation, we recommend getting started by running a system scan using the System File Checker (SFC) . This tool is built into Windows by default and can be accessed using the Command Prompt.

It works by scanning the system for any corruption errors and inconsistencies. If a corrupt/misconfigured file is identified, it will replace it with its healthier cached counterpart automatically, fixing errors like the one at hand in the process.
It is also important to note that since SFC makes changes to system files, you will need to have administrative privileges to run it. Thus, if you are currently signed in with a standard user account, switch to an administrator account to proceed with running the utility.
2. Disable Non-essential Startup Programs
Some third-party programs or services can at times interfere with the normal operation of system interfaces, resulting in conflicts that cause issues like the “no interface supported” error. In this case, if you have a large number of apps that launch automatically at startup, you can try disabling the non-essential programs and check if that helps.
Doing so will also free up system resources that these startup programs were using, allowing the interfaces to operate smoothly without unnecessary strain.
Here is how you can do that:
- Press the Win + R keys together to open a Run dialog.
- Type “msconfig” in Run and press Enter to open the System Configuration window.
- In the Startup tab, click on Open Task Manager.
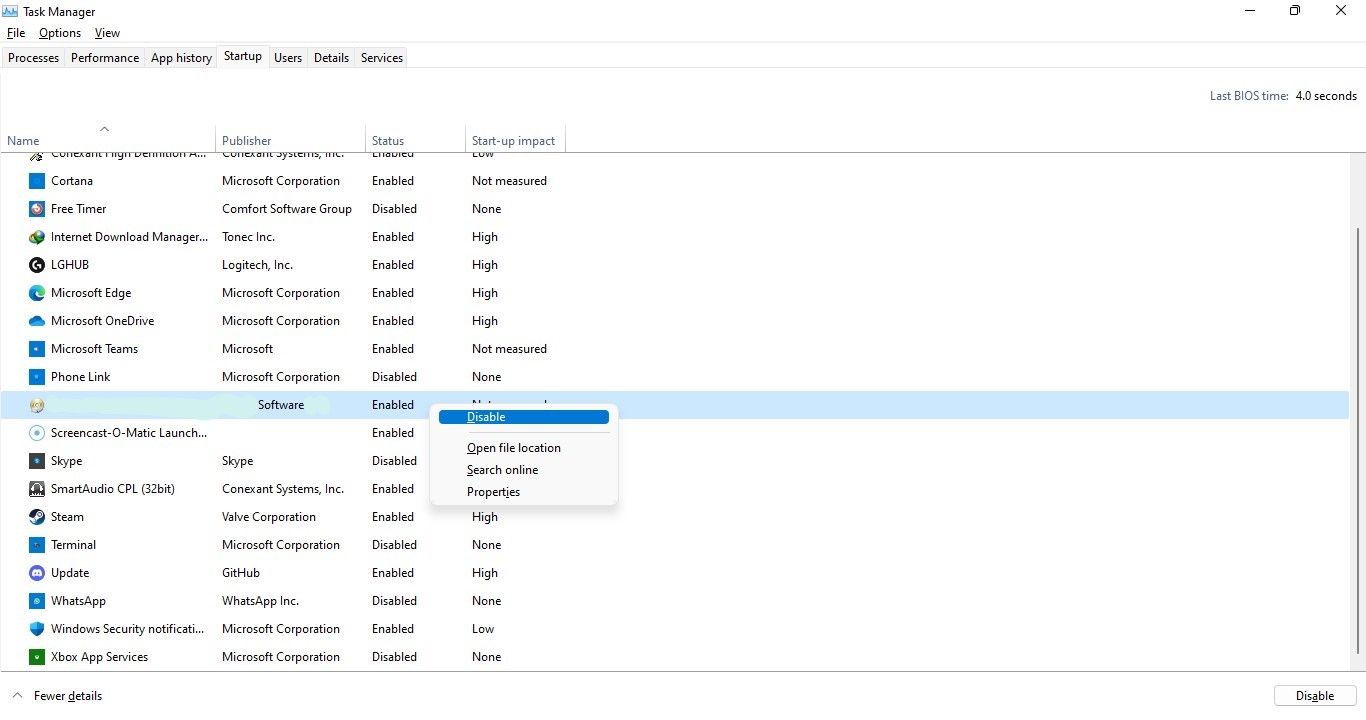
- You should now see a list of programs that launch automatically when the system launches. Identify the unnecessary ones and right-click on them. Choose Disable from the context menu. Perform the same steps for all the programs you don’t want to launch at startup.

- Once done, exit the Task Manager.
- Finally, restart your computer, and upon reboot, try performing the action that was initially triggering the error. If the issue was being caused due a startup program, this should fix it for good.
3. Re-Register DLL Files
A DLL file associated with the problematic app can also lead to the issue if it is missing or corrupted, has an incorrect version, or is not properly registered.
This typically happens when the DLL file that programs or components rely on to access specific interfaces experiences issues. As a result, the program will not be able to recognize or support the interface, leading to issues like the one you are experiencing.
In the case of this specific error, you can try to re-register the DLL file, which will fix the issues caused by it automatically.
Here is how you can proceed:
- Press the Win + R keys together to open Run.
- Type “cmd” in Run and press the Ctrl + Shift + Enter keys together to launch Command Prompt as an administrator.
- Click Yes in the User Account Control prompt.
- Once you are in the Command Prompt, type the command below and press Enter to execute it:
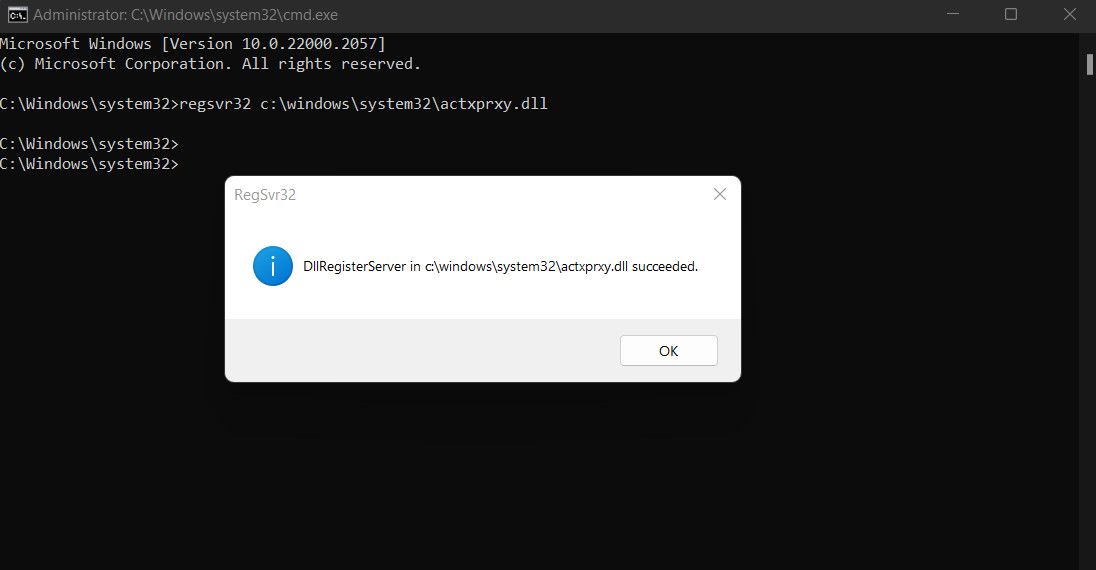
regsvr32 c:\windows\system32\actxprxy.dll
- Once done, a prompt should pop up confirming that the action has been completed. You can now close Command Prompt and check if the issue is resolved. If it persists, execute this command in Command Prompt:
FOR /R C:\ %G IN (*.dll) DO "%systemroot%\system32\regsvr32.exe" /s "%G"
Once the second command executes, hopefully, you will no longer face the issue.
4. Create a New User Account
The issue can also be caused due to problems in your user account profile.
A user account contains different settings, configurations, and permissions. If it gets corrupted, it can lead to various issues, including interface errors. A simple way to check if this is the case is by signing in to a different account and launching the app from there to check if the problem reappears.
If you do not have a separate profile already, create a new user account and then check if the issue appears in it. If it doesn’t, it implies that your current user account is the problem. In this case, you can use the System Restore utility to revert to a state where the issue under consideration was not present.
5. Fix Issues With the Problematic App
In some cases, the issue might be with the app that you are trying to launch, itself. The app can be outdated or may be dealing with a corruption error that is preventing it from launching.
If the fixes above have not worked for you, it is time to identify and fix any such issues with the problematic application. This includes updating the app, repairing it, resetting it, or even reinstalling the program. Our guide on fixing common Windows app problems covers these fixes in detail, so head over to it for step-by-step instructions.
Use Your Desired Apps Again on Windows
App errors are no fun, especially if you need to access the program urgently. Hopefully, the fixes above will help you fix the “no such interface supported” error for good. If it appears again, you can contact the Microsoft support team for further assistance.
Below, we walk you through the different solutions you can try to fix this issue once and for all.
Also read:
- [New] 2024 Approved Master the Art of Editing on Zero Budget Discover These Apps
- [New] Gamer’s Ultimate Guide Selecting the Best Video Card Brands
- [Updated] 2024 Approved The Ultimate Path to a Thriving Instagram Community
- [Updated] Charting Your YouTube Trajectory Essential Tools From Social Blade for 2024
- [Updated] Customizable MCB Visuals for YouTube Banners
- 9 Command Center of Live Gaming Streams for 2024
- Clarifying Chrome’s Unfounded Virus Warnings on Windows
- Eliminate Microsoft Store: Win11 Edition Guide
- Guiding You Through Recovering Frozen Netflix in Windows
- Hassle-Free Ways to Remove FRP Lock from Motorola Moto E13 Phones with/without a PC
- Mastering Windows 11: Understand These Top 8 Missteps
- Optimize PC Sound Output with Windows 11 Mixer Settings Guide
- Premium Laps Top Match-Up: Samsung Galaxy Book 2 Ultra Takes on Apple's MacBook Pro in a High Stakes Tech Battle
- Streamlined Conversion: Transform FLV Into AAC File Format Instantly & Gratis with Movavi
- Title: Eliminate 'Not Supported' Errors in Windows: A Quick Guide
- Author: Richard
- Created at : 2024-11-12 18:56:50
- Updated at : 2024-11-17 16:46:34
- Link: https://win11-tips.techidaily.com/eliminate-not-supported-errors-in-windows-a-quick-guide/
- License: This work is licensed under CC BY-NC-SA 4.0.

