Enhance Wake-Up Speed: Tweaking Boot Menu Wait Timer

Enhance Wake-Up Speed: Tweaking Boot Menu Wait Timer
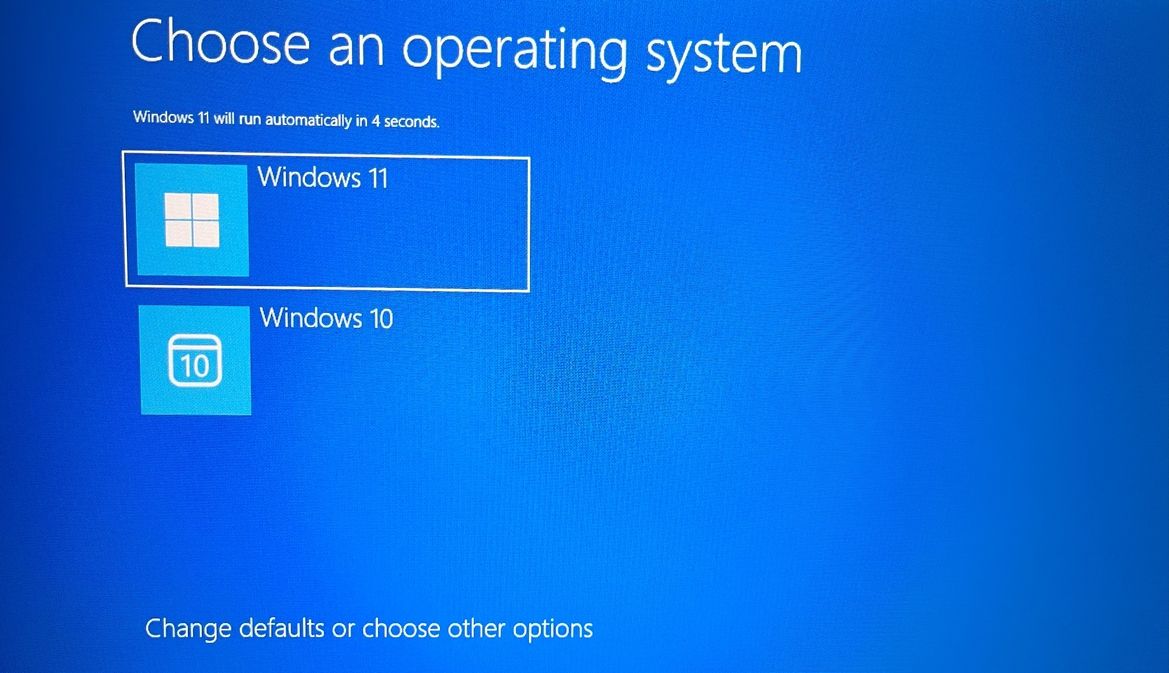
When you turn on your dual-boot system, Windows waits for a while, allowing you to choose the operating system you want to load. However, the default wait time may be too short, giving you little time to decide.
Fortunately, you can configure the wait time as per your choice. In this article, we’ll explore four quick ways to change the boot menu timeout in Windows 11. So, let’s begin.
1. Change Boot Menu Timeout Using the Settings App
The quickest way to configure the boot menu timeout is via the Settings app. Here’s a step-by-step instructions to do that:
- Press the Win + I hotkey to open the Settings app.
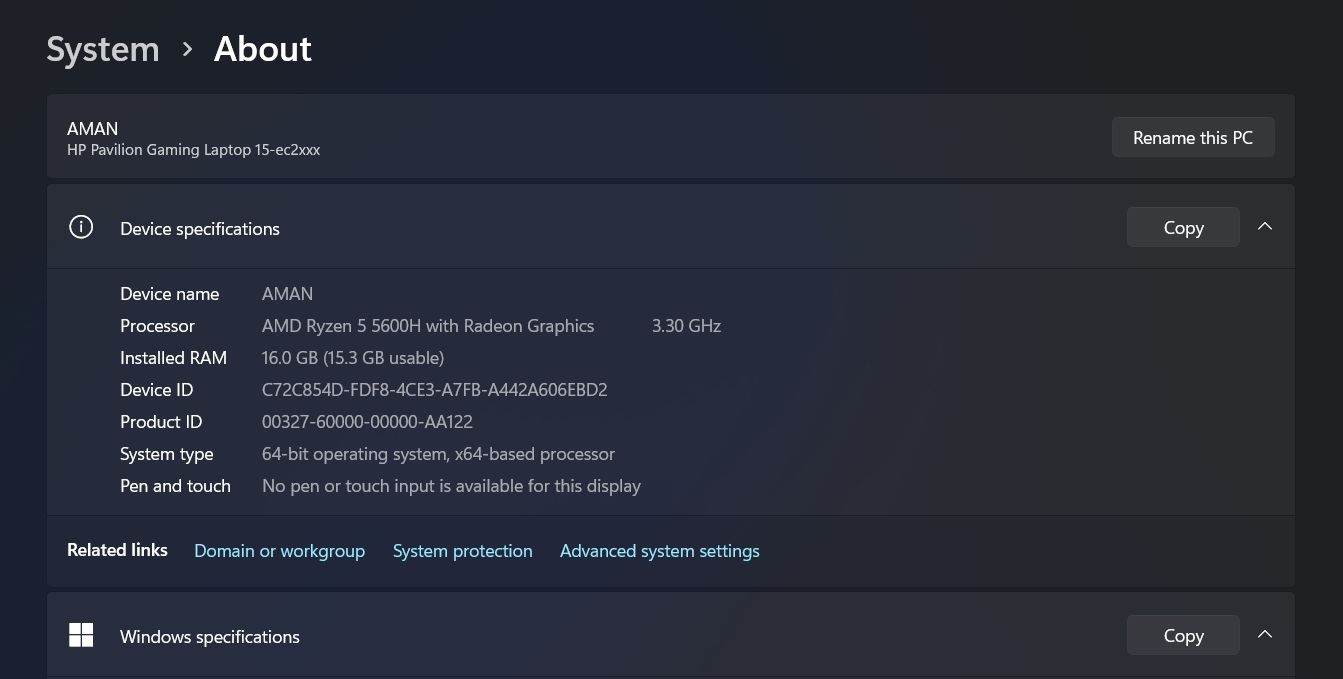
- Choose System from the left sidebar and About from the right pane.
- Choose System protection.

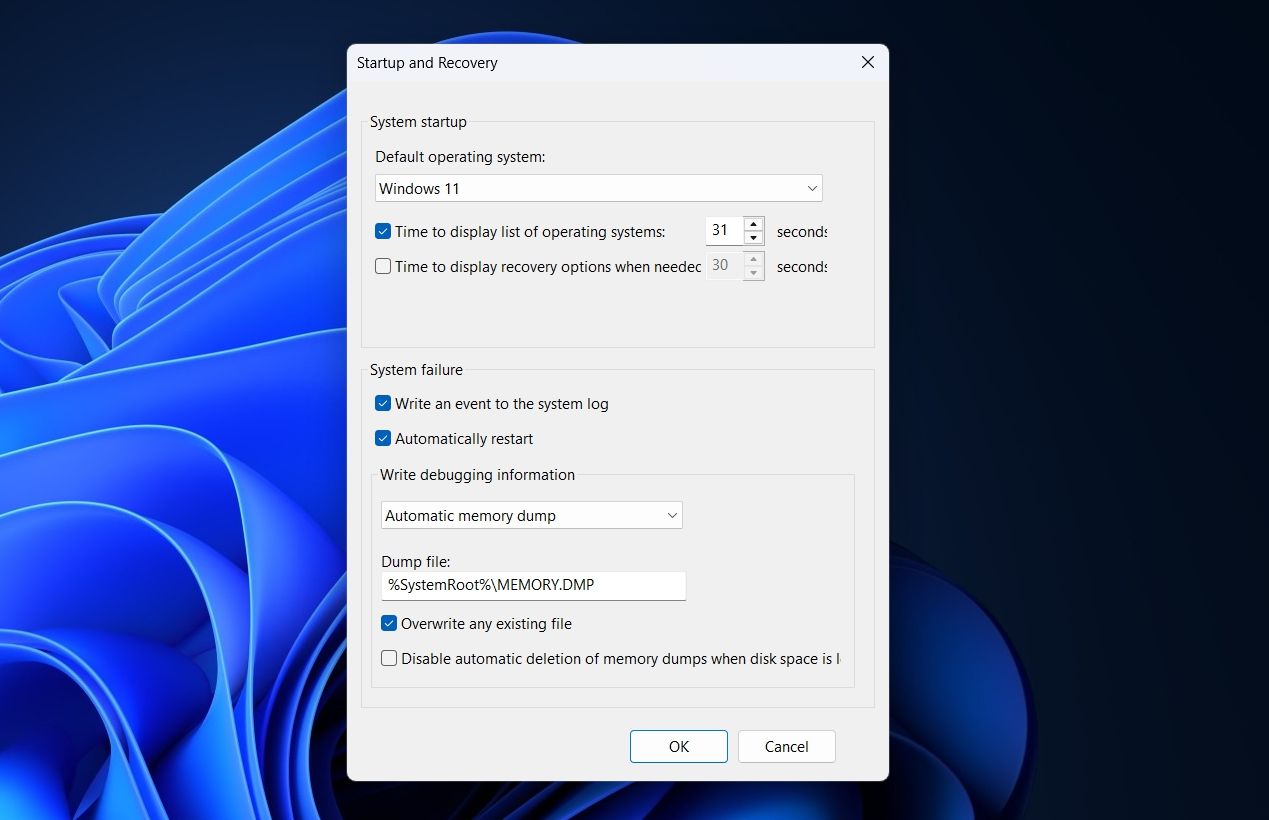
- Switch to the Advanced tab and click the Settings button under the Startup and Recovery section.
- Click the drop-down icon under the Default operating system option and choose your default OS.
- Check the Time to display list of operating systems option and select the timeout value. The value can range from 0 to 999.

- Click OK to save the changes.
2. Change Boot Menu Timeout Using System Configuration
The System Configuration app, aka msconfig, is a built-in Windows utility that lets you control your system’s startup programs and services. You can also use it to adjust various system settings, including the boot menu timeout. To change the boot menu timeout using the System Configuration app, follow the below instructions:
- Press the Win key to open the Start Menu, type System Configuration in the search bar, and select the same from the result.
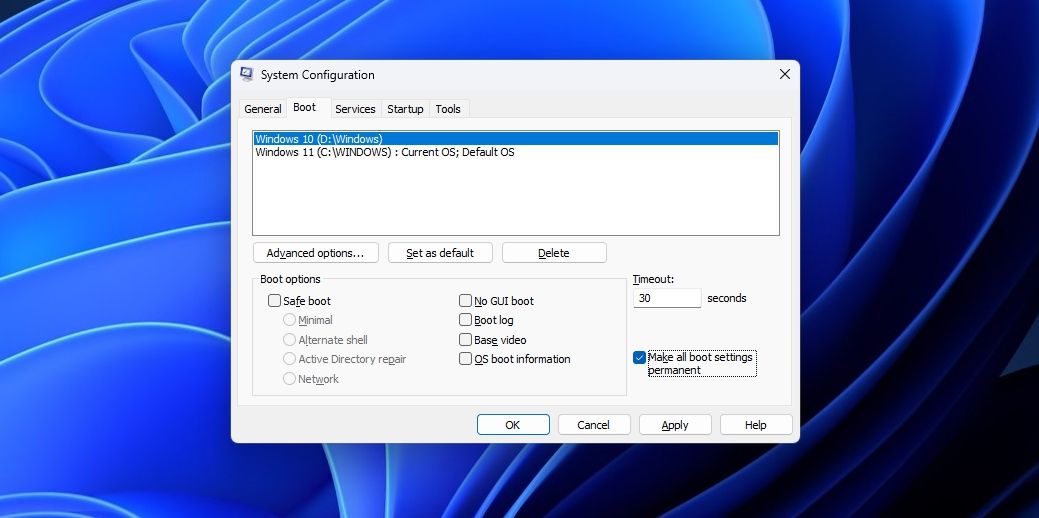
- Switch to the Boot tab.
- Enter the value (seconds) in the Timeout section and check the Make all boot settings permanent option.

- Click Apply.
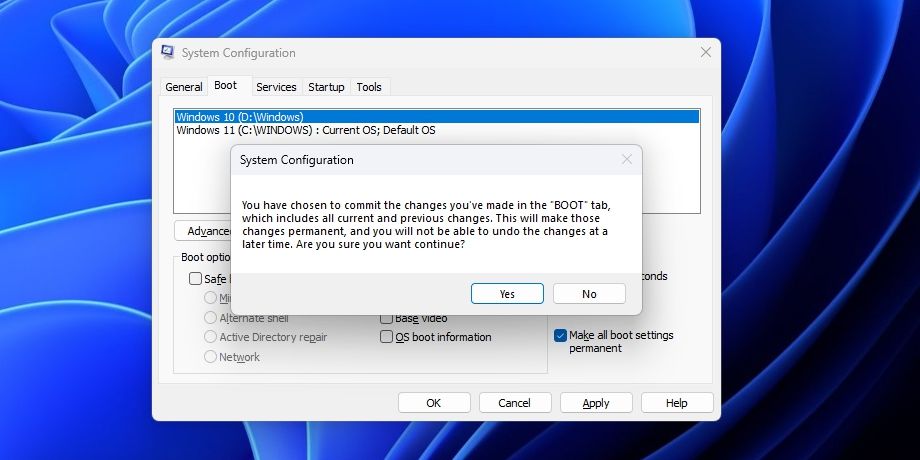
- Click Yes to confirm your changes.

- Choose the Restart button.
3. Change Boot Menu Timeout Using the Command Prompt
If you’re an advanced Windows user, you can use Command Prompt to configure the boot menu timeout on your Windows PC. Here’s how:
- Open the Start Menu, type Command Prompt in the search bar, and choose Run as administrator from the right pane. If this method doesn’t work, check out other ways to launch Command Prompt in Windows .
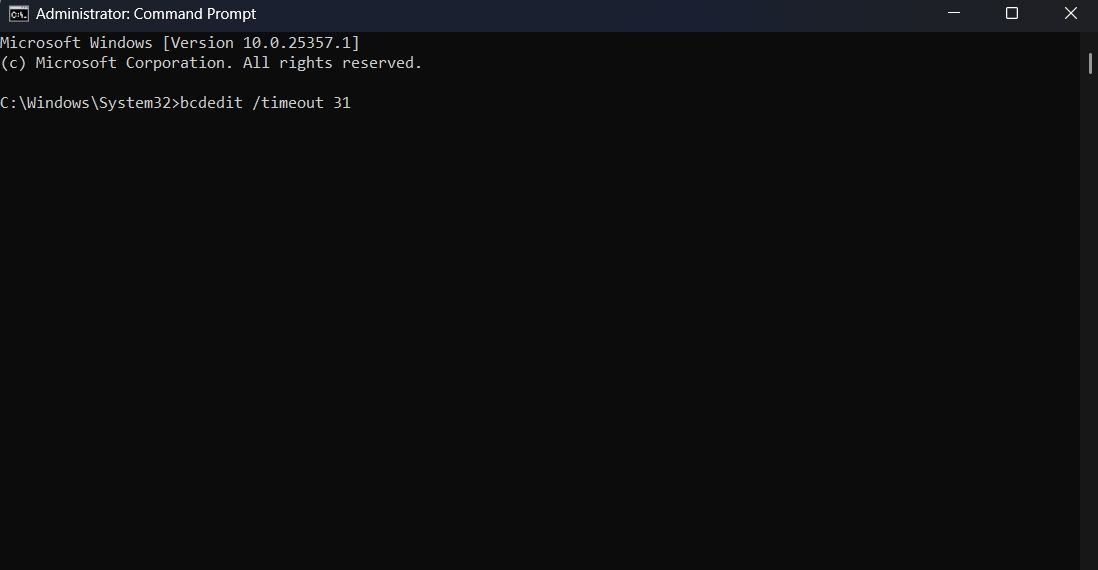
- In the elevated Command Prompt window, type the following command and press Enter. This will display the current time for which the boot menu appears.
bcdedit - Type the following command and press Enter to change the timeout. Make sure to replace **
SECONDS**with the new timeout.bcdedit /timeout SECONDS
That’s it! From the next boot, the boot manager will appear for the specified duration of time.
4. Change Boot Menu Timeout Using the Boot Options
Another efficient way to configure the boot menu timeout is through the Boot Manager. The Boot Manager, also known as the Boot Loader, is responsible for launching your operating system when you turn on your computer. Not only that, it enables you to select a specific operating system if you are using multiple operating systems on your device.
To modify the boot menu timeout through the Boot Manager, follow these instructions:
- Open the Start Menu, click the Power icon and choose Restart from the context menu. If this method doesn’t work, try any other ways to restart your Windows PC .
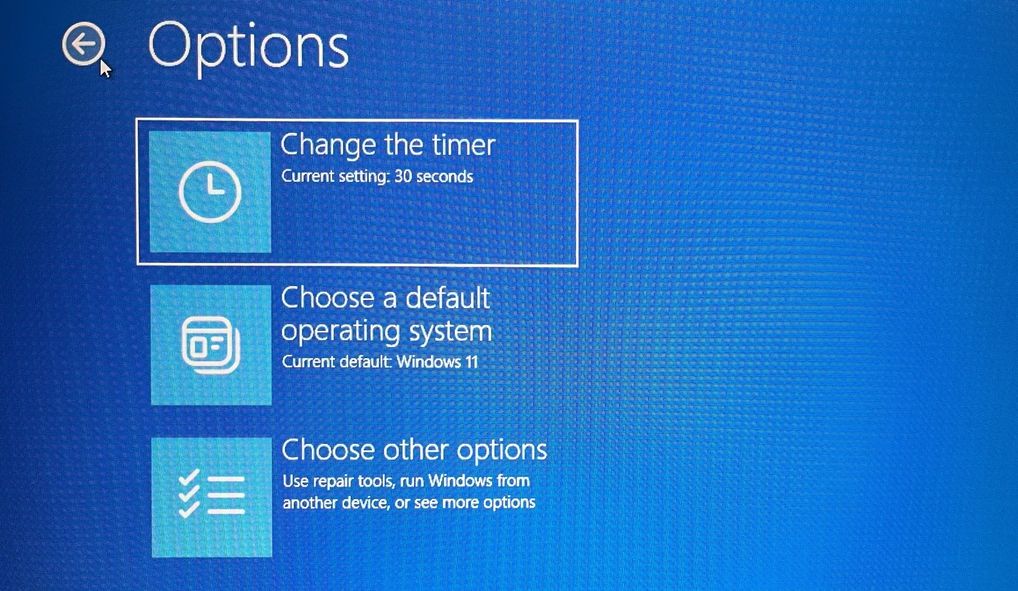
- In the Boot Manager, click on Change defaults or choose other options.

- Select the Change the timer option.
4. Choose a time between the given options.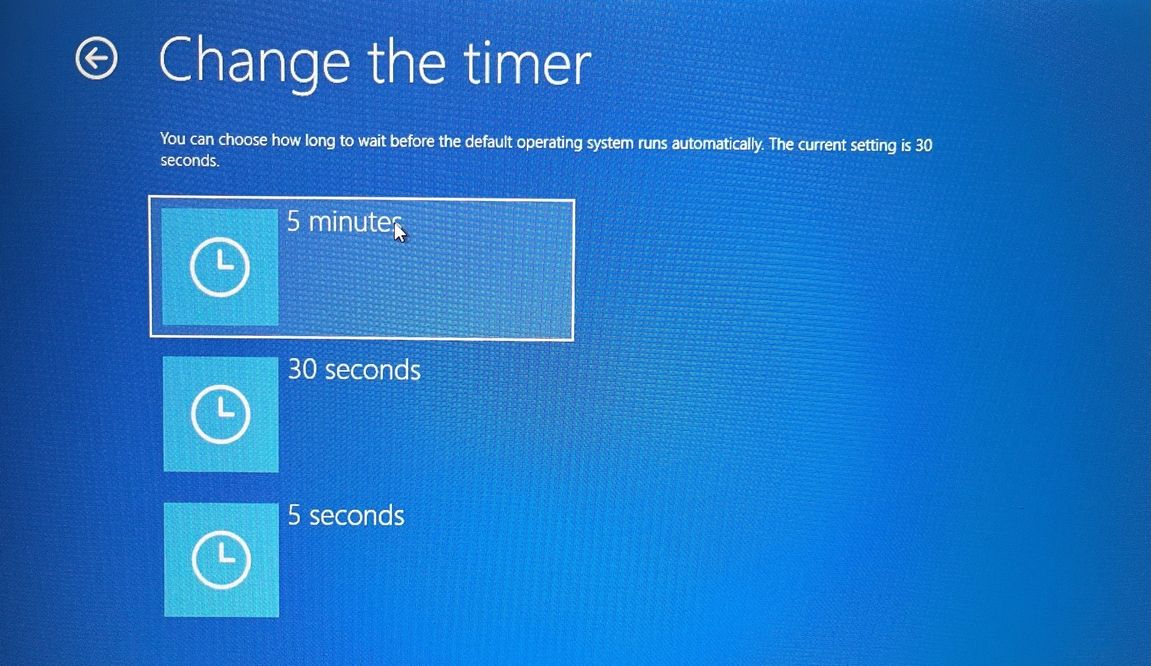
Control Your System Boot Menu on Windows
Optimizing the boot menu timeout in Windows is a simple yet effective way to manage your system’s startup time. By adjusting the duration for which the boot menu appears, you can ensure that you have adequate time to select your preferred operating system.
Fortunately, you can configure the wait time as per your choice. In this article, we’ll explore four quick ways to change the boot menu timeout in Windows 11. So, let’s begin.
Also read:
- [New] In 2024, Tips and Tricks for Recording PS3 Games with Flawless Results
- [New] Revolutionize Your Social Media Strategy – Use Free Video Creation Kit
- [Updated] 2024 Approved Balancing Act Weaving B Roll Into Main Scenes
- Chatbots Unveiled: The AI Enthusiast's Guide
- Disable Win 11 Mobility Center Effortlessly
- Effizientes Übertragen Von Backups Unter Windows 11 Zu Einem Neu Gekauften PC - Schritt-Für-Schritt-Anleitung
- Identifying and Repairing Issues with a Non-Responsive Car Radio
- In 2024, Tiny Tale Telling Framework
- Mitigating Critical Application Hiccups on PC
- Navigating DirectX: Download, Update Seamlessly
- Overcoming Spec Limits on Windows Game Capturing
- Resizing Photos Made Simple: The Top 6 Tricks for Windows 11 Users
- Smart Scheduling: Merging To-Do with IFTTT Services
- Stay Active with These Top-Rated Motion Tracking Apps
- Title: Enhance Wake-Up Speed: Tweaking Boot Menu Wait Timer
- Author: Richard
- Created at : 2024-12-26 22:50:55
- Updated at : 2024-12-27 18:21:36
- Link: https://win11-tips.techidaily.com/enhance-wake-up-speed-tweaking-boot-menu-wait-timer/
- License: This work is licensed under CC BY-NC-SA 4.0.
