
Ensuring Persistence of User-Defined Volume Mixer
Ensuring Persistence of User-Defined Volume Mixer
Whenever you make changes to the volume settings in Windows Volume Mixer, it might not always save the settings. This implies that no matter how many adjustments you make, you have to do them again.
In this article, we will discuss how to troubleshoot the problem and get your Windows Volume Mixer back to saving settings.
1. Run the Windows Audio Troubleshooter
Windows comes with a built-in troubleshooter that identifies and solves various audio issues. To use this tool, follow these steps.
- PressWin + I on your keyboard to open Settings.
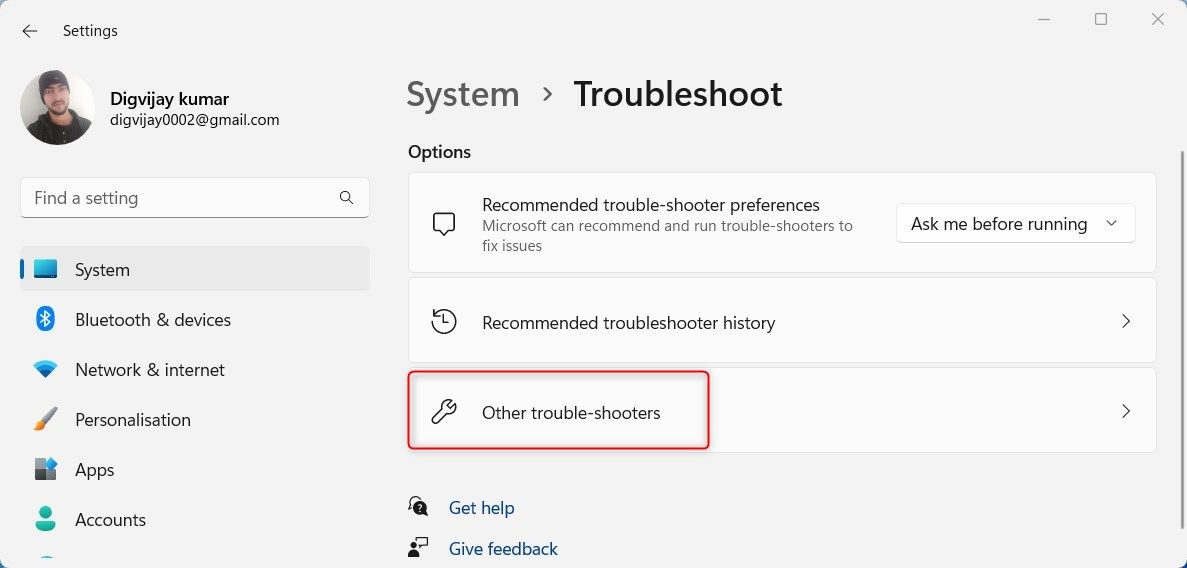
- In the Settings menu, clickSystem > Troubleshoot > Other troubleshooters .

- Next to thePlaying Audio troubleshooter, click theRun option.
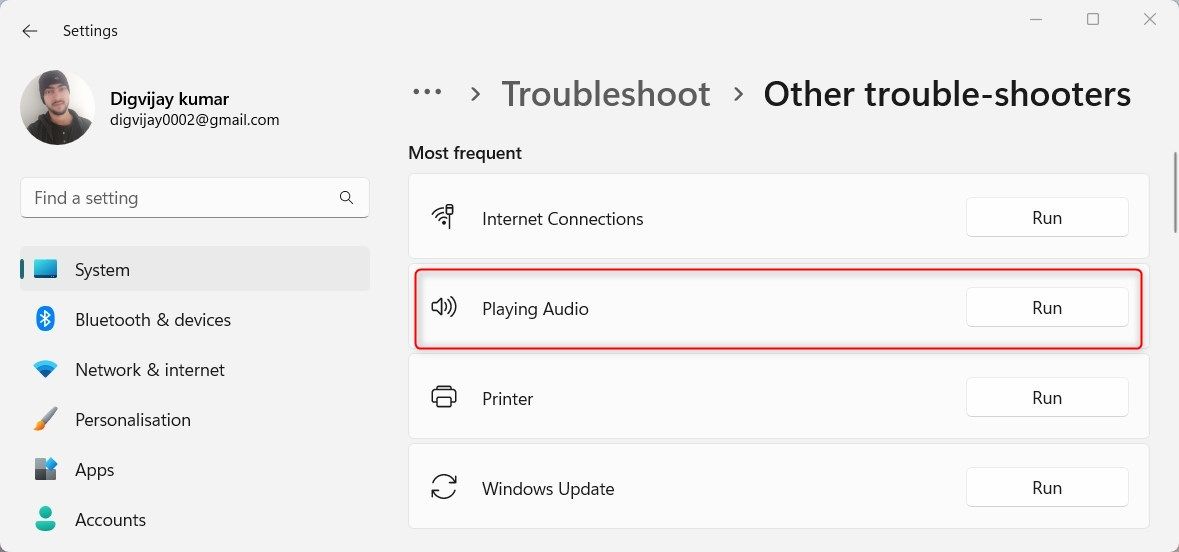
This will launch the troubleshooter and start scanning for any issues. Follow the on-screen instructions to fix any problems it finds. Once it’s done, restart your computer and check if it solves the issue.

2. Update or Reinstall Your Audio Driver
Outdated or corrupted audio drivers can lead to various sound problems, including this one. So, if the audio troubleshooter doesn’t find any issues, the next step is to update your audio drivers. Here’s how to do it:
- Right-click on Start and selectDevice Manager .
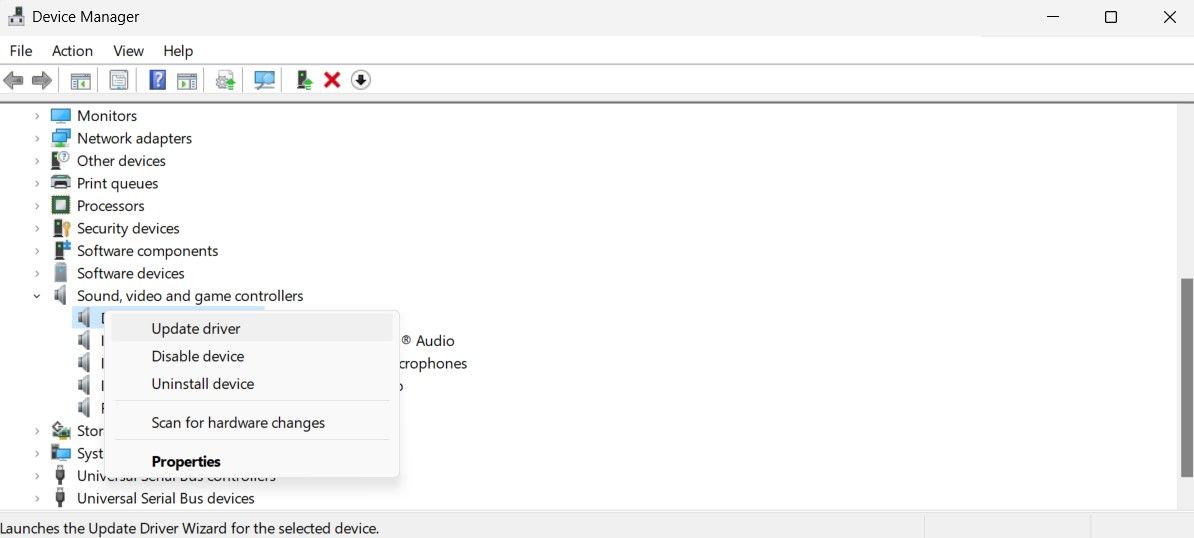
- In the Device Manager window, expand theSound, video and game controllers category.
- Right-click on your audio device and selectUpdate driver .
- When Windows asks how you want to search for drivers, selectSearch automatically for drivers .
Windows will then start searching for updated drivers and install them automatically. Follow any onscreen instructions if needed. Once the installation process is finished, restart your computer and see if this solved your problem.
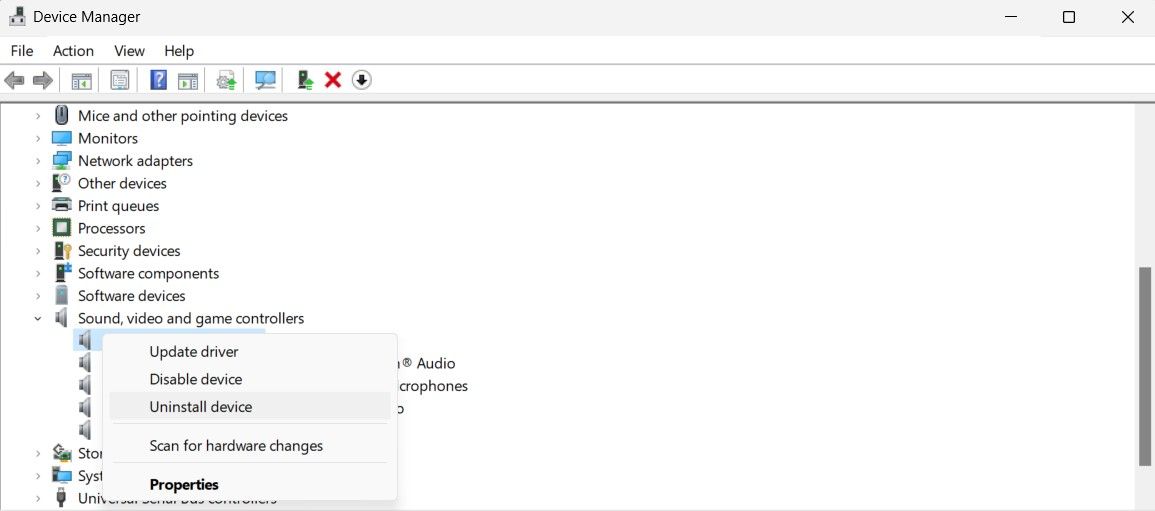
If not, you may need to reinstall your audio drivers. To do this, open Device Manager again. Right-click on your audio device and selectUninstall device .
After uninstalling it, restart your computer. Windows will automatically detect your audio device and install the necessary drivers.

3. Allow Applications to Take Exclusive Control
If updating or reinstalling the driver didn’t solve the issue, you may need to allow certain applications to take exclusive control of the audio device. Here’s how to do it:
To get started, launch Volume Mixer on your computer. If you need help, see our guide on how to open Volume Mixer on Windows 11 .
In the Volume Mixer window, click on theSpeaker icon to open the Properties window. Switch to theAdvanced tab, and you’ll see theExclusive Mode section here.
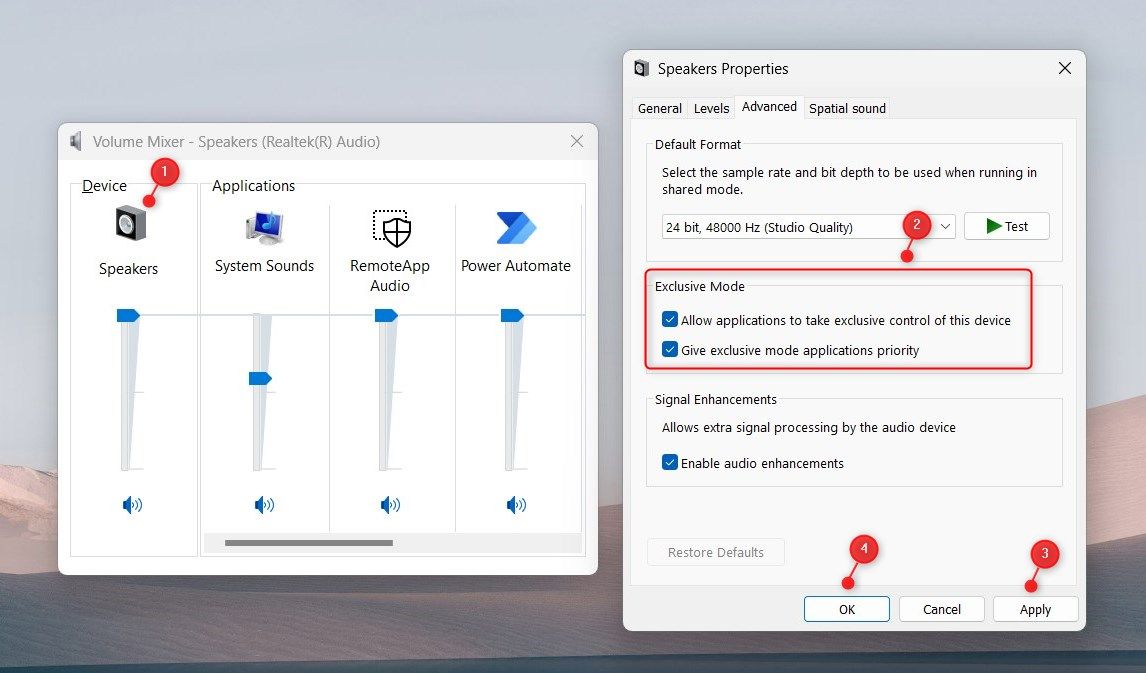

Check both boxes next to Allow applications to take exclusive control of this device andGive exclusive mode applications priority .
ClickApply >OK to save the changes. Now try adjusting the volume again and check if this fixes the issue.
 The BootIt Collection covers multi-booting, partitioning, and disk imaging on traditional PC’s using the standard BIOS and newer PC’s using UEFI. The collection includes BootIt Bare Metal (BIBM) for standard BIOS systems and BootIt UEFI (BIU) for UEFI system.
4. Create a New User Account
If you’re still unable to save settings in Windows Volume Mixer, you may need to create a new Windows user account . This process won’t delete your old profile or data, but you’ll need to reconfigure your settings. Once created, log out of your current account and log into the new one to see if the settings reset issue is resolved.
5. Perform a Few General Windows Fixes
If the above methods haven’t solved your problem, you can try some general Windows fixes. Here are a few:
- Repair corrupt system files - Corrupted system files can cause various errors, such as this one. You must run the System File Checker (SFC) tool in order to fix it. This built-in Windows utility scans your system and replaces corrupted files with cached copies.
- Perform a clean boot - A clean boot is a troubleshooting technique that reduces conflicts related to software that can cause the issue. It stops all non-Microsoft services and programs from running during startup, making it easier to identify the problem.
Save Your Volume Mixer Settings Now
Whether you use the Volume Mixer to reduce system sounds or mute certain sound applications, losing your settings can be frustrating. You may encounter this issue with music, games, or notifications. This guide provides solutions to troubleshoot and fix the issue so that the settings are saved properly.
- Title: Ensuring Persistence of User-Defined Volume Mixer
- Author: Richard
- Created at : 2024-08-16 01:41:31
- Updated at : 2024-08-17 01:41:31
- Link: https://win11-tips.techidaily.com/ensuring-persistence-of-user-defined-volume-mixer/
- License: This work is licensed under CC BY-NC-SA 4.0.