
Fixing Disk Errors with Advanced Windows Tools
Fixing Disk Errors with Advanced Windows Tools
Errors and bugs can pop up on your Windows device, no matter how well you maintain it. One such error is related to your computer’s disk, which can prevent your system from booting up properly and restrict access to your files and applications.
Let’s look at various methods to repair the disk issue on your Windows device.
Why Does the “Repairing Disk Errors” Issue Occur?
When the disk error occurs, your computer reboots with an error message: “Repairing disk errors. This might take over an hour to complete.“ Most of the time, this error will just show up once and won’t appear the next time you reboot, but sometimes it will show up every single time you boot your PC.
Usually, this error is caused by:
- A sudden power failure.
- An improper system shutdown.
- Physical damage to your hard drive.
- Corrupted Windows system.
Now let’s look at possible troubleshooting ways to fix the repairing disk error on your Windows device.

1. Start With These Basic Fixes
When your Windows computer starts showing disk errors, there are a few initial steps you can take before moving on to more advanced solutions. Here’s what we recommend doing:
- Wait for an hour to pass: Sometimes, the easiest solution is to wait. If this is the first time you’ve encountered this error message in a while (if ever), give it an hour, and the error might resolve itself, allowing your computer to reboot normally.
- Check your drive for physical damage: If your drive has suffered physical damage, this can lead to this error constantly popping up. Inspect your disk drive for any damage.
- Revert to a previous time with a System Restore point: System Restore undoes recent system changes without affecting your files. If the error started appearing recently, try using System Restore on Windows and see if that fixes things.
If the above solutions are not working for you, it’s time to get started with the advanced troubleshooting methods.
2. Run the Startup Repair Utility
The Startup Repair tool is a built-in Windows feature to fix problems preventing your computer from starting correctly. This tool can be a lifesaver if your system keeps encountering errors when booting up.
Here’s how you can use the Startup Repair tool on your computer:
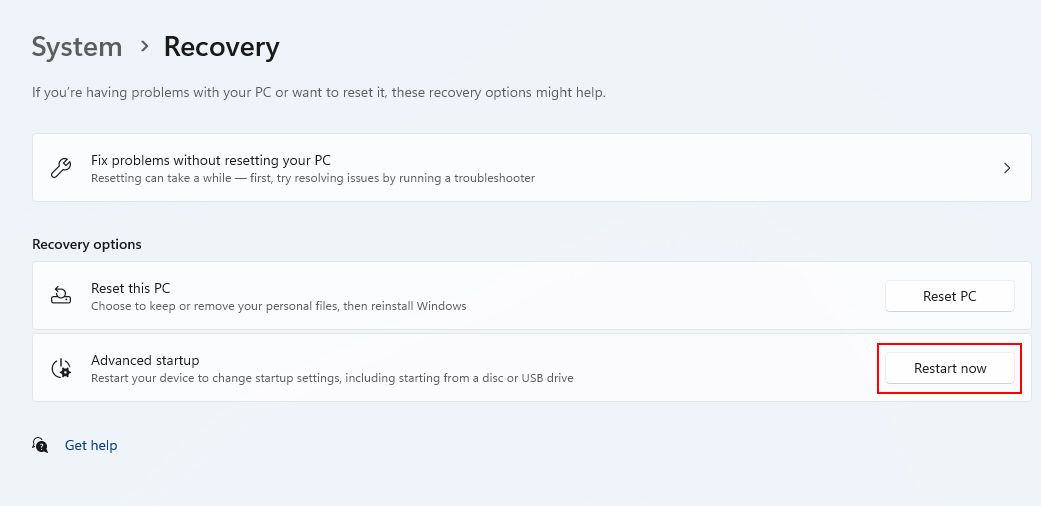
- Launch the Settings app and go to System > Recovery.
- On the Settings window, click on Restart now button (located next to Advanced startup).
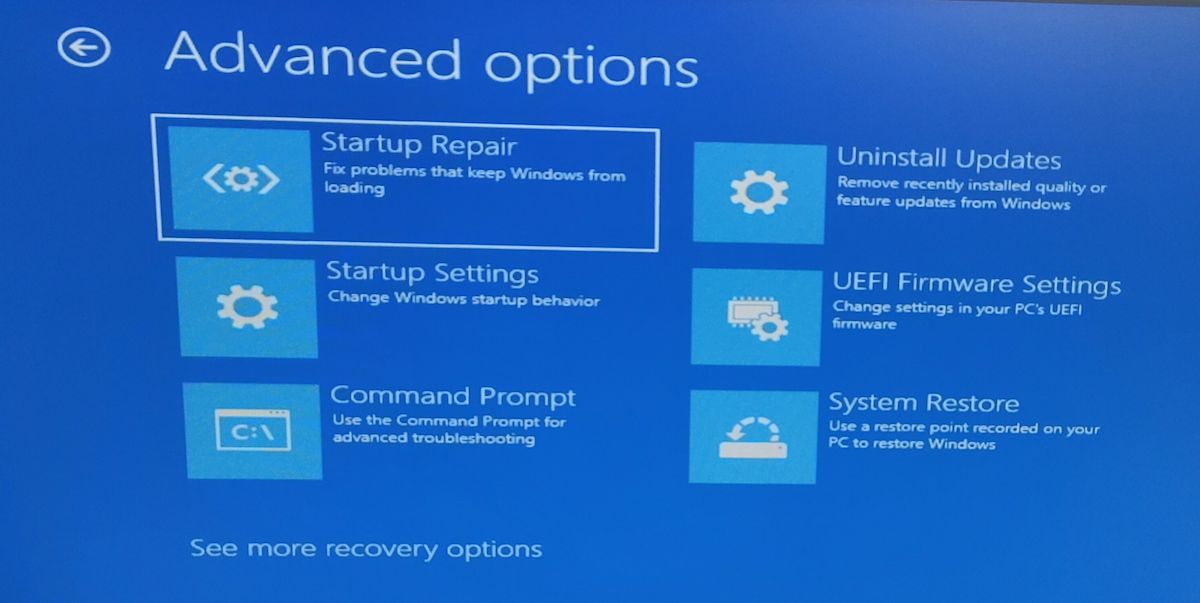
- A blue-colored screen must appear now. From there, click on Troubleshoot > Advanced options and then Startup Repair.

The repair tool will then scan for any corrupted files to repair. If this doesn’t work, check out what to do if Startup Repair fails to fix your PC .
Once the repair process begins, avoid interrupting it or turning off your computer. Doing so could corrupt Windows even further.
3. Run the SFC and CHKDSK Tools
If the startup repair tool does not work, it’s time to use the Command Prompt to run the System File Checker and CHKDSK tool.
The System File Checker (SFC) tool checks your computer for any buggy system files and then tries to fix them. Most of the time, this resolves the disk error issue and other startup issues on Windows .
Follow the steps given below to use the System File Checker and CHKDSK:
- Launch the Command Prompt with administrator rights .
- On the Command Prompt window, input the sfc /scannow command and then Enter.
- Then, type chkdsk %SystemDrive% /scan and again press Enter.
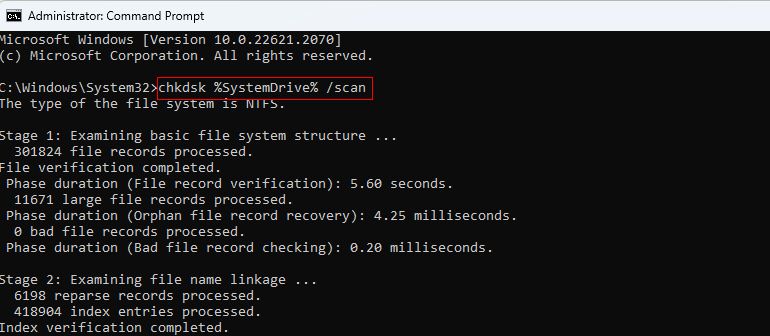
The above-given commands initiates a thorough scan of your system. It might take a while, and once completed, you should no longer see the black screen on startup.
If you cannot access your desktop, you can also run the Command Prompt and the given commands via Windows safe mode.
If these commands came in handy, be sure to check out all the built-in Windows tools that repair corrupted system files .
4. Update the Disk Controller Driver
The “disk controller driver” usually appears under a variety of names, like “Standard SATA AHCI” Controller. It is a Windows driver that establishes communication between your operating system and your hard drive. If the disk controller driver gets outdated, it can lead to disk-related errors.
Follow these steps to update the disk controller driver on your PC:
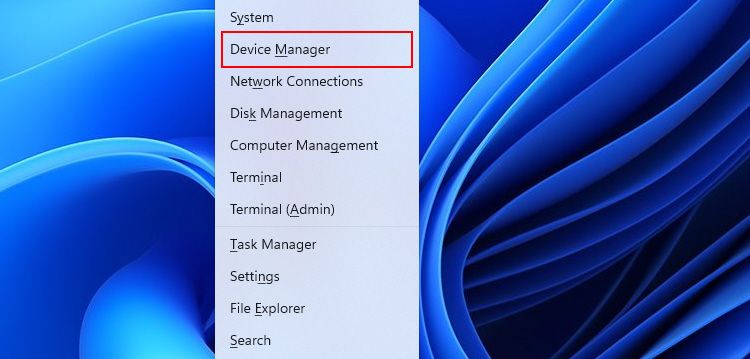
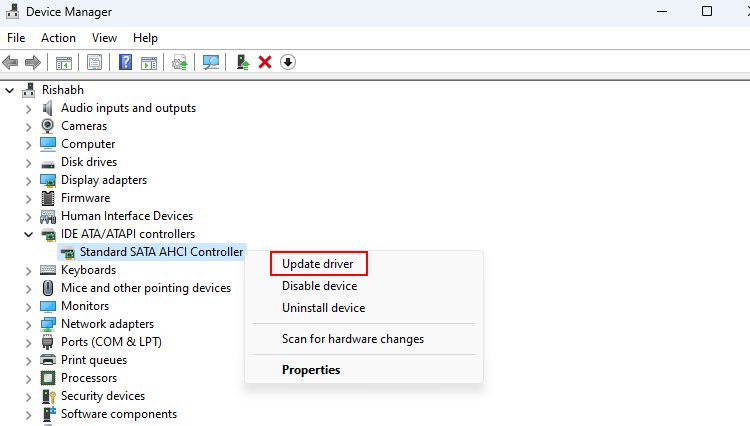
- Press Win + X and click on Device Manager from the menu.
- Expand the IDE ATA/ATAPI controllers category. Right-click on your disk controller driver (in our case, Standard SATA AHCI Controller) and select Update driver.
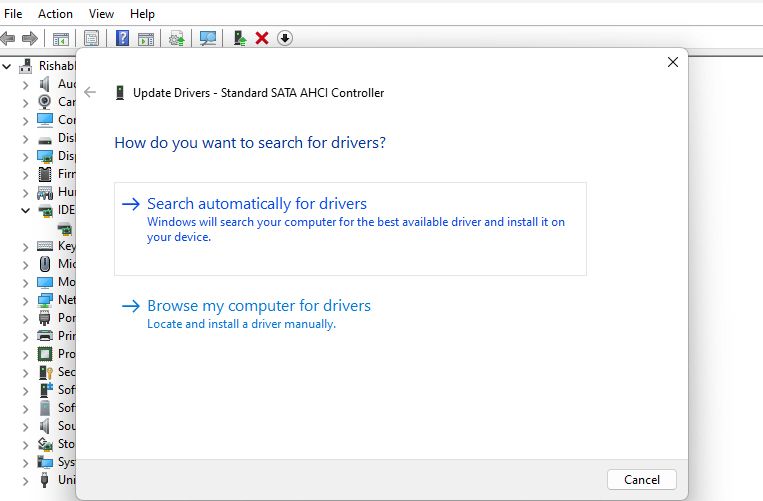
- Choose Search automatically for drivers, then Search for updated drivers on Windows Update. Windows will then search for the necessary updates for your disk controller driver.
Project Manager - Asset Browser for 3Ds Max
- Once it installs the driver update, restart your computer. If the error black screen doesn’t appear, it means your issue is resolved.
 Project Manager - Asset Browser for 3Ds Max
5. Try a Third-Party Disk Repair Tool
Sometimes the in-built Windows tools for troubleshooting are of no use. So, you have to depend on third-party tools to investigate the issue. We’ll use a free tool called Macrorit Partition Expert for this guide.
Third-party disk repair tools are not a sure-shot fix. They sometimes work and sometimes create more trouble with the system. So, before using any tool, create a restore point on Windows as a backup.
Here’s how to use the Macrorit Partition Expert tool on Windows:
- Download the tool from the Macrorit website and install the application.
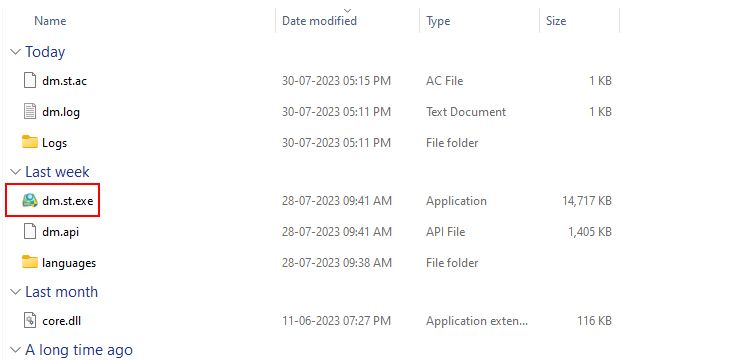
- Click on dm.exe to run Macrorit Partition Expert.
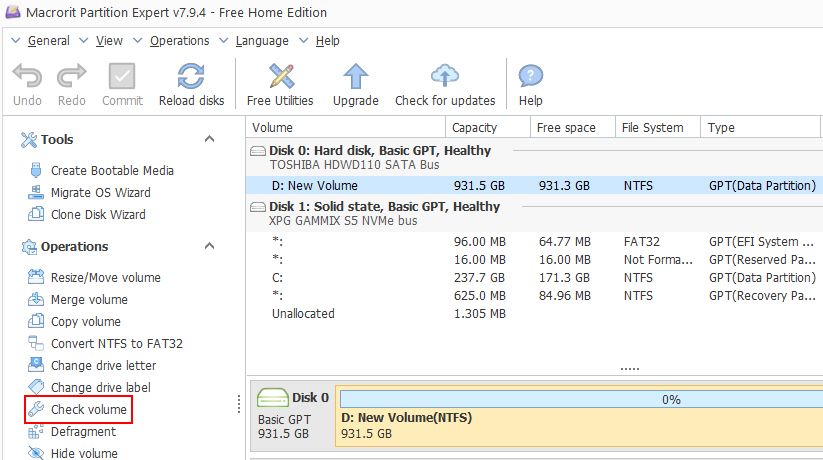
- On the application window, select the disk or volume where your current Windows is present. For example, in our case, it’s in Disk 0.
- After selecting, click on Check Volume from the left-hand sidebar.
- Choose Fix found errors, Try to fix found bad sectors, and click OK.
Advanced Find and Replace for Google Sheets, Lifetime subscription
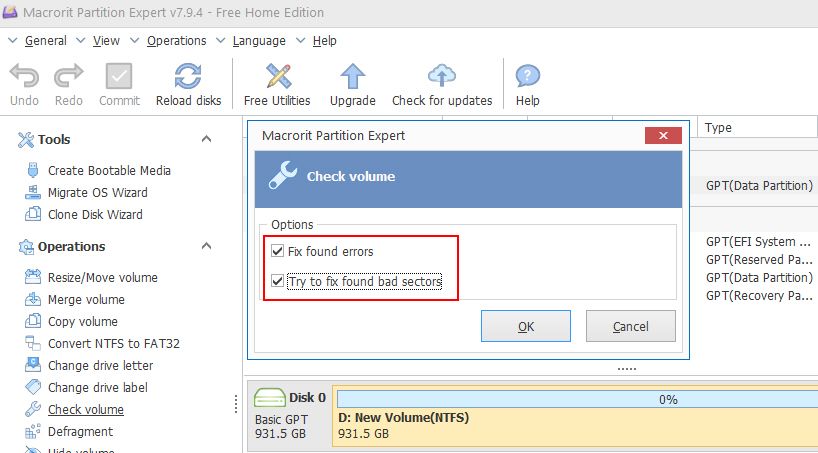
Now, Macrorit Partition Expert will analyze your selected disk to check for any bad sectors and try to fix them.
6. Factory Reset Windows
If none of the fixes were helpful, you must reinstall Windows OS as a last resort. This will wipe all the data from your computer, so ensure to back up your important data.
Once you’ve backed up your files, check out how to factory reset Windows . Once the reinstallation is complete, you’ll have a clean slate to work with, and you can restore all the files you’ve backed up.
Power Tools add-on for Google Sheets, 12-month subscription
No More Disk Errors on Windows
As said earlier, there’s no fixed reason for the repairing disk error. However, one thing that causes the error is an issue with your disks, such as bad sectors, physical damage, and viruses.
If you fail to resolve the issue, consider resetting your computer and fresh set up everything.
Let’s look at various methods to repair the disk issue on your Windows device.
- Title: Fixing Disk Errors with Advanced Windows Tools
- Author: Richard
- Created at : 2024-08-16 02:26:30
- Updated at : 2024-08-17 02:26:30
- Link: https://win11-tips.techidaily.com/fixing-disk-errors-with-advanced-windows-tools/
- License: This work is licensed under CC BY-NC-SA 4.0.