Fixing Resource Discrepancy: AppName/Text W11

Fixing Resource Discrepancy: AppName/Text W11
If you have performed an upgrade recently and noticed a weird “ms-resource:Appname/text” entry in the Start Menu, you are not alone. You may also encounter this error when opening a setting or app.
This entry in the Start Menu is a trace for a built-in app that has been removed in the successive upgrade. Depending on where you are seeing the error, follow the steps in the article below to resolve this error on your computer.
Disclaimer: This post includes affiliate links
If you click on a link and make a purchase, I may receive a commission at no extra cost to you.
1. How to Fix the “ms-resource:Appname/Text” Error in the Start Menu
You can remove the “ms-resource:Appname/Text” entry from the Start Menu by removing the affected application package using PowerShell. Additionally, you can kill the StartMenuExperienceHost.exe process in Task Manager to restart the service.
Before attempting to remove the app, package, and restart the services, check if you have any Windows updates pending. If you are running a fresh install, try to install all the pending Windows updates. These updates often include bug fixes and may be the only thing you need to do to fix this issue.
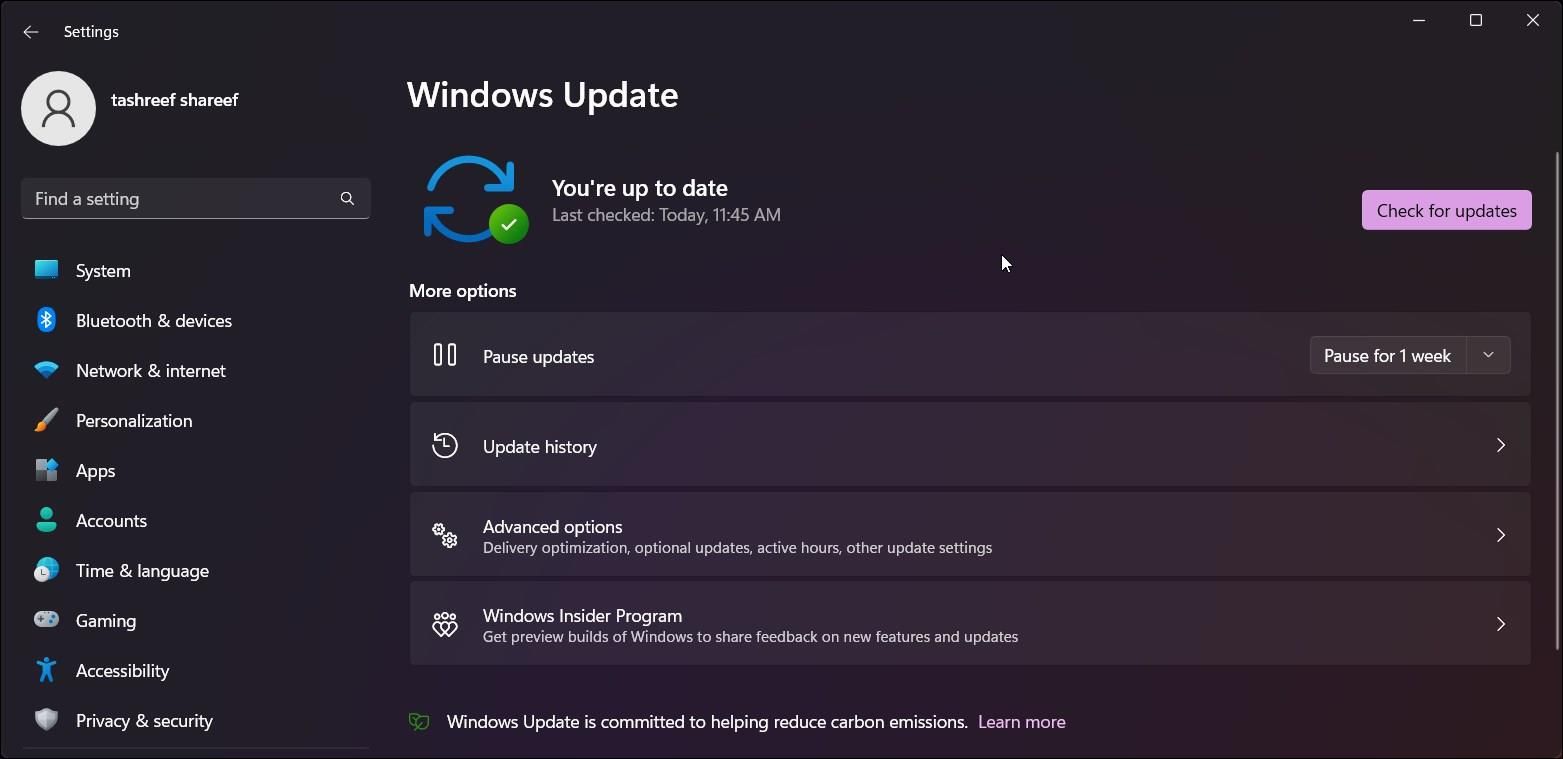
To check and install Windows updates:
- Press Win + I to open the Settings app.
- Open the Windows Update tab.
- Click on Check of updates. Continue to download and install all pending updates.
- Restart your computer to apply the updates and check if the issue is resolved.
If the issue persists, you can use PowerShell to remove the affected app package and then restart the associated services to fix the problem.
To remove the “ms-resource:Appname/Text” entry from the Start Menu:
- Press the Win key and type powershell.
- Right-click on Windows PowerShell and select Run as administrator.

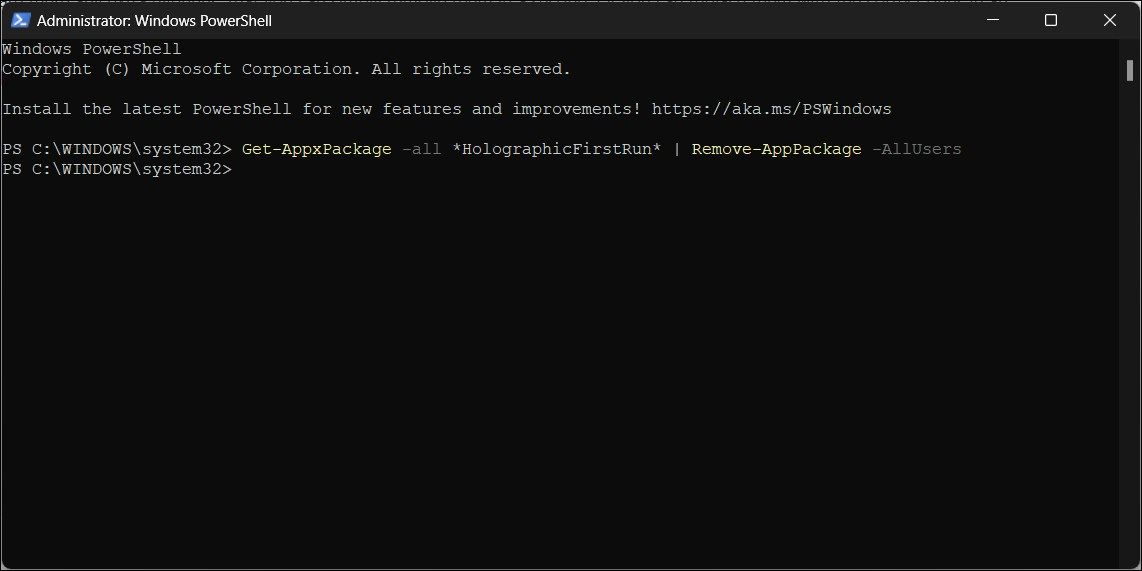
- In the PowerShell window, type the following command and press Enter:
Get-AppxPackage -all *HolographicFirstRun* | Remove-AppPackage -AllUsers
Once you’ve run the command, be sure to restart your computer.
- After the computer restarts, open Task Manager .
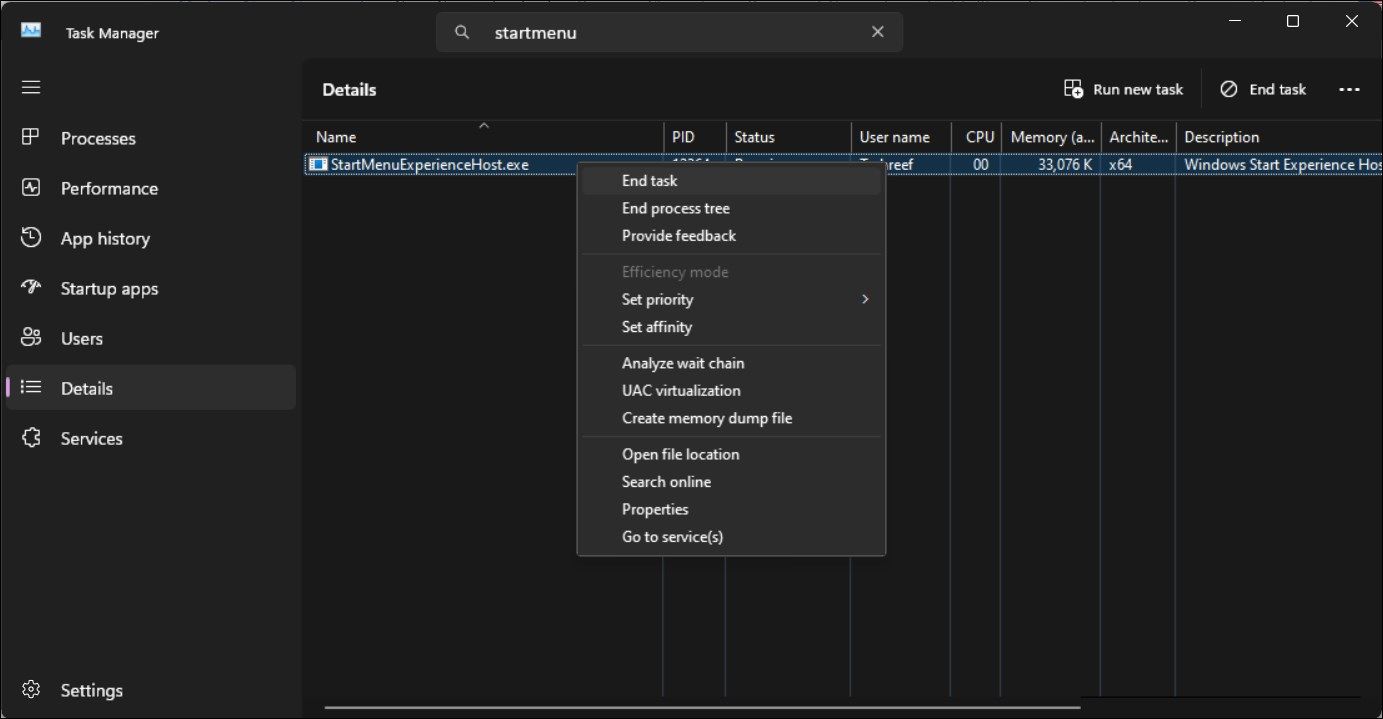
- Next, open the Details tab in Task Manager. On Windows 11, click the three horizontal lines icon to access the details tab.
- Now you need to locate both StartMenuExperienceHost.exe and Explorer .exe. On Windows 11, you can use the search feature in Task Manager to locate the processes.

- Right-click on each process and End Task.
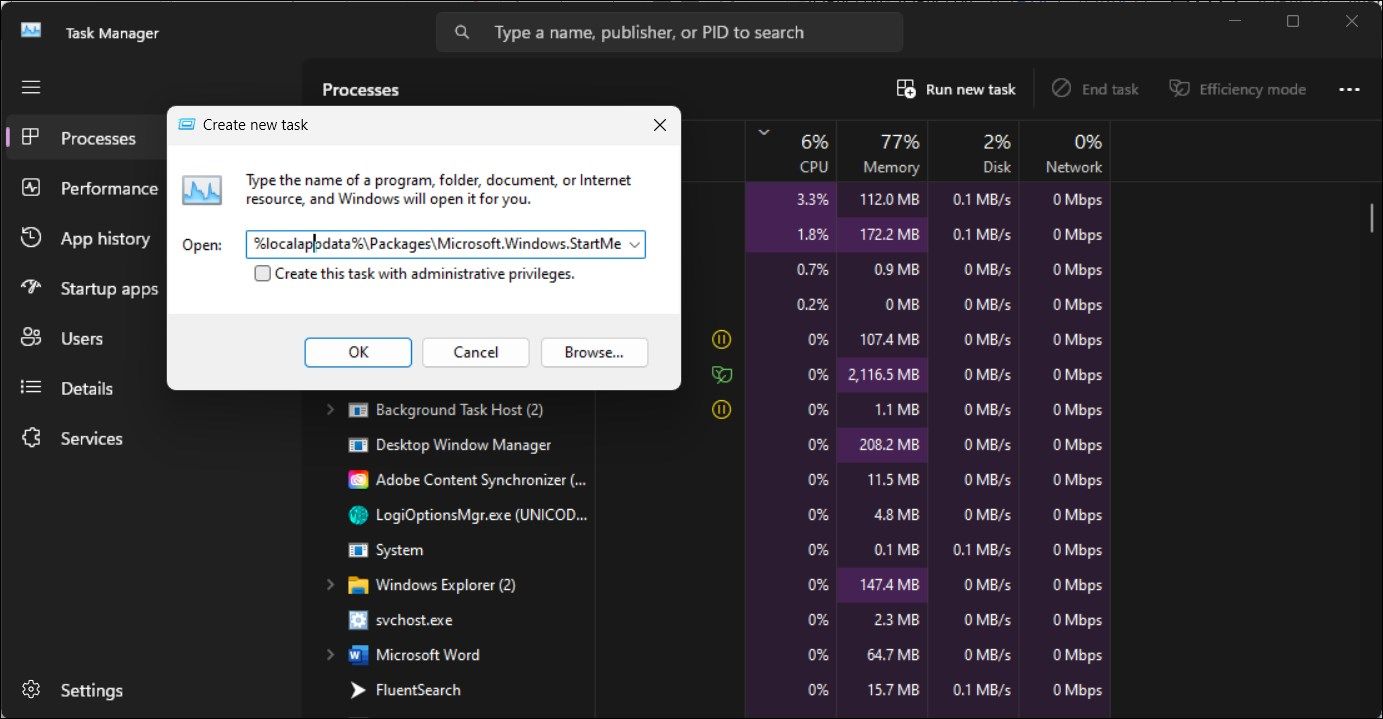
- In Task Manager, click Run new task. On Windows 10 and older versions, click File and select Run new task.

- In the Create new task dialog, type the following path and click the Browse button.
%localappdata%\Packages\Microsoft.Windows.StartMenuExperienceHost_cw5n1h2txyewy
7. In the File Explorer window, delete the TempState folder.
8. Go back to Task Manager, and click Run new task.
9. Type explorer.exe and select the Create this task with administrative privileges option.
Once done, give your PC another restart.
2. Re-Register Your Microsoft Store Apps
You can re-register Microsoft Store apps using PowerShell to stop the error appearing when using Microsoft apps. Doing so should remove any leftover entries showing up in the Start Menu after the update.
Wait for the process to complete. This may take a few minutes as the command will try to re-register all the apps, including existing ones. Once the process is complete, restart your computer and check for any improvements.
3. Check the Microsoft Store for App Updates
You may see the “ms-resource:Appname/Text” entry if Windows attempted an unsuccessful app installation. To fix the issue, check if an update exists for the app in the Microsoft Store.
To determine the app name click on the app entry and check if you can find any information about the app. If not, right-click on the app entry in the Start Menu and select Open File Location.
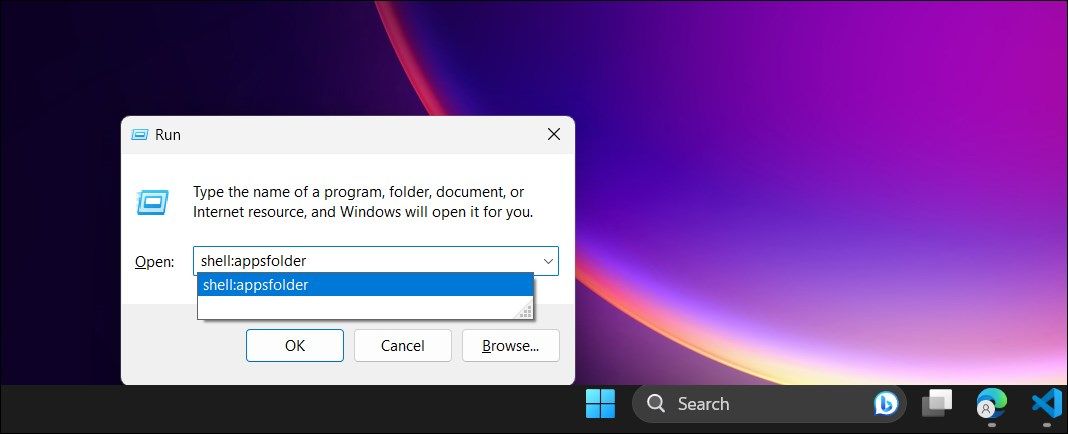
Alternatively, you can view the application directory to view the installed apps. Press Win + R to open Run, type shell:appsfolder, and click OK. It will open the Applications folder. Go through the apps to see if you can locate an app named ms-resource:Appname/Text or similar to the entry in the Start Menu.
Once you have the app name, open the Microsoft Store. Search for the app and check if an update exists. Click Update to download and install the update. Once installed, restart your computer and check for any improvements.
What if the “Ms-resource:Appname/Text” Error Appears When Launching an App?
At times, you may encounter this error when opening a built-in Microsoft Store app. In this instance, you can run the Microsoft Store apps troubleshooter to fix the issue. Here are a few additional troubleshooting steps to fix this error when launching an app.
4. Run the Microsoft Store Apps Troubleshooter
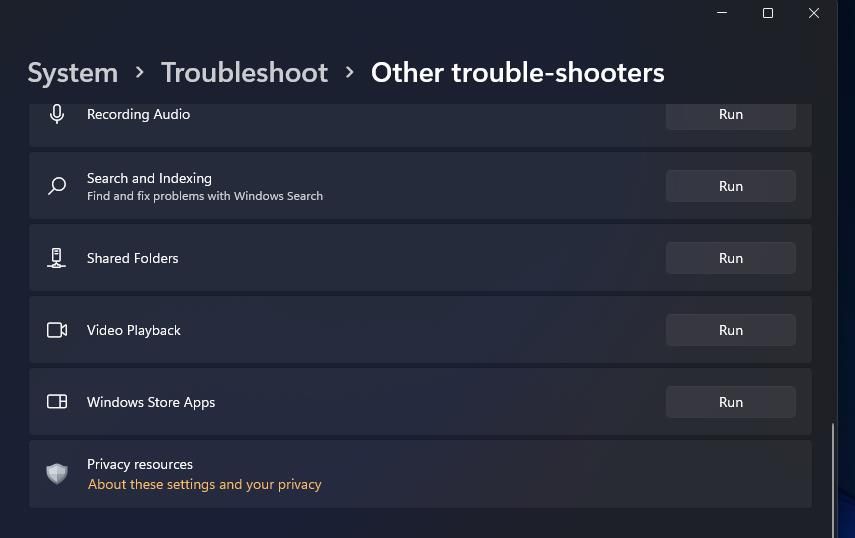
You can use the built-in Microsoft Store Apps troubleshooter to fix issues with the store apps. Here’s how to do it.
- Press Win + I to open Settings.
- In the System tab, scroll down and click on Troubleshoot.
- Next, click on Other troubleshooters.
- Click the Run button for Windows Store Apps. Wait for the troubleshooter to launch and follow the on-screen instructions. It will scan your system against the common Microsoft Store app issues. Apply any recommended fixes and restart your computer to see if the issue is resolved.
If you don’t see a Windows Store App troubleshooter option, you are likely running a newer version of the OS without this option. In this instance, try to repair the Microsoft Store app.
5. Repair the Microsoft Store App
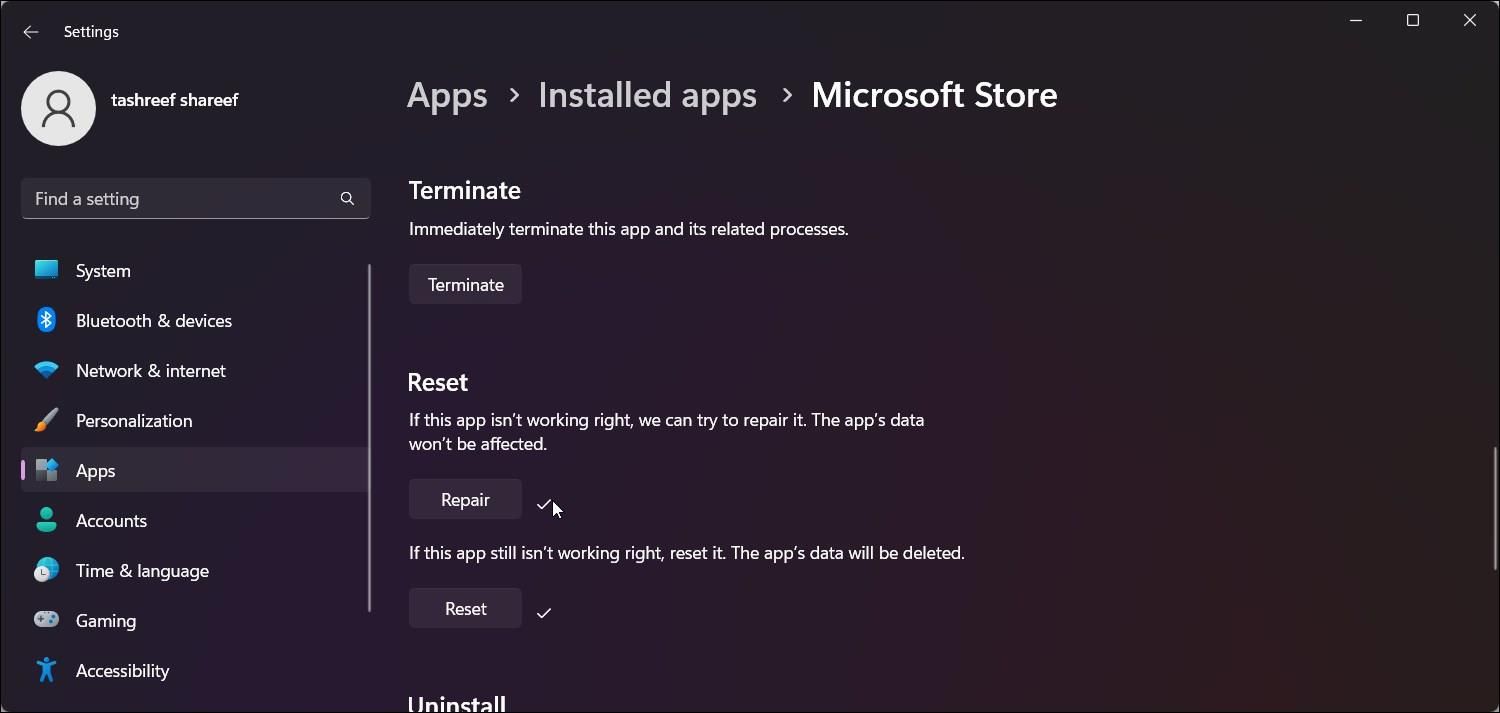
If the Windows Store Apps troubleshooter is missing or didn’t help, try to repair the Microsoft Store App. You can use the built-in repair option to find and fix common issues with the official app store.
To repair the Microsoft Store app:
- Press Win + I to open the Settings app.
- Open the Apps tab and click on Installed Apps.
- Locate and click the three-dots menu beside the Microsoft Store app.
- Select Advanced Options.
- Scroll down to the Reset section.
- Click the Repair button, wait for the process to complete, and show a checkmark. If the repair is successful, restart your computer.
Reset the Microsoft Store App
In addition to performing a repair, you can also reset the Microsoft Store app to resolve common issues with the store apps. You can perform a reset from the Advanced Options section. Before that, run the wsreset.exe tool to clear the store cache to see if that helps.
To reset the Microsoft Store App cache:
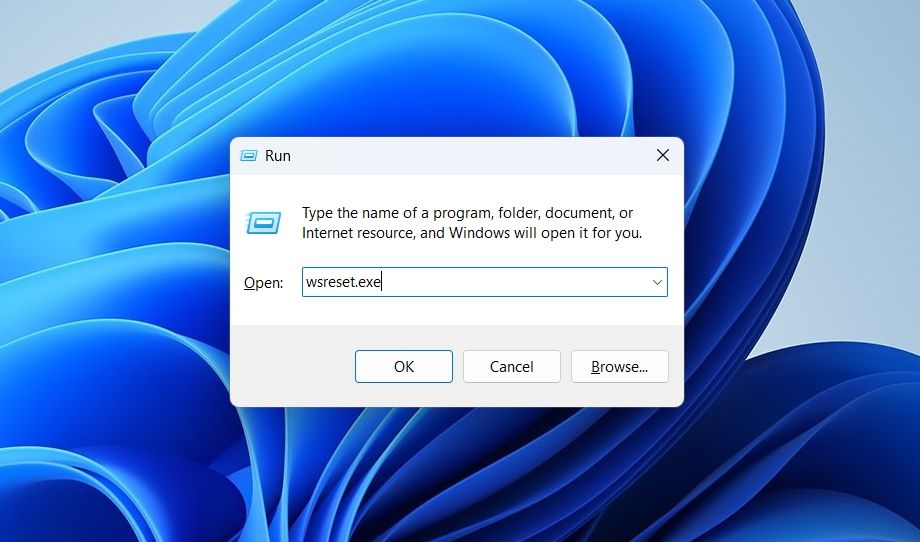
- Press Win + R to open the Run dialog.
- Type wsreset.exe and click OK.
Still not resolved? Try to perform a Microsoft Store reset . Doing so will delete all app data, and you may need to sign in to your Microsoft account again.
6. Other Troubleshooting Steps You Can Try
If the issue persists, here are a few additional troubleshooting steps you can follow:
- Create a new user account – Try to create a new local user account to see if the error exists in the new account. This is a handy workaround for a newly set up Windows computer.
- Perform a repair reinstall of Windows 11 – You can reinstall Windows 11 without deleting your apps and files . This is an upgrade reinstall and should fix any issues triggered due to issues with the system files.
- Perform a reset – If an in-place upgrade doesn’t help, consider performing a factory reset . You can perform a complete reset while choosing to keep your files, but all your apps will be removed.
- Clean install – Performing a Windows clean install will erase everything on your computer and reinstall Windows 11 from scratch. Make sure to back up important data before attempting a clean install.
Fixing the “ms-resource:Appname/Text” Error in Windows 11
Often this entry in the start menu is a ghost entry from an unsuccessful or leftover installation of a Microsoft app. To remove the entry or restore the app, you can re-register the Microsoft app, remove the affected app package or run the Windows Store Apps Troubleshooter.
If the issue persists, an in-place upgrade, factory reset, or a clean install may be necessary to resolve the issue. This is a time-consuming process, and you may need to set up your computer from scratch.
This entry in the Start Menu is a trace for a built-in app that has been removed in the successive upgrade. Depending on where you are seeing the error, follow the steps in the article below to resolve this error on your computer.
Also read:
- [New] 2024 Approved MomentFreeze Immediate Screen Grab Guide
- [New] Unveiling Top 10 Camcorders In-Depth Reviews for 2024
- Adding Move/Copy Tasks to Windows Explorer's Context Menu
- Empower Your Windows Network with Python-Driven Transfers
- How to Rectify Windows 11 Camera App F429F Hiccup
- In 2024, How to Unlock Honor 90 Lite Phone without PIN
- Optimizing Mouse Response Time on Windows Devices
- Re-Engineering the Taskbar: Key Steps to Better Windows 11 UX
- Reactivating Winget in Windows 11 Environments
- Seamless Integration of DVD Playback on Your System for 2024
- Transforming iMovie Projects Into YouTube Shows for 2024
- Troubleshooting Techniques: Lowering GPU Consumption by Desktop Window Manager in Windows 11
- Understanding United Airlines' Request for Additional Charges | Detailed Breakdown
- Unveiling Tech Secrets - The Ultimate Guide to Hardware by Tom
- Upgrade Your Windows 11 Defense: Enhanced Filter Options via Context Menu
- Why Modern Standby Gets a Bad Rap in Windows
- Windows Guide: Sending & Receiving iMessage Texts Like a Pro - Tips From ZDNet
- Title: Fixing Resource Discrepancy: AppName/Text W11
- Author: Richard
- Created at : 2024-11-29 19:16:05
- Updated at : 2024-12-07 01:44:51
- Link: https://win11-tips.techidaily.com/fixing-resource-discrepancy-appnametext-w11/
- License: This work is licensed under CC BY-NC-SA 4.0.
