Fixing Windows-Based Audacity Crash Code 9999

Fixing Windows-Based Audacity Crash Code 9999
Audacity is among the foremost sound-editing software for Windows. However, some users can’t record audio in Audacity because of error code 9999. Error code 9999 is an issue that arises for some users when they try to use their recording microphones with Audacity. The sound editor throws up a message that says, “Error opening recording device. Error code: -9999.”
Users have mostly reported error 9999 happening on Windows 10 PCs. However, that doesn’t mean that issue can’t arise in Microsoft’s latest desktop platform. This is how you can fix Audacity error code 9999 in Windows 11/10.
1. Run the Recording Audio Troubleshooter
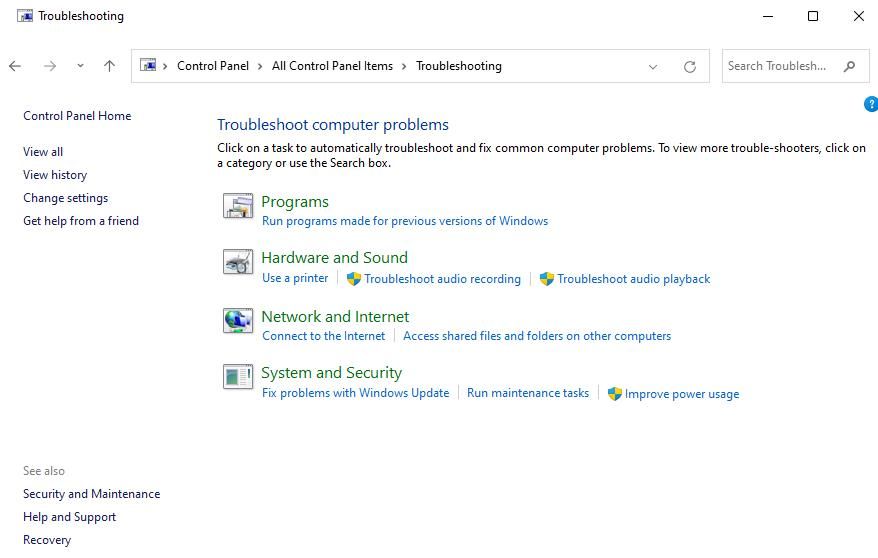
It makes sense to run the Recording Audio troubleshooter since error code 9999 is a recording issue. Running that troubleshooter isn’t widely confirmed to fix error code 9999, but it’s worth a try as it can resolve a variety of recording issues on Windows. You can run the Recording Audio troubleshooter from the Windows 11/10 Control Panel as follows:
- Start the Run accessory, which is quickly accessible with theWindows logo +R hotkey.
- EnterControl Panel in Run’s command text box and selectOK .
- To see all Control Panel items, click theLarge icons option that’s on theView by menu.

- SelectTroubleshooting to open up that applet.
- ClickView all to see the full list of troubleshooting tools.

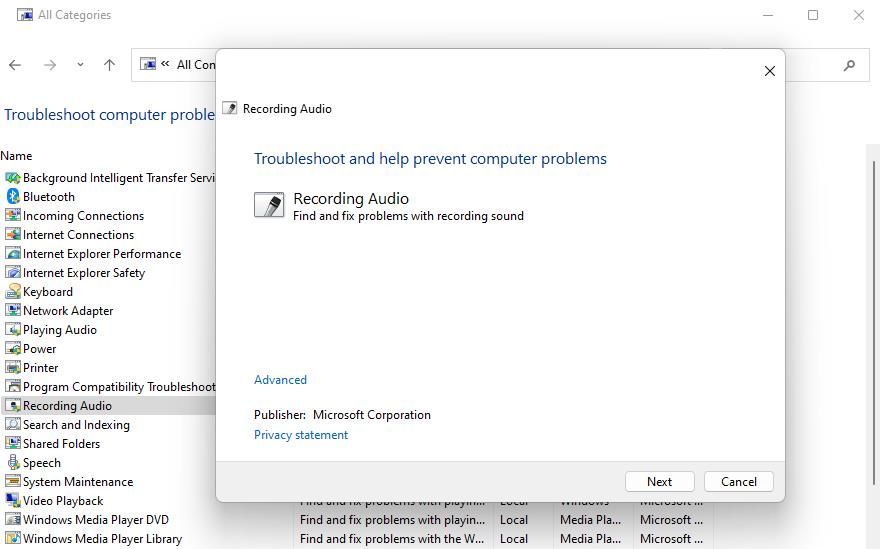
- SelectRecording Audio to bring up that troubleshooter.

- Then pressNext to start the Recording Audio troubleshooting.
2. Close All Communication Apps Before Running Audacity
Error 9999 can arise because of other messaging and video conference apps, such as Skype, Teams, Google Meet, and Zoom, using the microphone. Such apps can run in the background when you’re utilizing Audacity on the taskbar. If you have other communication apps installed that can potentially conflict with Audacity, try closing them like this:
- To access Task Manager, press that utility’sCtrl +Shift +Esc keyboard shortcut.
- ClickProcesses to switch to that tab if necessary.
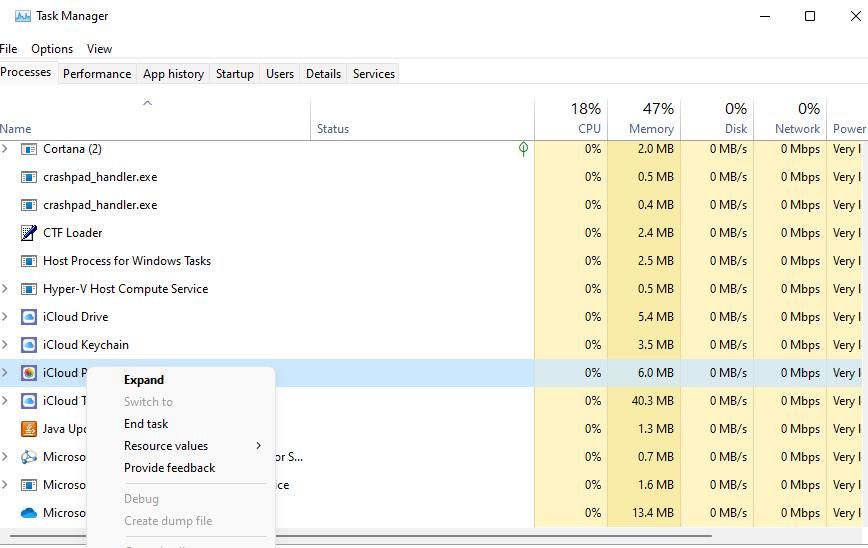
- Select any messaging software listed underApps and clickEnd task .
- Then go through theBackground processes section to see if there are any messaging apps there. Right-click messaging app processes there and selectEnd task .

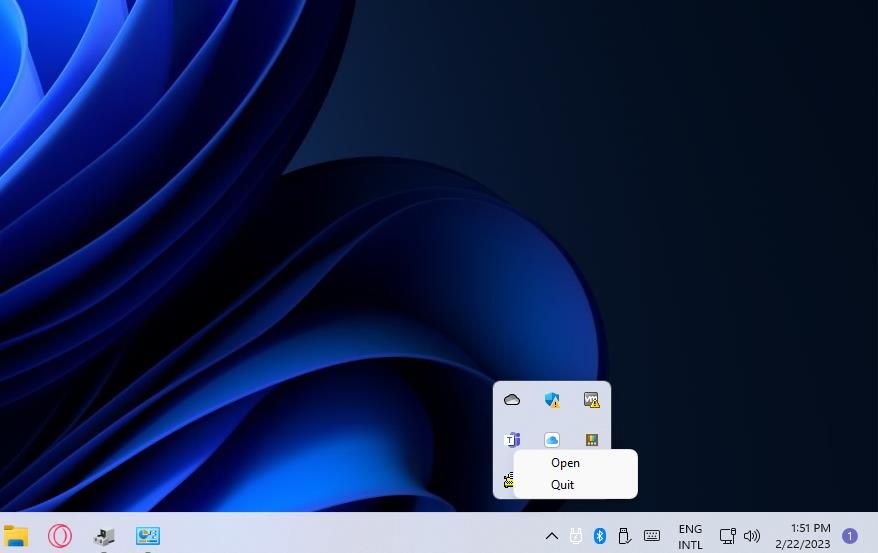
- Also, look in your system tray to see if that includes an icon for a messaging app like Skype or Zoom. Right-click any messaging app icon there and select a context menu option that closes the software.

 OtsAV DJ Pro
 - Then open Audacity and try recording something again.
3. Enable Microphone Access for Audacity
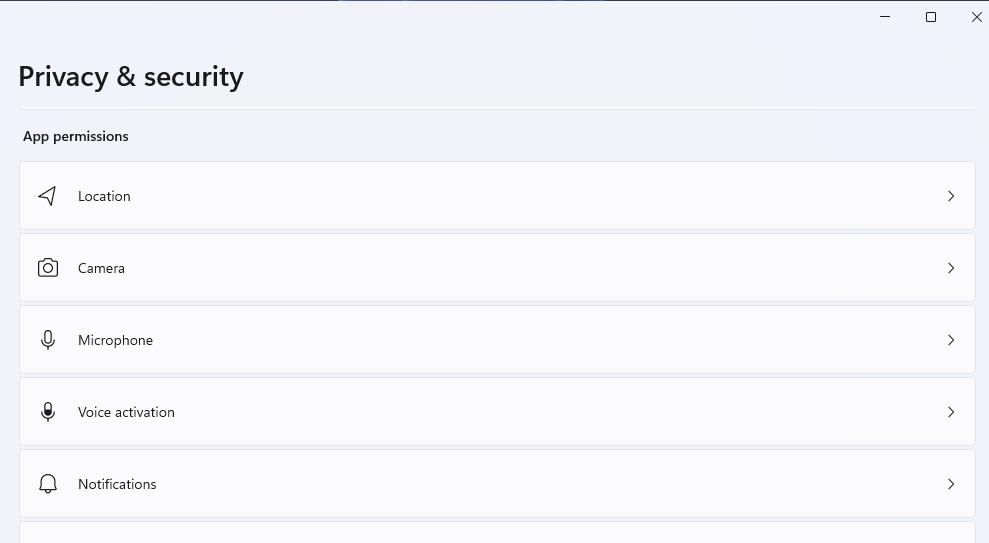
Error 9999 often occurs because Audacity is denied microphone access. Enabling microphone access for Windows apps is among the most widely acknowledged error 9999 resolutions to work. This is how you can enable apps to access your microphone in Windows 11/10:
- Open Settings in Windows 11 or 10 by selecting that app’s Start menu shortcut.
- Click thePrivacy tab or category.
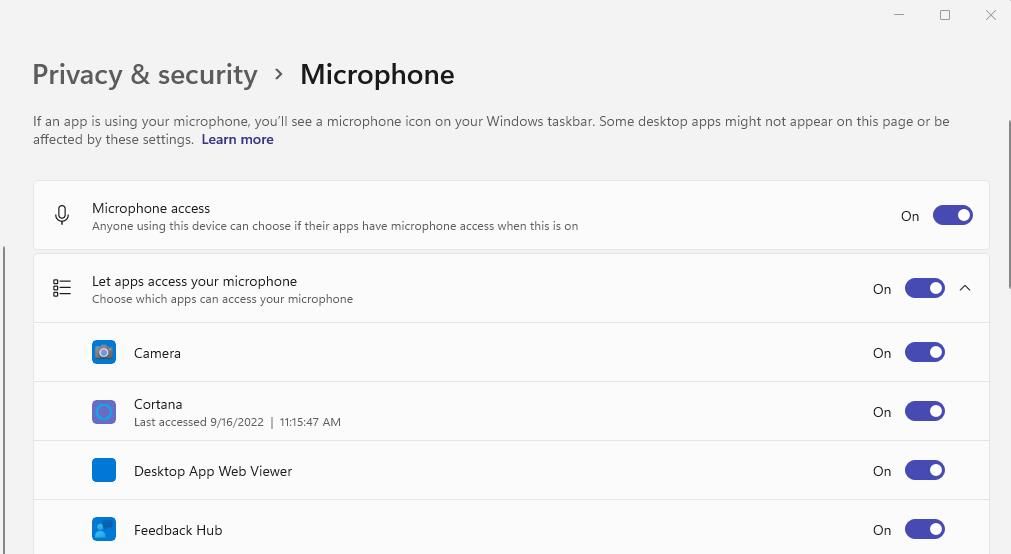
- SelectMicrophone to access those app permission settings.

- Toggle on theMicrophone access option if it’s disabled. In Windows 10, turn on theAllow apps to access your microphone setting.

- Then scroll through the list of apps below that setting and click Audacity’s toggle button to enable microphone access.
4. Reinstall the Microphone Driver
Another possible cause for error 9999 is a faulty microphone driver. Reinstalling your microphone‘s driver will address that potential cause. These are the steps for reinstalling a microphone driver in Windows:
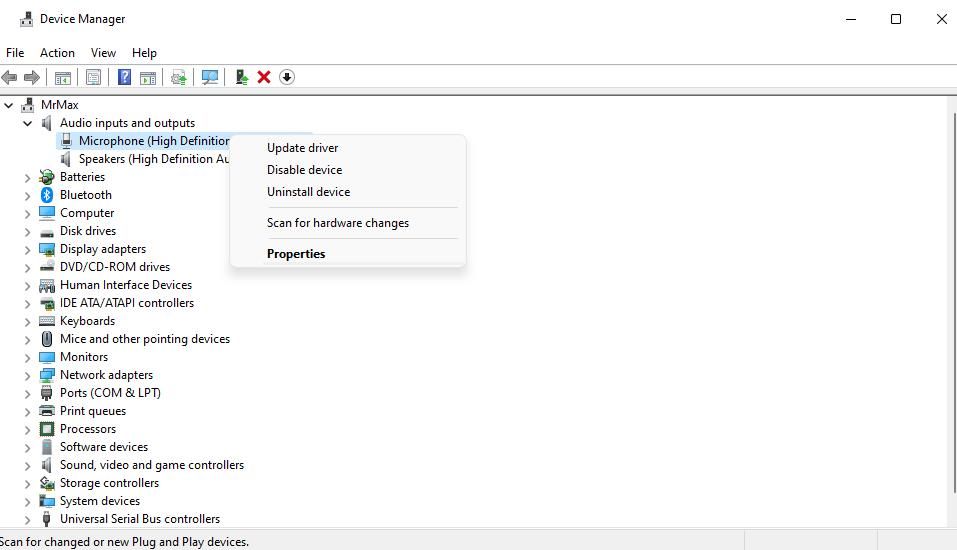
- Bring up Device Manager by right-clickingStart and selecting a shortcut for that utility on the Power User menu.
- Then double-click theAudio inputs and outputs category to view sound devices.
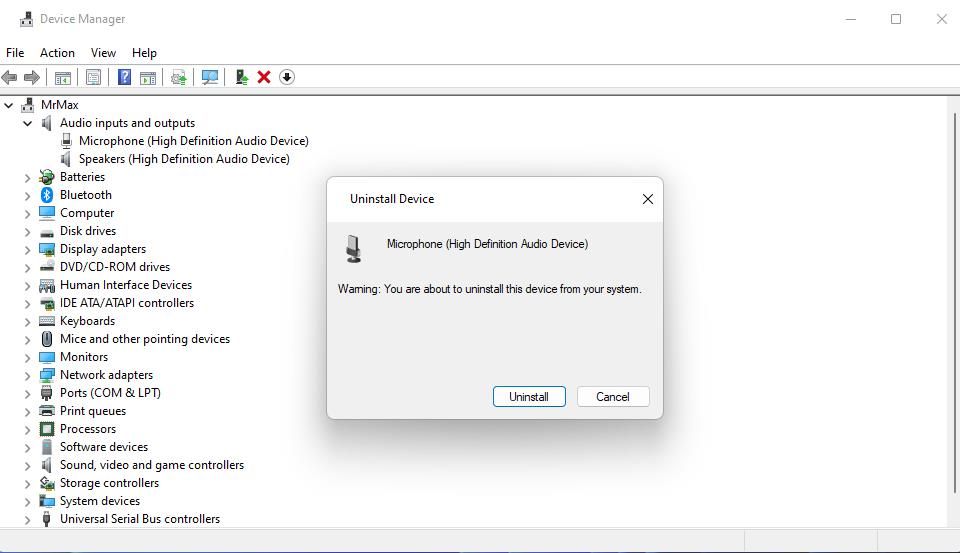
- Right-click your microphone and selectUninstall device .


- Click the confirmation dialog’sUninstall option.


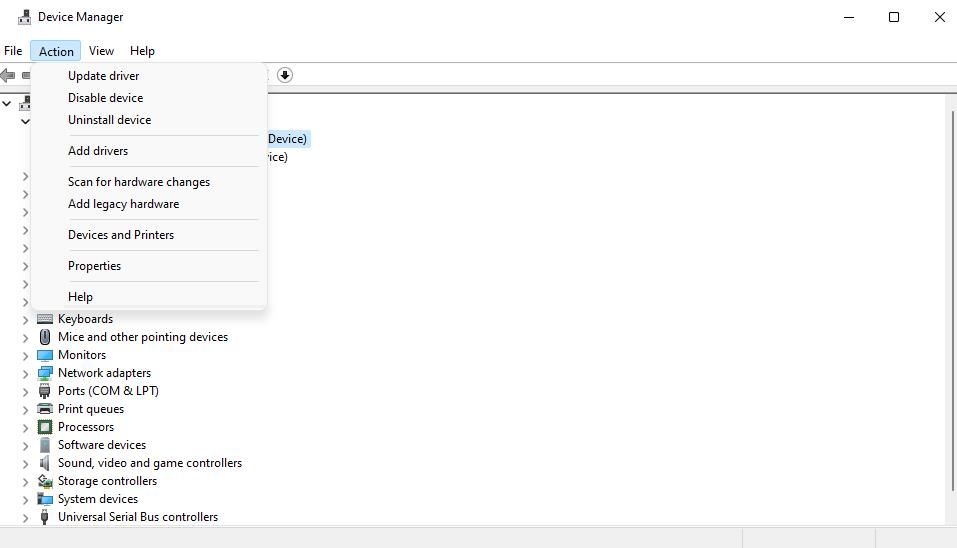
- SelectAction >Scan for hardware changes to reinstall the microphone driver.


5. Turn Off Host Intrusion Protection in Kaspersky Security Software
Audacity users have confirmed disabling Host Intrusion Protection in Kaspersky antivirus (security) software fixes error 9999. Host Intrusion Protection is a feature that regulates apps’ activities in Windows 11/10. That component is enabled by default in Kaspersky security software.
Do you have Kaspersky security software installed on your PC? If so, look for and disable aHost Intrusion Protection setting in that software. This Kaspersky online help page tells you how to disable that feature in Endpoint Security for Windows. Or move Audacity to a Trusted app group in that software.
6. Disable Third-Party Antivirus Shields
Other third-party antivirus software packages can also feasibly conflict with Audacity. If you’ve installed a third-party antivirus utility in Windows 11/10, try disabling its shield before running Audacity. You can usually do that by right-clicking an antivirus tool’s icon in the system tray and selecting a context menu option to turn off its shield.
However, some antivirus utilities have special features that monitor microphones, which can block mic access for certain apps. For example, Bitdefender has aMicrophone monitor setting. Disabling your antivirus utility’s shield might not turn off such a microphone security feature. So, have a look through your security software’s tabs to see if they include any feature setting that could affect microphone access and disable it.
7. Perform a Clean Boot
Clean booting is a troubleshooting method for disabling third-party apps and services that start with Windows. Performing a clean boot is a potential error 9999 resolution because it might eliminate a background program or service interfering with Audacity. Our guide on how to clean boot on Windows tells you how to apply this potential error 9999 resolution with MSConfig and Task Manager.
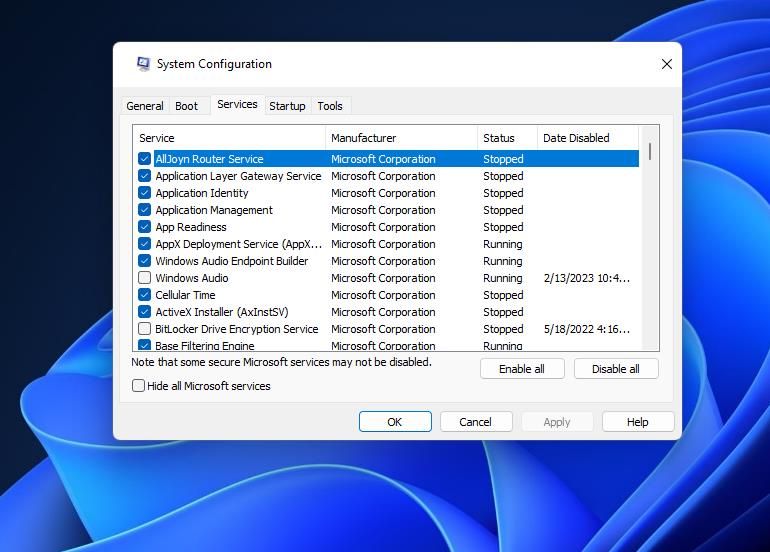
When you’ve set a clean boot and restarted Windows, try recording in Audacity. If recording works thereafter, you can leave the boot configuration as it is. However, users who prefer to re-enable startup apps and services will need to identify what one is causing error 9999.
8. Reinstall Audacity
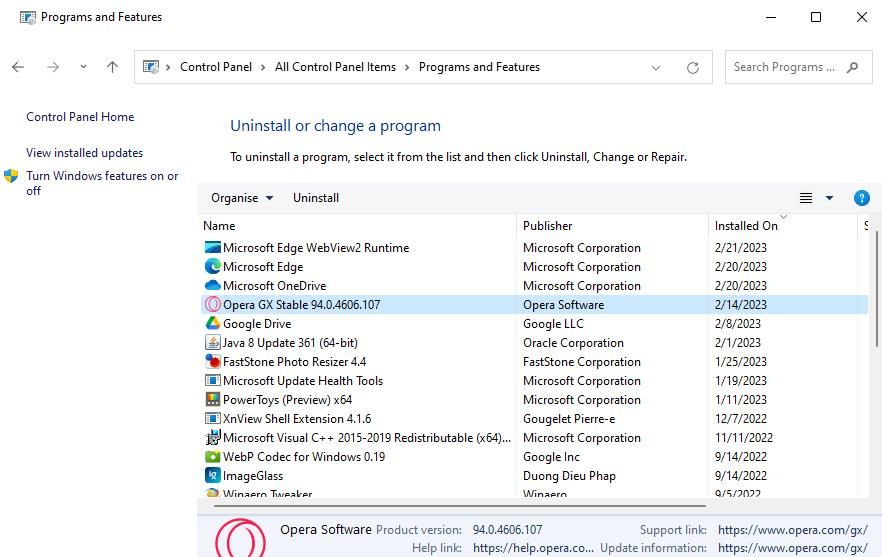
Reinstalling Audacity is the last resort if none of the potential error 9999 solutions work for you. In this case, that sound editor app could have corrupted or missing files. You can remove Audacity within the Control Panel as instructed for method one in our guide to uninstalling software in Windows .
To reinstall the software, open the Audacity download page. Click theDownload for Windows option there.Open Windows File Explorer and double-click theaudacity-win-3.2.4-x64.exe file in whatever folder includes it. Then you can go through the setup wizard to reinstall Audacity.
Record Audio in Audacity Again
Those potential fixes for error 9999 are widely confirmed to work by Audacity users who’ve resolved that issue. So, it’s likely that one of those solutions will fix Audacity’s recording on your Windows PC. Then you can record audio to your heart’s content with that sound-editing software.
- Title: Fixing Windows-Based Audacity Crash Code 9999
- Author: Richard
- Created at : 2024-08-16 02:15:17
- Updated at : 2024-08-17 02:15:17
- Link: https://win11-tips.techidaily.com/fixing-windows-based-audacity-crash-code-9999/
- License: This work is licensed under CC BY-NC-SA 4.0.
 OtsAV DJ Pro
 Easy GIF Animator is a powerful animated GIF editor and the top tool for creating animated pictures, banners, buttons and GIF videos. You get extensive animation editing features, animation effects, unmatched image quality and optimization for the web. No other GIF animation software matches our features and ease of use, that’s why Easy GIF Animator is so popular.