Guide to Designing Excel Progress Trackers Using Advanced Conditional Format Rules
Guide to Designing Excel Progress Trackers Using Advanced Conditional Format Rules
Progress bars are pretty much ubiquitous these days; we’ve even seen them on some water coolers. A progress bar provides instant feedback on a given process, so why not bring some of that graphical pizzazz into your spreadsheet, using Excel’s Conditional Formatting feature?
Progress Bars in Excel 2010
“Bar-type” conditional formatting has been around since Excel 2007. But Excel 2007 would only make bars with a gradient – the bar would get paler and paler towards the end, so even at 100% it wouldn’t really look like 100%. Excel 2010 addresses this by adding Solid Fill bars that maintain one color all throughout. These are ideal for creating progress bars.
Creating The Bar
The first thing you have to do is enter a numeric value into the cell you’d like to format. You can either enter the value directly or use a formula. In our case I’ll just type it in.
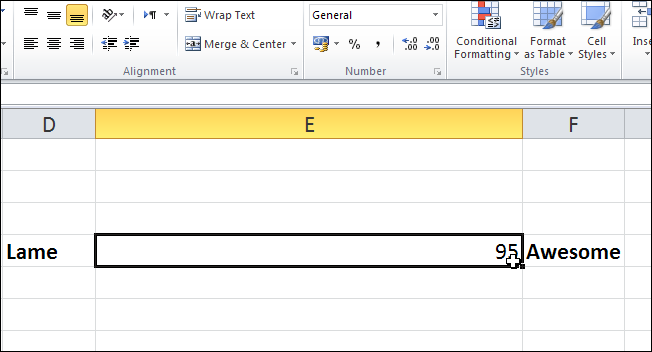
Note how I made the column wider; you don’t necessarily have to do this, but it does help make the bar look more like a “bar” (and not just a colored cell).
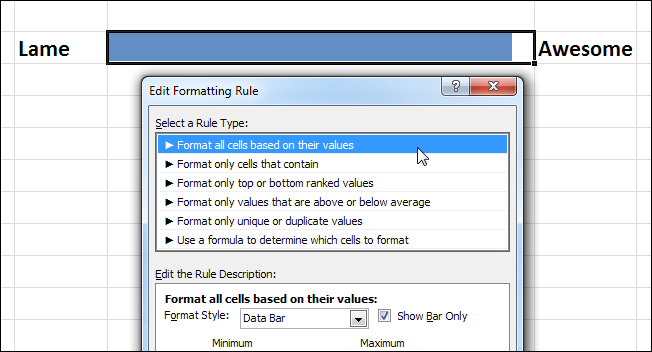
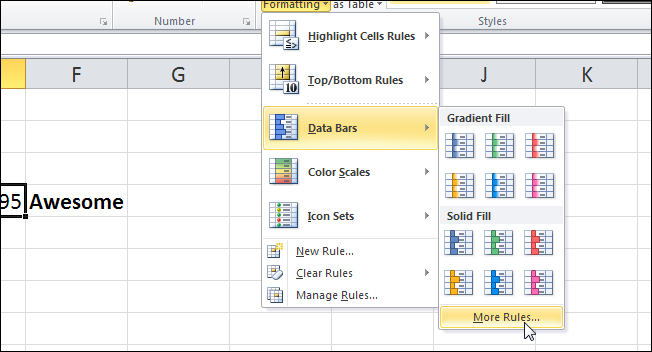
Now click Conditional Formatting, select Data Bars and click More Rules.
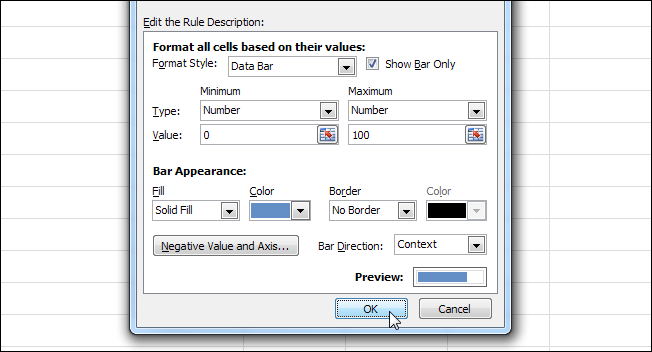
In the New Formatting Rule dialog check the box that says Show Bar Only (so the number doesn’t appear in the cell). Under Minimum and Maximum, select Type as Number. Then, set the Value to the minimum (beginning) value of your scale and maximum (the top of your bar, the end of the process). We’ll just go for 0 and 100, but you could set this to anything that works for you.
Now let’s configure the Bar Appearance. Make sure the Fill is Solid Fill and select the color you’d like to use. When you’re done, the dialog should look similar to this:
Now click OK, and you’re done! At this point you should have a beautiful, crisp progress bar adorning your spreadsheet.
Also read:
- [New] Key YouTube Policies Every Channel Owner Must Understand
- [Updated] Proven Sites for Downloading Premier Pixel Tones
- Chatbots Demystified for Parents: A Guide to Generative AI and ChatGPT
- Dragon Age Inquisition Fix: How to Resolve the Game Not Starting Issue
- Expert Guide: Removing Write Lock From USB Drives, SD Cards, and CD Discs on PCs Running Windows
- How to Transfer Data from Vivo Y36i to Other Android Devices? | Dr.fone
- Master Your Day in Windows: The Top 5 Must-Use Productivity Tools
- Navigating Your Fileshare Needs: The Best Tools for WinPC Users
- Overcoming Non-Opens: WinXP's Folder Dilemma on Double-Click
- Sony BDP-S6700 Review for 2024
- Streamline Your Tech Setup: Downloading & Deploying MSIX Extensions
- Why The New iPhone 16'S Innovative Capabilities Make It Time for an Update - Insights
- Title: Guide to Designing Excel Progress Trackers Using Advanced Conditional Format Rules
- Author: Richard
- Created at : 2024-12-06 00:50:59
- Updated at : 2024-12-07 02:11:41
- Link: https://win11-tips.techidaily.com/guide-to-designing-excel-progress-trackers-using-advanced-conditional-format-rules/
- License: This work is licensed under CC BY-NC-SA 4.0.