Guidelines to Mend VAC Verification Issues on PC

Guidelines to Mend VAC Verification Issues on PC
When you attempt to matchmake in a Steam game, do you receive the error message “VAC was unable to verify your game session”? In most cases, it occurs when you try to enter the game with a cheat or hack enabled. However, Steam sometimes raises a false flag when you’re simply trying to play fair, resulting in this error message.
But what exactly is this VAC that couldn’t verify your game session? In this article, we’ll discuss this error in detail and offer solutions you can use to fix it.
Disclaimer: This post includes affiliate links
If you click on a link and make a purchase, I may receive a commission at no extra cost to you.
What Does the “VAC Was Unable to Verify Your Game Session” Error Mean?
To understand what this error message represents, you must understand how VAC works. VAC, known as Valve’s Anti-Cheat, is a software program developed by the same company, Valve, that owns many popular Steam games, including Counter-Strike, Day of Defeat, etc.
This software works with Steam and hunts down players who attempt to enter the game session with a hack or cheat software enabled. Not only does it detect an unallowed program or script running with the game, but it also detects any changes to the game files. Once the software detects unfair play, it immediately bans the user.
In light of this, the error message “VAC was unable to verify your game session” means that VAC, an anti-cheat program, was unable to verify your game session because it detected some tempering in your game files or detected a third-party program or script that attempted to alter the game processing.
When you encountered this error, did you run such a program or make unapproved changes to the game files? If so, make sure VAC hasn’t banned you.
First, Ensure You Aren’t VAC-Banned
The most common reason for this error message is that you might have received a VAC ban. Therefore, it’s a good idea to rule this out first. Follow these steps to confirm:
- Log in to your Steam account.
- In the top-left corner, click Steam and select Settings.
- In the left sidebar, click the Account tab.
- In the right pane, check the VAC Status.

If it says “No VAC Bans on Account,” there are no VAC bans on your account. If it says you’re banned, go to the VACBanned website , enter your SteamID in the top-right search bar, and hit Enter. The VACBanned engine checker will show you when you received the VAC ban.
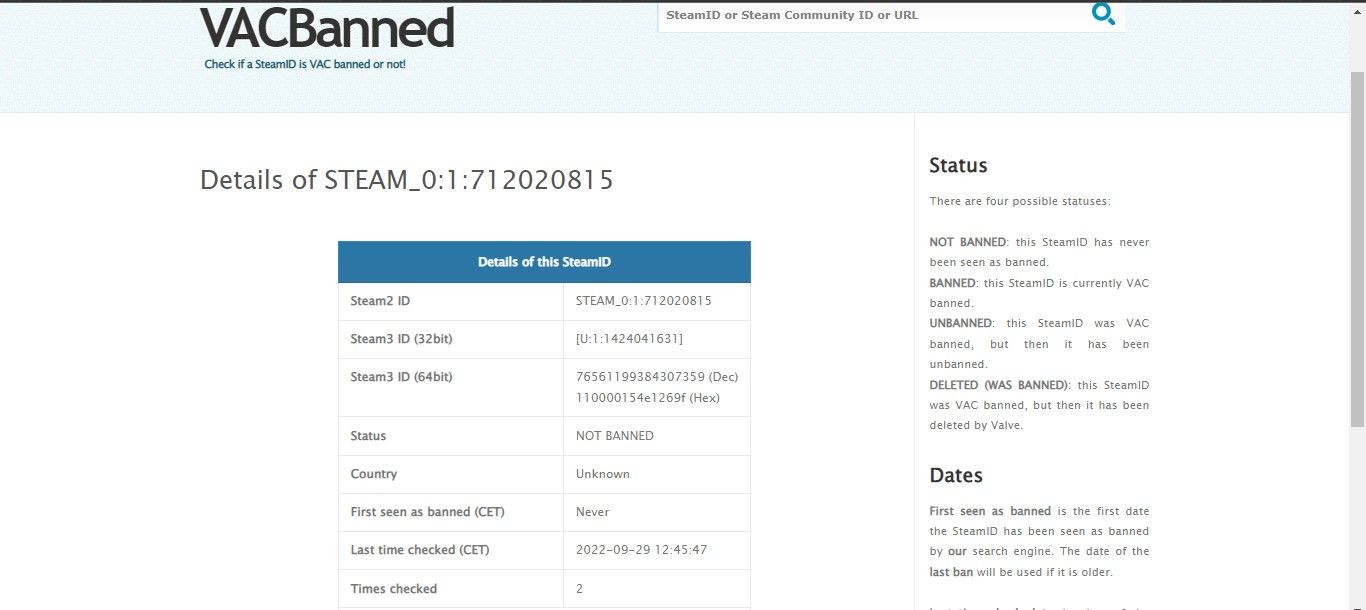
If it was placed recently and you are confident that you did not do anything wrong, it might automatically be removed once the investigation by the Steam support team completes. Regarding Steam support’s investigation timeframe, no information has been provided on how long it takes. So, let’s wait a couple of days and see what happens.
Nevertheless, if it’s been there for a long time, the investigation might already be complete. There is no option to appeal VAC bans, so you may only have the option of creating a new account.
Now, Perform Some Preliminary Checks…
If you’re not banned, perform the following preliminary checks to rule out minor glitches:
- Leave your game session, restart the game, and try to matchmake again.
- Restart the Steam client.
- Re-login to your Steam account after logging out.
- Restart your Windows device.
- Disable Windows Defender or any other antivirus you use, or whitelist the Steam client and directory folders.
- If you have been using a VPN, now is the time to turn it off.
- Ensure your Steam client and game are up-to-date.
- Ensure your operating system is up-to-date.
If none of these checks help, it’s time to dig deeper.
1. Run Steam as an Administrator
VAC may not verify your game session because Steam cannot access specific game files. To rule this out, give Steam exclusive access to all system files by running it as an administrator. To do that, right-click the Steam shortcut and click Run as administrator.
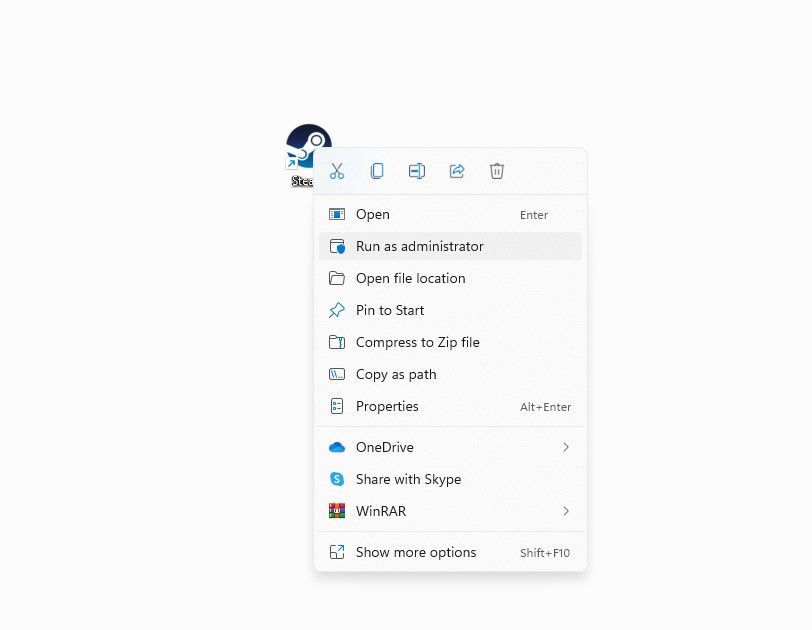
Apply the following fix if you continue to receive the error.
2. Run the Game as an Administrator
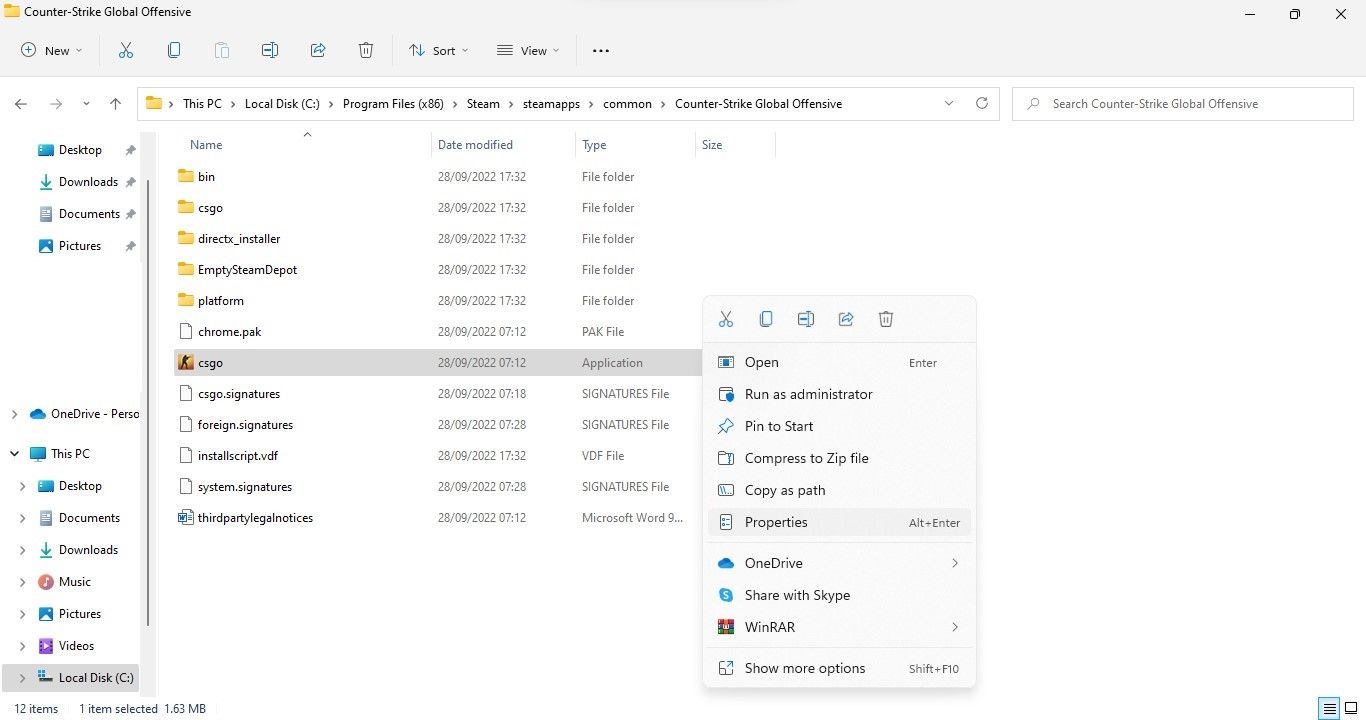
For the same reason we gave Steam client administrator rights, you should run the CS: Go or any other game as an administrator to ensure that limited access isn’t resulting in the error under discussion. Here are the steps you need to follow:
- Paste the following path in Windows File Explorer:
C:\Program Files (x86)\Steam\steamapps\common - Open the folder of the game you’re having trouble with.
- Find the game’s executable file.
- Right-click on it and select Properties.

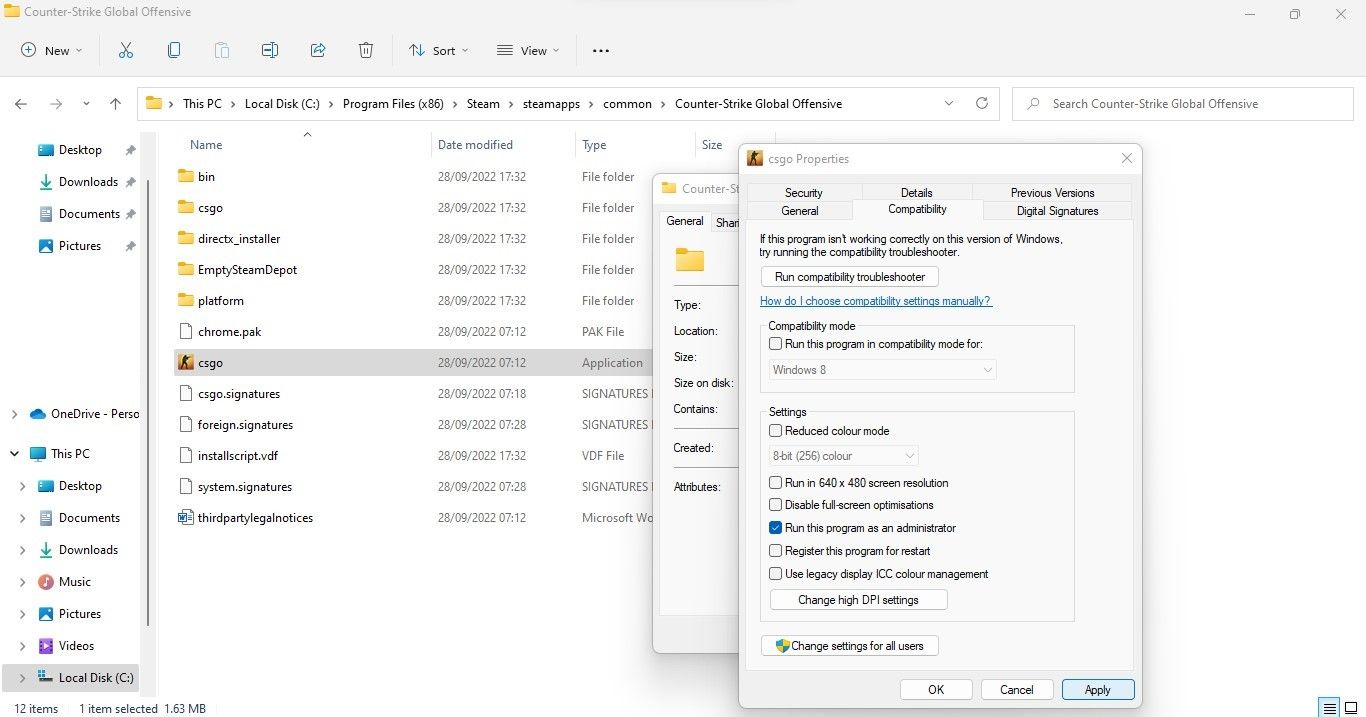
- Navigate to the Compatibility tab in the Properties window.
- Check the box for Run this program as an administrator.

3. Rule Out Interference From Other Programs
Although you can only be banned or get the error under discussion when you try to enter a game session hosted on a VAC-secured server with a cheat program, it is possible to encounter this error even when playing other single-player or offline games where cheating is allowed.
So, ensure you aren’t running a cheat program for any Steam game other than CS: GO. If you’re, you should temporarily close it. Likewise, you should ensure that no such background apps or tasks are running, which you may not see, but could be causing the error. For reference, see our guide on how to disable background apps in Windows 11 .
If the error persists after closing such programs, apply the next fix.
4. Verify the Integrity of Game Files
The “VAC was unable to verify your game session” error may occur due to improper installation of the game files. It means you may not be running any cheat programs or making unauthorized changes to the game files, but Steam may consider the improper installation of files a violation of VAC guidelines. As a result, you receive an error message.
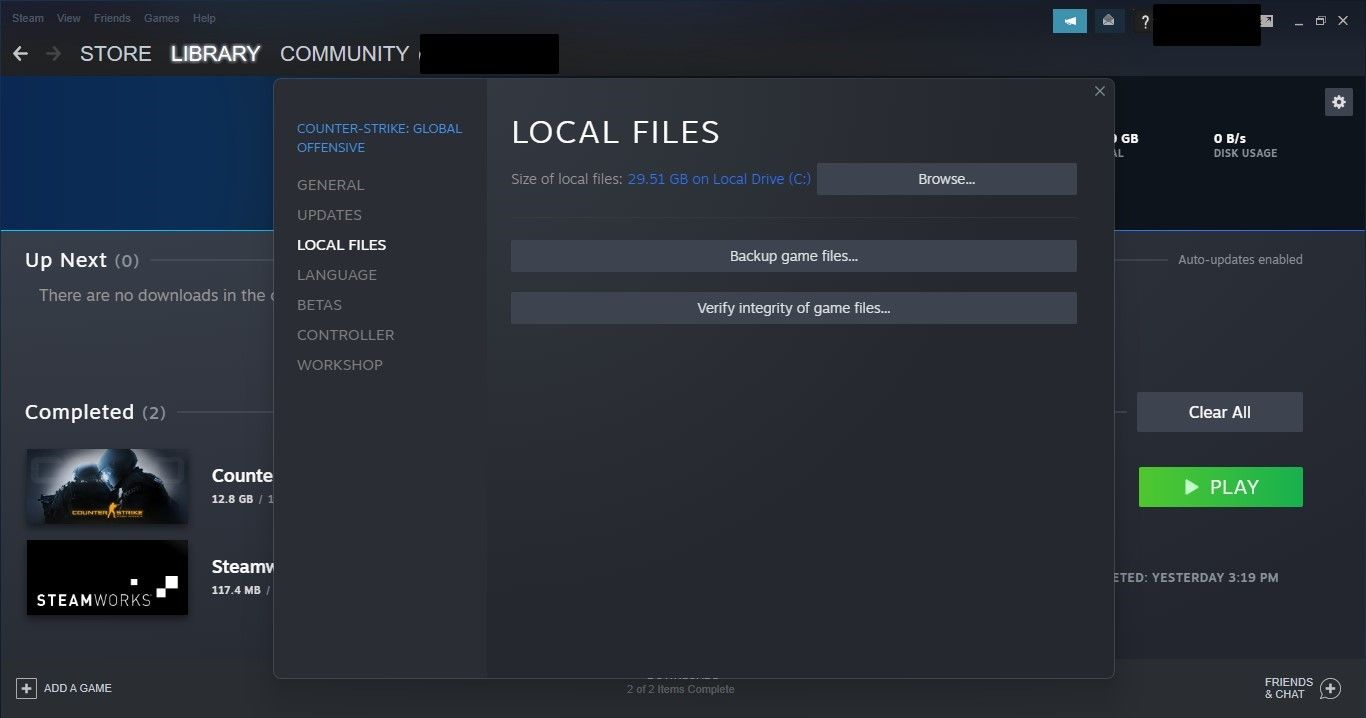
To rule out this possibility, you should verify the integrity of game files, which can be done through Steam. Here are the steps you need to follow:
- Log in to your Steam account.
- Right-click the game you’re encountering the error with and select Properties.
- In the left sidebar, click the Local Files tab.
- In the right-pane, click Verify integrity of game files.

5. Switch to Offline Mode and Back to Online Mode
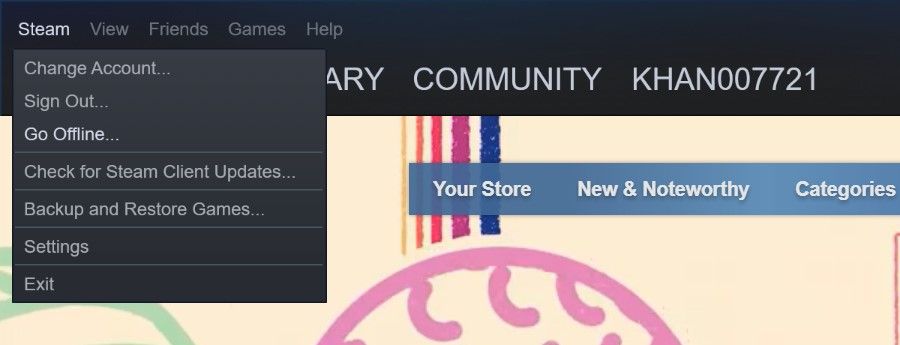
If verifying the integrity of game files does not work, attempt a rather unusual but handy fix by switching between Steam’s offline and online modes once. Performing this step will ensure that any temporary issues with the game’s connectivity aren’t the cause of the problem. Here are the steps you need to follow:
- Start Steam and log in.
- In the top-left corner, click the Steam tab.
- Click on Go Offline.

- Click Enter Offline Mode.
- Take a few minutes to wait.
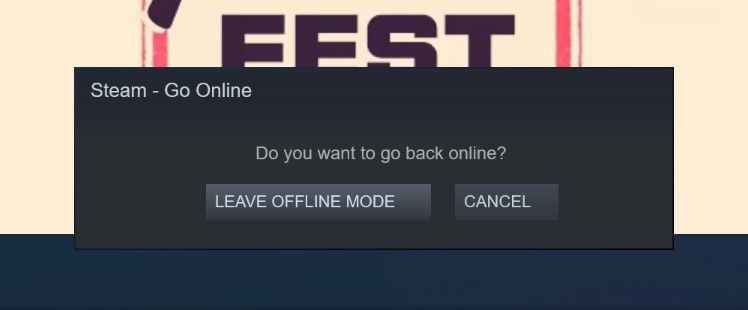
- Go back to the Steam tab, and click Go Online.
- Click Leave Offline Mode.

6. Repair the Steam Library Folder
Repairing the Steam Library folder also has a good chance of resolving the issue. Follow these steps to run the repair as a last resort:
- Log in to your Steam account.
- In the top-left corner, click Steam and select Settings.
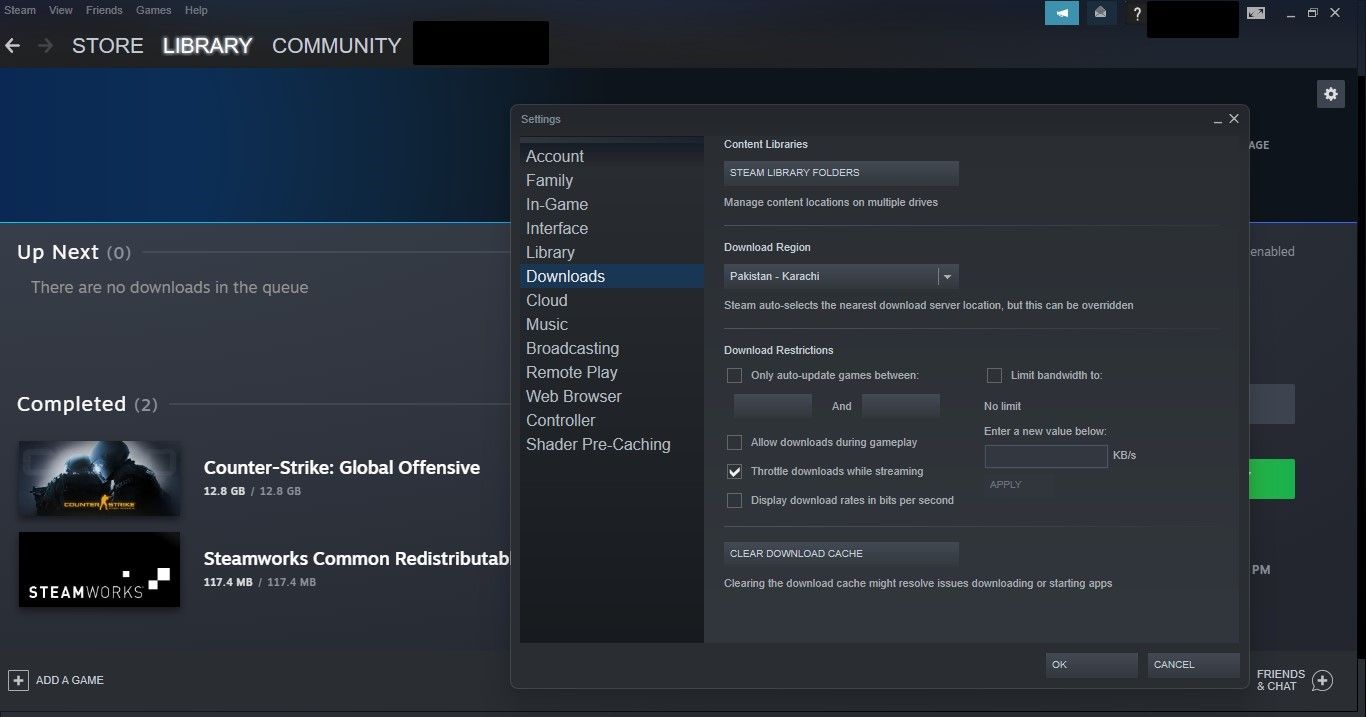
- In the left sidebar, click the Downloads tab.
- In the right pane, click Steam Library Folders.

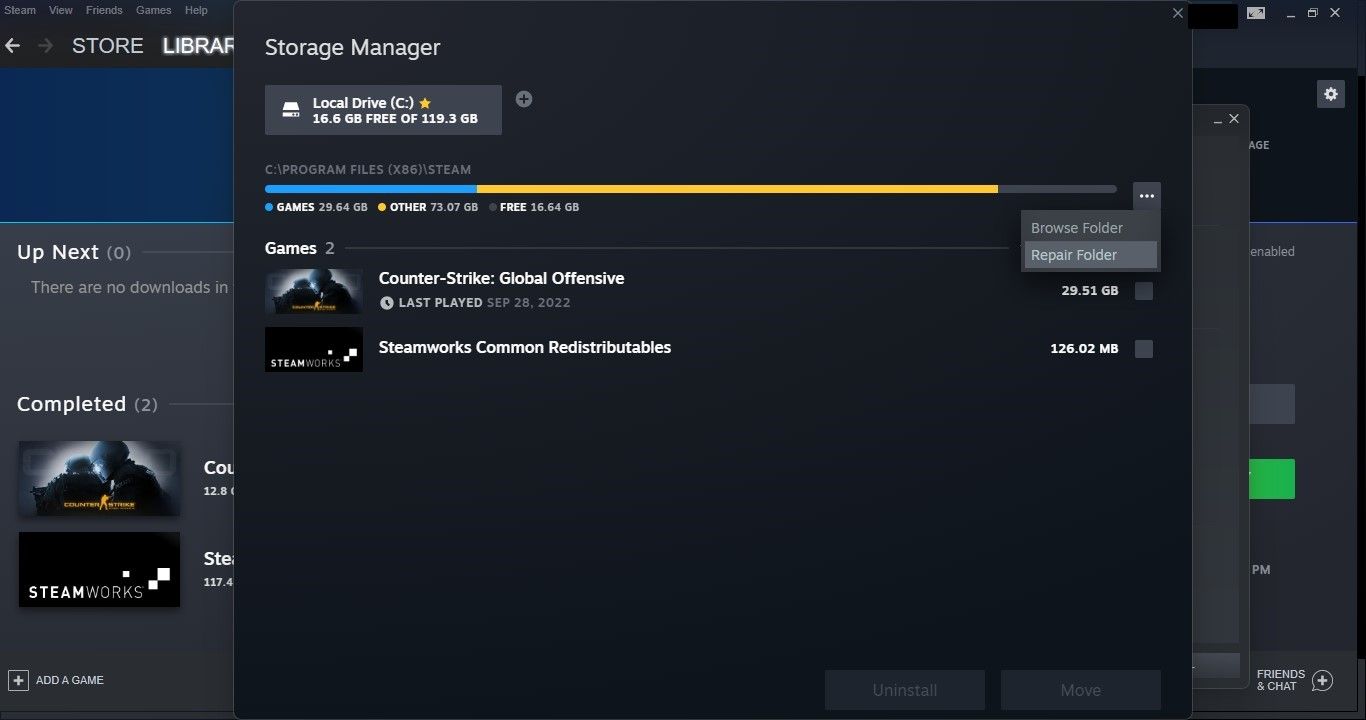
- Next to a storage location, click on the three horizontal dots.
- Hit Repair Folder.

Run Steam again once the folder has been repaired to see if the issue has been resolved.
7. Reinstall Any Error-Prone Games and Steam
If the issue persists, it may be necessary to reinstall the games you are experiencing the error with. If you’re not sure how to do that, check our guide on how to uninstall and reinstall Steam games for more information.
If that doesn’t work, you’ll have to reinstall Steam itself. Uninstalling Steam will erase all your games, including their saves. As such, be sure to back up your saves or ensure they’re uploaded to Steam Cloud before continuing.
Getting Back Into Your Steam Games
We hope our fixes will help you fix the “VAC was unable to verify your game session” error.
When you attempt to matchmake in a Steam game, do you receive the error message “VAC was unable to verify your game session”? In most cases, it occurs when you try to enter the game with a cheat or hack enabled. However, Steam sometimes raises a false flag when you’re simply trying to play fair, resulting in this error message.
But what exactly is this VAC that couldn’t verify your game session? In this article, we’ll discuss this error in detail and offer solutions you can use to fix it.
Also read:
- [Updated] 2024 Approved Action Camera Accessories Buying Guide
- [Updated] From Standard to Stylish Installation of Personalized Ringtones & Alerts in Android for 2024
- Efficiently Record & Refine WebCam Videos for Excellence for 2024
- Expert Advice: Overcoming the Most Common Update Issues
- Exploring the Legacy of Yahoo! Messenger: Understanding Its Demise and Impact on Communication
- In 2024, 5 Ways Change Your Home Address in Google/Apple Map on Apple iPhone 15 Pro/iPad | Dr.fone
- In 2024, How to Unlock Samsung Galaxy F15 5G Phone without Google Account?
- In 2024, Live Chat With WooCommerce Your Gateway to Successful Live Selling
- Reviving Energy Levels After High Living in Windows
- Safeguard Gameplay: Steam Screenshots Redundancy
- Secure Windows 11 Temp Directory Functionality
- The Essence of Windows Cab Files & Execution Procedures
- Unraveling Code 0X800f0831: The Troubleshoot Tome
- Win 10/11: Overcoming the HYPERVISOR BSOD Crash
- Title: Guidelines to Mend VAC Verification Issues on PC
- Author: Richard
- Created at : 2024-10-25 18:39:19
- Updated at : 2024-11-01 18:27:47
- Link: https://win11-tips.techidaily.com/guidelines-to-mend-vac-verification-issues-on-pc/
- License: This work is licensed under CC BY-NC-SA 4.0.

