
How to Add or Remove the “Run as Different User” Option to Start on Windows 11

How to Add or Remove the “Run as Different User” Option to Start on Windows 11
There are times when you want to run programs and processes as a different user in the Start menu, only to find the Run as different user option missing in the context menu. Other times, you might want to prevent other users from using that option due to security and privacy reasons.
No matter the case, there are several ways to add or remove the Run as different user option from the Start menu on Windows 11. Here are three of them.
Disclaimer: This post includes affiliate links
If you click on a link and make a purchase, I may receive a commission at no extra cost to you.
1. How to Add or Remove “Run as Different User” Using Settings
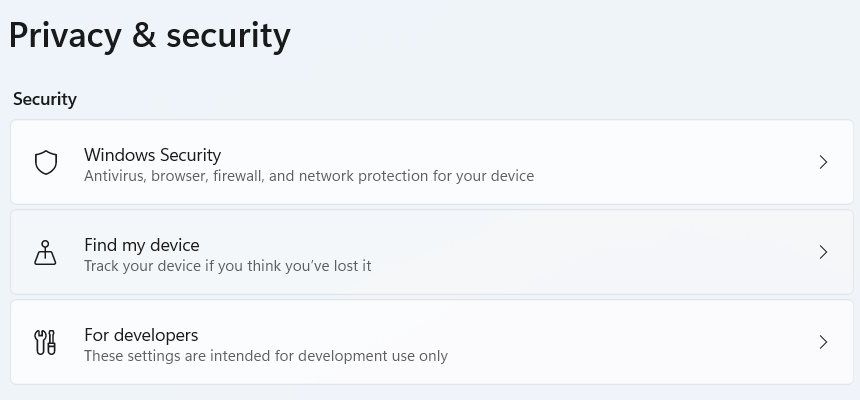
Press Win + I to open the Settings app. In the left pane, select Privacy & security and then click on For developers in the right pane.
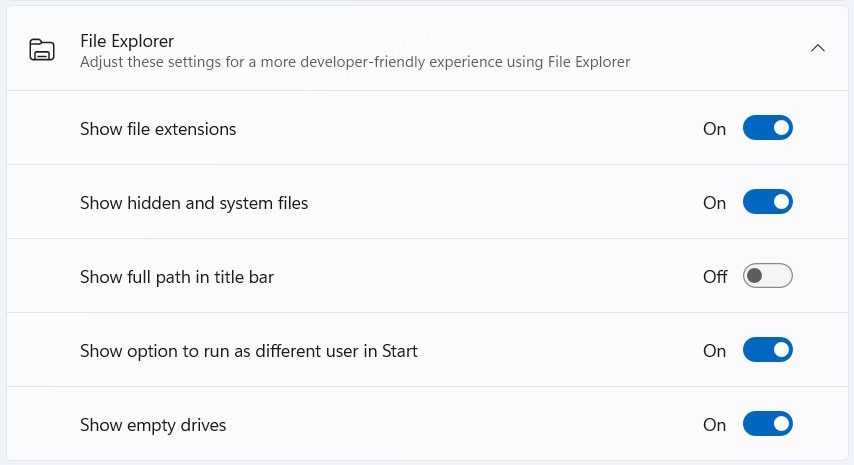
Expand the File Explorer section and then click on the toggle next to Show option to run as different user in Start. If the toggle was On, it would now become Off and vice-versa.
2. How to Add or Remove “Run as Different User” to Start Using the Local Group Policy Editor
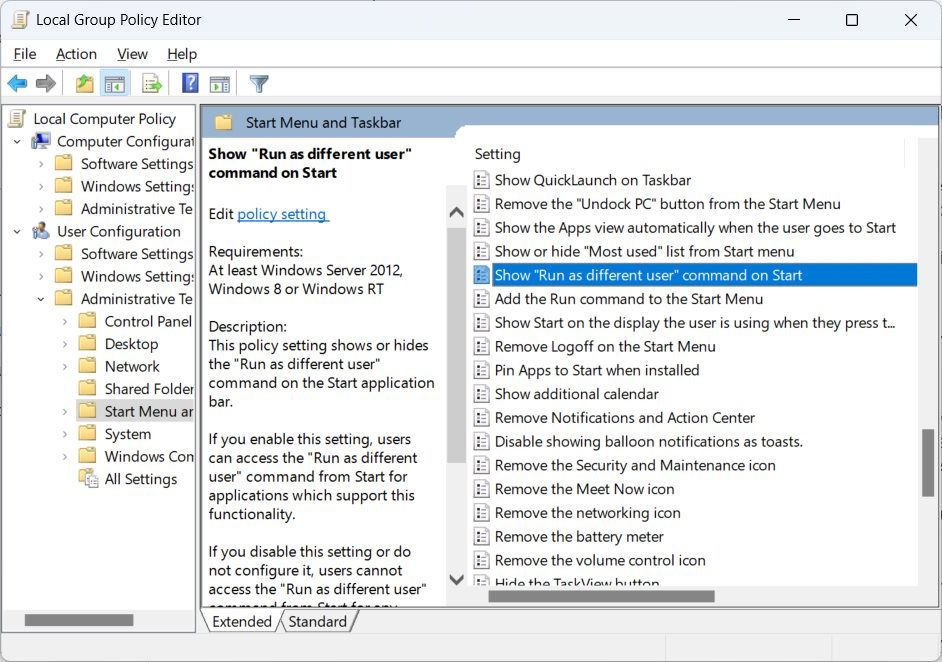
Press Win + R to open the Windows Run dialog box, enter gpedit.msc in the text box, and then click OK to open the Local Group Policy Editor. Then, head to User Configuration > Start Menu and Taskbar in the left pane and double-click on the Show “Run as different user” command on Start policy in the right pane.
To add Run as different user to the context menu in Start, set the radio button to Enabled and click OK to apply the changes. If you want to remove the option, set the radio button to Not Configured or Disabled instead.
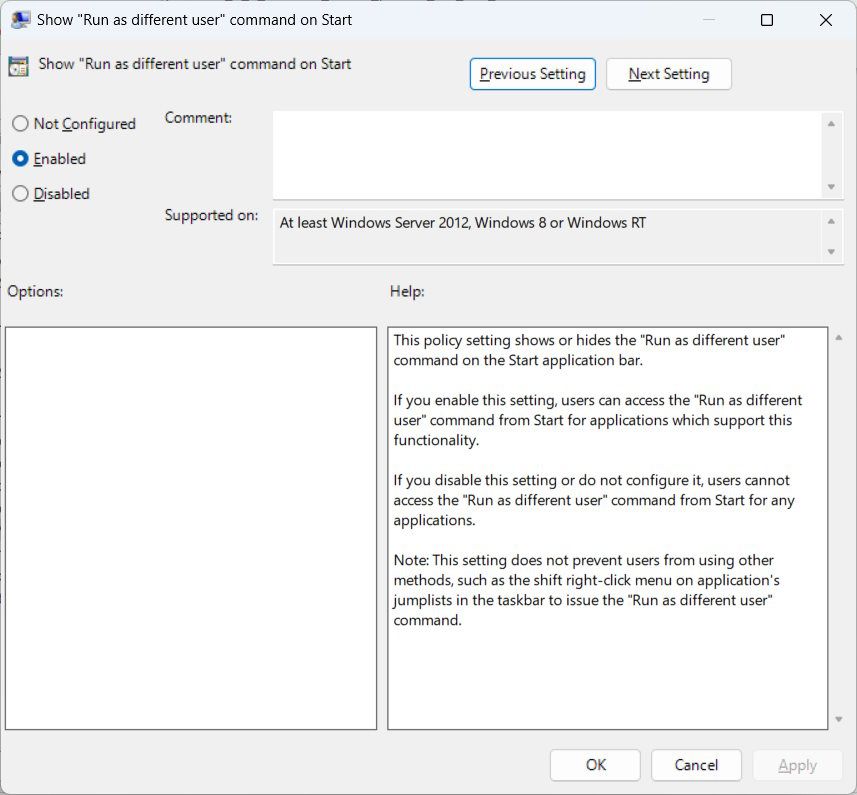
Now that user profile won’t be able to use the Run as different user optionin the Start menu**.**
3. How to Add or Remove “Run as Different User” to Start Using the Registry Editor
Press Win + R to open Windows Run, enter regedit in the text box, and then click OK. Then, click Yes when the UAC prompt comes up. The Registry Editor will now launch.
Since you’ll be making changes to the Windows registry in this section, which can potentially break Windows if you make a mistake, it’s a good idea to create some sort of backup. To do that, we recommend that you either back up the Windows registry or create a system restore point before moving forward.
In the Registry Editor, you can add or remove the Run as different user in the Start menu for the current user or all users. We will look at how to do both.
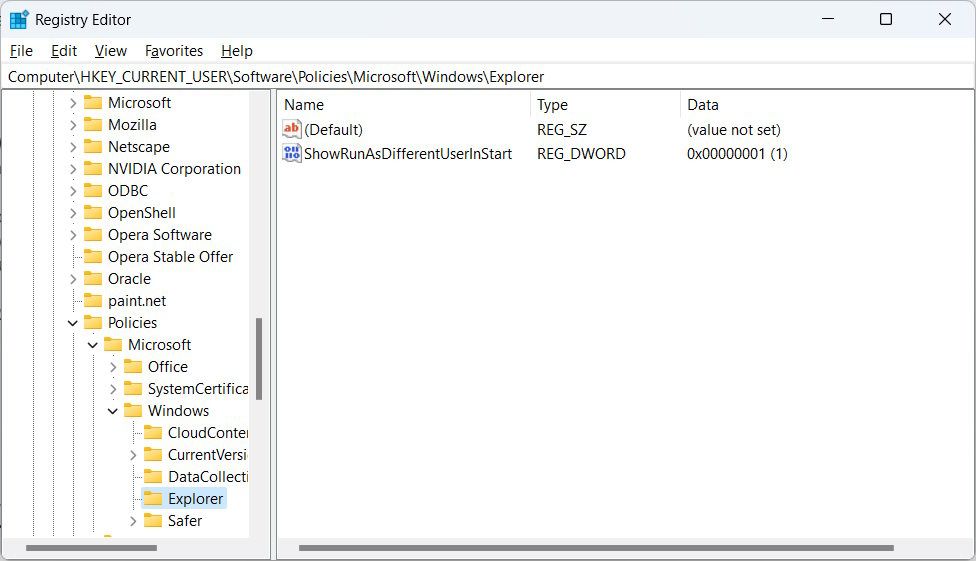
For the current user only, head to the following registry key using the Registry Editor’s navigation pane on the left: HKEY_CURRENT_USER > SOFTWARE > Policies > Microsoft > Windows > Explorer.
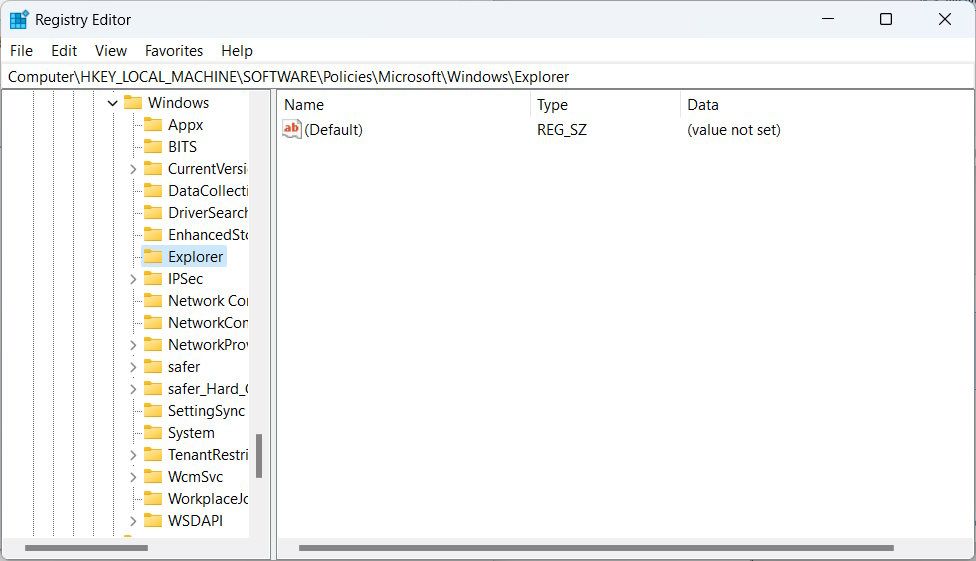
If you want to add or remove the option for all users, head to the following key: HKEY_LOCAL_MACHINE > SOFTWARE > Policies > Microsoft > Windows > Explorer.
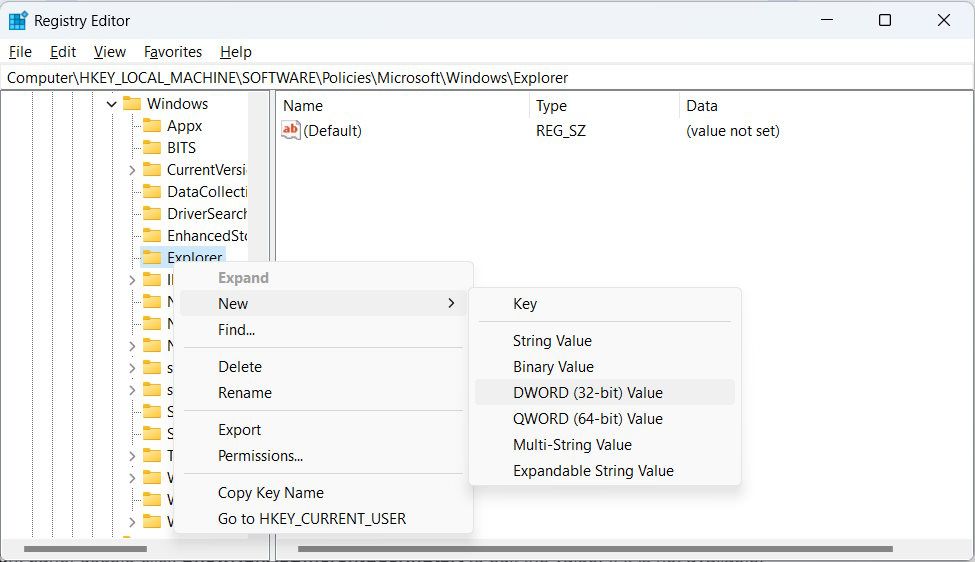
In the right pane, look for the ShowRunAsDifferentUserInStart value. If it’s not available, right-click the Explorer key in the left pane and select New > DWORD (32-bit) Value. Then, name the newly-created value ShowRunAsDifferentUserInStart.
Now, double-click the ShowRunAsDifferentUserInStart value to edit it.To add the Run as different user option in the Start menu, set Value Data to 1.
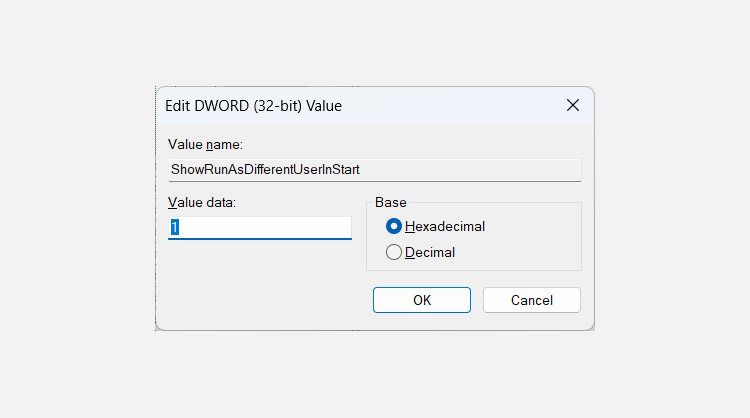
To remove it, set Value data to 0.
Get Access to the “Run as Different User” Option in the Start Menu
Sometimes, it’s useful to run a program or process as a different user on Windows, and other times, it’s not. As the admin, you have the power to add or remove the option to do so in the Start menu. We recommend you do that in Settings or with the Local Group Policy Editor, though—only tweak the Registry if you have to.
Keep in mind that even though people using your computer won’t be able to run programs and processes as different users in Start, they can still do so using other methods.
No matter the case, there are several ways to add or remove the Run as different user option from the Start menu on Windows 11. Here are three of them.
Also read:
- [SOLVED] Windows 10 Display Too Big
- [Updated] Pioneering Non-Udemy Virtual Classrooms for Learning for 2024
- 2024 Approved Step-By-Step Creation of Gamers' Channel Graphics
- Easing Into Intel Graphic Upgrades for Underperforming PCs
- Fixing a Broken Snipping Feature in Windows Operating Systems, Including Windows 11 Edition
- Genius WideCam F100 Review: Pixelated Image and Echoing Sound
- How to Effortlessly Adjust Your Software Size with Windows 11 Keys
- In 2024, How to use Snapchat Location Spoofer to Protect Your Privacy On Samsung Galaxy XCover 6 Pro Tactical Edition? | Dr.fone
- Refreshing Historical DirectX Titles Through Enhanced DXVK Performance
- Removing Read-Only Settings for Steam Libraries on Win 11 PCs
- Slow Motion Magic A Complete Appraisal of 2024 Edition
- System Safety: Proven Ways to Prevent Unauthorized Access
- Unblocking the Disabled Recycle Icon on Win11
- Your Guide to Making Millions on YouTube From Novice to Big Earnings
- Title: How to Add or Remove the “Run as Different User” Option to Start on Windows 11
- Author: Richard
- Created at : 2024-09-26 22:15:58
- Updated at : 2024-10-03 19:52:16
- Link: https://win11-tips.techidaily.com/how-to-add-or-remove-the-run-as-different-user-option-to-start-on-windows-11/
- License: This work is licensed under CC BY-NC-SA 4.0.