How to Fix the Windows “Disk Management Could Not Start Virtual Disk Service” Error

How to Fix the Windows “Disk Management Could Not Start Virtual Disk Service” Error
Disk Management is a Windows utility with which users can partition and rename drives. However, some users have reported this Windows error message pops up when they try to access Disk Management: “Disk Management could not start Virtual Disk Service (VDS).” A variation of that error message also says, “Unable to connect to Virtual Disk Service.”
This error means users can’t access and utilize Disk Management. The issue more typically arises in remote connection environments. This is how you can fix the Disk Management Virtual Disk Service error in Windows 10 and 11.
1. Disconnect External Drives From Your PC
First, try disconnecting all non-essential USB devices from your PC. Make sure there aren’t any external drives, USB sticks, mobile phones, or card readers connected to your PC. Then try opening the Disk Management utility again.
2. Run System File and Image Repair Scans
System file corruption could feasibly cause the Disk Management Virtual Disk Service error. So, check the integrity of system files on your PC with the Windows System File Checker command-line tool. That utility will also usually repair corrupted system files detected. This how to run the System File Checker guide includes instructions for utilizing that tool.
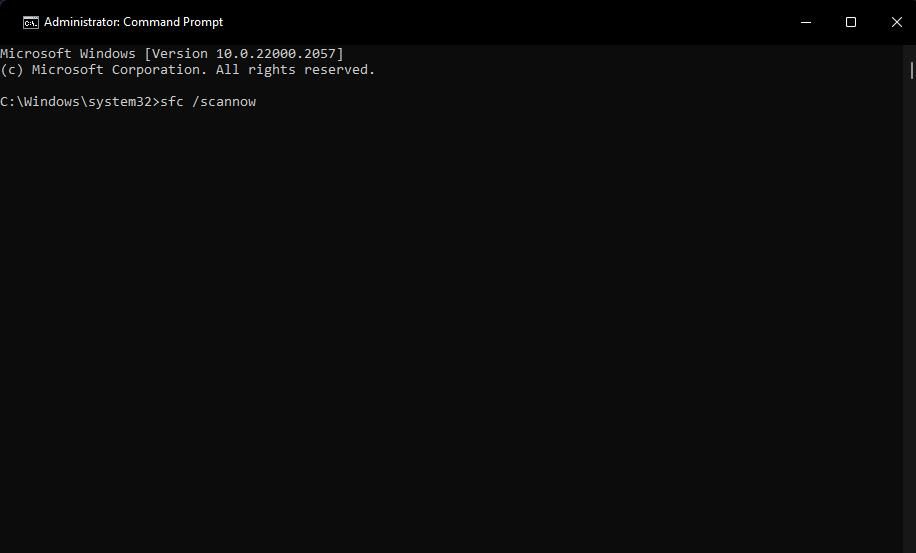
If SFC detects corrupted system files but can’t repair them, you may need to run a Deployment Image Service Management scan. That’s a tool for fixing issues with the Windows system image. You can run that utility by executing this Deployment Image command within the Command Prompt:
DISM /Online /Cleanup-Image /RestoreHealth
3. Enable and Run the Virtual Disk Service
A disabled Virtual Disk service is a common cause of the Disk Management VDS error. Disk Management can’t connect to VDS when the Virtual Disk service is disabled. So, try enabling and running the Virtual Disk service like this:
- To access Run, press Win + R.
- Enter services.msc inside the Run command dialog and press Return.
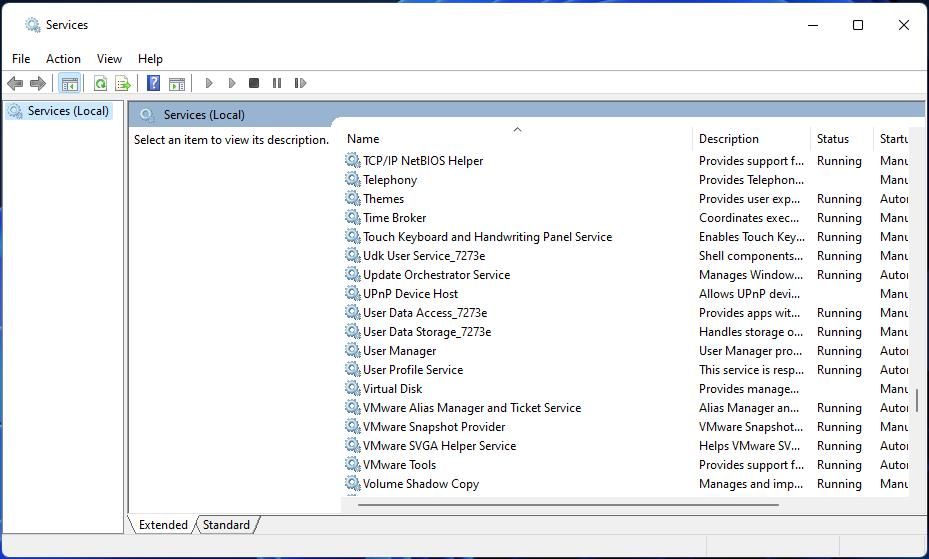
- Scroll down and double-click on Virtual Disk within the Services window.

- Select the Automatic setting on the Startup type menu.
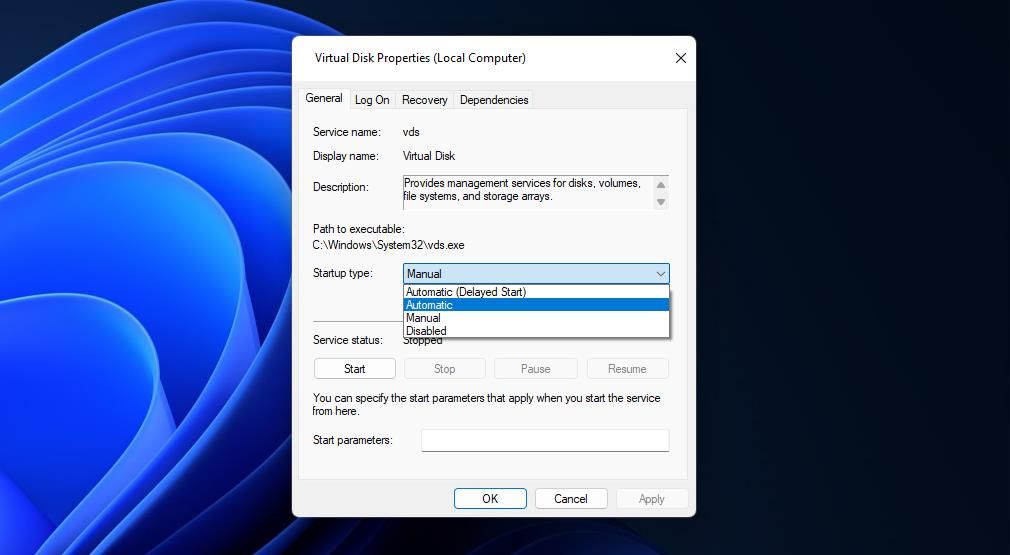
5. Press Start within the Virtual Disk Properties window.
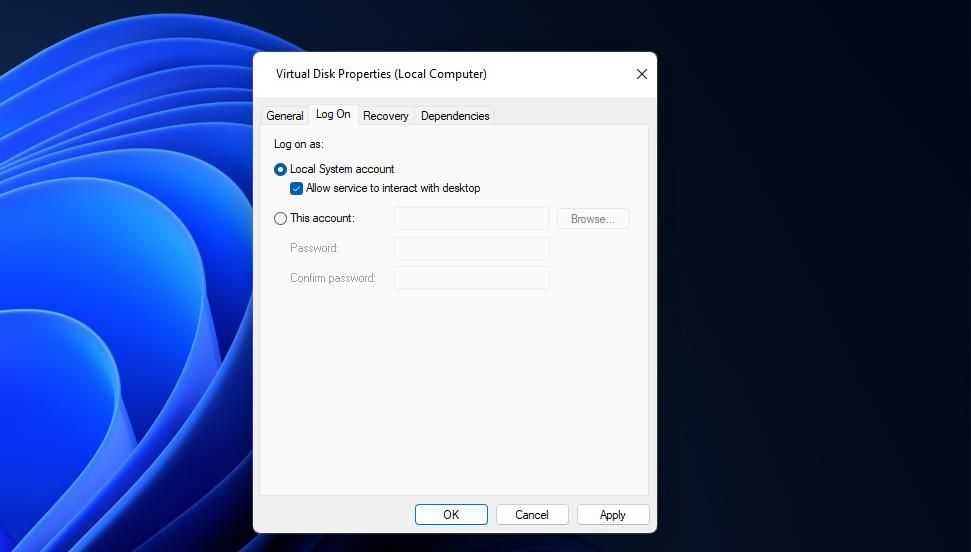
- Select the window’s Log on tab.
- Next, click the Allow service to interact with desktop checkbox to select that option.

- Click Apply to save your new Virtual Disk service settings.
- Select the Virtual Disk Properties window’s OK option.
- If you encounter the Disk Management VDS error within a remote connection environment, repeat the above steps to check the Virtual Disk service is enabled on both the local and remote PCs.
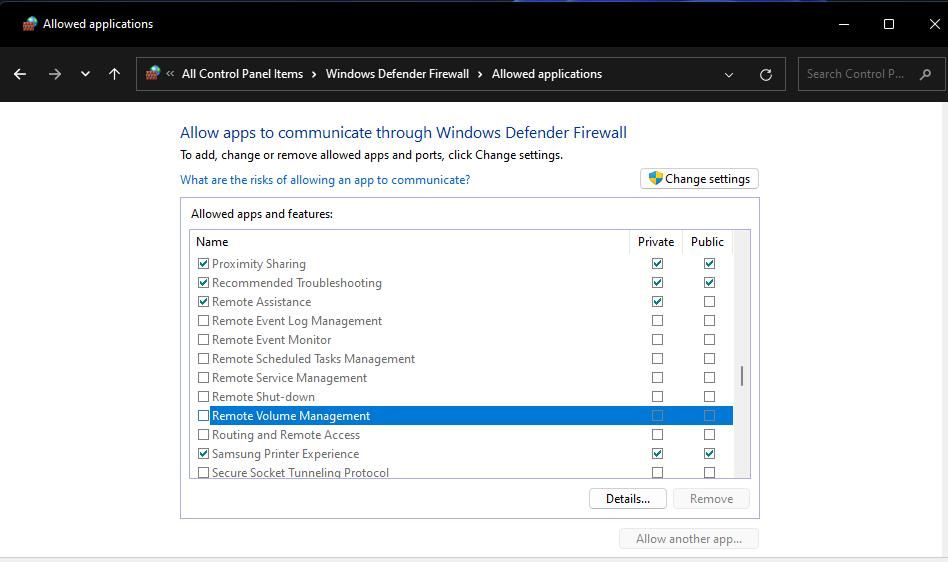
4. Allow Remote Volume Management Through Windows Defender Firewall
Windows Defender Firewall can cause the Disk Management VDS error by blocking that utility from connecting with Virtual Disk. So, make sure Remote Volume Management is allowed through that firewall on both local and remote PCs. Our guide to allowing apps through the Windows firewall includes instructions for applying this resolution.
5. Turn Off Third-Party Security Software
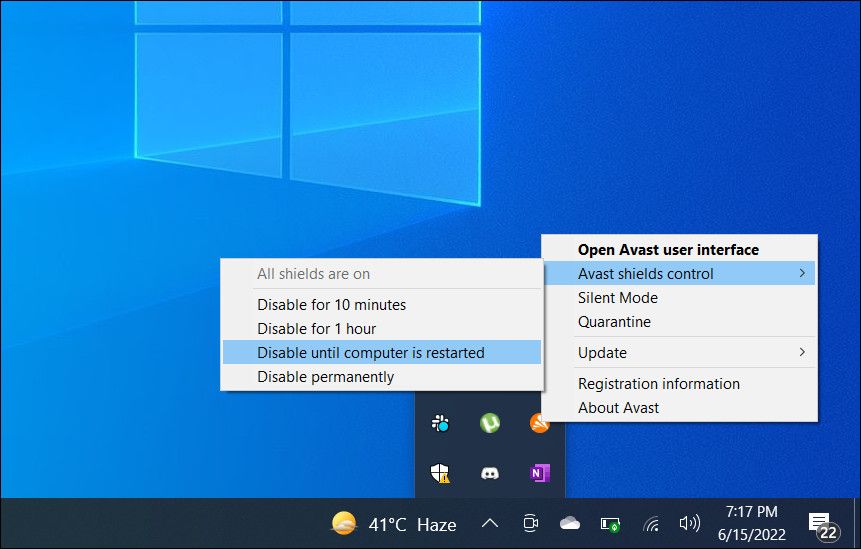
If your PC includes a third-party security (antivirus) app, that software could be blocking Disk Management from establishing a VDS connection. Remember that many third-party security apps also incorporate firewalls along with antivirus components. So, try temporarily disabling both the firewall and antivirus module within your third-party security software.
To disable the firewall part, look for a turn-off firewall option within the settings tab of your antivirus software. You can usually turn off antivirus shields by right-clicking on security apps’ system tray icons and selecting disable options on their context menus. Select to turn off the antivirus shield for about an hour if you can, and try accessing Disk Management again to see if the issue persists.
Manage Your Drives With Disk Management Again
The potential solutions in this guide aren’t totally guaranteed, but they’re the most likely ways to fix the Disk Management VDS error on a Windows PC. So, maybe one will get the Disk Management VDS issue sorted on your PC. Then you can manage and partition your drives with Disk Management again.
This error means users can’t access and utilize Disk Management. The issue more typically arises in remote connection environments. This is how you can fix the Disk Management Virtual Disk Service error in Windows 10 and 11.
Also read:
- [New] StreamlinedProcess for YouCamWebRecord
- [Updated] 2024 Approved The Ultimate List of WhatsApp Secrets and Hacks
- Easy Fixes: How to Refresh and Install New Drivers for Your Webcam in Windows 11
- Efficient Folder Formation Techniques for Win11 Users
- Effortless Projection without PIN in WIndows 11
- Eliminate Default USB Suspend Using Windows 11 Features
- Fix Freeze Frames in Windows-Based League of Legends
- Immediate Save Action Plan: Top 6 Solutions to PPT Issues in Win11
- Improve Display Clarity with GPU Reset in Windows 11
- In 2024, Harnessing the Power of Supplemental Film Footage
- Inside Track Understanding Sound Rights on Instagram for 2024
- Master the Art of Clearing Vacant Directories on Windows
- Mastering Technology Choices: Why Experts Agree, Apple's iPad Pro (201E, 11-Inch) Is Unbeatable
- Skyrocketing Traffic The Power of Collaborative YouTube Outros for 2024
- Streamlined Setup: Integrating Gmail Into Outlook on Windows PCs
- Tips for Fixing System Settings Glitch in Win11
- Top 5 Mac OS Sierra Video Editing Apps
- Top Rated 2023 Dual-Function Device Unlocks Hidden Office Perks: A Comprehensive Review
- Update or Get New Canon PIXMA MG2522 Drivers for Optimal Performance
- Title: How to Fix the Windows “Disk Management Could Not Start Virtual Disk Service” Error
- Author: Richard
- Created at : 2024-11-03 09:30:21
- Updated at : 2024-11-07 03:21:39
- Link: https://win11-tips.techidaily.com/how-to-fix-the-windows-disk-management-could-not-start-virtual-disk-service-error/
- License: This work is licensed under CC BY-NC-SA 4.0.
