
How to Fix the Windows Sandbox No Hypervisor Was Found 0XC0351000 Error
How to Fix the Windows Sandbox No Hypervisor Was Found 0XC0351000 Error
Windows Sandbox is a handy utility to test untrusted apps and files in a secure virtual environment. The setup process is pretty straightforward for Windows Sandbox. However, when you try to launch the app, you may encounter the “No Hypervisor was found code 0XC0351000” error.
The error message indicates that Windows Sandbox was unable to detect Hypervisor. This can happen due to many reasons, including incorrectly configured virtual machine-related features in Windows Features.
Follow the steps in the article below to troubleshoot this error on your Windows PC.
1. Check and Enable Virtualization Technology in BIOS
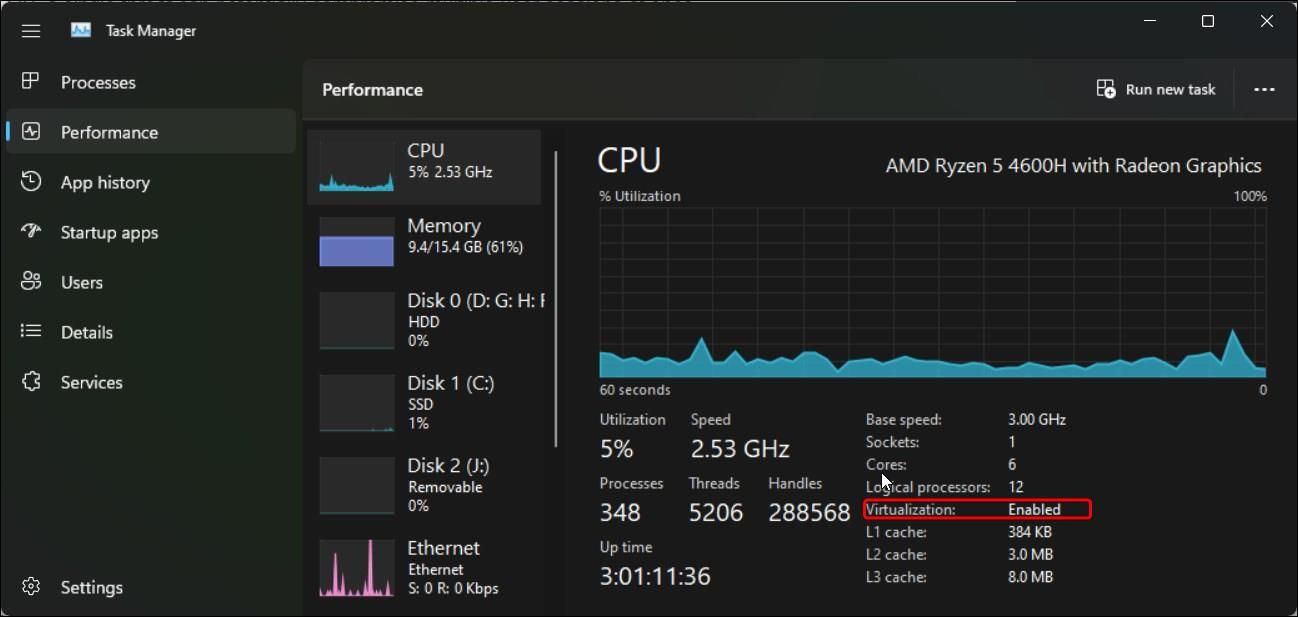
All the virtualization-based tools need hardware virtualization enabled in BIOS to work. If you haven’t configured your hardware virtualization, check if it is enabled in Task Manager. If not, you can manually enable it in BIOS to support virtualization tools.
To check the virtualization status:
- Right-click onStart and openTask Manager.
- In Task Manager, open thePerformance tab.
- Next, make sure theCPU tab is selected.
- Locate theVirtualization section. IfEnabled , skip to the next method.
- IfDisabled , follow the steps below to enable hardware virtualization on your computer.
Now we’ll cover how to enable Hardware Virtualization in BISO on an HP computer. The instructions to enable hardware virtualization may vary depending on your computer manufacturer. You can find specific instructions on your computer manufacturer’s website, or check out how to enter the BIOS in Windows 10/11 .
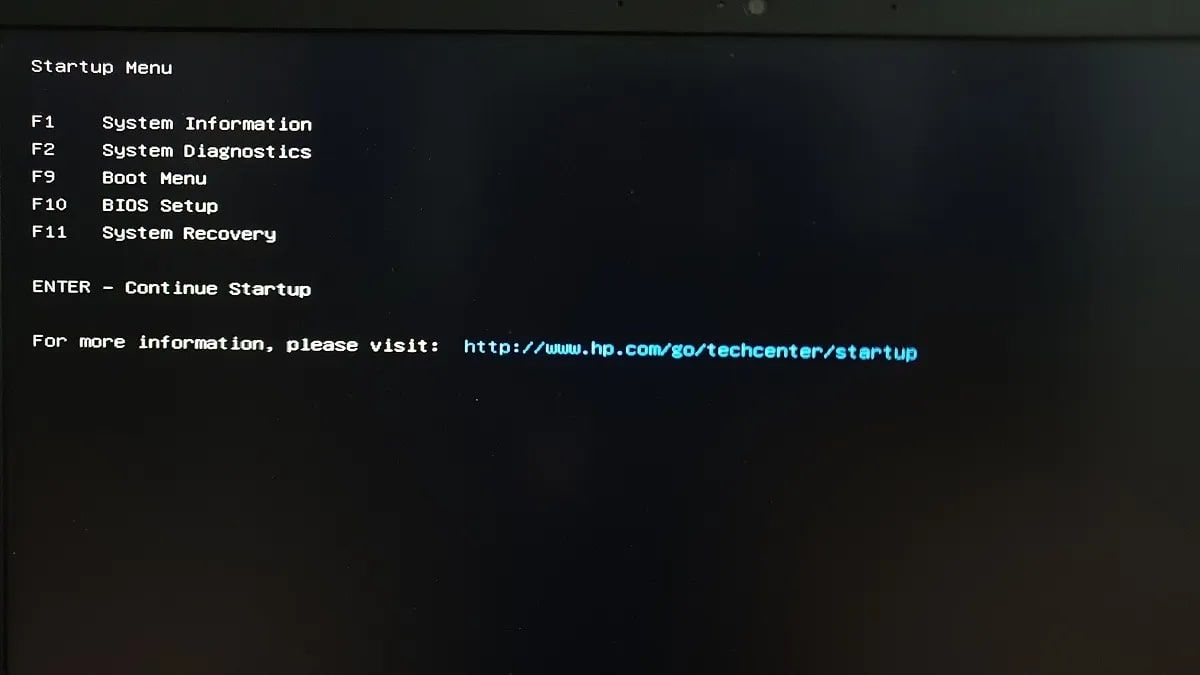
- Shut down your PC.
- Press thePower button and then start pressing theEsc key to view theStart menu .
- PressF10 to enterBIOS Setup.

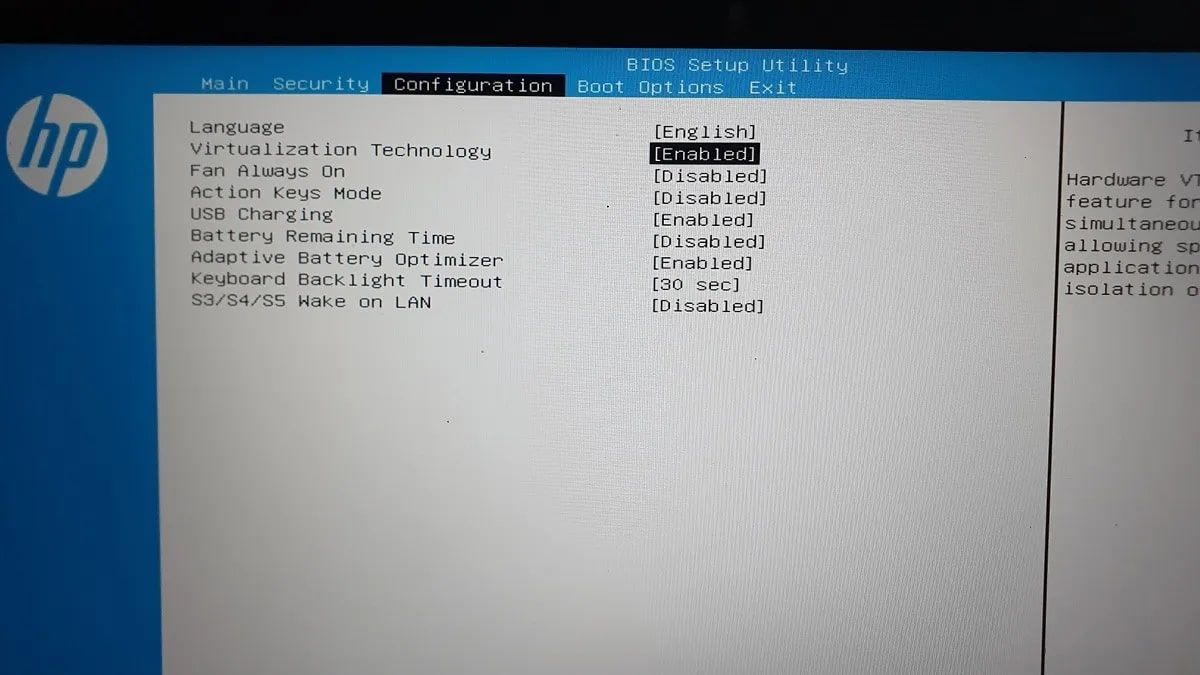
- In theBIOS Setup Utility, use the right-left arrow keys to locate and open theConfiguration tab.
- Next, use the down-up arrow keys to selectVirtualization Technology or anything with similar terms.
- With the option highlighted, pressEnter and selectEnabled from the options. Now the Virtualization Technology status will show asEnabled .
- PressF10 again to save the changes and exit BIOS.
Wait for your computer to restart. Open Task Manager to see the Virtualization status in the CPU tab. If it says “Enabled,” try to open Windows Sandbox to see if it works without the error.
2. Enable Virtual Machine Platform Features
Windows Sandbox is available as an optional feature that you can install from the Windows Features dialog, and we’ve covered how to do this in our guide on how to enable and set up Windows Sandbox in Windows 11 . Similarly, you may need to enable a few additional optional features essential to run the virtualization tool successfully.
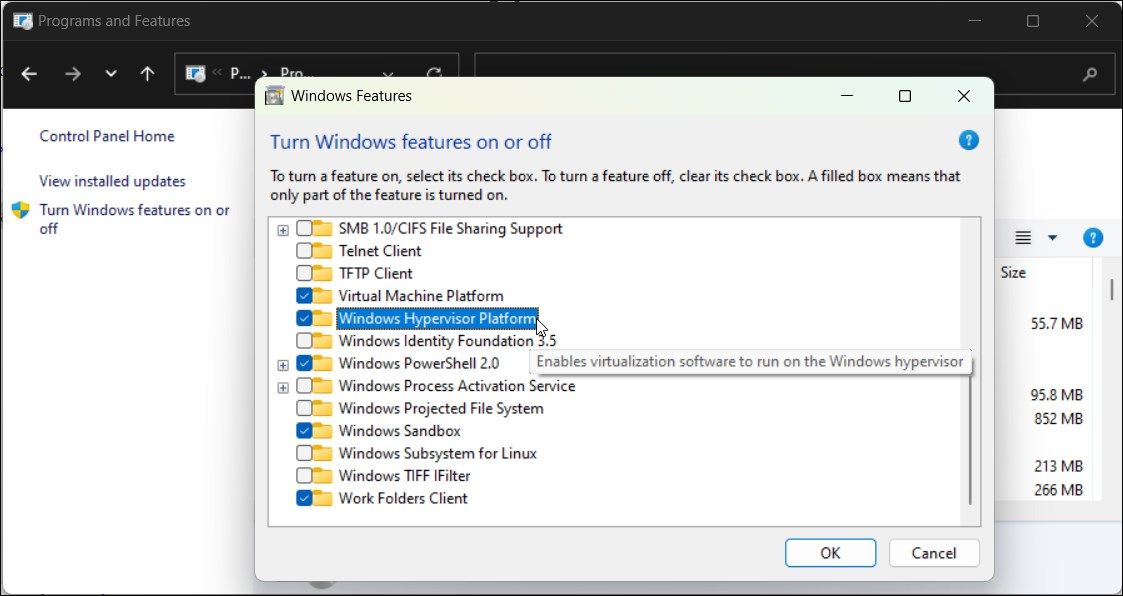
The two optional features you need to enable areVirtual Machine Platform andWindows Hypervisor Platform . These tools enable platform support for virtual machines and provide the necessary API to run virtualization software on Windows.
To enable virtualization features:
- PressWin + I to openSettings .
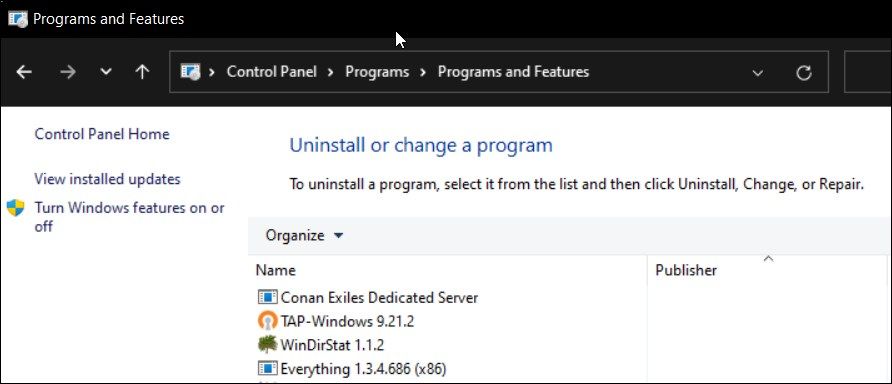
- Typeappwiz.cpl and clickOK to openControl Panel.
- In the left pane, click onTurn Windows features on or off.
- In theWindows Features dialogue, scroll down and locateVirtual Machine Platform andWindows Hypervisor Platform.
- Select both options and clickOK .
- Windows will start installing the necessary files. So, wait for the process to complete. Once done, click onRestart Now to restart your system and apply the changes.
3. Set Hypervisor to Run at System Startup
Windows Sandbox may not work if Hypervisor fails to start during system startup. To fix this issue, you can modify your Boot Configuration Data (BCD) file to launch Hypervisor automatically at system startup.
To set Hypervisor to launch at system startup:
- Press theWin key and typecmd . Then, right-click onCommand Prompt and selectRun as administrator.
- In the Command Prompt window, type the following command and press Enter:
BCDEDIT /Set {current} hypervisorlaunchtype auto - Wait for the success message and restart your PC.
- After the restart, open Command Prompt as administrator and run the following command:
bcdedit - Next, scroll down to theHypervisorlaunchtype entry and make sure it is set toAuto .
- Try to launch Windows Sandbox and check if the No Hypervisor was found error is resolved.
Note that with the Hypervisor set to launch at startup, virtual machines running on third-party virtualization tools such as VMWare may not work correctly.
To disable Hypervisor at startup, type the following command in the elevated Command Prompt:
bcdedit /set hypervisorlaunchtype off
Once done, restart your computer to apply the changes.
Get Set With Your Sandbox Again
While only available on the Pro, Enterprise, and Education editions of the Windows 10 and 11 running systems, Sandbox is an excellent lightweight virtualization solution to test unsafe files and apps on your PC.
However, if this virtualization option is unavailable, consider using a Windows Sandbox alternative such as Sandboxie-Plus. It is free to use and works on all the editions of Windows OS.
Also read:
- [New] 2024 Approved IPhone's Ultimate Podcast Downloading Manual
- [Updated] 2024 Approved Navigating Like a Pro with Telegram Web
- 2024 Approved Prime Landscapes for Streaming Success
- ASUS Drivers Download & Install for Windows
- Converti GIF a Formato FLV Free Online Con Movavi
- Earn Big with Little Experience - Discover the Top 13 Reddit Money Ways for 2024
- Gratis Omzettingen Van AI-Fysische Architecturen Online - Movavi
- Guía Paso a Paso: Cómo Eliminar Y Recortar Archivos De Video MP4 Sin Coste Alguno Desde Tu Computadora O Servicio Online
- How to Reset a Nubia Z50S Pro Phone That Is Locked | Dr.fone
- In 2024, Proven Ways in How To Hide Location on Life360 For Honor 90 Lite | Dr.fone
- MP3形式変換できる動画コンバーター - Movavi:オンライン・無料サービス
- New Free to Download Top-Rated 3D Animation Apps for Mobile Devices for 2024
- Quick Guide to Secretly Capturing Zoom Sessions – No Need for Approvals
- Updated 2024 Approved Split MKV Videos with Ease Top 10 Free Software Options
- Title: How to Fix the Windows Sandbox No Hypervisor Was Found 0XC0351000 Error
- Author: Richard
- Created at : 2025-02-28 18:28:03
- Updated at : 2025-03-04 17:56:56
- Link: https://win11-tips.techidaily.com/how-to-fix-the-windows-sandbox-no-hypervisor-was-found-0xc0351000-error/
- License: This work is licensed under CC BY-NC-SA 4.0.