
How to Harness the Power of Windows Print Management Console

How to Harness the Power of Windows Print Management Console
Ever heard of the Print Management tool? It’s an amazing app that helps you manage your print jobs on Windows.
But how does this tool work, and how do you access it? Let’s get started.
Disclaimer: This post includes affiliate links
If you click on a link and make a purchase, I may receive a commission at no extra cost to you.
How Does the Windows Print Management Tool Work?

This Print Management tool is an app that lets you monitor print queues and manage all your print jobs. It even sends you notifications when your print jobs get interrupted.
The best part is that this app can help you manage print jobs for your remote devices. Let’s explore how you can use this tool:
- Press Win + R to open the Run command dialog box.
- Type printmanagement.msc and press Enter to open the Print Management tool.
- Expand the Custom Filters folder and then select the All Printers option.
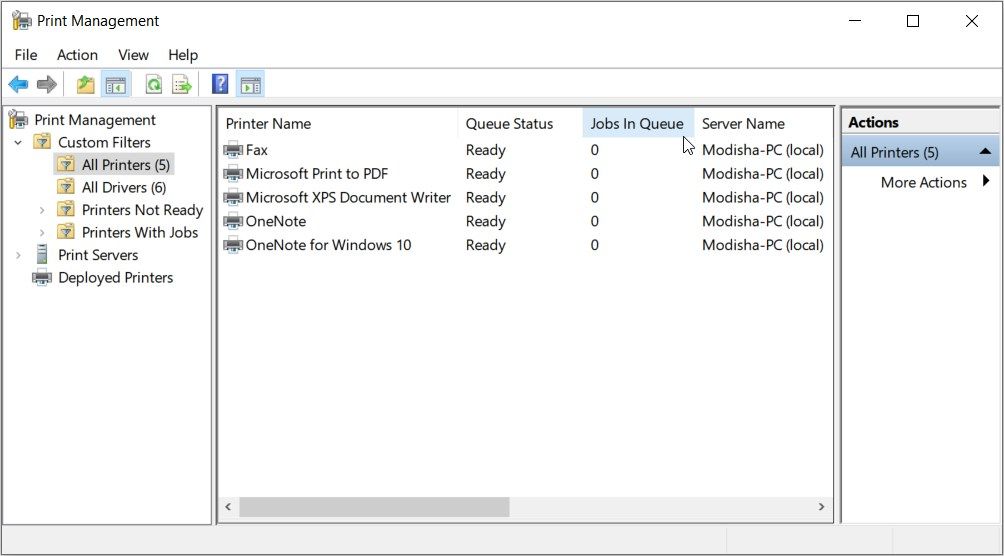
You can check everything about your print jobs in the “Queue Status” and “Jobs In Queue” sections in the middle pane.
If you want to check out specific printers, click the Printers Not Ready or Printers With Jobs folders on the left.
Interestingly, the Print Management app also lets you add and remove print servers. All you need to do is click the Print Servers option on the left and then follow the on-screen steps.
You’ve already discovered how to access the Print Management app using the Run command dialog box. So, let’s check out the various other ways to access this tool.
1. Access the Print Management Tool Using the Start Menu Search Bar

You can access almost any built-in app or third-party program using the Start menu search bar. Now, here’s how you can use the search bar to open the Print Management app:
- Press Win + S or click the Start menu search bar icon on the taskbar.
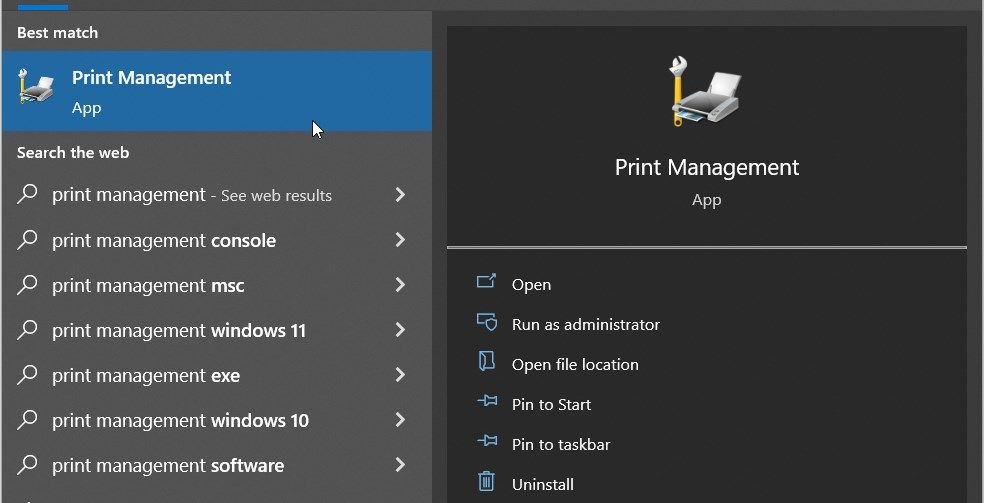
- Type Print Management and then select the Best match.
2. Access the Print Management Tool Using the Start Menu
Alternatively, you can access the Print Management tool via the Start menu. Here are the steps you need to follow:
- Click the Start Menu icon on the taskbar or press the Windows Key.
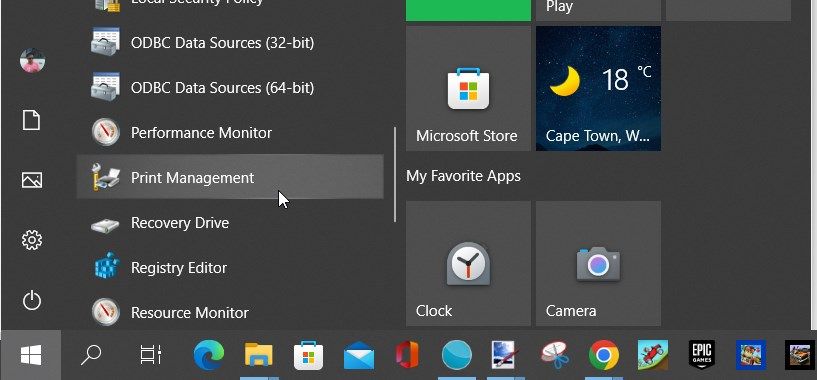
- Locate the Windows Administrative Tools folder from the menu items.
- Locate and select the Print Management app.
3. Access the Print Management Tool Using the Control Panel
In most cases, you’d usually use the Control Panel to troubleshoot various issues on your Windows PC . But besides that, you can also use this tool to access various apps
Let’s check out how you can open the Print Management app using the Control Panel:
- Type Control Panel in the Start menu search bar and select the Best match.
- Click the View by drop-down menu and select Large icons.
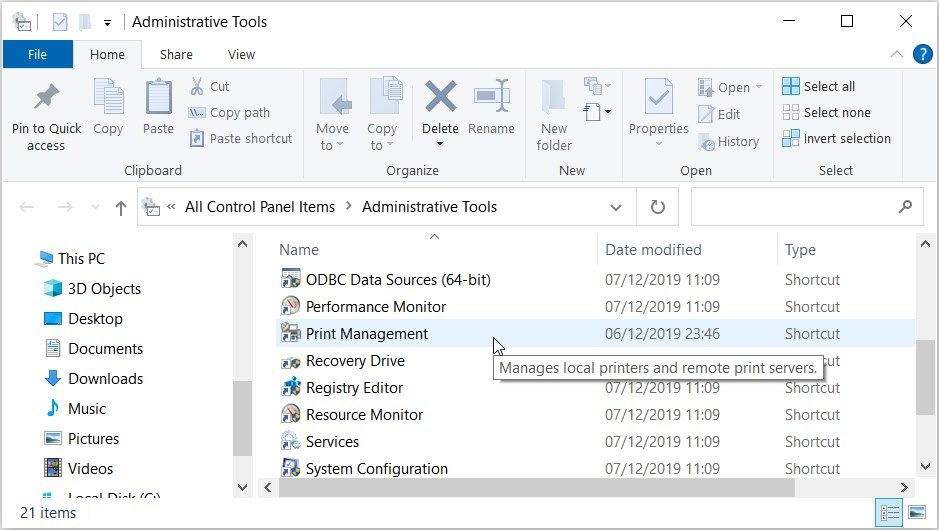
- Select Administrative Tools from the menu items.
- Double-click on the Print Management app to open it.
4. Access the Print Management Tool Using the File Explorer Address Bar
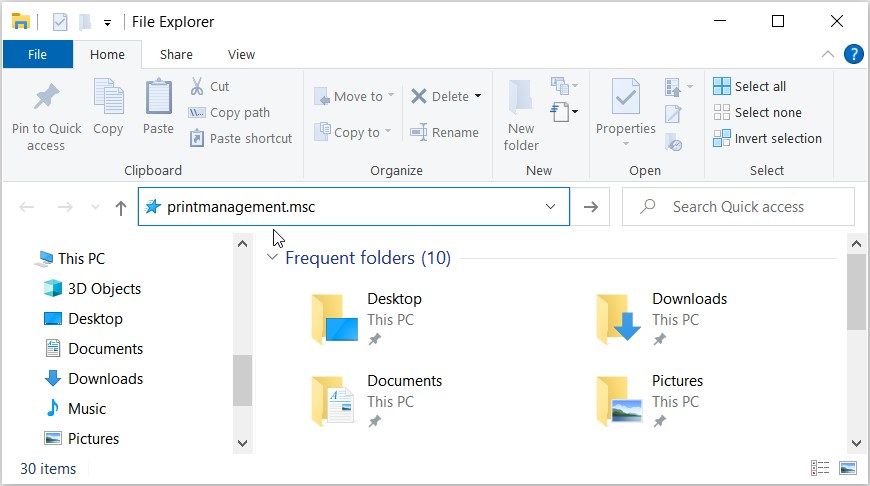
The File Explorer address bar usually displays your folder paths. Interestingly, you can also use the address bar to access most of the apps on your PC.
Here are the steps for accessing the Print Management tool with File Explorer’s address bar:
- Press Win + E to open the Windows File Explorer.
- Type printmanagement.msc in the File Explorer address bar and press Enter.
5. Access the Print Management Tool Using the Task Manager
You probably know that you can use the Task Manager to force close programs or analyze system performance. But did you know that you can use Task Manager to open the apps on your PC?
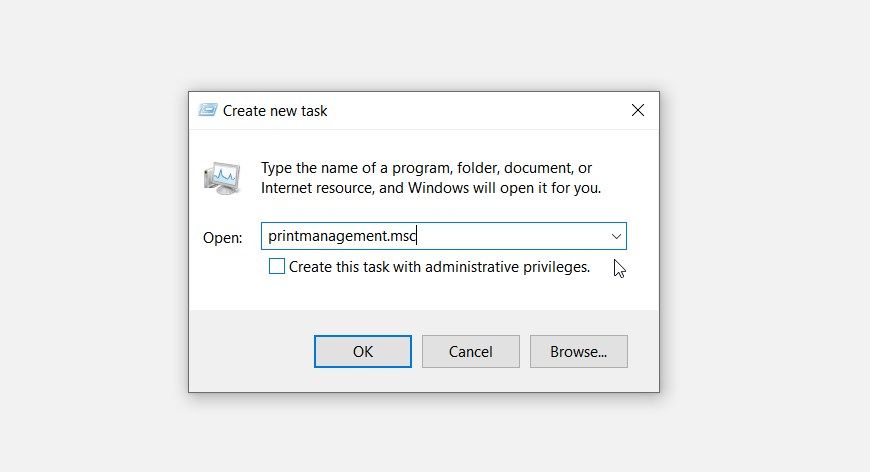
Here are the steps for accessing the Print Management app using the Task Manager:
- Type Task Manager in the Start menu search bar and select the Best match.
- Click the File tab and then select the Run new task option.
- Type printmanagement.msc in the search box and then press OK.
6. Access the Print Management Tool via the System32 Directory
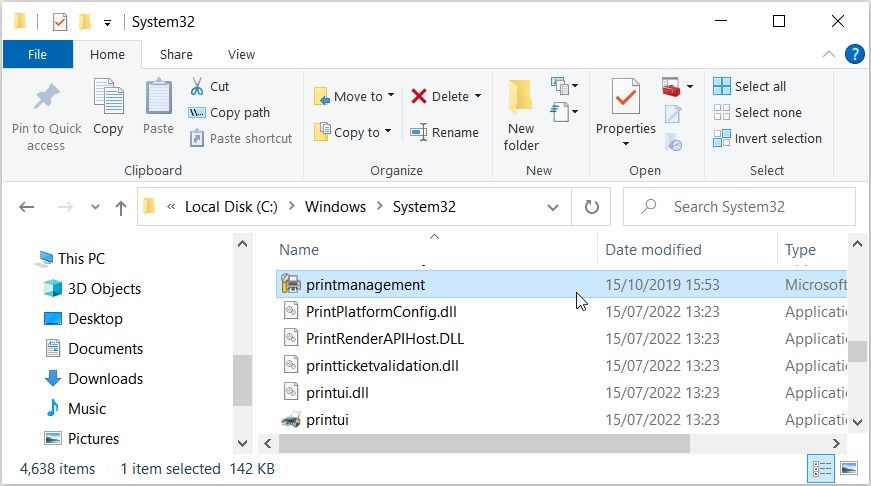
Can’t access the Print Management tool using the methods we’ve covered? Try opening this tool from the Windows System32 folder.
Here are the steps you need to follow:
- Press Win + E to open File Explorer.
- Select This PC on the left.
- Double-click on the Local Disk (C:) option on the right.
- Double-click on the Windows folder.
- Scroll down and double-click on the System32 folder.
- Locate and double-click on the printmanagement file.
7. Access the Print Management Tool Using the Command Prompt or PowerShell

The Command Prompt and PowerShell usually help when it comes to troubleshooting system issues. In fact, you can also use these tools to configure some PC settings.
The best part is that you can also use these tools to access various apps on your device.
Here’s how you can access the Print Management app using the Command Prompt:
- Press Win + R to open the Run command dialog box.
- Type CMD and press Ctrl + Shift + Enter to open an elevated Command Prompt.
- Type the following command and press Enter to access the Print Management app.
printmanagement.msc
Now, let’s check out how you can access the Print Management app using PowerShell:
- Press Win + X to open the Quick Access menu.
- Select Windows PowerShell (Admin) from the options.
- Type the following command and press Enter to access the Print Management app.
printmanagement.msc
8. Access the Print Management Tool Using a Desktop Shortcut

Windows desktop shortcuts make it easy for you to access the apps on your device. So, let’s check out how you can create a desktop shortcut for the Print Management tool:
- Press Win + D to access the desktop.
- When you’re on the desktop, right-click on a blank space and then select New > Shortcut.
- Type %windir%\system32\printmanagement.msc in the “Location” box and click Next to continue.
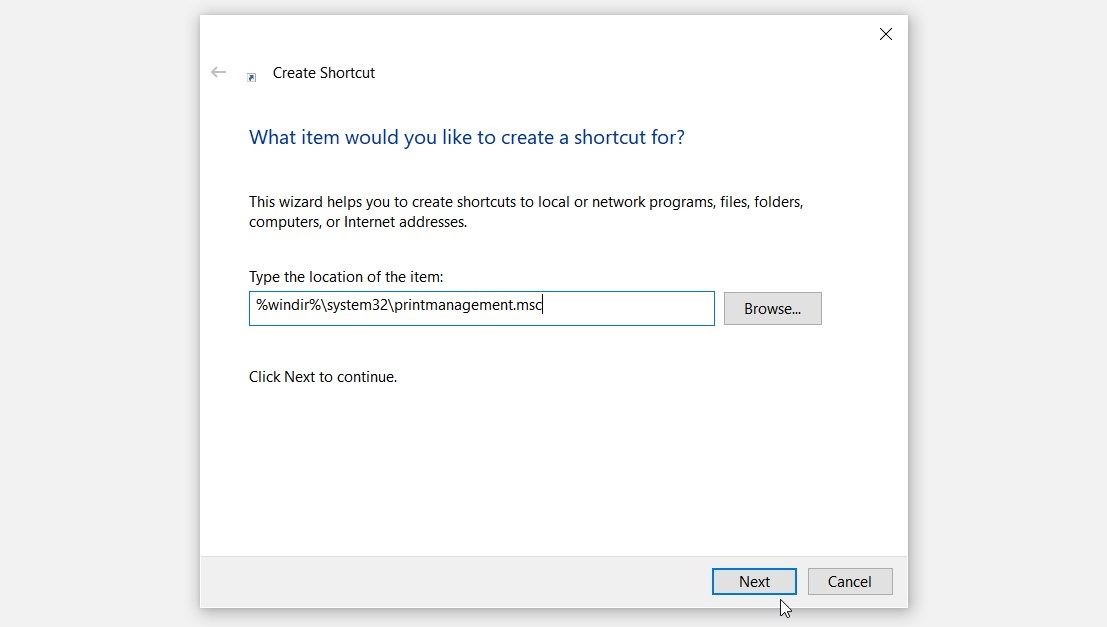
From there, type Print Management Tool in the “Name” box and then click the Finish button.
Now, you can easily access the Print Management tool with this desktop shortcut you’ve created.
Handle Your Print Jobs Easily With the Print Management App
If you regularly print out documents using your Windows device, then you need to use the right tools. For example, you can easily handle your print jobs using the built-in Print Management app.
And if you can’t connect to a printer on your Windows device, there are some solutions you can check out. For example, you could tweak a few settings in the Local Group Policy Editor.
Also read:
- [New] A Guide to Unwavering Visual Captures
- [Updated] Effortless YouTube Video to Text Conversion at No Cost for 2024
- 立即使用Movavi: 無限制的 WMV 至 3GP 免費線上轉換工具
- Addressing Mfc71u.dll Disappearance on PCs
- Comment Ajouter Un Motif De Filigrane Personnalisé À Votre Image Avec Le Logiciel De Retouche Photo Movavi
- Effective Techniques for Cutting Out Superfluous Segments From Your Footage
- Effortless SD Card Duplication for Windows 11 Users - A 5-Stage Process
- In 2024, Beyond Basics Professional Tips From Vida's Features
- Kostenlose Konvertierung Von WMV in MP4 Mit Movavi Online Tool - Effizientes Werkzeug Für Videokonverter
- Latest Intel Integrated Graphics Drivers for Windows Operating Systems: 10/11 Updates Available
- Navigating Video Aspect Ratios in YouTube Platform for 2024
- New 2024 Approved Take Your Videos to the Next Level OS X Mavericks Editing Tips
- Quick Guide to Downsizing Images on Mac Computers with Three Simple Methods
- Trasforma File M4A in Formato OGG Liberamente On-Line - Convertitore Gratuito Di Movavi
- 무료 OGG 파일을 MP3로 자유롭게 전환하기: 모바일 친화적 MP3 프로세스를 위한 Movavi
- Title: How to Harness the Power of Windows Print Management Console
- Author: Richard
- Created at : 2024-11-25 17:13:40
- Updated at : 2024-11-27 17:47:42
- Link: https://win11-tips.techidaily.com/how-to-harness-the-power-of-windows-print-management-console/
- License: This work is licensed under CC BY-NC-SA 4.0.