How To Revive Windows 11'S Sluggish Search Bar on the Settings Screen

How To Revive Windows 11’S Sluggish Search Bar on the Settings Screen
Windows 11 Settings app is stuffed with plenty of control options. And there are high chances that you might get lost in so many options. In such scenarios, the Search strip in the Settings app comes in handy, as it helps you find the exact control quickly in the Settings app.
But what if the Search is not working in the Settings app? In this article, we are putting together a list of fixes you can try when Search is not working in Windows 11 Settings app.
Disclaimer: This post includes affiliate links
If you click on a link and make a purchase, I may receive a commission at no extra cost to you.
1. Restart Your Device
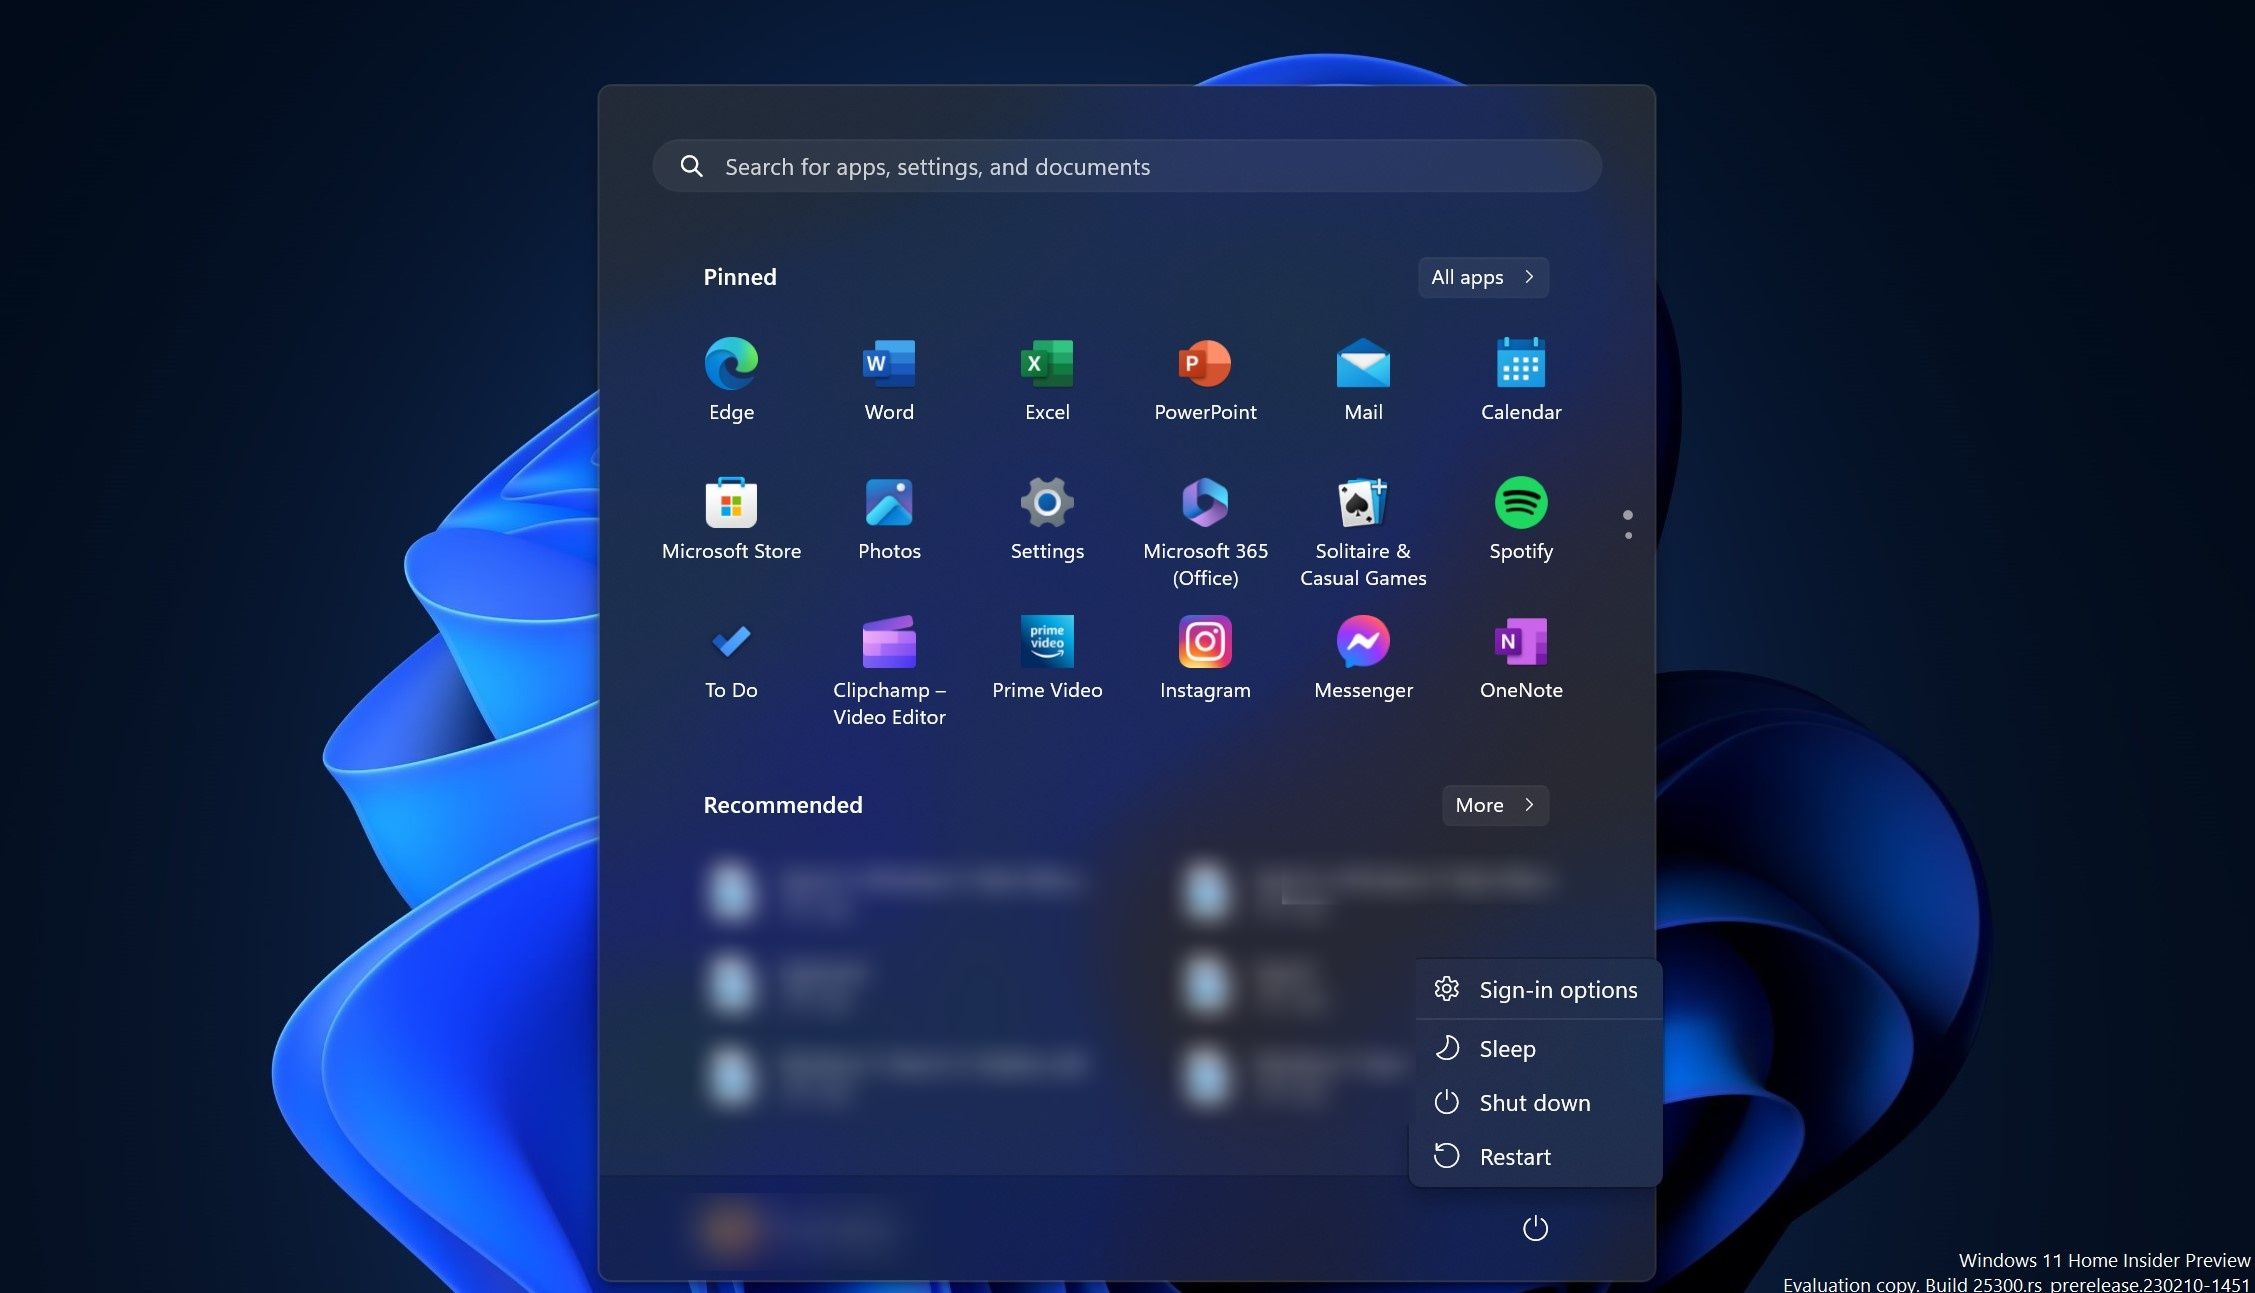
A restart can fix many issues that are plaguing your system. When you restart your PC, you are essentially instructing it to start with a clean slate, leaving behind issues that might be causing trouble. Restarting your PC can also fix the Search issue in the Settings app.
However, if your PC frequently requires a restart to fix this issue, the underlying problem affecting the Search feature in the Settings app persists. In that case, you should look for a more robust solution.
2. Install All the Latest Windows Updates
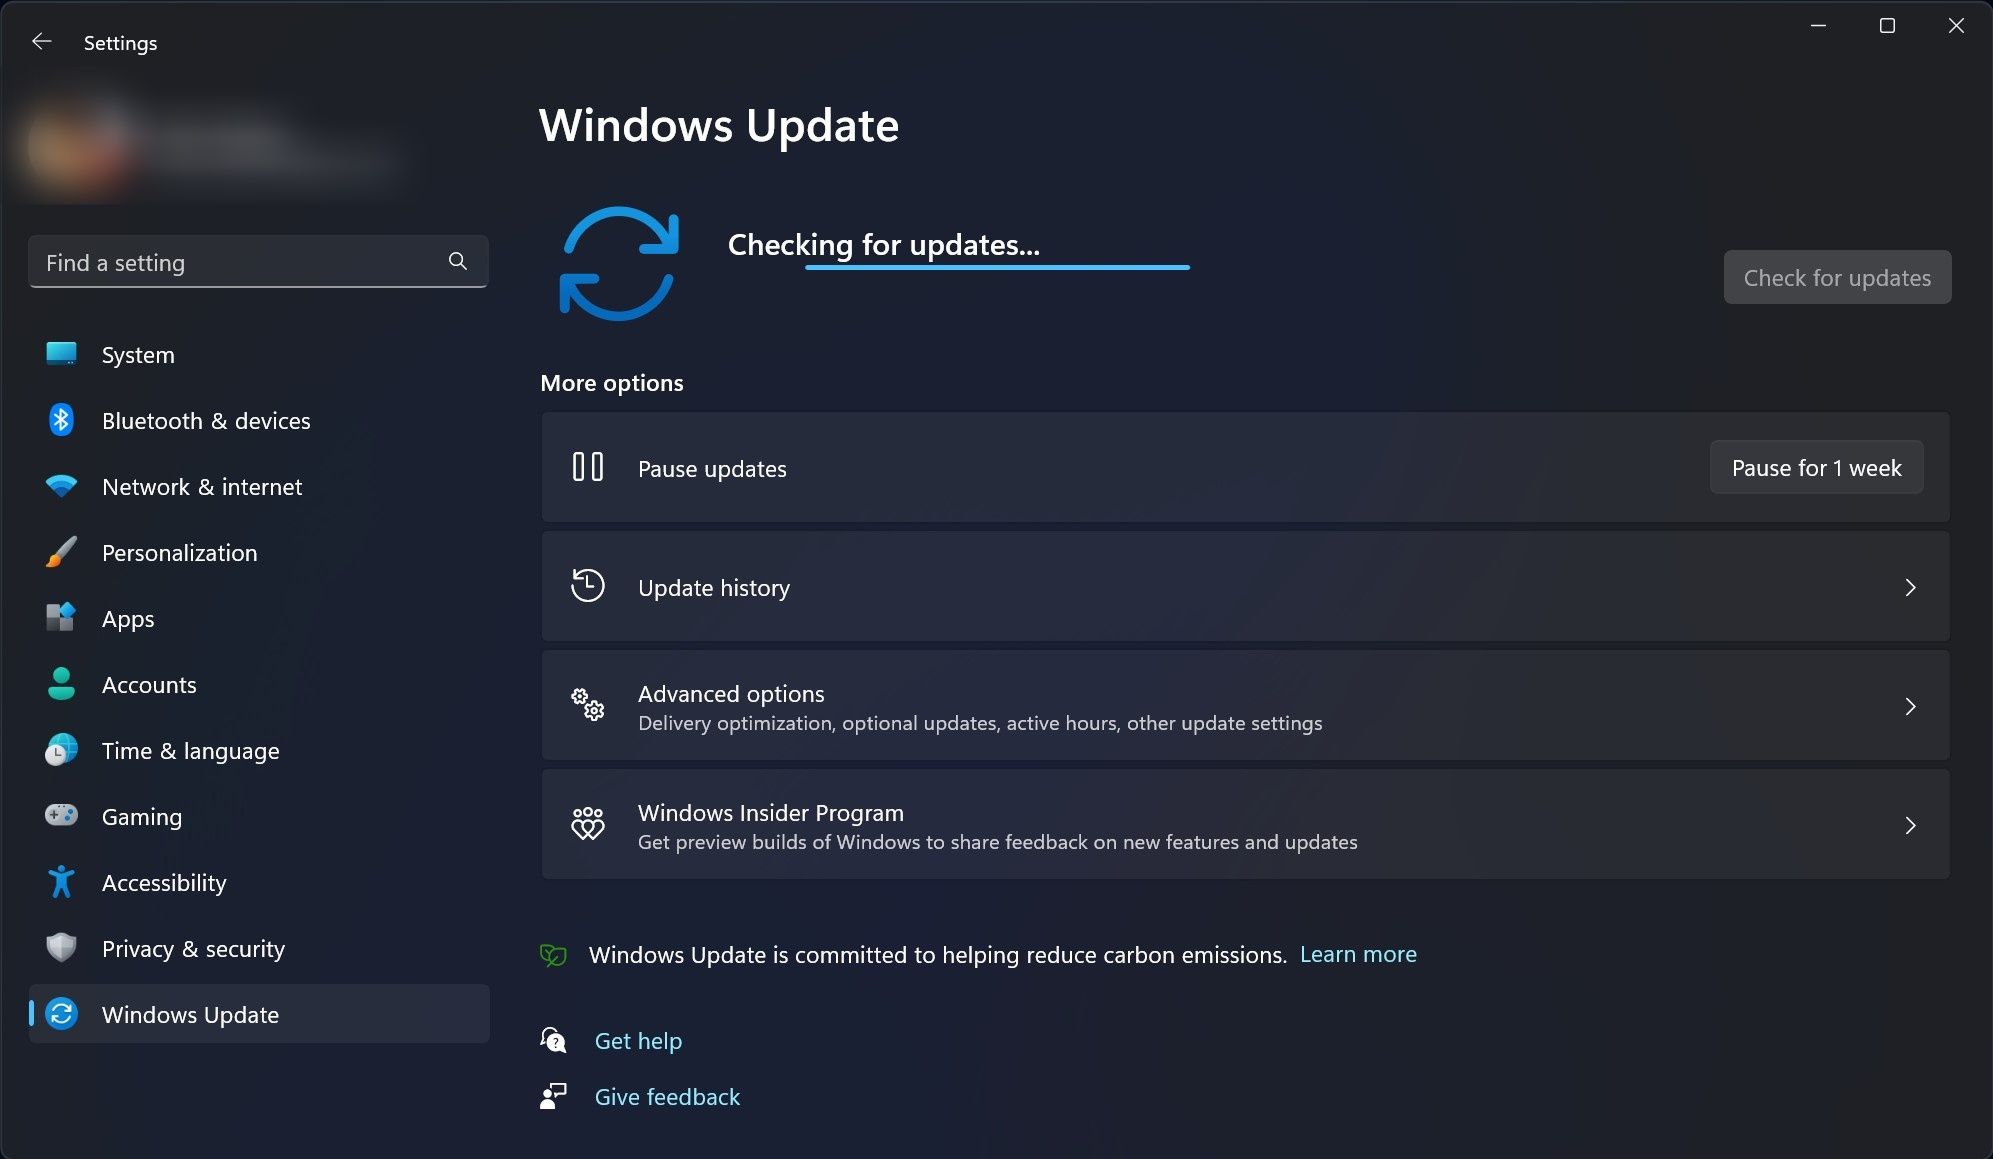
Besides new features, software updates are meant to improve performance by fixing issues impacting your PC. While it can happen to anyone, a dysfunctional Search can be pretty common if you are running a Windows 11 Insider build. Either way, if you are seeing a software update on theWindows Update page in the Settings app, you should install it to see if it fixes the issue.
If you’re not sure how to do this, check outhow to install Windows 11 updates for more info.
3. Run the Search and Indexing Troubleshooter
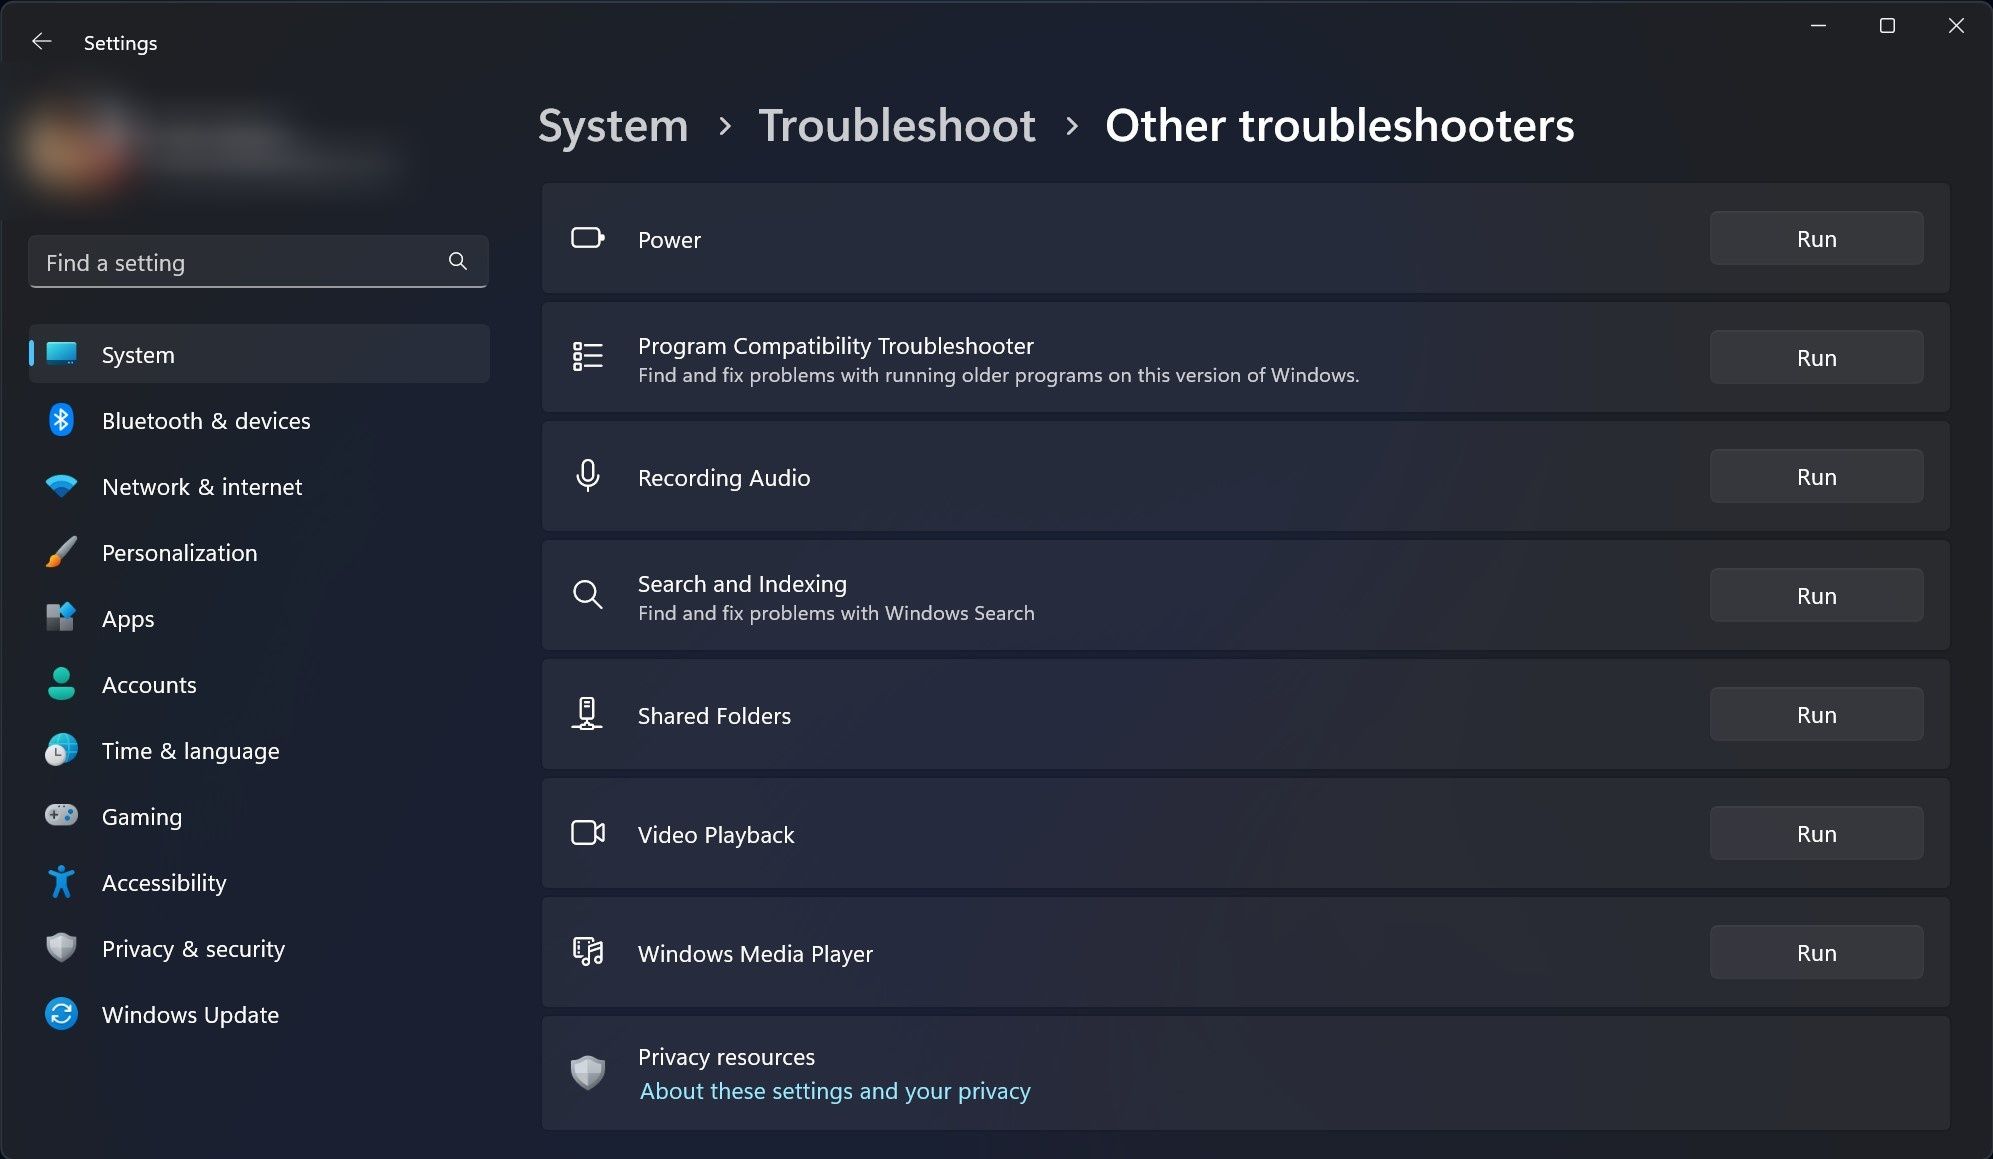
Search indexing is the process in which your PC looks at files, folders, and other content that are there in the system. Getting errors while searching for specific settings could be the result of the malfunctioning of the Search indexing. If the above solutions do not fix the Search issue, you should run this troubleshooter from the Settings app. You can run it by following the below steps:
- Open theSettings app by pressingWin + I on your keyboard.
- Go toSystem >Troubleshoot >Other troubleshooters .
- Scroll down until you findSearch and Indexing .
- ClickRun , which is on the right side ofSearch and Indexing .
The troubleshooter will look for the root cause of the issue and offer you solutions. Now, follow the fixes it recommends and see if the problem is gone.
4. Reset the Settings App
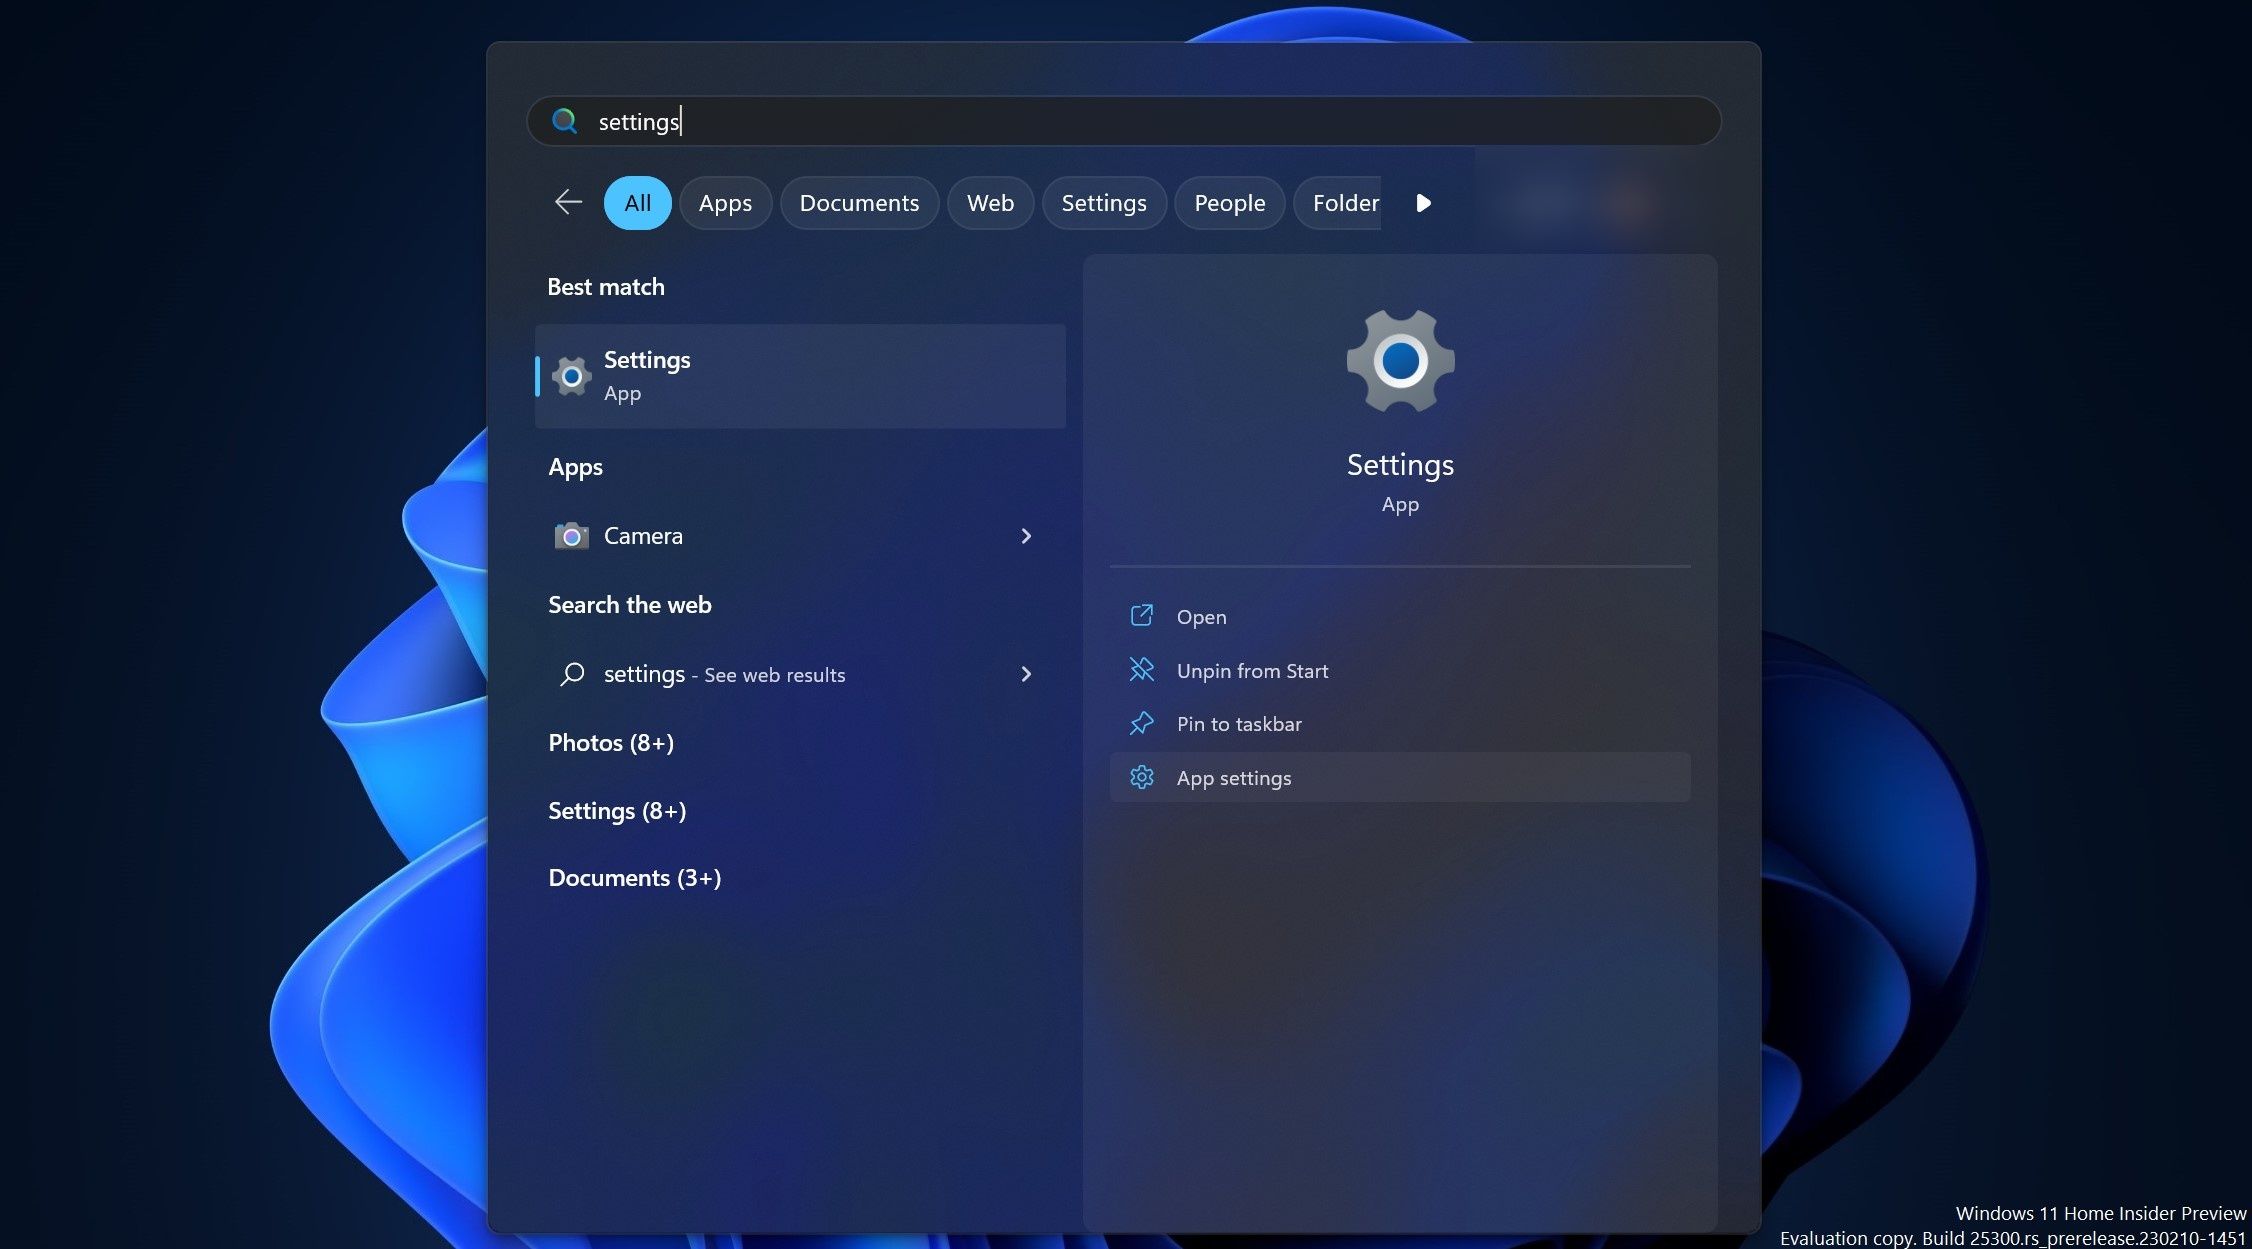
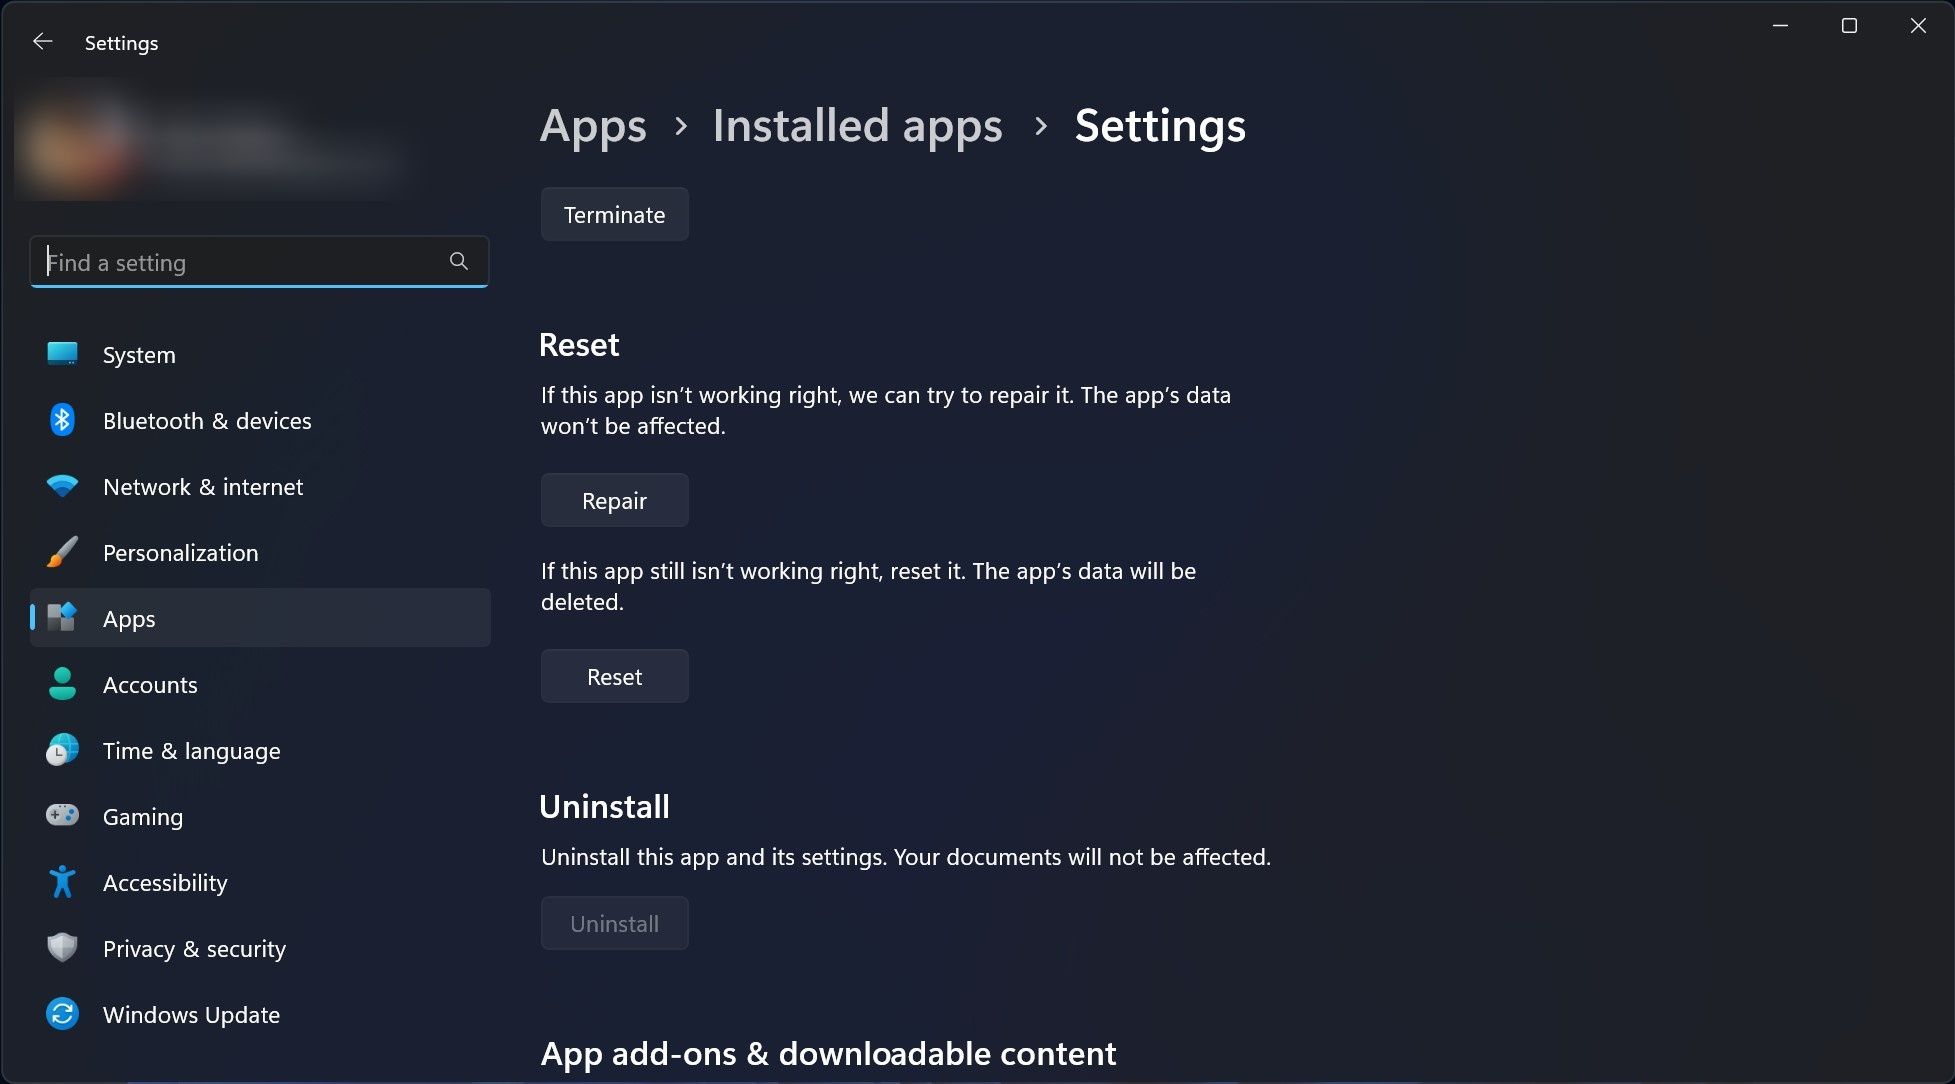
You can troubleshoot whatever is causing the Search issue in the Settings app by resetting or repairing it. A reset will take the Settings app to a normal state, though the app data will be deleted. On the other hand, if you repair the app, your system will look for what’s causing the problem and try to fix it without deleting app data.
To reset or repair the Settings app, follow the below steps:
- Click the Start icon and type “Settings.”
- Right-click onSettings , and then clickApp settings .

- Scroll the page down until you see theReset option.
Under theReset option, you will seeRepair andReset . Try repairing the app first, as it will not delete anything. However, if repairing does not work, you should try theReset option.
5. Use Commands in PowerShell to Reset Settings App
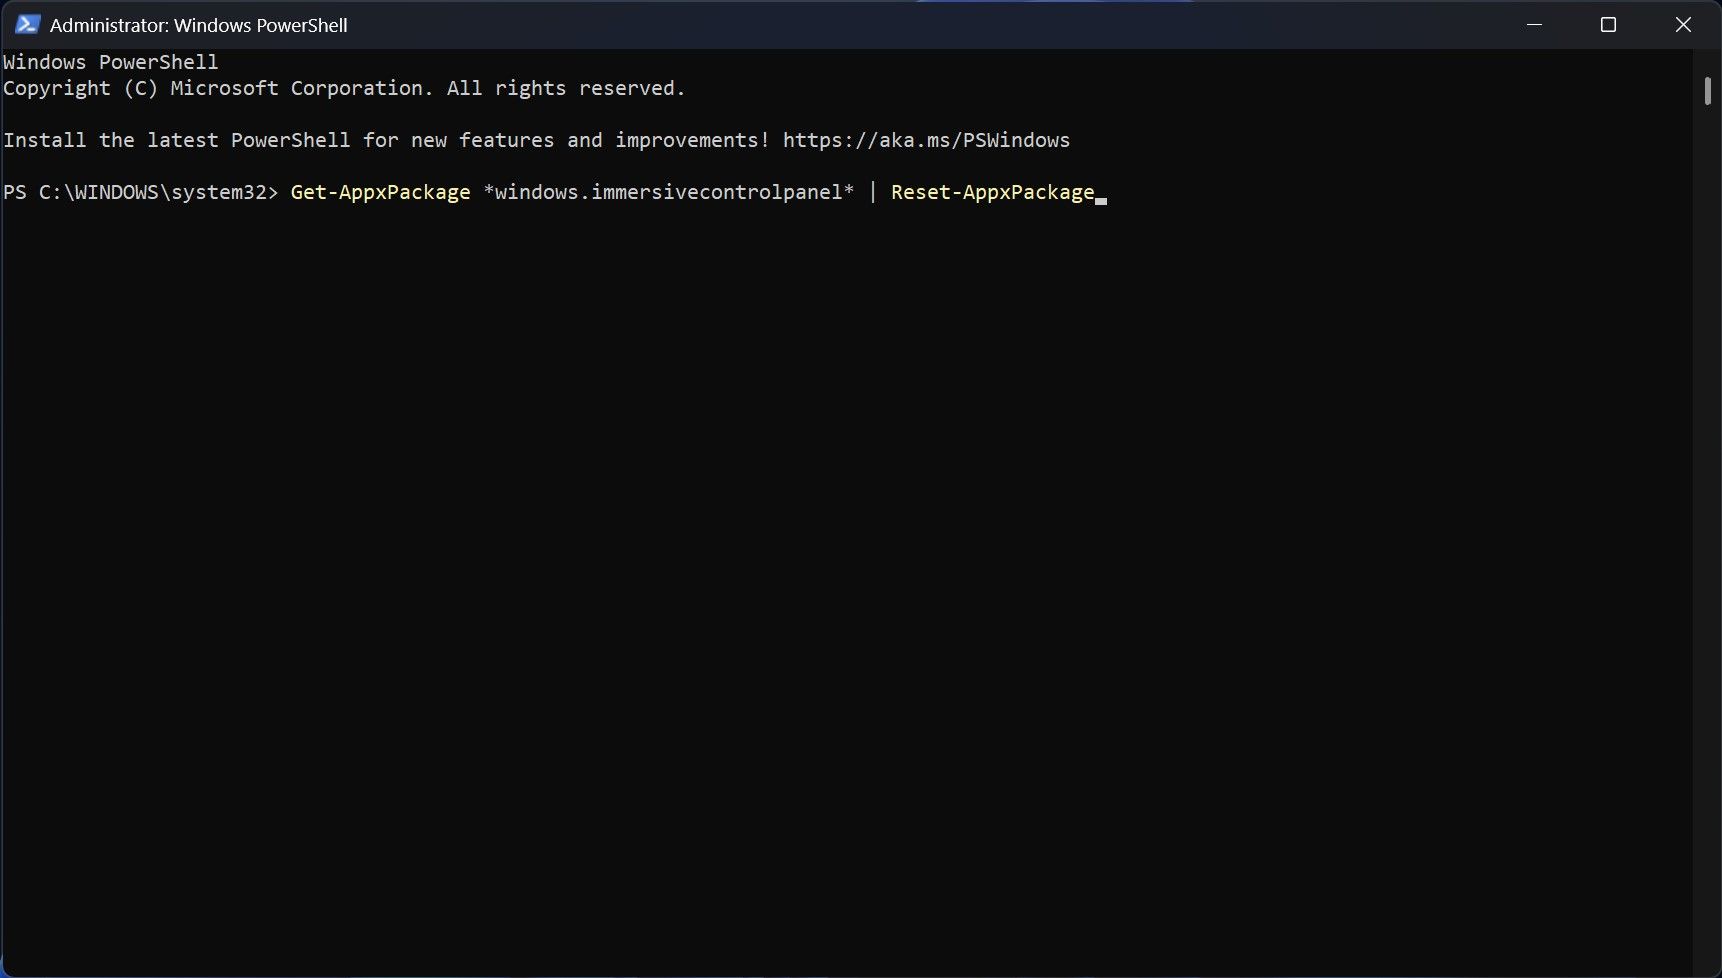
PowerShell in Windows 11 is a powerful tool that helps you control your PC from a command-line interface. One of the things you can do using PowerShell is reset what’s causing the issue to its original setting.
PowerShell can also reset the Settings app to its original state. To reset the app,open Windows PowerShell as an Administrator , copy and paste the below command on PowerShell, and then pressEnter :
Get-AppxPackage *windows.immersivecontrolpanel* | Reset-AppxPackage
It will reset the Settings app and take it back to its default state, which means you can find settings quickly by searching in the app.
The Windows Explorer Search Strip, Restored
After following the above steps, the Settings app’s Search functionality should return to normal, providing you with desired results. However, the Search in Settings app can become dysfunctional again in the future, and if it does, you should try fixing it again by following the methods mentioned above.
Also read:
- [New] 2024 Approved 2023'S Must-Have TikTok Items Available on Amazon
- [Updated] Revolutionary Tools for Next-Gen Streaming Experience for 2024
- [Updated] Windows 11 Unveiled Pro-Level Hacks and Tips for 2024
- 2024 Approved From Standard to Stunning Applying Filters in Zoom Step-by-Step
- A Practical Approach to Using Windows 11 Calendar
- A Step-By-Step Process for Local Llama 2 Setup
- Adapt Calc App for Night-Time Viewing: Dark Mode Tutorial
- Addressing Inactive Windows System Voices
- Comment Convertir Et Transférer Des Vidéos VHS en Format DVD Sur Votre Ordinateur ?
- How to Change the Lock Screen and Screen Saver Timeout Settings on Windows
- Steps to Rectify Windows 11 Error Code 22 Lockout
- Storage Galore Selecting Top PS5 HDDs/SSDs
- Updated In 2024, S Best Game Capture Methods Simple and Effective
- Win Over Controller Woes: A Guide to Steam Detection
- Title: How To Revive Windows 11'S Sluggish Search Bar on the Settings Screen
- Author: Richard
- Created at : 2024-10-08 00:40:05
- Updated at : 2024-10-08 16:36:46
- Link: https://win11-tips.techidaily.com/how-to-revive-windows-11s-sluggish-search-bar-on-the-settings-screen/
- License: This work is licensed under CC BY-NC-SA 4.0.
