How to Solve the 'Disconnected From NVIDIA Experience' Problem in Win 11
How to Solve the ‘Disconnected From NVIDIA Experience’ Problem in Win 11
GeForce Experience is a handy app for gaming optimization. However, some GeForce Experience users have posted on NVIDIA’s forum about the “unable to connect to NVIDIA” error message. Those users see that message when they start GeForce Experience.
GeForce Experience still opens when the “unable to connect to NVIDIA” error occurs. However, users can’t download NVIDIA drivers or utilize other features like ShadowPlay in that software because of this error. As such, here is how you can fix the “unable to connect to NVIDIA” error in Windows 11 and 10.
1. Erase the NSManagedTasks.xml and Restart the NVIDIA Network Service
Users with older GeForce Experience versions have been able to fix the “Unable to connect to NVIDIA” error by deleting an NSManagedTasks.xml file. However, that file doesn’t exist for more recent GeForce Experience versions. So, not all users will be able to apply this potential fix.
If you’re utilizing older GeForce Experience software, you might be able to resolve this issue by erasing the NSManagedTasks.xml file like this:
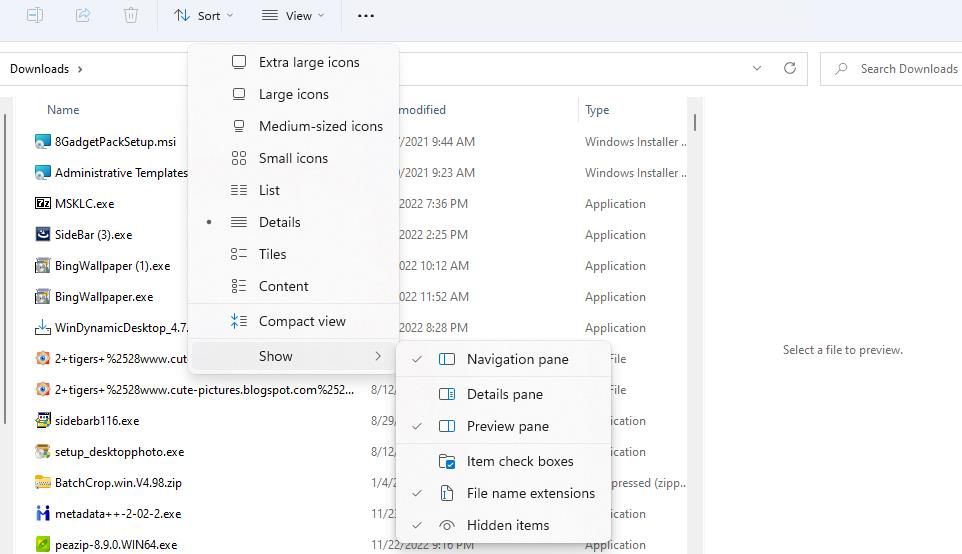
- To view File Explorer, pressWin + E .
- ClickView >Show >Hidden Items in Windows 11 File Explorer. In Windows 10 File Explorer, you’ll need to select theHidden Items checkbox on theView tab.

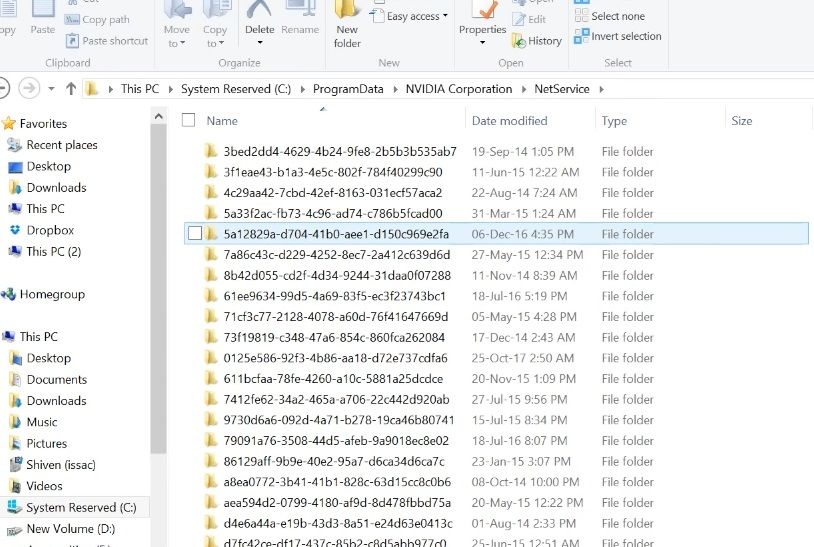
- Clear the current folder path in File Explorer’s address bar. Then input this NetService folder path and hitEnter :
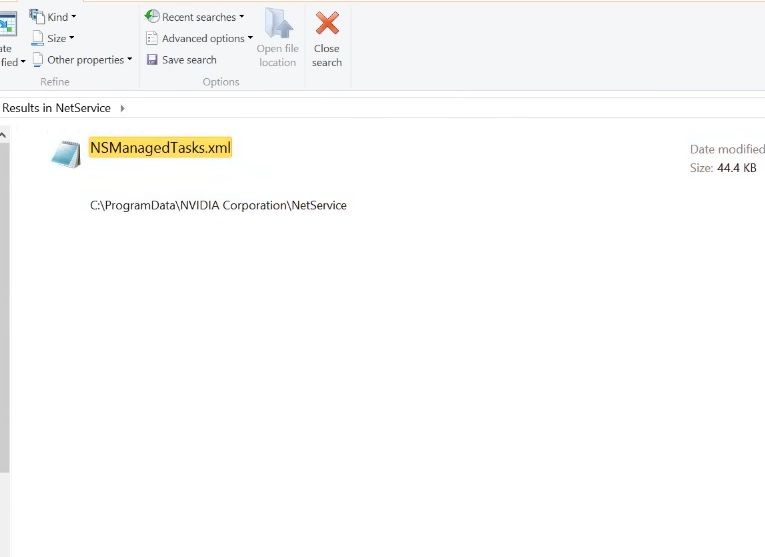
C:\ProgramData\Nvidia Corporation\NetService\ - InputNSManagedTasks.xml in Explorer’s search box to find that file within the folder.
- Right-click theNSManagedTasks.xml file and select itsDelete option (the trash can in Windows 11).
Once that’s done, it’s time to restart the NVIDIA network service.
- Bring up the Task Manager tool, which has a usefulCtrl +Shift +Esc hotkey for quick access.
- Select Task Manager’sDetails tab.
- Then find and select theNvStreamNetworkService.exe (NVIDIA Network Service) there.
- ClickEnd Task to stop the service.
- Exit the Task Manager window.
- Next, click aSearch box orType here to search button on the Windows taskbar.
- Enter aservices search phrase.
- ClickServices inside the search tool’s results.
- Then double-click theNVIDIA Network Service to access its options.
- SelectStart for theNVIDIA Network Service to restart it.
- Press the NVIDIA Network Service Properties window’sApply >OK buttons.

Now launch GeForce Experience to see if the “unable to connect” error persists.
If you can’t find a NetService folder or NSManagedTasks.xml file, then this isn’t the “Unable to connect” resolution for you. Proceed with the other potential fixes below.

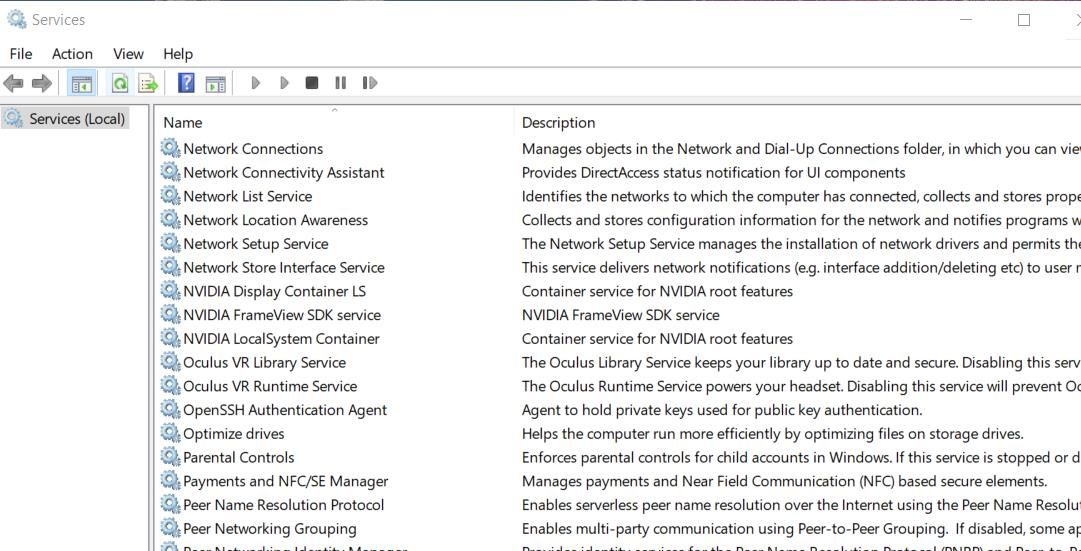
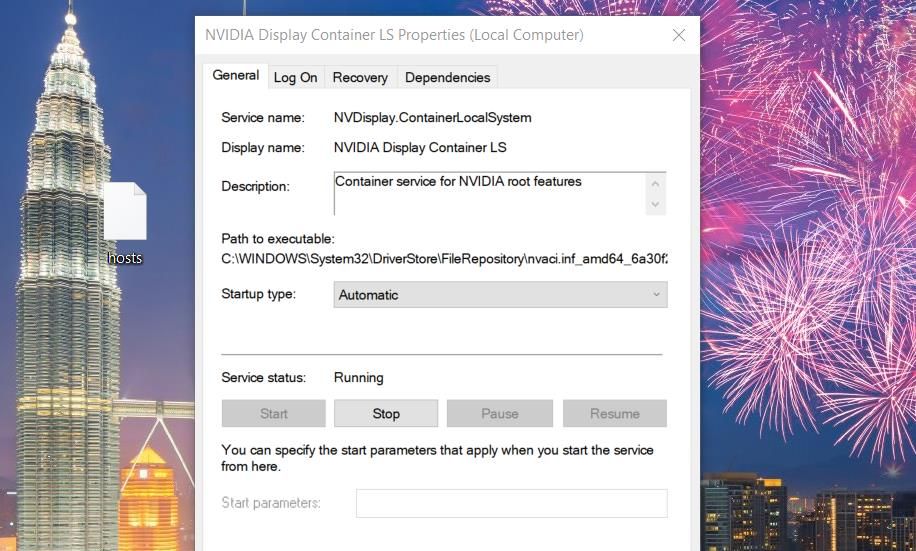
2. Run the Relevant NVIDIA Services
Some GeForce Experience users have confirmed they’ve been able to fix the Unable to connect to NVIDIA” error by starting NVIDIA services. Thus, this error can seemingly occur because of disabled NVIDIA services.
Here is how you can enable and run NVIDIA services in Windows 10 and 11:
- Open Services as instructed in steps 11-13 of the first resolution above.
- Then double-click an NVIDIA service in the window to open its properties window.
- Select theStart option in the properties window if the service isn’t running (stopped).
- ClickApply andOK to save settings and exit the service’s window.
- Repeat those steps for all NVIDIA services you can find.
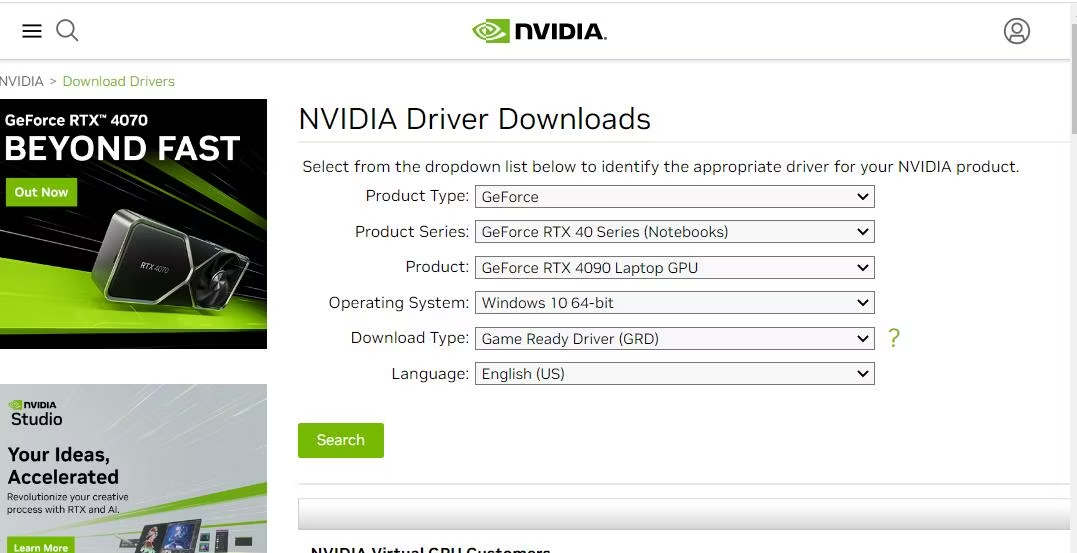
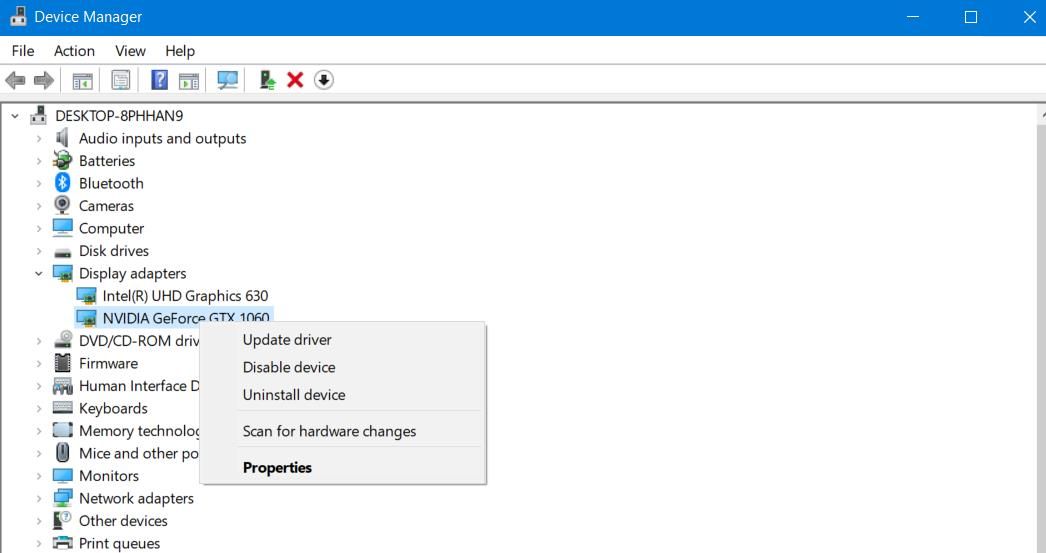
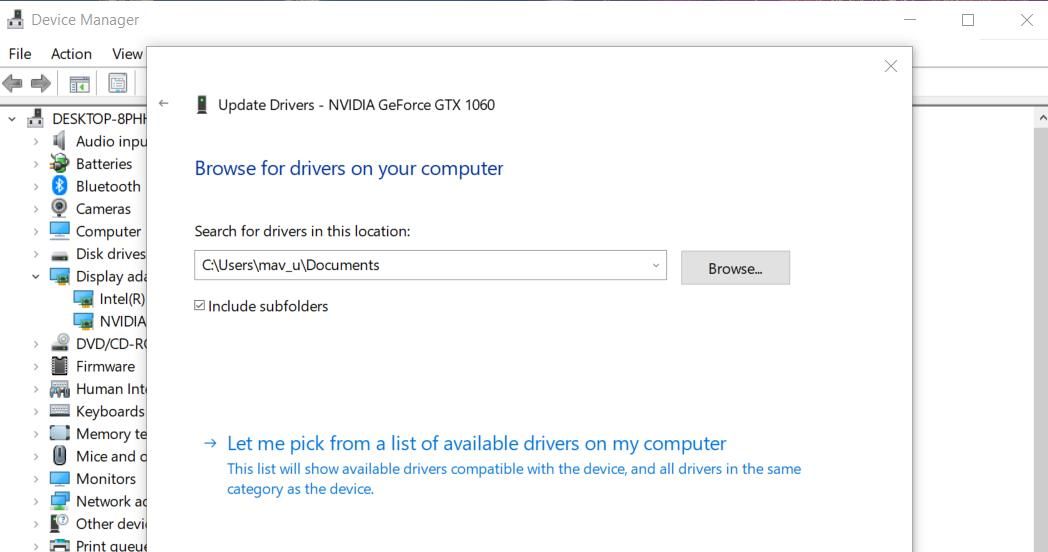
3. Manually Update the NVIDIA Graphics Driver With Device Manager
Updating the NVIDIA graphics driver is a potential resolution some users confirm to fix the “Unable to connect” error. However, users can’t update their graphics drivers with GeForce Experience because of the issue. Instead, manually update your NVIDIA GPU’s driver with Device Manager like this:
- Open the NVIDIA driver download website.
- Select your graphics card model and PC OS in the drop-down menus and clickSearch .
- SelectDownload to obtain the NVIDIA driver pack.
- Then open Device Manager, which you can access by right-clicking yourStart button in Windows and selecting the shortcut for that tool. You can also use one of the other ways to open the Device Manager .
- Next, click the arrow beside theDisplay adapters to view that category.
- Right-click the NVIDIA GPU to selectUpdate driver on the context menu.
- SelectBrowse my computer to locate a driver package.
- ClickBrowse to select the downloaded driver package.
- SelectNext to install the selected NVIDIA driver.

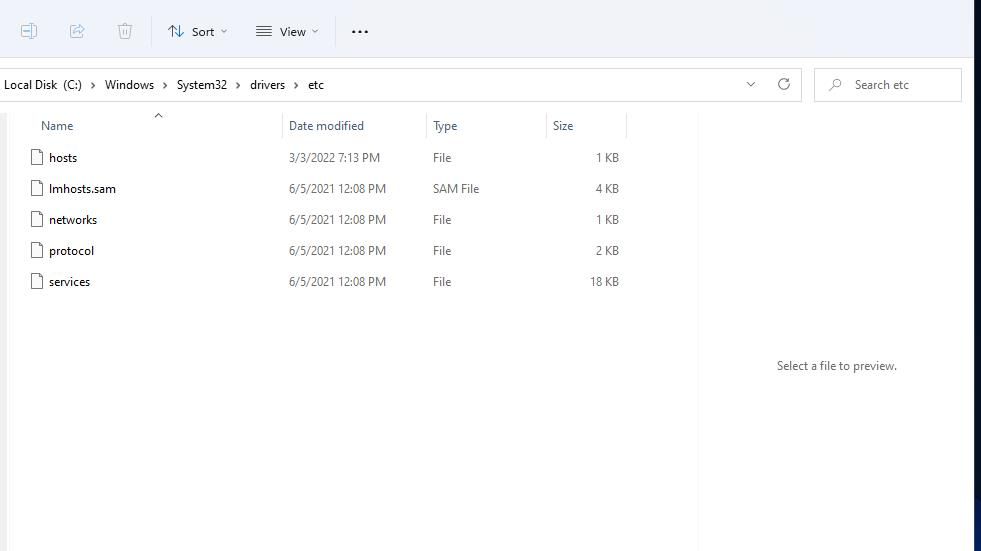
4. Edit the Hosts File
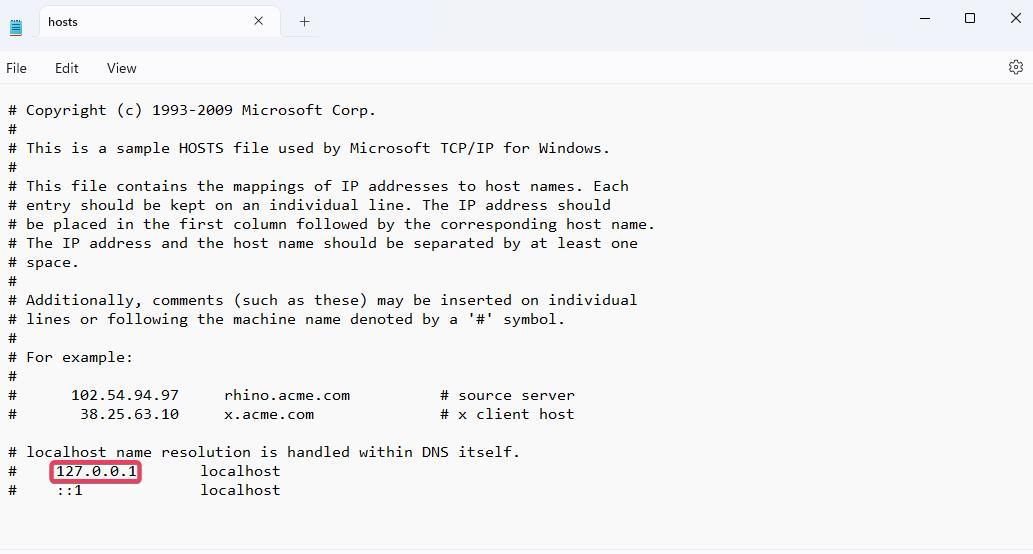
Hosts is a file for mapping domain names. The “Unable to connect to NVIDIA” error occurs when the localhost value in it equals 0.0.0.0. Some GeForce Experience users have fixed the “Unable to connect to NVIDIA” error by changing the localhost value to 127.0.0.1 in the hosts file like this:
- Open File Explorer and input this folder location in the folder address bar:
C:\Windows\System32\drivers\etc - Click thehosts file with the mouse’s right button and selectOpen with .
- Then clickNotepad to view the hosts file in that text editor.
- If the localhost is set to0.0.0.0 , or another value, change it to127.0.0.1 as shown in the image below.
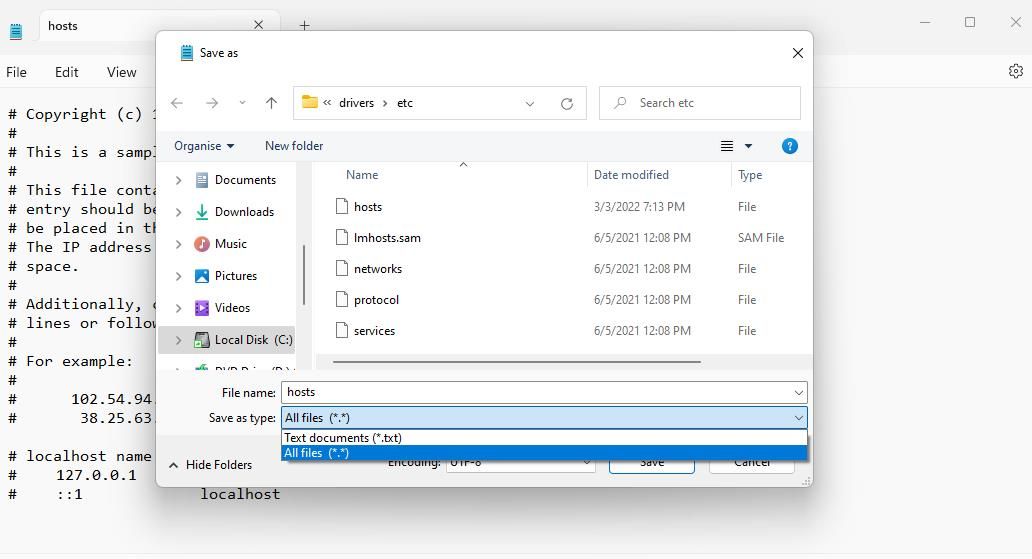
- Then clickFile at the top of Notepad to select aSave option.
- SelectAll Files on the drop-down menu and clickSave .
If you can’t edit hosts because of permission restrictions, copy and paste the file onto the desktop. To do so, right-clickhosts and selectCopy . Then right-click the desktop and selectPaste .
Next, edit and save hosts as outlined above. Copy the edited hosts file on the desktop. Open the etc folder that includes the original hosts file again and press theCtrl +V hotkey. Click theReplace option to overwrite the original file.
 Forex Robotron Basic Package
5. Reinstall GeForce Experience
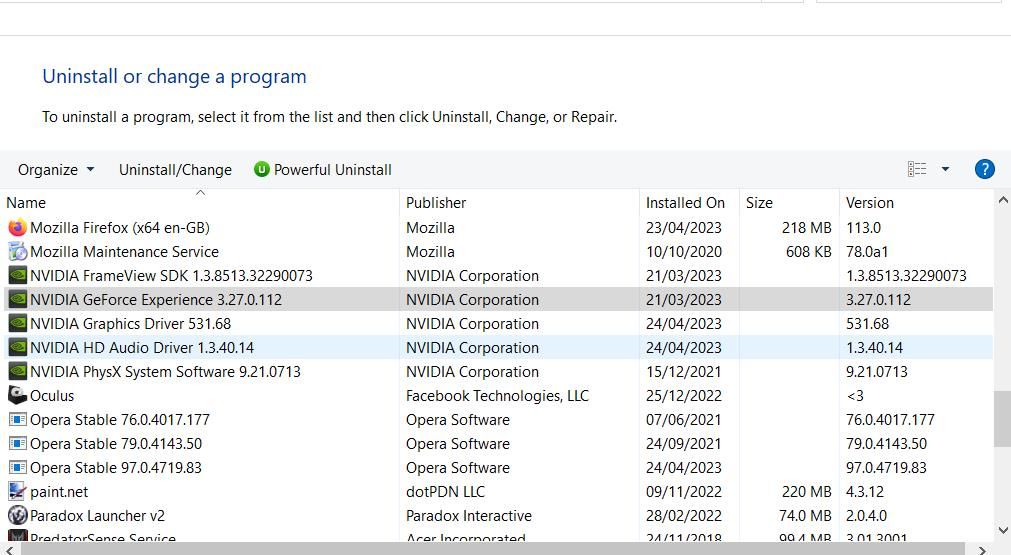
Outdated GeForce Experience software is one of the most common causes of the “Unable to connect to NVIDIA” error. Many users have resolved the issue by uninstalling GeForce Experience and installing the latest version. You can uninstall GeForce Experience within the Control Panel as instructed in this guide to removing Windows software .
Power Tools add-on for Google Sheets, 12-month subscription
When you’ve uninstalled the old software version, open the GeForce website . ClickDownload Now to obtain the setup wizard for the latest GeForce Experience version. Go into File Explorer, open the folder containing the downloaded setup file, and double-clickGeForce_Experience_v3.27.0.112.exe . Then selectAgree and Install within the setup wizard.
Get the “Unable to connect to NVIDIA” Error Sorted
The “unable to connect to NVIDIA” error is an old issue GeForce Experience users have talked about on the NVIDIA forum for many years. A lot of users have been able to fix that issue by applying the potential resolutions outlined above. So, it’s likely one of them will get the same “unable to connect to NVIDIA” error sorted on your Windows PC.
- Title: How to Solve the 'Disconnected From NVIDIA Experience' Problem in Win 11
- Author: Richard
- Created at : 2024-08-16 01:29:26
- Updated at : 2024-08-17 01:29:26
- Link: https://win11-tips.techidaily.com/how-to-solve-the-disconnected-from-nvidia-experience-problem-in-win-11/
- License: This work is licensed under CC BY-NC-SA 4.0.