Implementing Custom Lock Patterns in Windows 11 PCs

Implementing Custom Lock Patterns in Windows 11 PCs
A pattern lock is a login method for securing a device with a preset pattern. It enables you to sign in to a device by inputting a unique pattern for connecting multiple circles. The Meta Quest 2 VR headset is an example of one device for which users must set pattern locks.
Most users secure their Windows PCs with passwords or PINs. However, you can also secure your PC by adding a custom pattern lock with 9Locker or Eusing Maze Lock. This is how you can set up a pattern lock for Windows 10 and 11 with those software packages.
Disclaimer: This post includes affiliate links
If you click on a link and make a purchase, I may receive a commission at no extra cost to you.
How to Add a Custom Pattern Lock With 9Locker
9Locker is freeware software with which you can set a pattern lock for a 3x3 grid. Then you can lock Windows with that pattern by running the software whenever you need to temporarily vacate your PC. This software also has additional features like an alarm and email alerts. You can set up a custom pattern lock with 9Locker as follows:
- Open the 9Locker page on the Softpedia website and download the file.
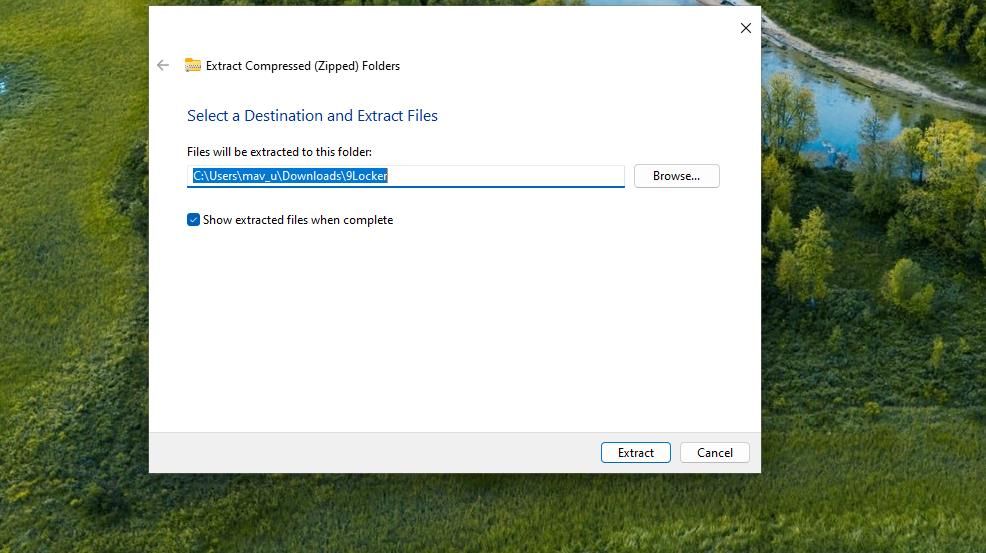
- Next, extract 9Locker’s archive with your favorite method for unzipping ZIP files on Windows .

- Double-click the 9LockerSetup.exe file to bring up the installer.
- Click Next once and select the I accept the terms in the license agreement radio button.
- Then click Next to proceed with installation.
- Press the setup wizard’s Finish button after installing 9Locker.
Now that 9Locker is installed, it’s time to set up a pattern:
- Open the 9Locker window by double-clicking that software’s desktop shortcut.
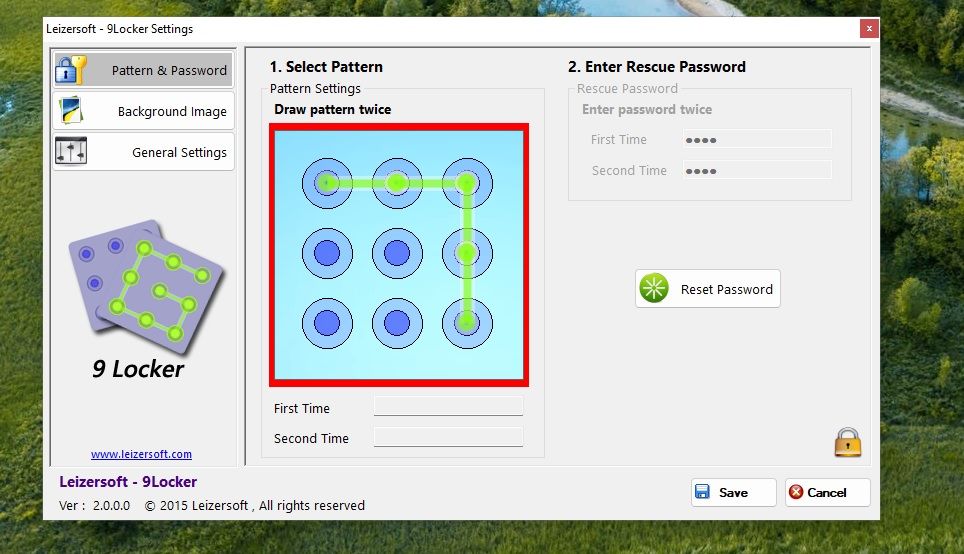
- You’ll be prompted to input a pattern password after launching 9Locker for the first time. Click OK on the First Pattern window to remove the prompt.
- Draw two matching patterns on the 3x3 grid to set a lock.

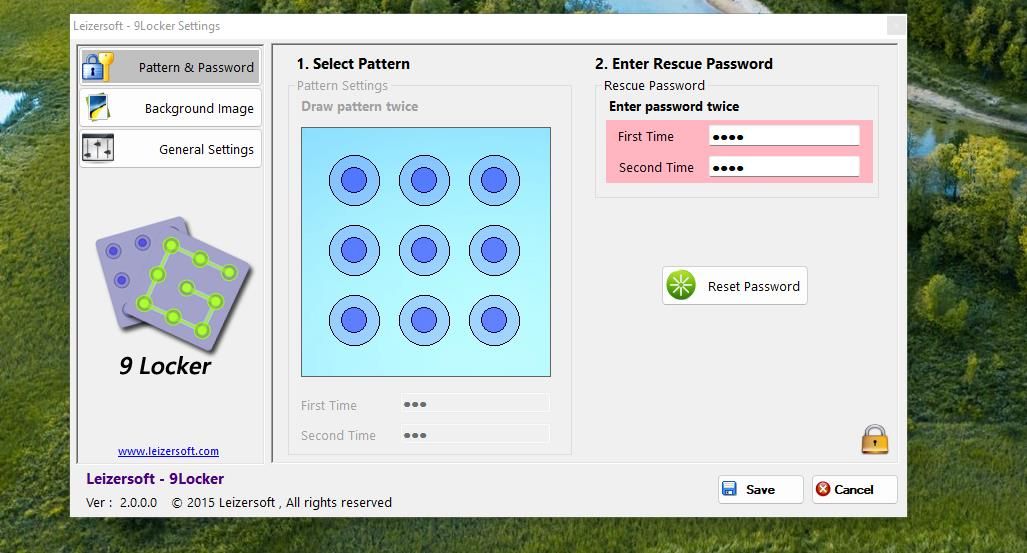
- Click OK on the Rescue Password prompt that pops up.
- Input a matching password within the First Time and Second Time text boxes.

- Click Save to set your new pattern lock.
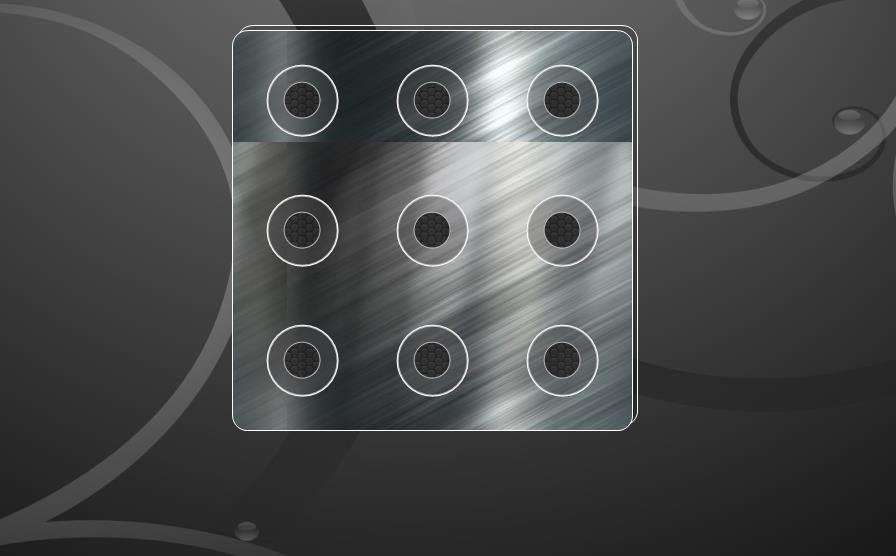
Now you can lock Windows anytime by activating the pattern lock. Double-click the 9Locker desktop shortcut to activate the pattern lock screen. Drag the mouse cursor across the circles on the 3x3 grid while pressing the left button to input the set pattern for unlocking Windows.
How to Customize 9Locker
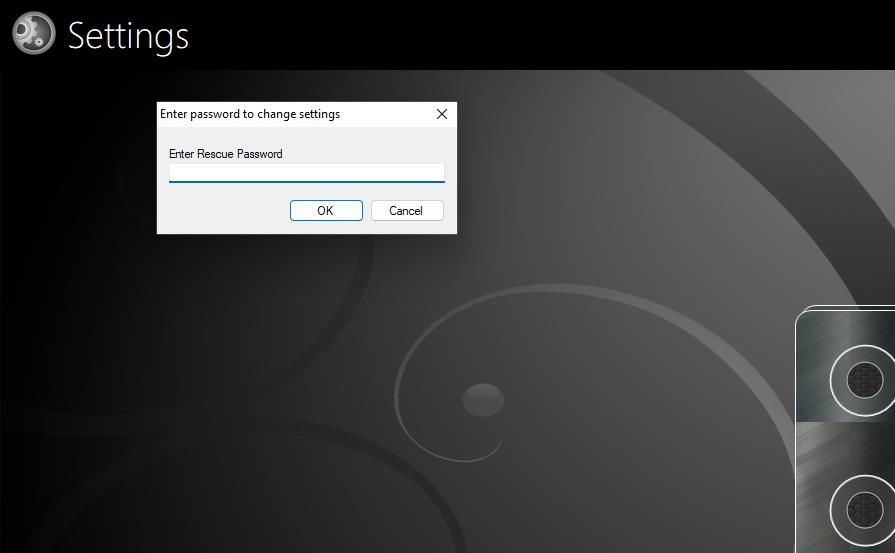
To access the 9Locker settings window, you’ll need to input your rescue password instead. Click Settings at the top left of the pattern lock screen. Input your rescue password and select OK.
You can select a different background image for the pattern lock screen. To do so, click the Background Image tab. Then click Image and choose one of the eight wallpapers for the pattern lock screen. Or you can select a custom background image from another folder.
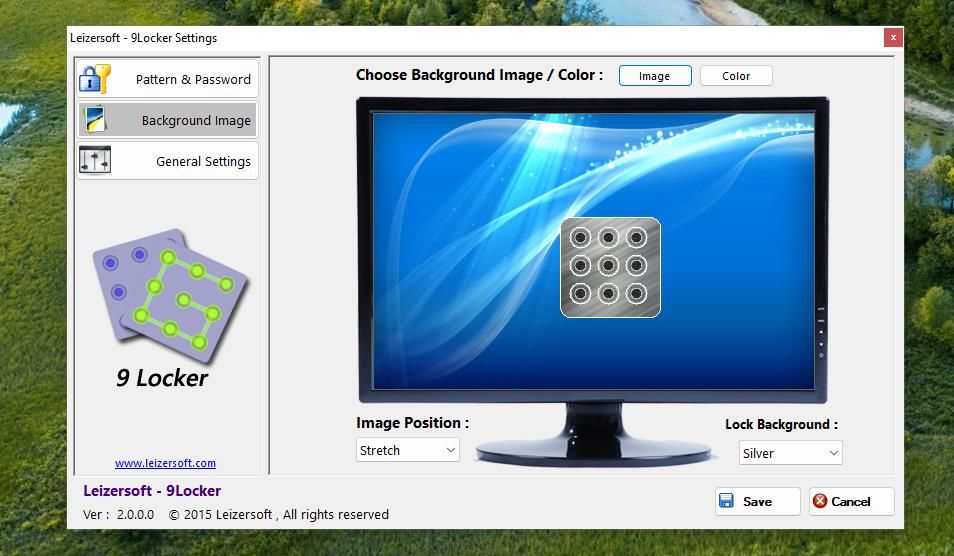
Alternatively, you can set a solid color for the background. Click the Color button on the Background image tab. Then choose a color on the palette and select OK.
9Locker also has an alarm that’s set to go off after three failed pattern logins by default. There aren’t any sound settings for that alarm. However, you can disable it by deselecting the Play Alarm Sound checkbox on the General Settings tab. Or change the number of retries that set off that alarm by inputting a different value in the After box.
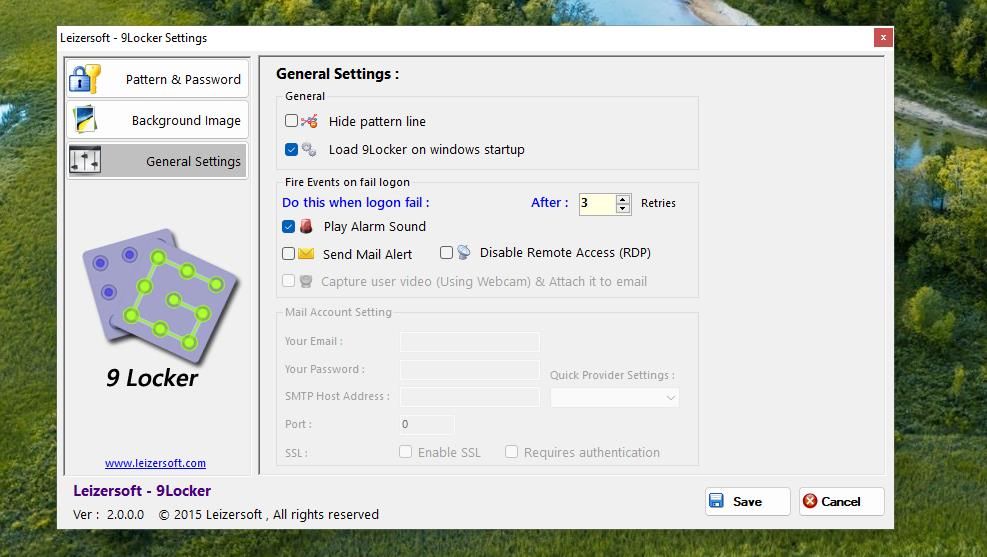
9Locker’s pattern lock screen should appear automatically with the Load 9Locker on Windows startup checkbox selected on the General Settings tab. However, I needed to add 9Locker to the startup folder to get the program to run at startup. If you need to do the same, check out how to utilize the Windows startup folder .
How to Add a Custom Patter Lock With Eusing Maze Lock
Eusing Maze Lock is an alternative to 9Locker that enables you to set a pattern lock on your Windows 11/10 PC much the same. However, this software also enables you to set locks on bigger 4x4 and 5x5 grids. This is how you can set up a pattern lock for your PC with Eusing Maze Lock:
- Bring up the Eusing download page and download the executable.
- Double-click on the EMLSetup.exe file.
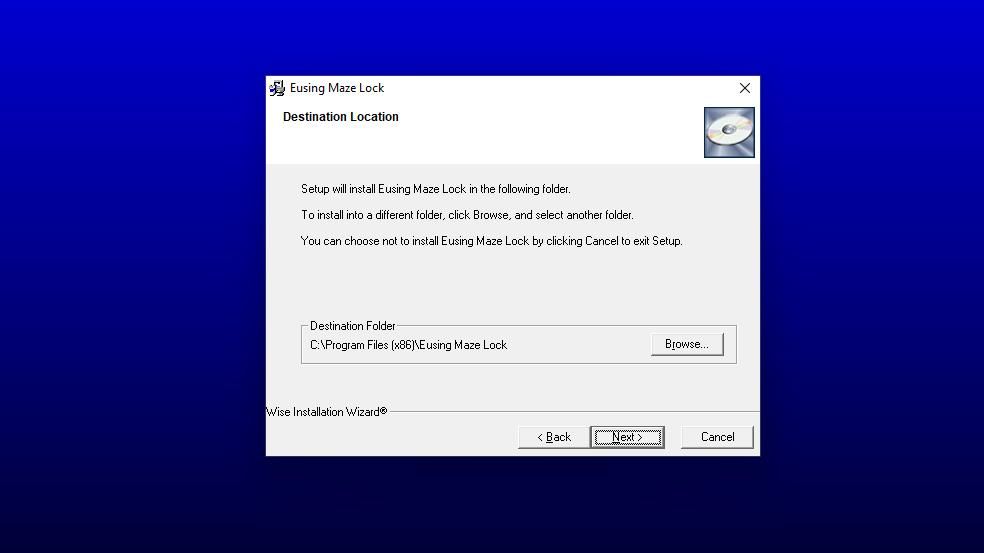
- Click Next three times to install Eusing Maze Lock in a default Program Files directory.

- Press the Finish button with the Launch Eusing Maze Lock checkbox selected.
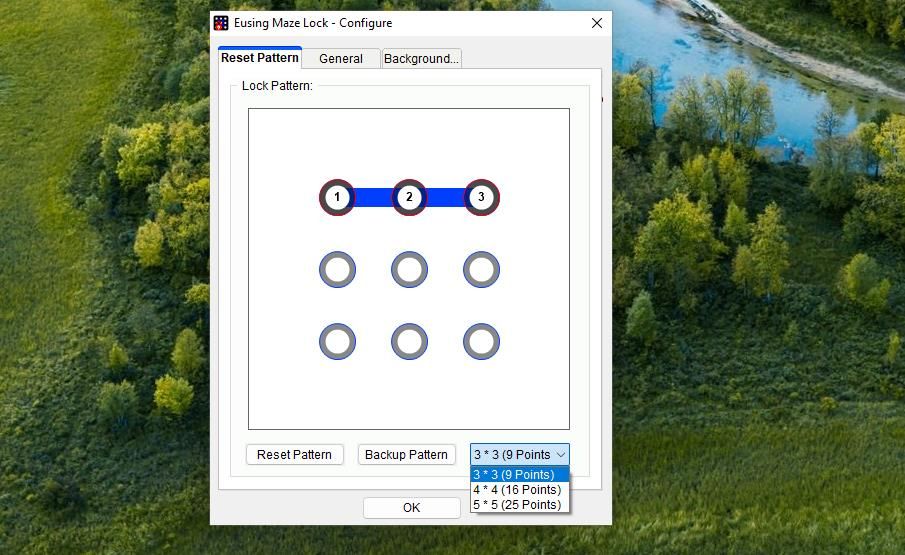
An Eusing Maze Lock prompt for unlocking the preset pattern lock will appear. Click OK to close that prompt and bring up a configuration window.
Press the Reset Pattern button.
Select a 3 * 3, 4 * 4, or 5 * 5 pattern grid size on the drop-down menu.

Hold the left mouse button and drag your cursor over the circles to set a lock pattern.
Click OK on the reset lock pattern prompt.
Select Yes when asked to back up the lock pattern. Then select a backup folder and click Save.
Click OK on the Eusing Maze Lock window.
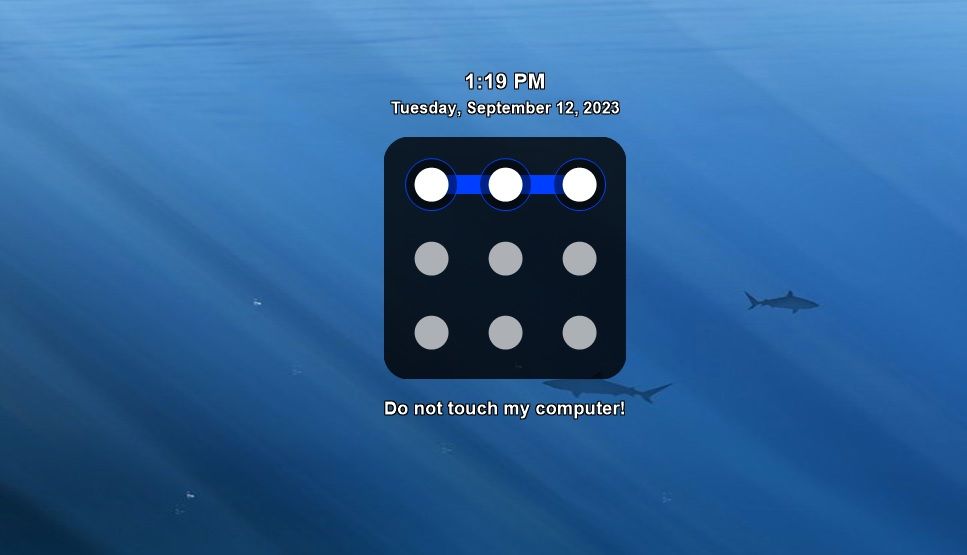
Now click the Eusing Maze Lock system tray icon or press the Windows key + Ctrl + A hotkey to bring up the lock screen for users to input the pattern lock you’ve set.
Inputting the correct pattern will remove the lock screen. You’ll set the alarm bells ringing if you input the wrong pattern a few times.
How to Customize Eusing Maze Lock
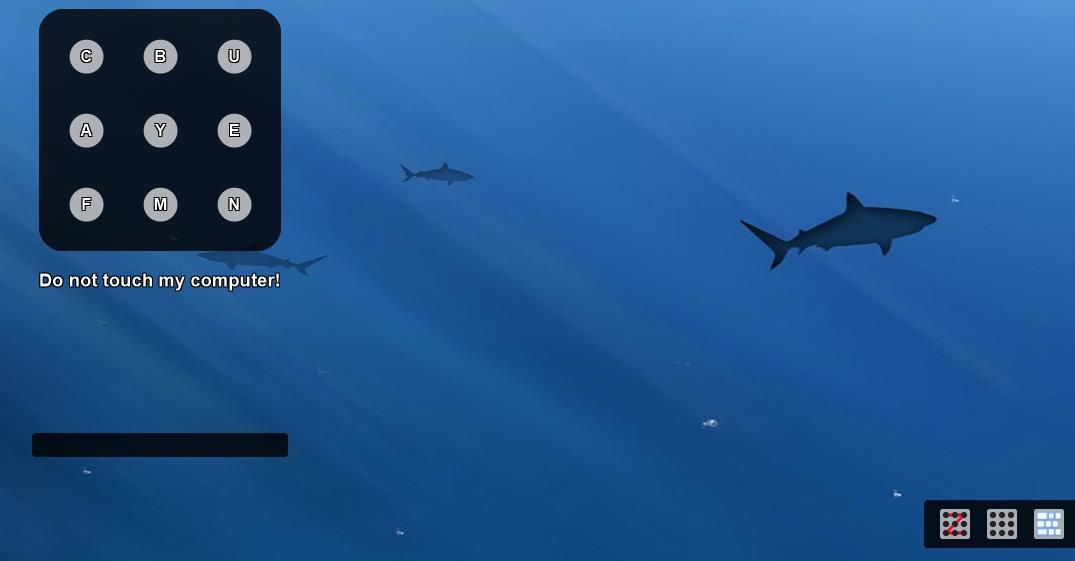
The Eusing Maze Lock pattern lock screen includes two alternative input options in the bottom right corner. Clicking the middle option will make the pattern lock invisible for more secure input. Or click the right button to input a pattern by pressing the keyboard letter keys for corresponding circles.
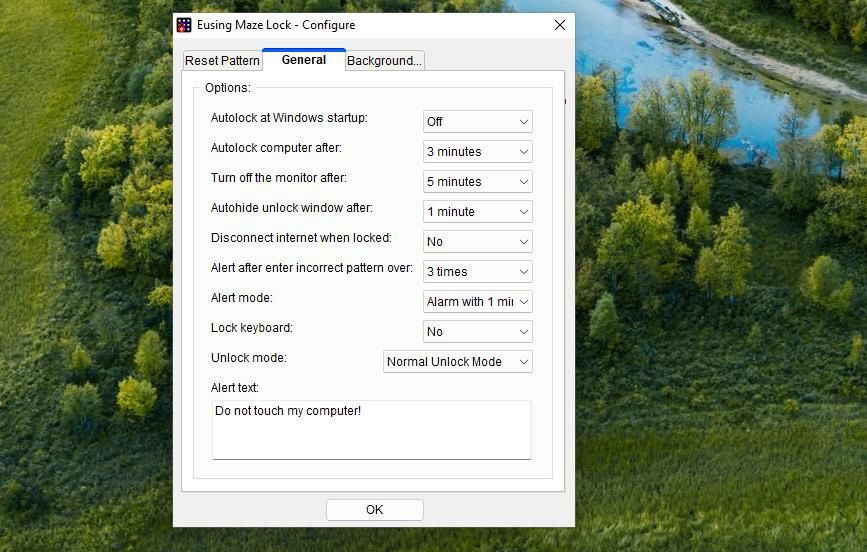
To access Eusing Maze Lock’s settings, right-click the software’s system tray icon, select Configure, input your pattern lock, and click the General tab. There you can add Eusing Maze Lock to the startup by selecting On from the Autolock at Windows startup drop-down menu.
Select an option on the Autolock computer after drop-down menu to set an inactive time for the pattern lock screen to automatically come on.
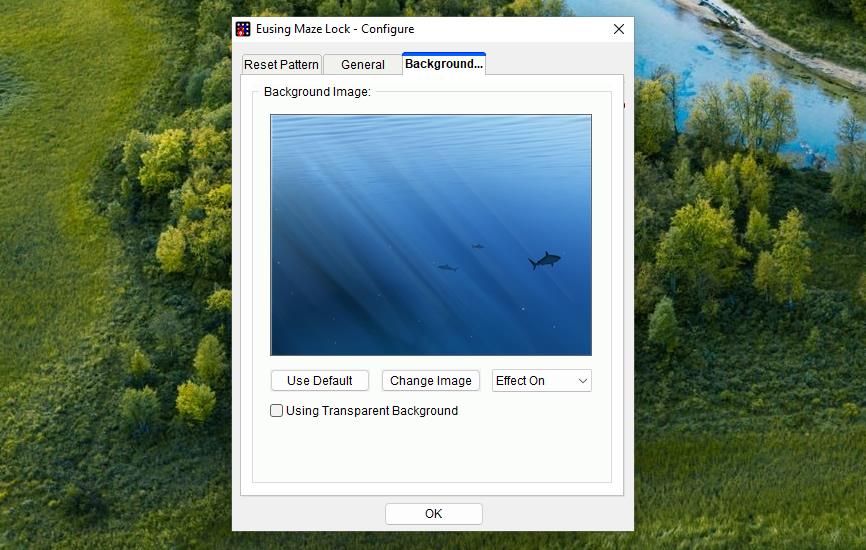
You can also set a custom wallpaper for the pattern lock screen on the Background tab. To do so, click the Change Image button to bring up a selection window. Select an image file for the background and click Open.
Lock Your Windows 10 or 11 PC Differently
Both Eusing Maze Lock and 9Locker provide an alternative to the standard Windows 10 OR 11 lock screen.
Admittedly, 3x3 (or even 5x5) pattern locks aren’t necessarily more secure than passwords. However, it can be easier to remember a pattern lock than a long password. The pattern lock screens’ alarms are also a unique security feature that the default Windows lock screen doesn’t offer.
Most users secure their Windows PCs with passwords or PINs. However, you can also secure your PC by adding a custom pattern lock with 9Locker or Eusing Maze Lock. This is how you can set up a pattern lock for Windows 10 and 11 with those software packages.
Also read:
- [Updated] Budget Cameras with Bold Action Features and Quality
- ASUS Aura Themes & Wallpapers: Free Downloads Compatible with Windows 11 Systems
- Clearing Admin Restrictions From Windows Security Error
- Deciding on ITop Recorder - An Indispensable Tool?
- Dodging the Hurdle of Microsoft Store Error 0X80072EFD on Windows Devices
- Experience the Lenovo Tab 4 8 with Your Hands: An In-Depth Review
- How to Mend D3DX9_39.dll Gap on Windows 11
- In 2024, Avoiding Fuzzy Edges in PicArt Picture Processing
- In 2024, Harvest Hangouts The Most Friendly Farm Gaming Experiences
- In 2024, How to Transfer Apps from Nokia C22 to Another | Dr.fone
- Latest Chrome OS Upgrade Introduces Windows 11 Features to Chromebook Users - ZDNet Insights
- Proven Tricks: Navigating Through WinError in Oculus Setup for WS11/WS10
- Redefining Windows 11'S Default Touch Interface Positioning
- Remedy for Windows Error Code 0XC0000001 Instances
- Should You Pay More for Enhanced LinkedIn Access?
- Solutions for Resolving mfc42.dll File Missing or Unavailable Issue
- Troubleshooting Common Windows App Glitches: 7 Fixes
- Unlock the Secrets to a Responsive Esc Key in Windows Systems
- Winning Over Windows: Correcting Access Violations
- Title: Implementing Custom Lock Patterns in Windows 11 PCs
- Author: Richard
- Created at : 2024-12-08 16:26:04
- Updated at : 2024-12-13 02:45:50
- Link: https://win11-tips.techidaily.com/implementing-custom-lock-patterns-in-windows-11-pcs/
- License: This work is licensed under CC BY-NC-SA 4.0.
