Key Steps for Delving Into Windows' Boot Zone

Key Steps for Delving Into Windows’ Boot Zone
The Startup folder determines which programs automatically launch upon starting your computer. If you’re not okay with certain programs launching at startup or want to add a few of your own, you can do it in the Startup folder.
However, finding the Startup folder isn’t that simple. It’s buried deep within your system files, which often requires an in-depth search. In this guide, we explore how to quickly find and access the Startup folder on Windows. Let’s see how to open the Startup folder.
1. How to Access Startup Folder Using the Run Command
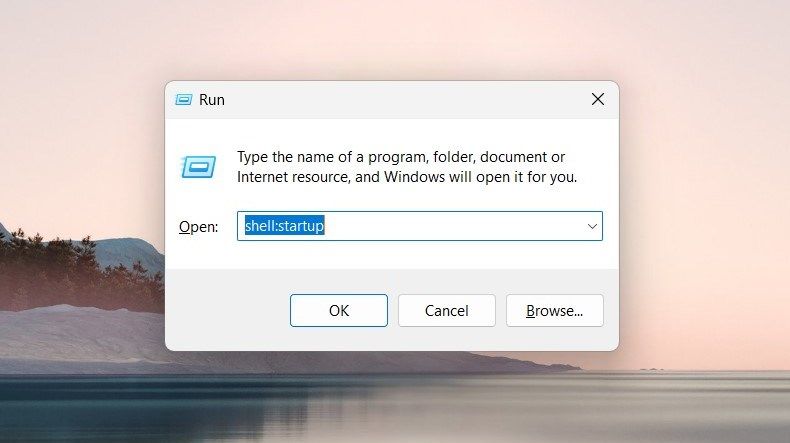
The Run command gives you quick access to various system functions and saves time navigating system menus. To open the Startup folder using the Run command, follow these steps:
- Open the Run command window .
- Type Shell:startup in the search field and click OK.

The Startup folder will open in a new File Explorer window. Here, you can manage all the programs that launch at startup and insert new ones.
2. How to Access Startup Folder Using Task Manager
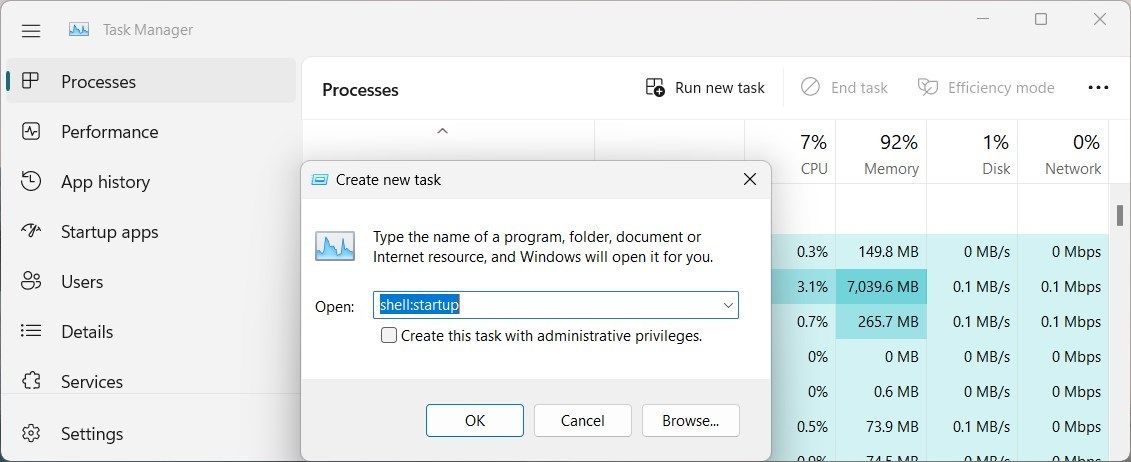
Task Manager controls processes and services running on your computer. It also has a “Run new task” option for launching things like files and folders.
To open the Startup folder using Task Manager, follow these steps:
- Press Ctrl + Shift + Esc to open the Task Manager. If the shortcut key fails, right-click on the Taskbar. Then select Task Manager from the menu list.
- In the Task Manager window, click Run new task at the top of the screen.

- Type Shell:startup in the dialog box and hit Enter. The Startup folder will now open on your screen.
3. How to Access Startup Folder From File Explorer
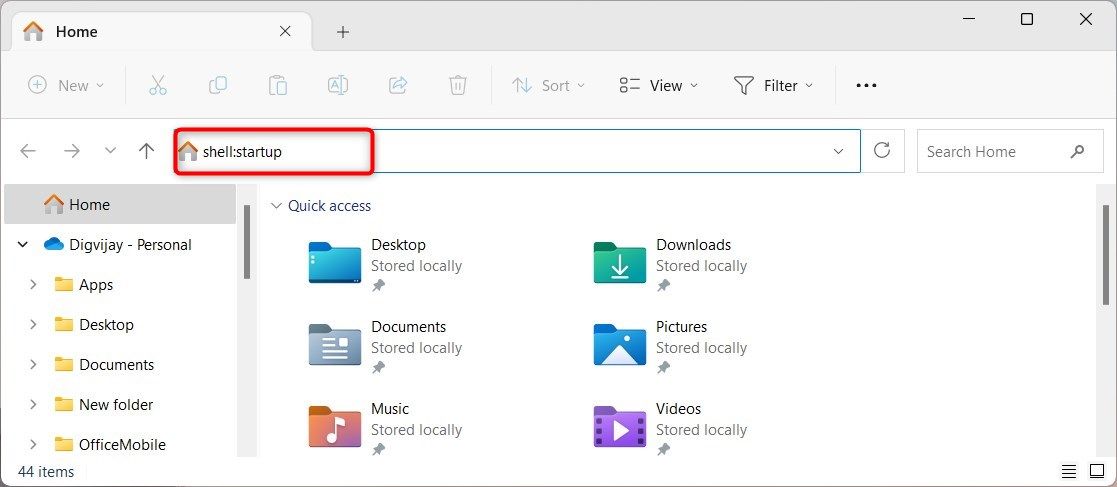
File Explorer gives you quick access to files. It has an address bar that makes finding folders and files super easy. To open the Startup folder from File Explorer, do the following:
- Open the Windows File Explorer .
- In the address bar, type shell:startup and hit Enter.

4. How to Access Startup Folder Using a Desktop Shortcut
Creating a desktop shortcut is another way to access the Startup folder. A desktop shortcut offers quick access, and you don’t need to search for the folder every time you want to make changes.
To create a desktop shortcut for the Startup folder, do the following:
- Press Win + D on your keyboard. This minimizes the open windows and takes you to your desktop.
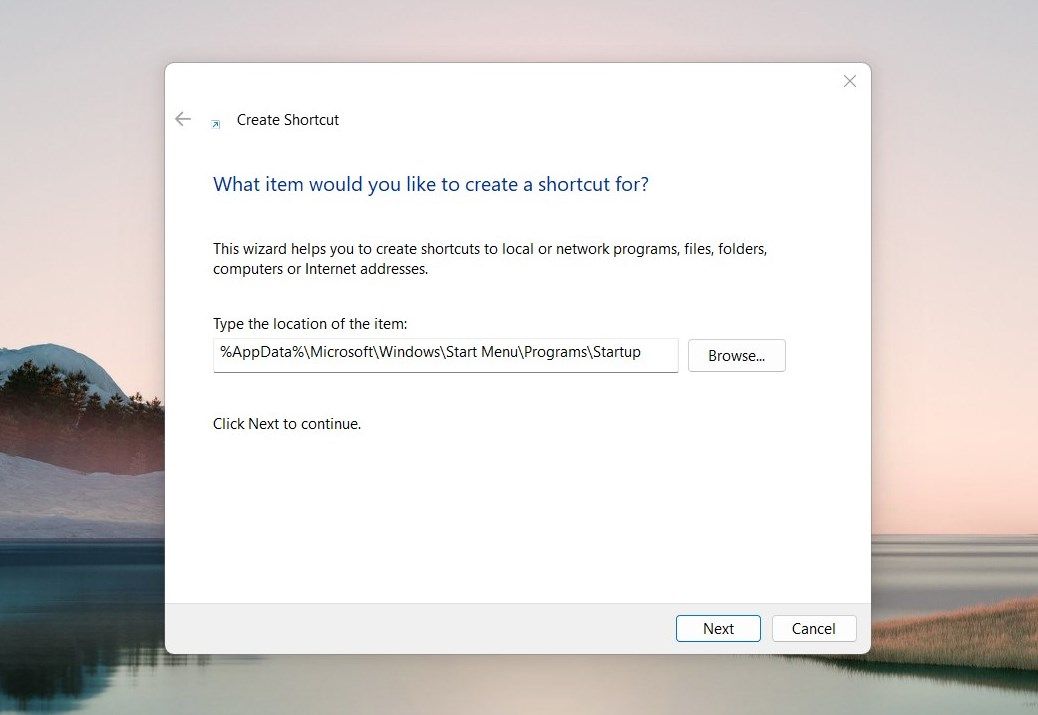
- Right-click the empty area and choose New > Shortcut. The Create Shortcut window will pop up on the screen.

- In the Location field, type or paste the following.
%AppData%\Microsoft\Windows\Start Menu\Programs\Startup
4. Click Next and give the shortcut a name you like.
5. Now click Finish, and you’ll see the shortcut on your desktop. To open the Startup folder, just double-click it.
5. How to Access Startup Folder Using a Shortcut Key
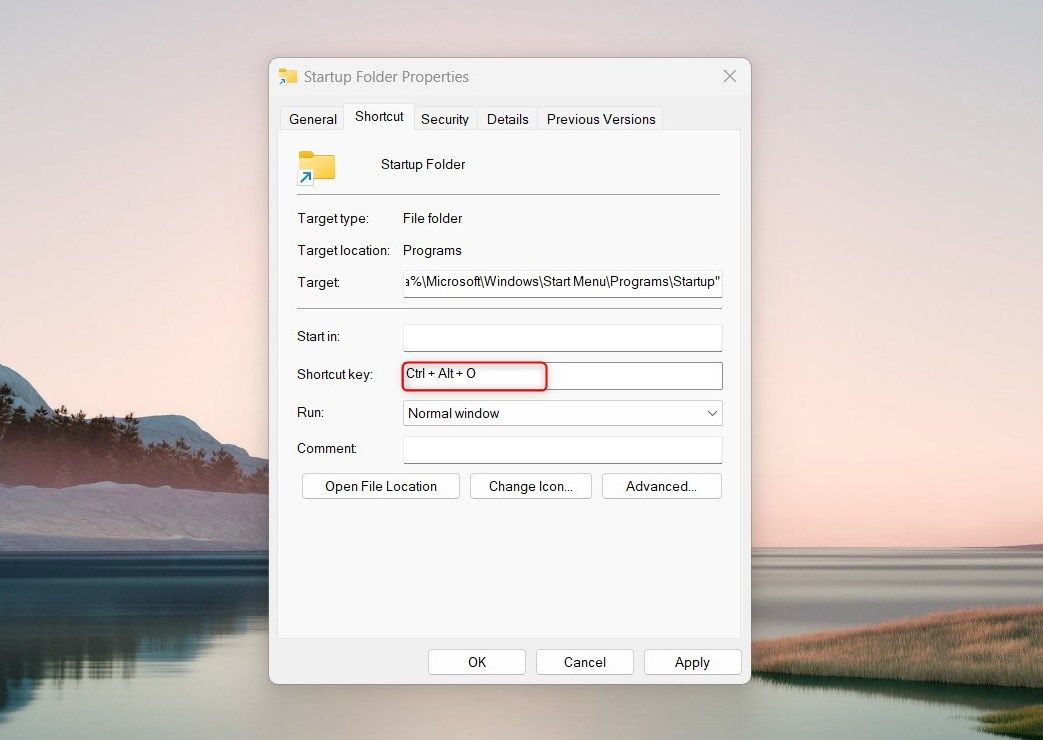
To access the Startup folder, you can also create a custom shortcut key. This method is preferred for those who often change the Startup folder. Here’s how to do it:
- Create a desktop shortcut for the Startup folder. We’ve already discussed how to do that above.
- Right-click the Shortcut and select Properties. This opens the Shortcut tab in the Properties window.
- Go to the Shortcut key field and type any letter inside it.

- You will see that Windows automatically adds Ctrl + Alt to the shortcut.
- Click Apply > OK to save the changes.
Now whenever you press Ctrl + Alt and the letter associated with the shortcut, your Startup folder will open.
Quick Access to Windows Startup Folder
The Startup folder allows you to store apps that launch automatically when you start your computer. Read this guide to understand the various ways of accessing the Startup folder. If you often use this folder, setting up a shortcut can make the process easier and faster.
However, finding the Startup folder isn’t that simple. It’s buried deep within your system files, which often requires an in-depth search. In this guide, we explore how to quickly find and access the Startup folder on Windows. Let’s see how to open the Startup folder.
Also read:
- [New] The Ultimate Guide to Product Revelation Best 15 Unboxing Channels for 2024
- [Updated] Enhance Live Stream Performance with These 5 Pro Tips
- 2024 Approved Creating Immersive iPhone 360 Reels for Social Media
- 2024 Approved From Default Dial-Tones to Signature Sounds The Ringtone Artisans Manual
- 發現與修復Windows 10 22H2無法完成更新的深入指南
- Conquer Stuttering Challenges: Enhancing Warhammer 40K Experience
- Eradicating Signature Verification Issue in WinOSes
- Guide to Resolve Defender's 0X80004004 Error
- In 2024, Boost Your Videos by Using the Best Intro Maker for PC. We Provide You with Tools, Both Offline and Online, to Choose the Top Software Amongst All
- In 2024, Top 5 Vivo V30 Pro Bypass FRP Tools for PC That Actually Work
- Mastering SID Retrieval for All Users on Windows 11
- Quick Fix for Flashing Display Issues on Windows 11
- Revamping Memory Use on Win 11 OS
- Secure Online Gaming: Prevent LoL Disconnections in Windows
- Solutions Rapides Aux Erreurs De Connexion Windows 11: 3 Techniques Efficaces Pour Réparer Votre Accès
- Steps for Inspirational Daily Living Visual Stories
- Title: Key Steps for Delving Into Windows' Boot Zone
- Author: Richard
- Created at : 2025-01-09 20:39:49
- Updated at : 2025-01-12 19:17:33
- Link: https://win11-tips.techidaily.com/key-steps-for-delving-into-windows-boot-zone/
- License: This work is licensed under CC BY-NC-SA 4.0.
