
Master the Subnet Shift: A Guide to Win11 Networks

Master the Subnet Shift: A Guide to Win11 Networks
Devices in a subnetwork have IP addresses that begin with the same prefix. The length of this prefix is different for different devices—it depends on the network size, whose length is identified using the subnet mask.
While troubleshooting network issues, you must ensure that the subnet mask is correct. So, we’ll share how to find and change the subnet in Windows 11.
How to Find the Subnet Mask in Windows 11
The easiest way to find the subnet mask in Windows 11 is through the Windows Command Prompt or Windows PowerShell. To find it using the Command Prompt, follow the steps below:
- Press theWin key to launch the Start Menu.
- In the search bar, typeCommand Prompt and choose theRun as administrator option from the right pane.
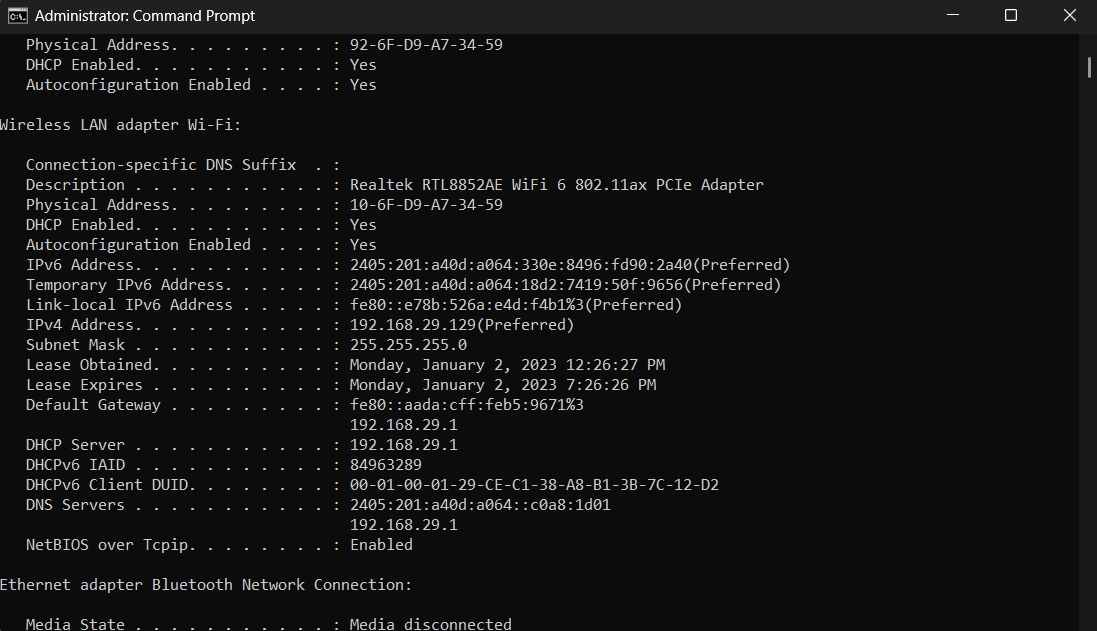
- In the elevated Command Prompt window, typeipconfig /all and press Enter. This command will display all the important details about the network your computer is connected to, including the subnet mask.
- Scroll and look forSubnet Mask. It’ll be under theWireless LAN adapter Wi-Fi section.

The steps to do it using Windows PowerShell are similar to the Command Prompt. To do it,open Windows PowerShell with admin rights , type the ipconfig /all command, and press Enter.
In the result that appears, you can see the subnet mask under the Wireless LAN adapter Wi-Fi section.
How to Change the Subnet Mask in Windows 11
Now that you know how to find the subnet mask on your computer, let’s check out how to change it.
 Power Tools add-on for Google Sheets, Lifetime subscription
1. Change the Subnet Mask Using the Windows Settings
The settings menu is the central hub of a Windows operating system. It’s a place to configure different settings of your computer and manage the network. You can also use it to change the subnet mask.
Here’s how to do it:
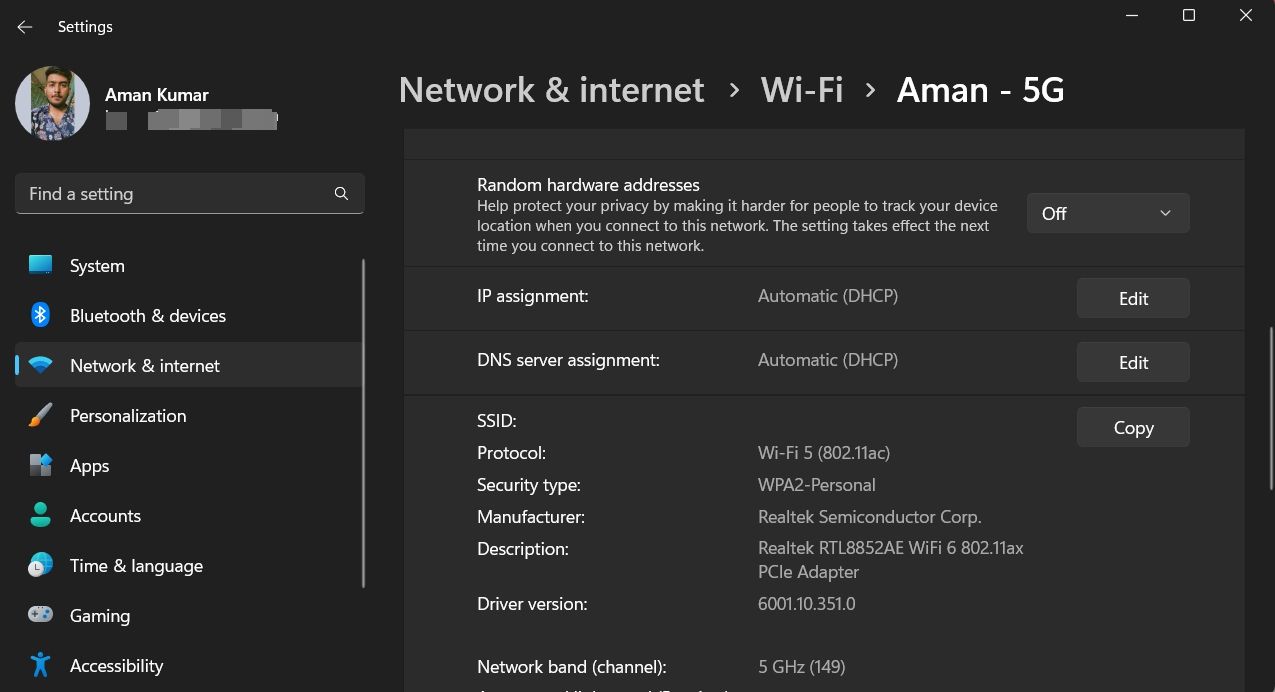
- Open the Windows Systems Settings menu , and chooseNetwork & internet from the left panel.
- SelectWi-Fi, and then choose your network in the following window.
- Click theEdit button next to theIP assignment option.

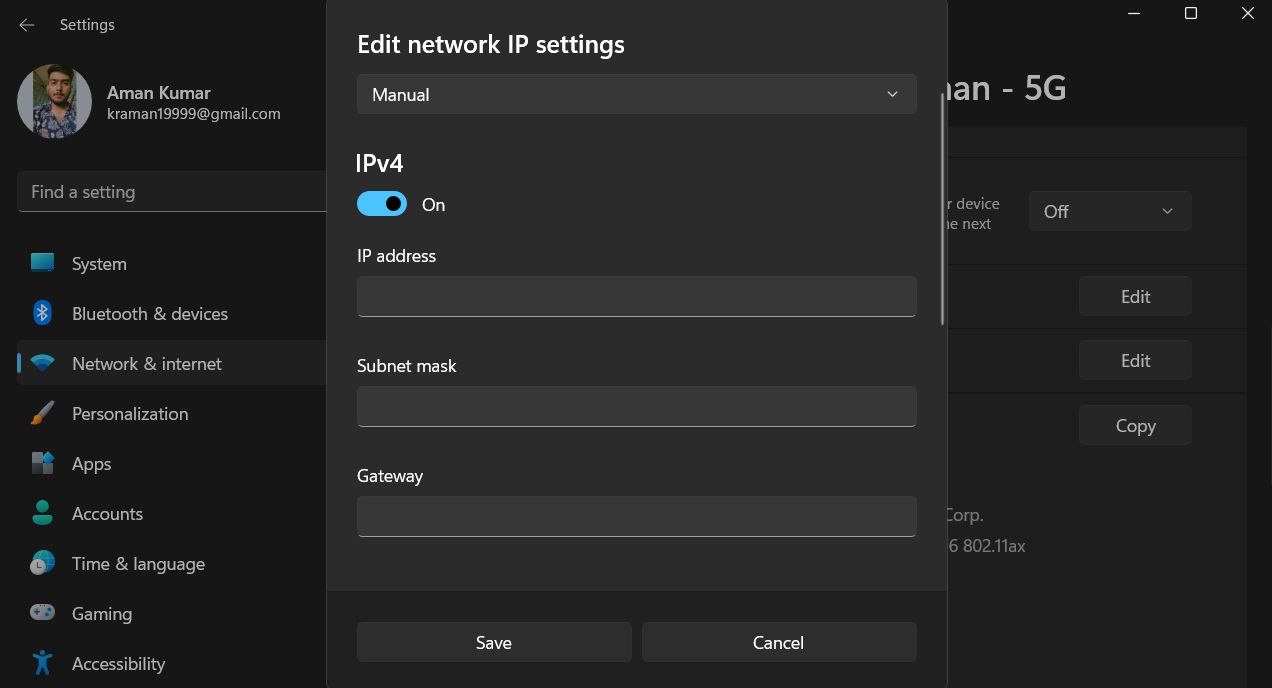
- In the prompt that crops up, click on the drop-down icon and chooseManual.
- Enable the toggle next to the IP version you’re using.
- Enter the details, including the subnet mask, and clickSave.


2. Change the Subnet Mask Using the Control Panel
The Control Panel is the go-to place to configure window settings and make changes to your device. To use it to change the subnet mask, follow the below instructions:
- Press the Win key, typeControl Panel in the search bar, and press Enter.
- Click the drop-down icon next toView by and chooseLarge icons.
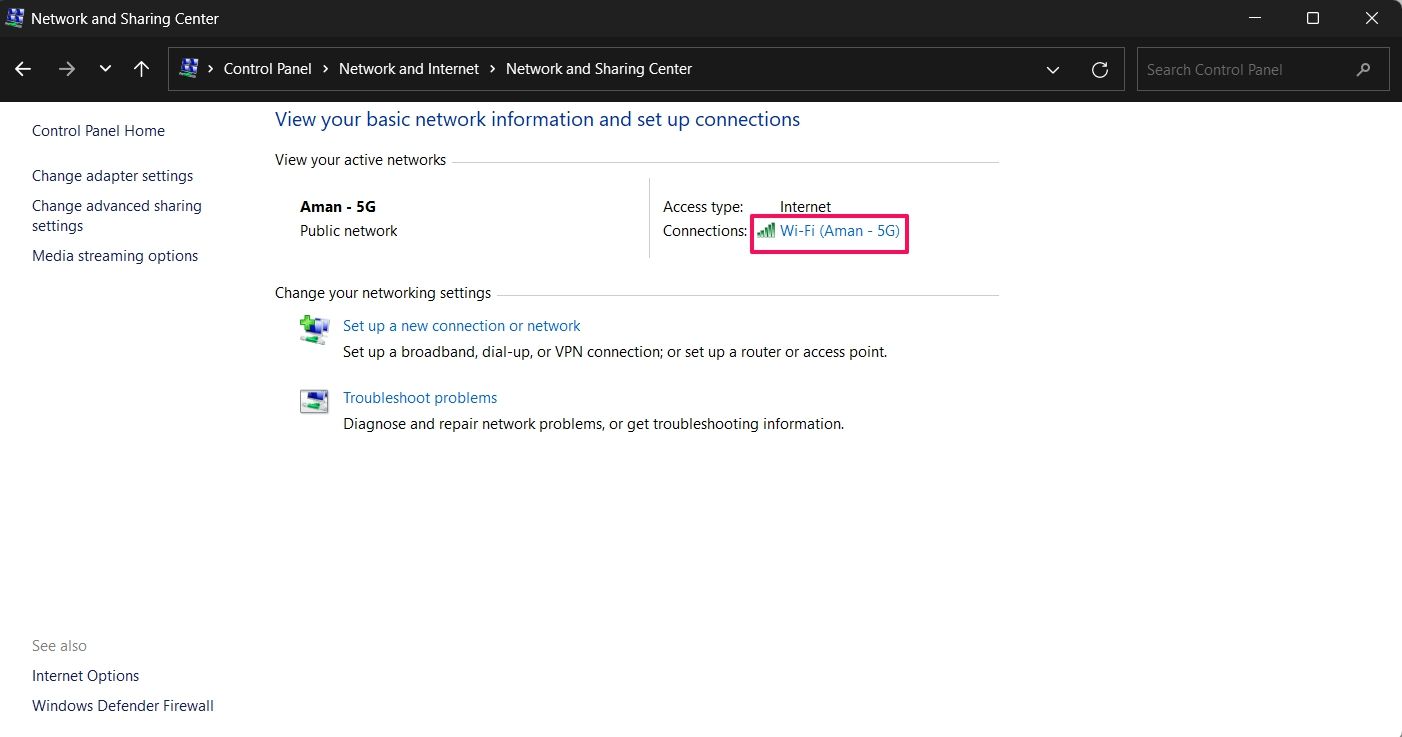
- ChooseNetwork and Internet , and then selectNetwork and Sharing Center in the following window.
- Click on your network next toConnections.

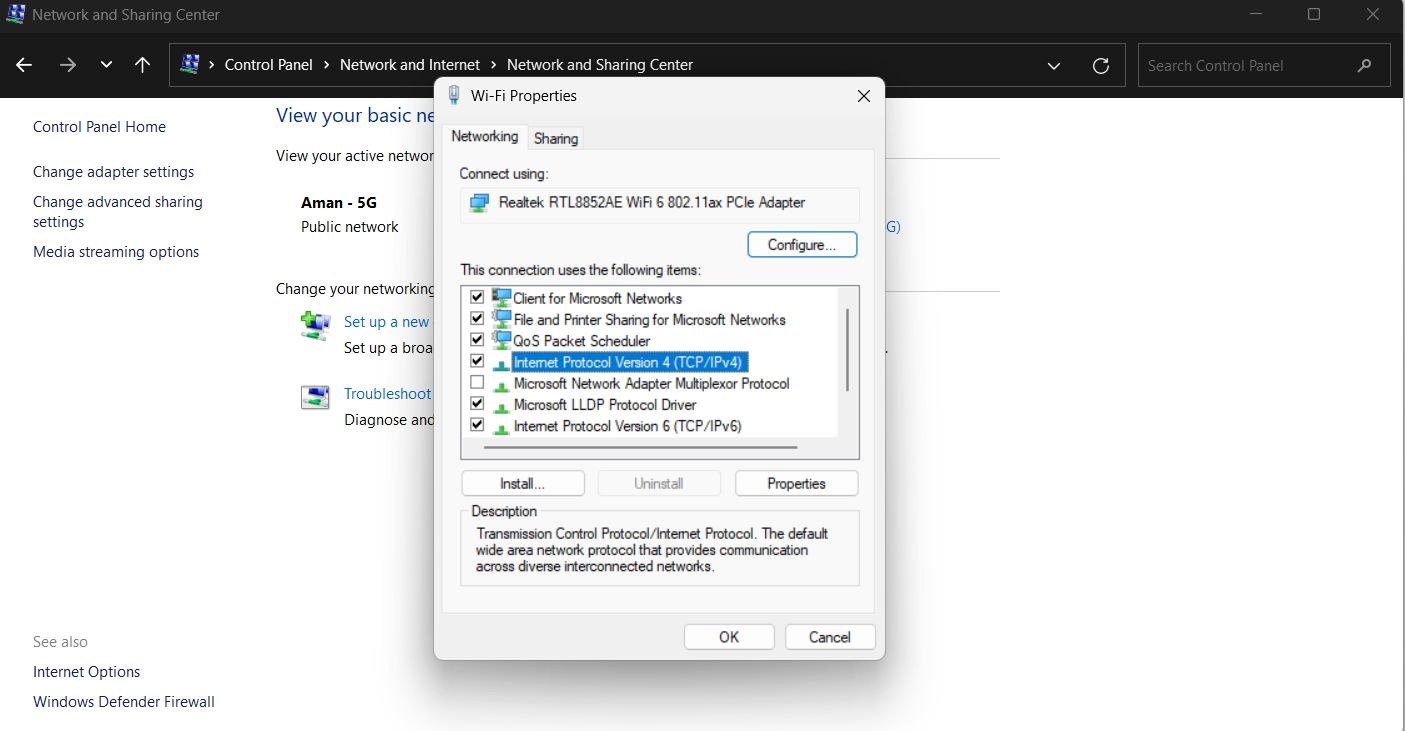
- ChooseProperties from the window that appears.
- Select the IP version you’re using. For instance, if you’re using IPv4, selectInternet Protocol Version 4 (TCP/IPv4) and click theProperties button.

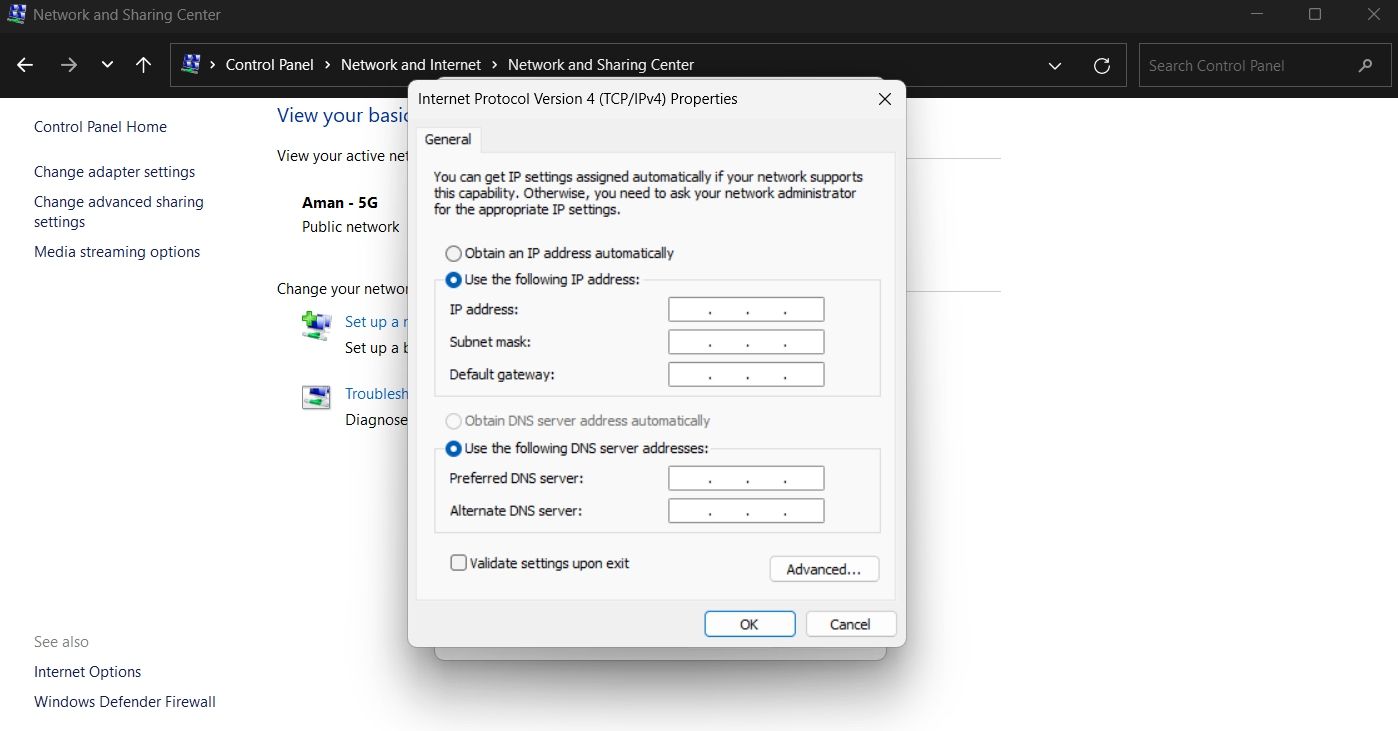
- Select theUse the following address option and enter the details.

- ClickOK to save the changes.
3. Change the Subnet Mask Using Windows PowerShell
Windows PowerShell is also one of the places from where you can change the subnet mask in Windows 11. Here’s how to do it:
- Open Windows PowerShell with admin rights, type the following command, and press Enter. This command will display all the network adapters installed on your device.
Get-NetAdapter -physical - To change the subnet mask, type the following command and press Enter. Make sure to replace the “ifIndex Number “ with the number associated with the network adapter whose subnet mask you want to change. And replace “subnet prefix length “ with the new subnet prefix length you want.
Set-NetIPAddress -InterfaceIndex (ifIndex Number) -PrefixLength (subnet prefix length)
For instance, if the ifIndex Number is 3 and the new subnet prefix length you want is 24, then the command will be:
Set-NetIPAddress -InterfaceIndex 3 -PrefixLength 24
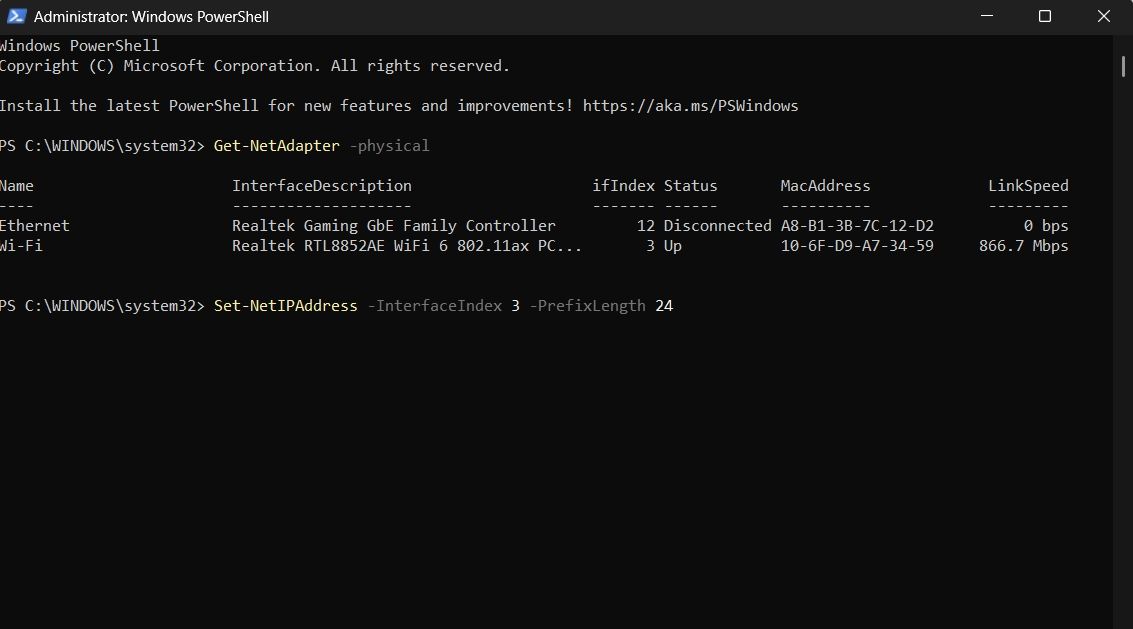
Changing the Subnet Mask in Windows 11
The subnet mask helps to identify the network and the host bit of the IP address. If you want to find and change the subnet mask on your computer, you can do it using either of the above methods.
Meanwhile, you might be interested to know more about subnets and how to calculate them.
- Title: Master the Subnet Shift: A Guide to Win11 Networks
- Author: Richard
- Created at : 2024-08-16 01:35:32
- Updated at : 2024-08-17 01:35:32
- Link: https://win11-tips.techidaily.com/master-the-subnet-shift-a-guide-to-win11-networks/
- License: This work is licensed under CC BY-NC-SA 4.0.


 WinUtilities Pro