Navigate Effortlessly: Bypass PIN in Windows 11 Projections
Navigate Effortlessly: Bypass PIN in Windows 11 Projections
Windows requires a PIN when projecting your computer onto another screen, such as a projector or a second monitor. Doing so prevents others from accessing your private information or projecting their content onto your computer.
However, if you’re the only person using your computer, you may find this extra security measure unnecessary. Let’s explore how to disable the “require PIN for pairing” setting when projecting to your PC in Windows 11.
1. Using Windows Settings
Windows has a built-in app that allows you to change various settings. You can use this app to turn off the “require PIN for pairing” setting when projecting to your PC. Here’s how to do it:
- Open the Settings menu .
- From the left sidebar, select the System tab.
- Scroll down to the Projecting to this PC section and click on it.
On the next page, look for the Require a PIN for pairing setting. Click on its drop-down menu, and you’ll see three options:
- Never: Never ask for a PIN for pairing when projecting to this PC.
- First Time: Require a PIN the first time you’re projecting to this PC.
- Always: Always requiring a PIN for pairing when projecting to this PC.
Choose the Never option and exit the Settings window. The settings will be saved automatically, and you won’t need to enter a PIN when projecting your computer onto another display.
If you don’t see Require a PIN for pairing in the Projecting to this PC section, the feature is disabled on your computer.
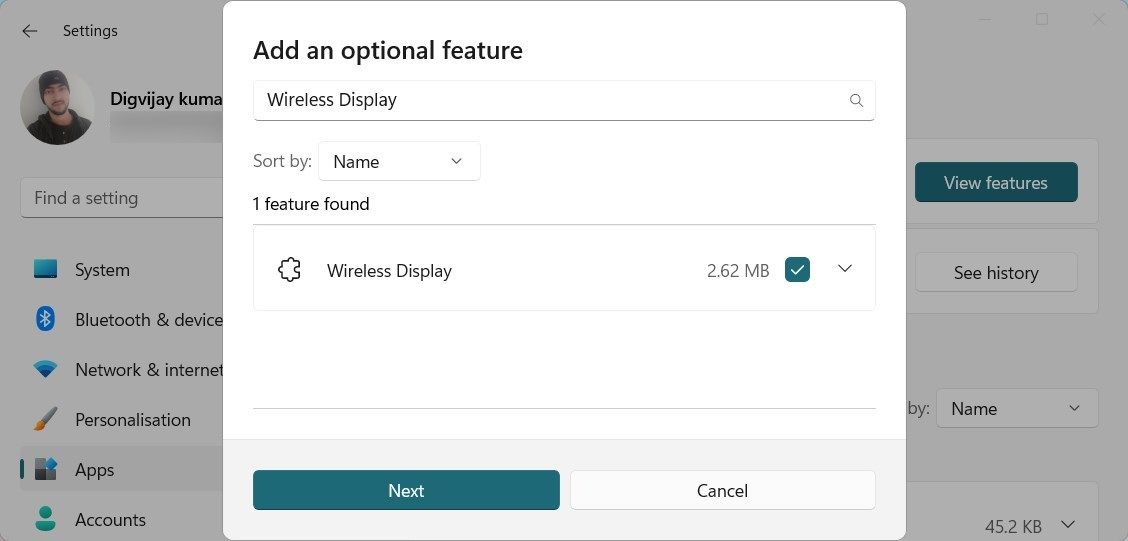
To enable this feature, click on the Optional features link. You can also navigate to Settings > Apps > Optional features to access the same page. Doing so will open the optional features window.

Click the Add an optional feature button and search for Wireless Display. You should see the Wireless Display feature listed in the search results. Check the box next to it and click Next > Install.
Once the feature is installed, return to the Projecting to this PC section in Settings. You should now see the “require a PIN for pairing” setting. Choose the Never option and close the window.
2. Using the Group Policy Editor
Another option is to use the Group Policy Editor. This method requires you to have a Pro or Enterprise Windows version. However, you can activate the Group Policy Editor in Windows Home Edition .
Once you’ve done that, follow these steps to turn off the feature:
- Press Win + R on your keyboard to open the Run dialog box.
- Type gpedit.msc in the text field and press Enter. This will open the Group Policy Editor window.
- From the left sidebar, navigate to the following path:
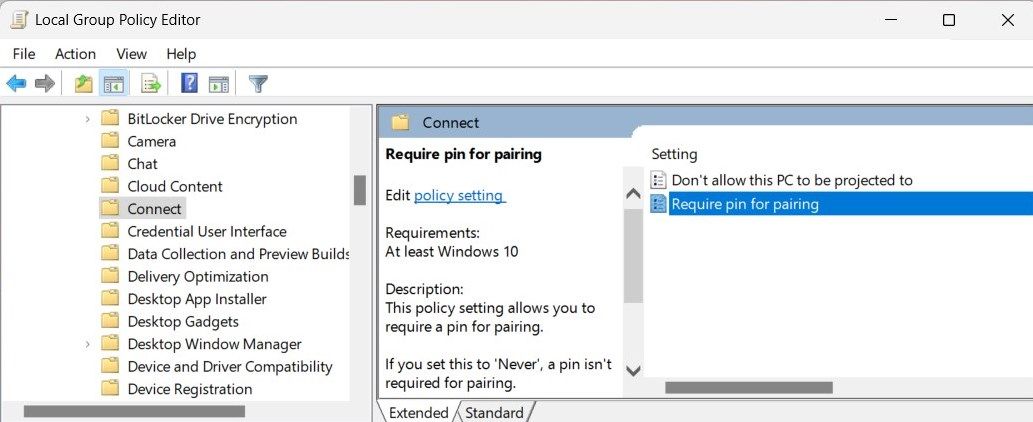
Computer Configuration > Administrative Templates > Windows Components > Connect - On the right side of the window, look for Require pin for pairing and double-click on it. Doing so will open the policy settings page.

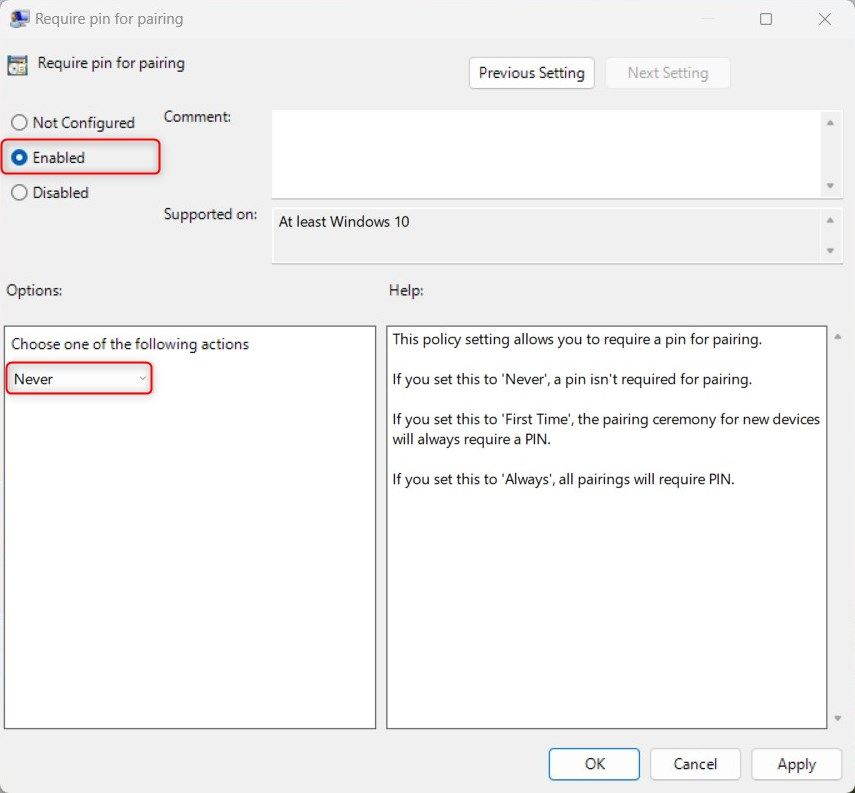
- Select the Enabled radio button and select Never from the drop-down menu.
- Click Apply > OK to save the changes.
After that, exit out of the window. When projecting your computer onto another screen, you won’t need a PIN anymore.
3. Using the Registry Editor
If you can’t access the Group Policy Editor, you can use the Registry Editor to disable the “Require PIN for Pairing” setting. This method involves editing the Windows registry, so creating a system restore point and backing up the registry before proceeding is essential. That way, you can easily restore your computer if anything goes wrong.
Once you’ve done that, follow these steps to turn off the feature:
- Press the Windows key to open the Start menu.
- Type regedit in the search bar and hit Enter to open the Registry Editor.
- If the User Account Control window prompts, click Yes to give the program permission.
- In the left sidebar, navigate to this path:
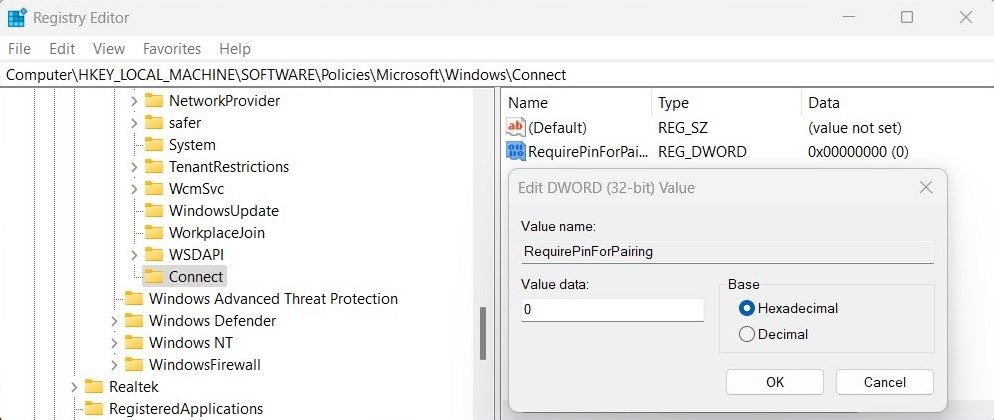
Computer\HKEY_LOCAL_MACHINE\SOFTWARE\Policies\Microsoft\Windows\Connect - If you don’t see the Connect key at this location, right-click on Windows and select New > Key. Name it Connect and press Enter.
- Now, right-click on Connect and select New > DWORD (32-bit) Value.
- Name the value RequirePinForPairing and press Enter. Doing so will create a new DWORD in the registry.
- Double-click on this newly created value to open its Properties window.
- Set the Value data to 0 and click OK to save the changes.
Once you’ve done that, exit the Registry Editor window and restart your computer. After restart, you won’t need a PIN when projecting your computer onto another screen.
To turn the feature back on, follow the same steps but set the Value data to 1. This will enable the required PIN for pairing settings when projecting to a Windows 11 PC.
4. Using a REG File
The fourth and final option is to use a REG file. This method is for those who have little or no experience with the Registry Editor. The REG file contains instructions that edit the Windows registry on your behalf. If you’d rather use this method, here’s what you need to do:
- Right-click on Start and select Run from the menu.
- Type Notepad in the text field and press Enter.
- In the Notepad window, type or copy-paste the following code lines:
`Windows Registry Editor Version 5.00
[HKEY_LOCAL_MACHINE\SOFTWARE\Policies\Microsoft\Windows\Connect]
"RequirePinForPairing"=dword:00000001`
4. Click File and select Save as from the menu.
5. In the Save As window, click the Save as type drop-down menu and select All files.
6. Name the file DisableRequirePin.reg and select Desktop from the left sidebar.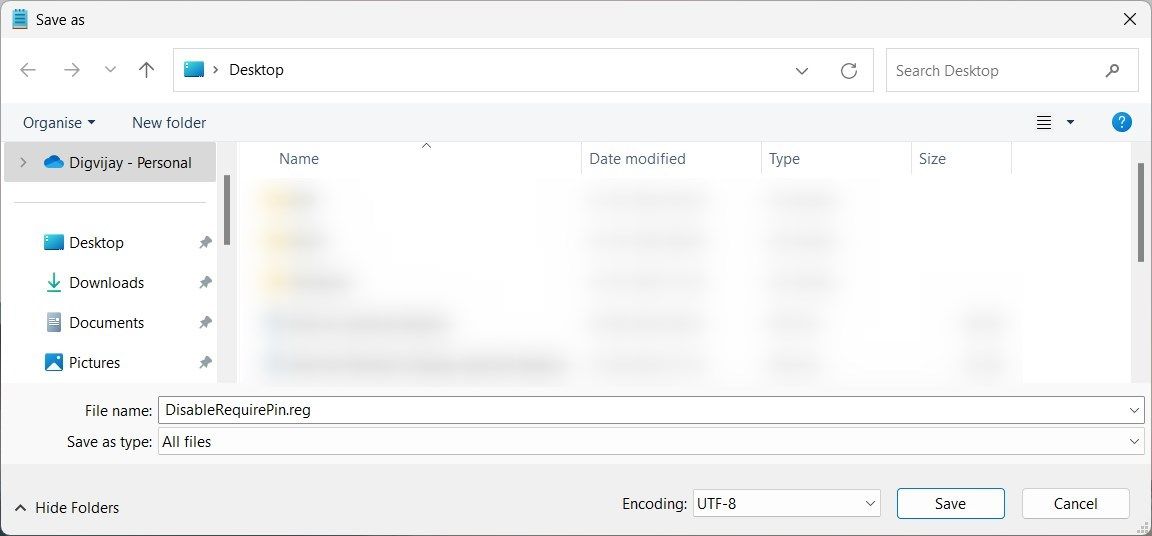
 Video Converter Factory Pro
- Now click Save and exit Notepad. You'll find the REG file on your desktop.
- Double-click on it and select Yes when prompted. This will edit the registry on your behalf.
Once done, restart your computer and the settings will be saved automatically. You won't need to enter a PIN when projecting your PC onto another screen.
If you ever want to re-enable this feature, repeat the same steps as above and use this code in Notepad:
`Windows Registry Editor Version 5.00
[HKEY_LOCAL_MACHINE\SOFTWARE\Policies\Microsoft\Windows\Connect]
"RequirePinForPairing"=dword:00000003`
Save the file with the EnableRequirePin.reg filename and double-click on it to edit the registry.
After that, restart your computer and the setting will be enabled. You'll now need to enter a PIN each time you project the PC onto another screen.
Project to a Windows 11 PC Without Requiring a PIN
Projecting your PC onto another display is a useful feature that allows you to mirror or extend your computer screen. Now you know how to do so without needing to enter your PIN every time.
However, if you’re the only person using your computer, you may find this extra security measure unnecessary. Let’s explore how to disable the "require PIN for pairing" setting when projecting to your PC in Windows 11.
- Title: Navigate Effortlessly: Bypass PIN in Windows 11 Projections
- Author: Richard
- Created at : 2024-08-16 02:19:36
- Updated at : 2024-08-17 02:19:36
- Link: https://win11-tips.techidaily.com/navigate-effortlessly-bypass-pin-in-windows-11-projections/
- License: This work is licensed under CC BY-NC-SA 4.0.