
Navigating PowerShell for Windows Account Management
Navigating PowerShell for Windows Account Management
When managing user accounts on a Windows PC, it often makes sense to use the Settings app. After all, it provides a graphical user interface that simplifies the process. But for those who’d rather manage the accounts with fewer clicks, they can use the net user command in Command Prompt to manage user accounts on Windows.
In this guide, we’re going to show you how to use the net user command to perform various actions on user accounts on a Windows computer.
1. List All User Accounts
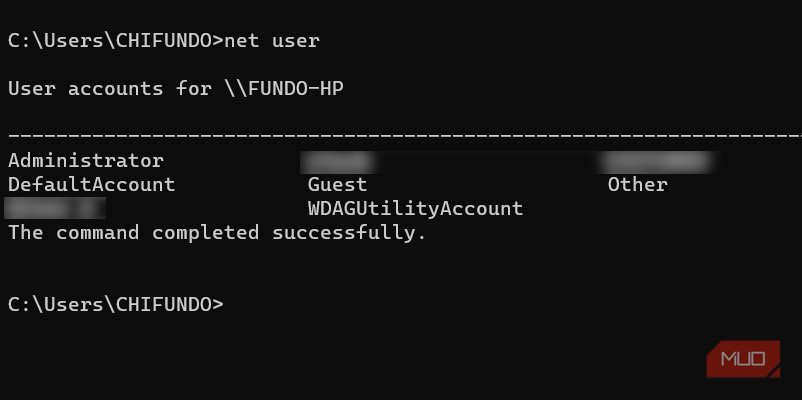
Before you start managing user accounts with net user, it helps to know all the user accounts on your computer. To list them all, open Command Prompt as an administrator , enter the below command, and hit the Enter key to run it:
net user
Keep the names you see in mind, as you will need them as you use the net user command.

2. Show All the Information of a User Account
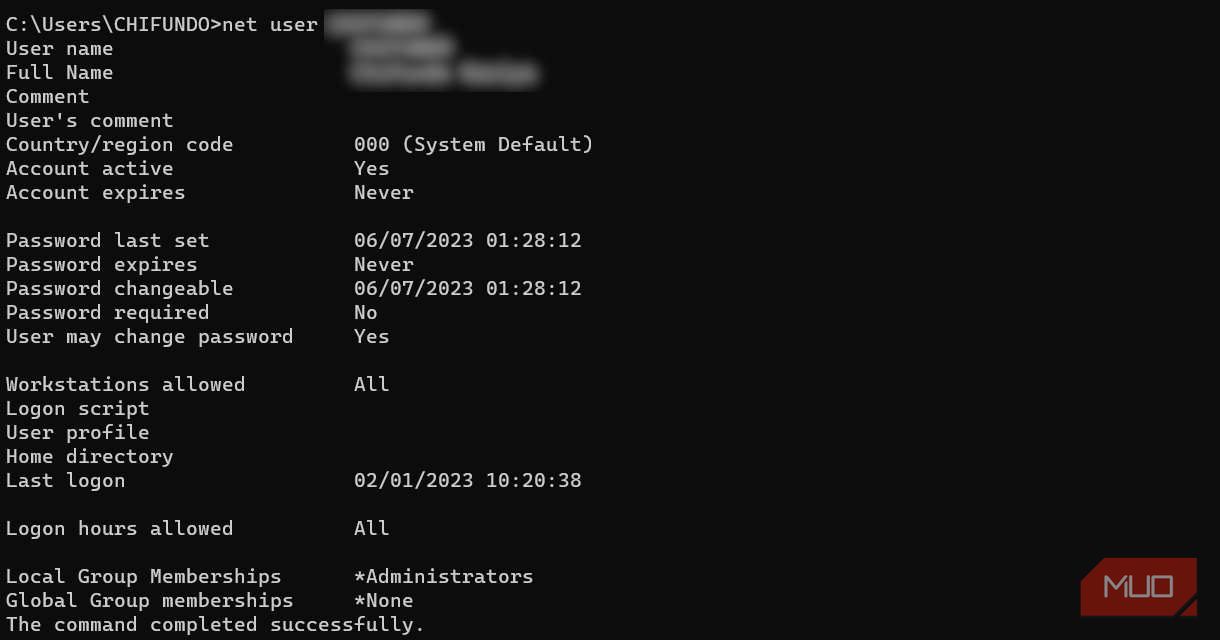
You can also bring up all the important information about a user by simply typing the net user command followed by the name of the user’s name. Here’s the basic syntax:
net user Username
Let’s say there’s a user named “Jack” on the computer. To bring up their account information, you’d enter the below command, replacing Username in the above command structure with Jack:
net user Jack
Once you run the command, you’ll be able to see, the user’s full name, when their password expires, when they last logged in, whether they’re an administrator, and more.

3. Add and Delete a User Account
To add a new user in Command Prompt, you need to use the net user command followed by the name of the new account, the desired password you wish to set, and the /add switch (this tells net user that you’re adding a user). Here’s the basic syntax of the command:
net user Username Password /add
Keep in mind that all you’ll be creating here is a local account, but you can always switch a local account to a Microsoft account later on. Here’s an example of the command in action:
net user Jill Pa$w0rd /add
After you run that command, you’ll see that the new user, Jill, has been added to your computer. To delete an account, just replace the /add switch with /delete without specifying the password. Here’s how:
net user Jill /delete
Now net user will remove the account from the computer.
4. Enable and Disable a User Account
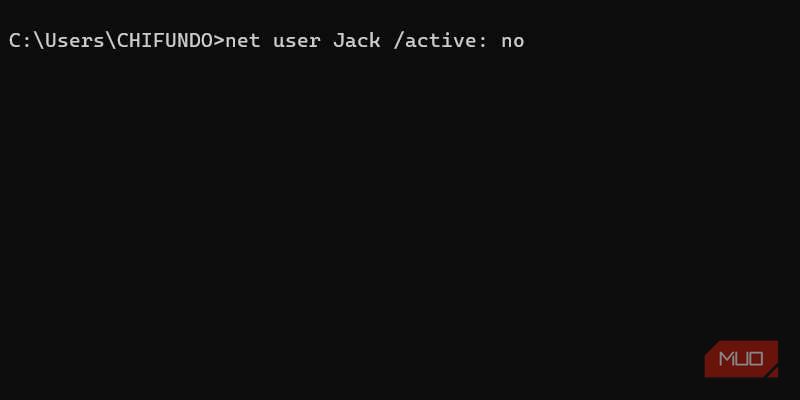
If there’s a user you wish to temporarily restrict so they can’t access their account, you can simply disable it instead of deleting it. Here’s the basic syntax of that action, making sure to use the /active:no switch at the end of the command to tell net user you’re disabling it:
net user Username /active:no
So, here’s an example of what disabling an account would look like after replacing Username with the name of the actual user account:
net user Jack /active:no
And if you want to enable a disabled account, you just have to change the /active:no switch to /active:yes.
5. Enable and Disable a Domain User Account
Sometimes, you might not want a user to access all the resources in a particular domain. The easier way to restrict them is to disable their account in that domain. You can do this by adding the /domain switch to the syntax discussed in the previous section.
Here’s the syntax for disabling an account on a particular domain using net user, making sure to replace Username with the name of the user you want to disable:
net user Username /domain /active:no
If you want to enable an account on a domain, just use the /active:yes switch in the above command structure instead.

6. Set User Account Login Times
If you want to specify the times someone can log in, you can use the /time parameter to specify the account login times. You can use the basic syntax below:
net user Username /time login_times
In the above command structure, replace Username with the user you want to limit the login times for, and login_times with a time range in the format D-D,00:00. Here’s an example of how you’d do this:
net user Jack /time:M-F,09:00-17:00
As per the example above, that user can only log in from Monday to Friday between 9 a.m. and 5 p.m. If Jack tried to log in, he’d get a message saying Your account has time restrictions that prevent you from signing in.
To remove the time restrictions, you’d use the below command:
net user Jack /time:all
Now Jack can go back to logging in whenever he wants.
7. Set User Account Expiry Date
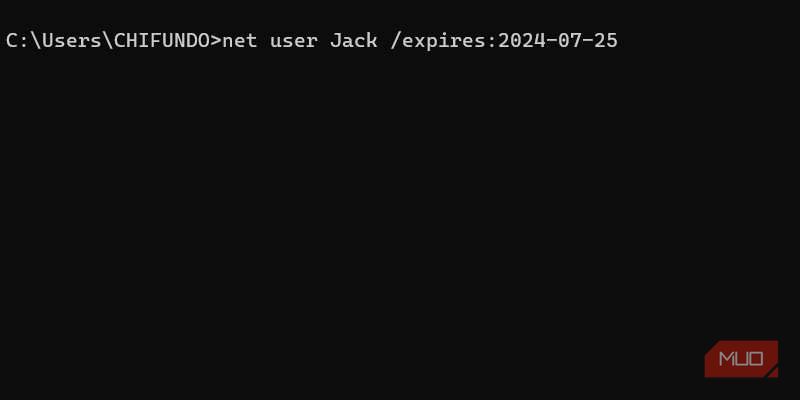
By default, accounts are set to never expire, but you can change that if you have a user you want to be active for a specific period of time. You will need to use the /expires parameter while specifying the year, month, and expiration date. Here’s the basic command structure:
net user Username /expires:DD/MM/YYYY
An example of this in action would be:
net user Jack /expires:27/07/2024
With the above command, Windows will disable the on the date you’ve set above.

company, user or members of the same household. Action! - screen and game recorder</a>
8. Change the Password of a User Account
You can also use the net user command to change the password of a user account in Command Prompt . This will make it so that you can quickly change the password of any local account with a single command, instead of having to do it through the Settings app, which requires many clicks.
The beauty of it is that you can also use it to change passwords for multiple accounts without leaving the Command Prompt window.

9. Change the Password of a Domain User Account
You can also change the password of a user on a domain by appending the /domain switch at the end of the command for changing a user account. The syntax for this is as follows:
net user Username NewPassword /domain
Again this has to be a local domain user account for this to work. So, if you changed the user account from a Microsoft account to a local account , you’ll need to switch it back to use the command.
10. Set a Password Policy for Users
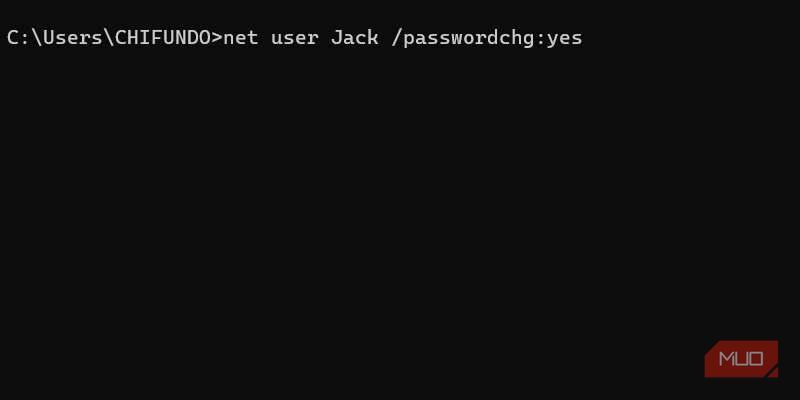
If you need a particular user to change the password during their next login, you can use the net user command along with the /passwordchg:yes parameter (by default, the parameter is /passwordchg:no). Here’s the basic syntax:
net user Username /passwordchg:yes
Here’s an example of what that would look like in Command Prompt:
net user Jack /passwordchg:yes
So, the next time Jack logs into the computer, he will get a prompt asking him to change his password before he can access his user account.
11. Set a Home Directory for Users
When creating a new user profile using net user, you can set the home directory, which is where Windows will store the user’s personal files and settings. By default, Windows places the home directory of each user account in This PC > Local Disk (C:) > Users. To change this with net user during account creation, the basic syntax is as follows:
net user Username Password /add /homedir:Path-to-directory
A real-world example of this would be:
net user Jack Pa$w0rd /add /homedir:D:\Other Users\Jack
The above command will place the home directory of Jack, as it creates the account, in the D:\Other Users\Jack folder.
Take Control of Your Computer’s Users Accounts With the Net User Command
Net user is a simple command to understand, allowing you to effectively manage your accounts from one location: Command Prompt. Of course, we haven’t covered everything here, as there are too many parameters and switches to cover in a single guide.
With that said, after you’ve understood how to perform the net user actions we’ve covered, you’ll be on your way to managing accounts on Windows much quicker.
In this guide, we’re going to show you how to use the net user command to perform various actions on user accounts on a Windows computer.
- Title: Navigating PowerShell for Windows Account Management
- Author: Richard
- Created at : 2024-08-16 02:20:42
- Updated at : 2024-08-17 02:20:42
- Link: https://win11-tips.techidaily.com/navigating-powershell-for-windows-account-management/
- License: This work is licensed under CC BY-NC-SA 4.0.