
Navigating the Windows 11 Calendar Space

Navigating the Windows 11 Calendar Space
Windows 11 has a horde of underutilized tools that could improve people’s lives only if they started to use them yesterday. One of those tools is the Calendar app, an updated version of the Calendar app carried over from Windows 10 and its earlier versions.
With the Calendar app on Windows 11, you can do everything from creating an event reminder to a schedule setup—without the complexity that’s necessary for using third-party apps. So let’s look at all the ways you can make use of the Calendar app on Windows 11.
1. Install and Set Up Your Calendar Account on Windows 11
If you are looking to set up your account on Windows 11 , you first need to check if you have the Calendar app installed on your PC in the first place.
If you do not have the app, then follow the steps below to get the app right away:
- Launch the Microsoft Store app.
- From the search bar on the top, type in ‘mail and calendar’, and select the Mail and Calendar app from Microsoft, as shown below.
- Click on Install to get the app on your Windows 11.
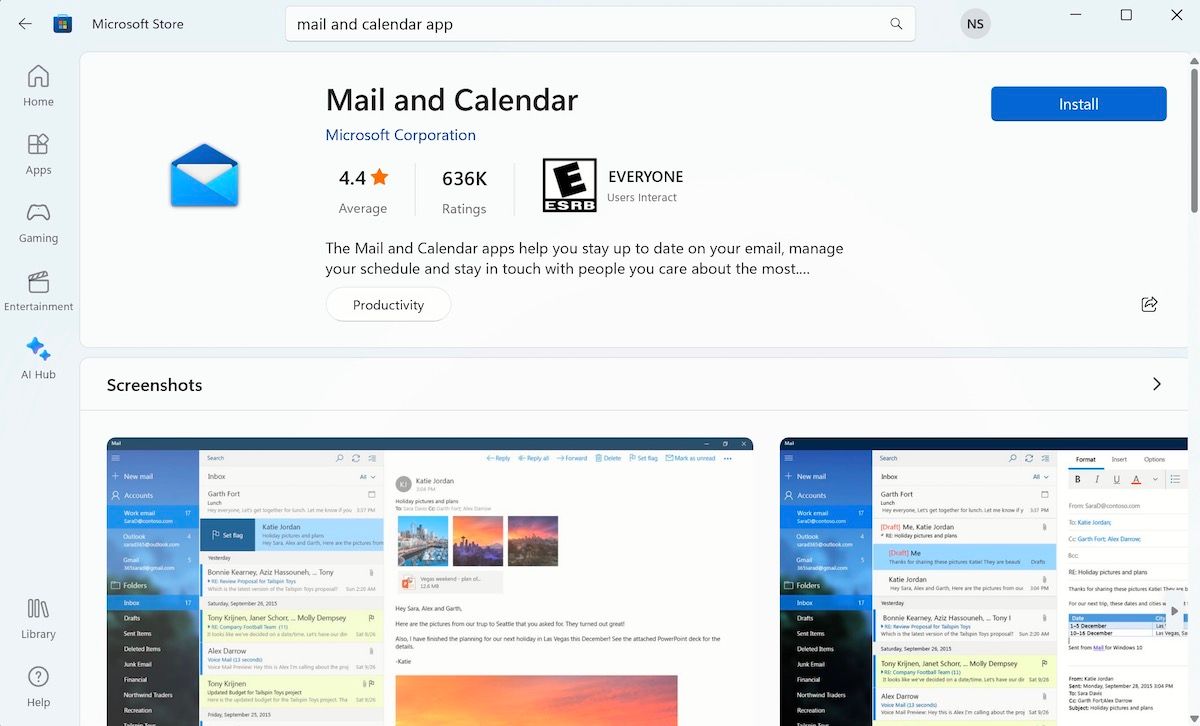
As soon as you go through the above steps, installation of the Calendar app on your Windows 11 will begin in a few seconds. From there, sign in to the app with your Microsoft account, and you will be able to use the app from here on.
Once the app is installed, you find it from the Start menu search bar, from your taskbar, or you can add the app to your Windows Start menu .
2. Scheduler Your Events in Calendar
Perhaps the most obvious—and also the most neglected—feature of a Calendar app on Windows is the event scheduler. Among a vast variety of schedule and reminder apps online today, it makes sense, too.
But if you’re a regular Windows user, you can skip the third-party apps without much to lose and instead use the free Calendar app from Microsoft. Here’s how:
- After you have downloaded the app, head to the Start menu search bar, type in ‘calendar’, and select the best match.
- Put in your account credentials and login to get access to all features of the app.
- Once you are in the Calendar, click on any date you’d like to set a reminder for, and you will see an instant window pop-up.
- Now, you can put in the event name, time, and even the place of the event to fill in all the event details.
- Click Save to solidify the information, and you will be ready.
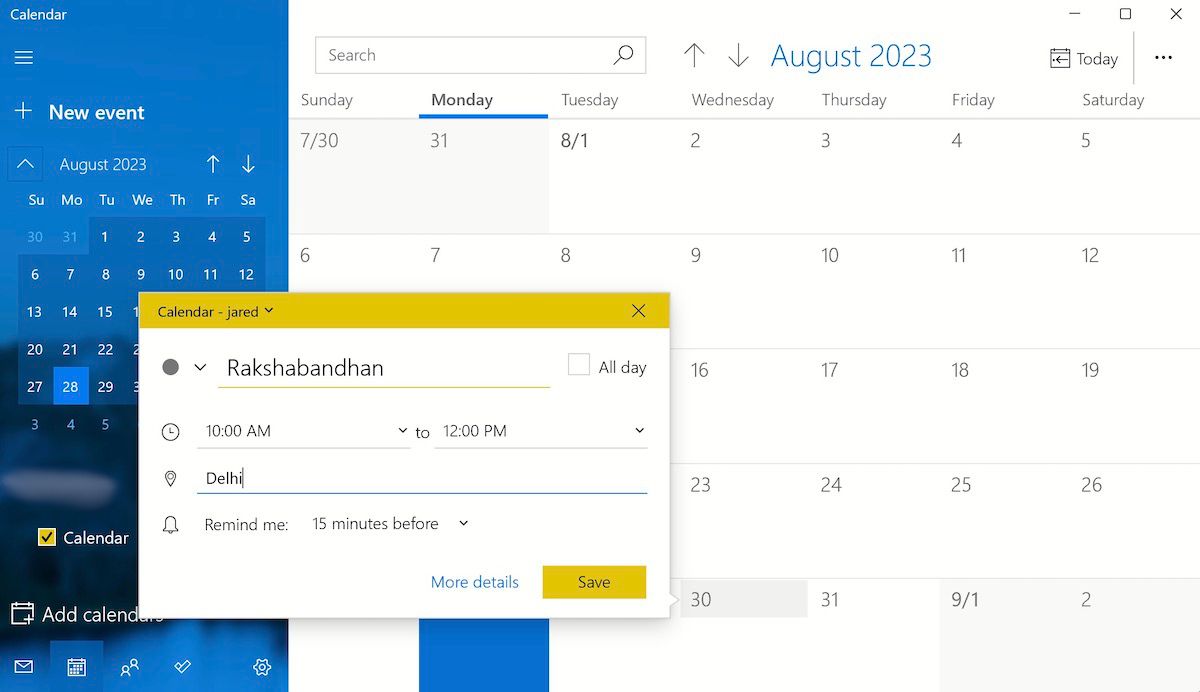
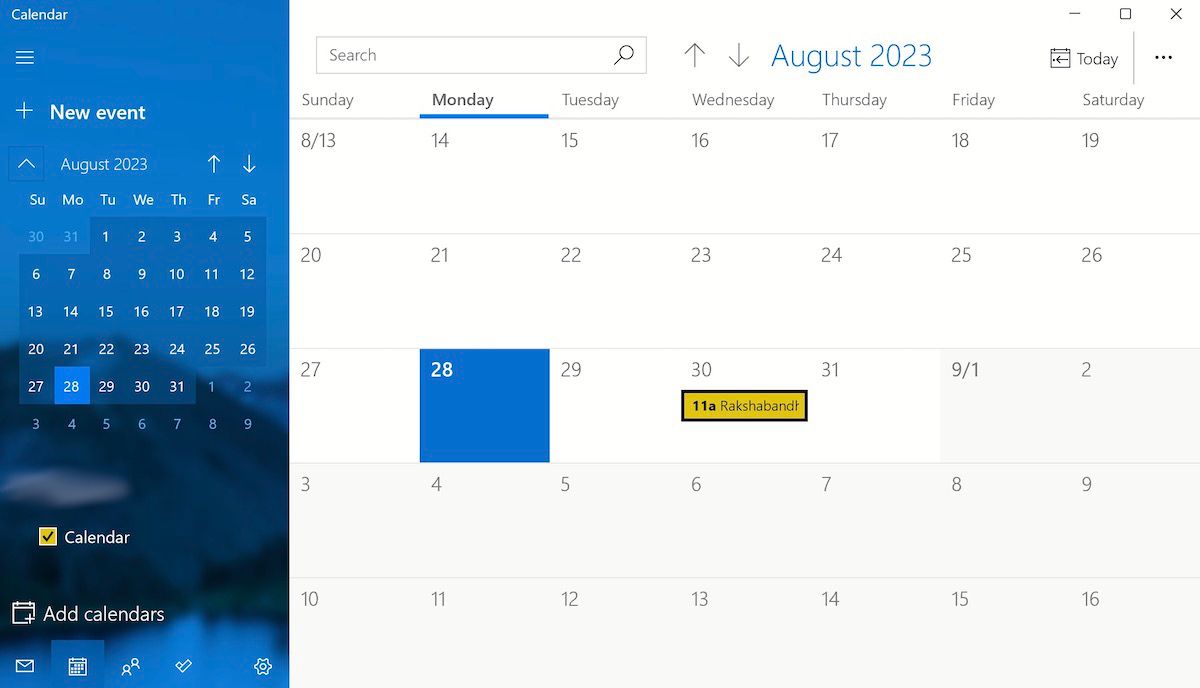
After you have created the event as we laid down in the above steps, you will get the specified date marked with a notification, as you can see below.
3. Use the Calendar Feature
When you first log in and start using the Calendar app, you will notice many default calendars on your app from before. You can add many more.
To add new calendars, click the Add calendars option from the bottom left corner.
From the newly launched Add calendars dialog box, you can select from a slew of calendar options: Holiday calendars, Sports, NBA, NHL, and so on. For example, click on Holiday calendars, and you will then get to select the country of your choice.
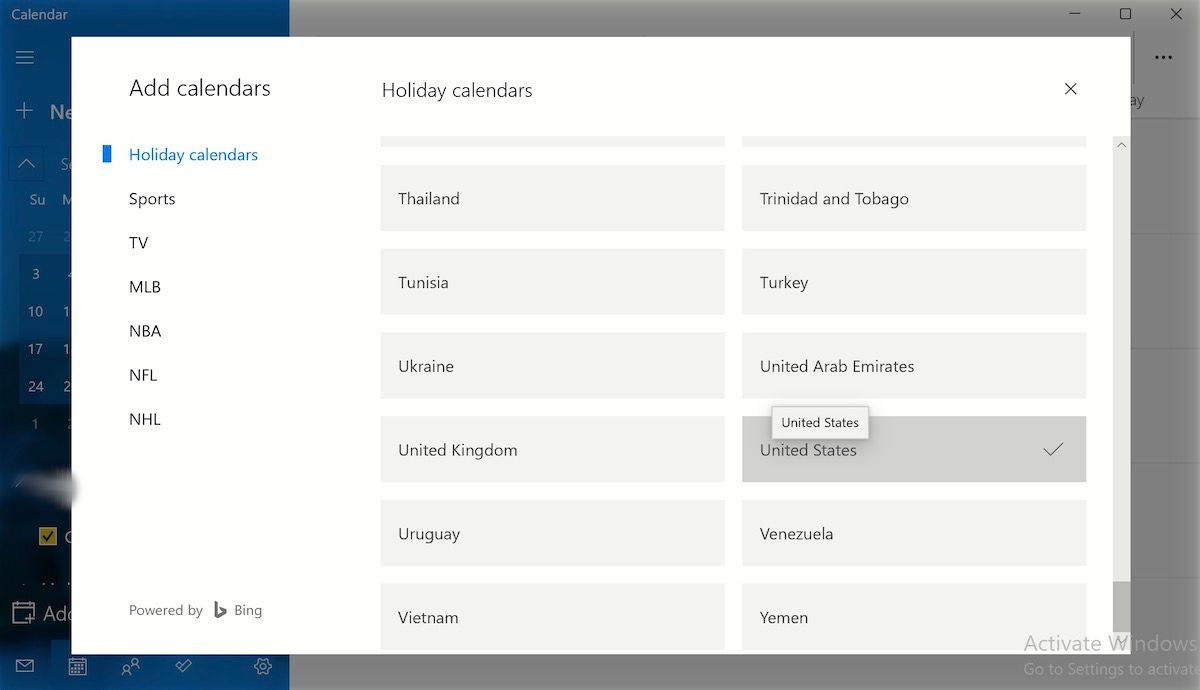
Now go back to your Calendar, and you will see all the essential festive dates marked as holidays in your famous festivals. In our case, we see the date for Labor Day, a prominent holiday celebrated in the USA, marked out differently from the rest.
You are, of course, free to add in multiple holiday calendars like this, whether of different countries or sports events.
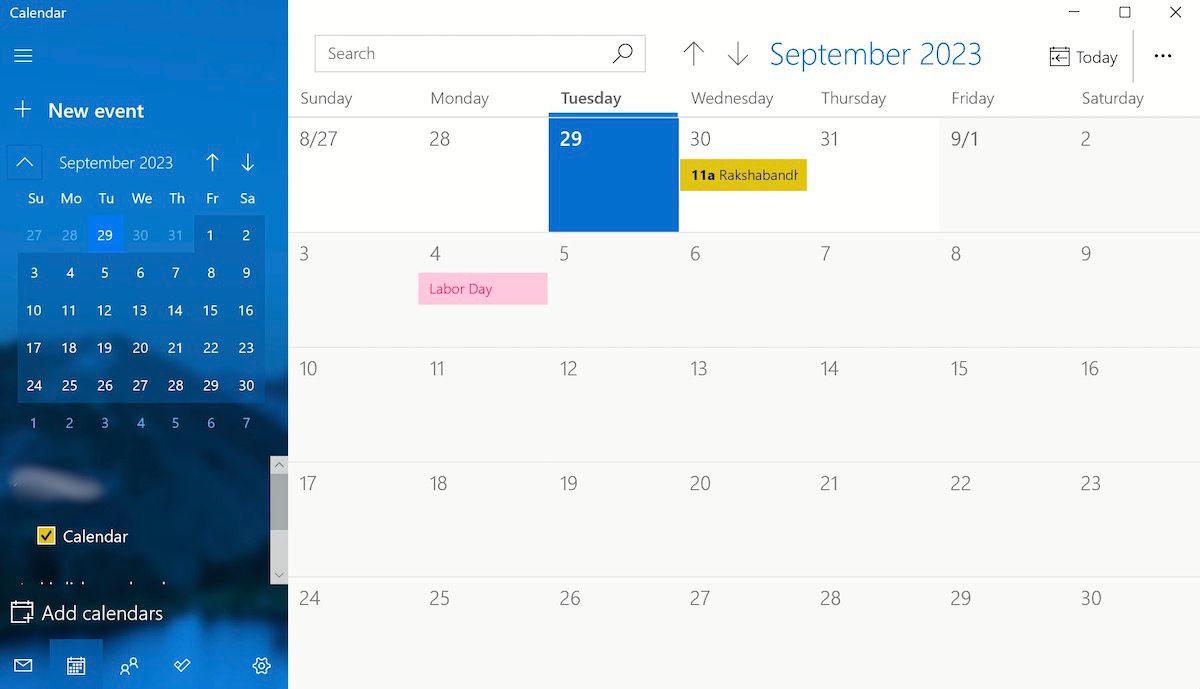
Our only tip, though, will be to keep yourself from adding too many calendars right away; that will complicate your Calendar very quickly and will beat the very purpose of using Calendar.
4. Syncing Your Calendar With Other Devices
You can also use the Calendar with other apps on your PC, such as Outlook, iCloud, or Google. Click the Settings icon from the bottom left corner, and select Manage Accounts.
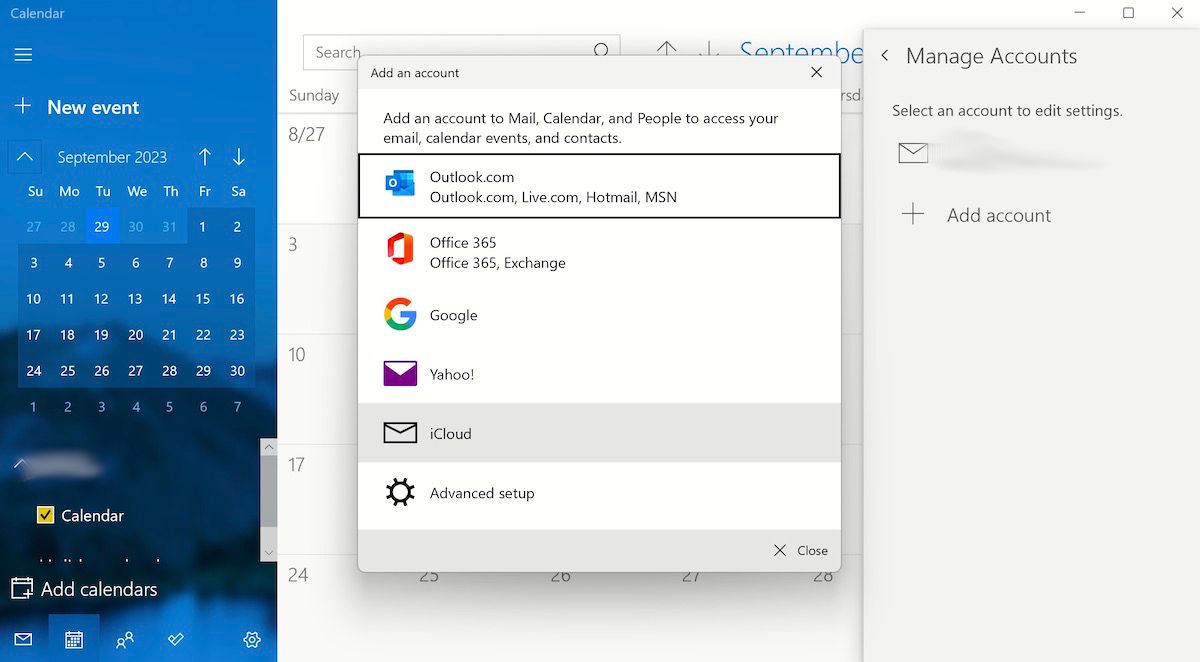
Now click on Add account, and you can pick from Yahoo, Google, iCloud, or Office 365. Pick one, sign in with your account credentials, and that’s it—all your events and meetings from other accounts will be synced with your Calendar app.
4. Tweak Calendar Settings on Windows
The Calendar app also lets you control and manage its settings straight from the app menu on your Windows computer. Just click on the Settings from the bottom left corner and select Calendar Settings.
The Calendar Settings on your PC is the only place where you can tweak the first day of the week, your days in a week, and your working hours—it has a separate section for all the options.
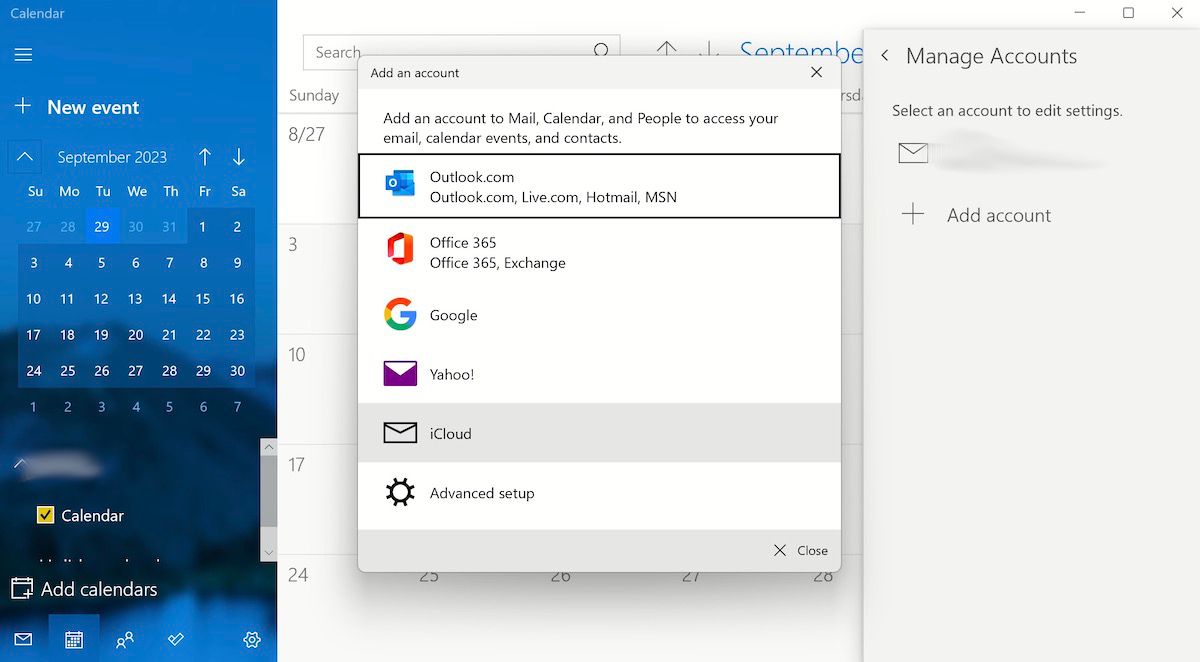
Apart from this, the Calendar app offers a unique way to choose your language and a host of different calendars, such as Hijri, Saka Hera, and so on. So you should definitely play around with the settings and pick the ones that suit you best.
5. Set Reminders & Send Invites
After you have marked your event on the Calendar app, you can then also edit them to add reminders to stay on top of the event; the reminder can be set up to remind you before 1 week, 1 day, 5 minutes, 1 minute, and so on.
To invite someone to your meeting, just head to the People section and click on the Contacts icon. From there, start typing in your saved contacts and then select the best match to add and send an invitation.
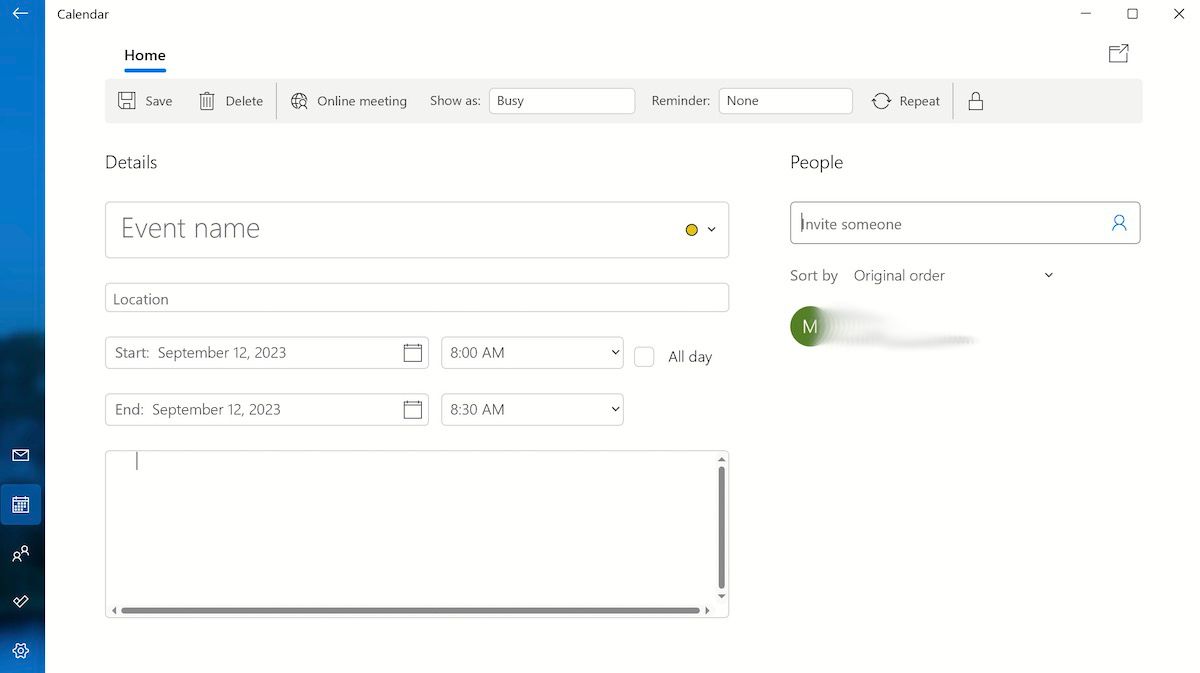
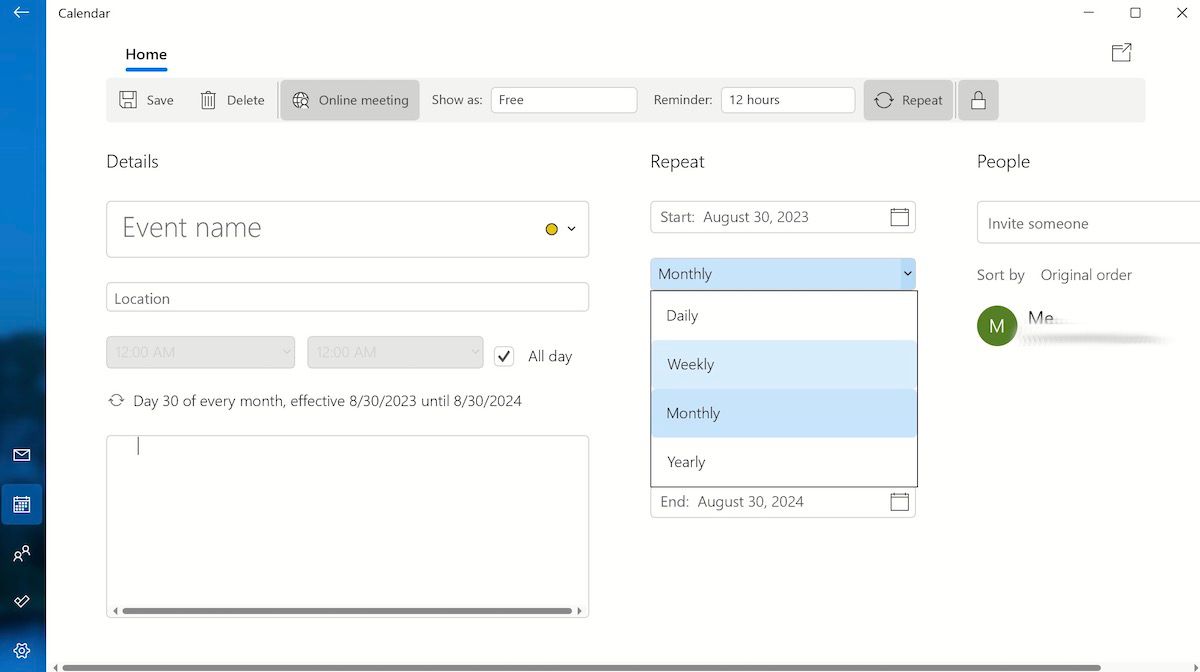
Another handy feature is Repeat, situated right above the People section. Just click on the Repeat icon, select how often you would like your event or reminder to repeat (weekly, monthly, or yearly), and put in the date and time. That’s it; your event will repeat from here on unless you cancel it manually.
Using Your Calendar on Windows 11 Computer
And that, folks, is the Calendar app for you on Windows 11. While it may not be as overloaded with features as many productivity tools that you might encounter all over the productivity space online, its simplicity does make things much easier for you.
With the Calendar app on Windows 11, you can do everything from creating an event reminder to a schedule setup—without the complexity that’s necessary for using third-party apps. So let’s look at all the ways you can make use of the Calendar app on Windows 11.
Also read:
- [New] In 2024, Masterminds of Making Magic Top 6 in NFT Innovation
- [New] Skyrocket Your YouTube Speed with Effective Render Techniques
- [Updated] Accompanying Audio WhatsApp Statement Boost
- [Updated] Quick Access to XP's Movie Making Tools
- 2024 Approved Become a Streaming Sensation on Twitter Platform
- 4 solution to get rid of pokemon fail to detect location On Realme Narzo 60 5G | Dr.fone
- 免費線上AI到MP3的音頻變換 - 如何使用 Movavi 工具
- 網路直接無成本自動轉換3GP到SWF - 使用Movavi的方法
- AIF MOV 파일을 제공하는 URL로 원격에서 무료 바이트열 변환 - 모바비
- ASF形式の動画をAVIに変換する自由なオンラインツール - 快適で使いやすくて安全な方法!
- DNG 크리이프트 투 JPEG/PNG - 원격 송신용 무료 변환 서비스
- Effortless MP4 Upgrade From OGG - Utilize Movavi's No-Cost Online Service
- Guía Gratuita De Instalación E Inicio De Sesión en Google Meet Desde Teléfonos Inteligentes Y PCs
- Jogging Beats Compile Your Ultimate Running Soundtrack
- Understanding Game Console Network Issues: How to Tell if the Problem Is Universal or Personal
- Title: Navigating the Windows 11 Calendar Space
- Author: Richard
- Created at : 2025-02-25 18:52:17
- Updated at : 2025-03-04 19:43:35
- Link: https://win11-tips.techidaily.com/navigating-the-windows-11-calendar-space/
- License: This work is licensed under CC BY-NC-SA 4.0.