
Navigating Windows' Voice Logging Features
Navigating Windows’ Voice Logging Features
There are times when you need to record calls on your computer - for purely legitimate reasons. Windows allows you to do so, but the feature is disabled by default.
In this guide, we will discover how to record on Windows using the built-in feature as well as discuss some third-party applications that can help. Proceed with the method that works best for you while keeping the legal guidelines in mind.
1. Use the Voice Recorder App
The easiest way to record calls on Windows is by using the Voice Recorder application that comes built into Windows.
Here is how you can use it to record your calls:
Press the Win + S keys to launch the Windows Search panel.
Type Voice recorder in the search bar and clickOpen . If this is your first time using the Voice Recorder application, the app will most likely update itself first so hang in there.
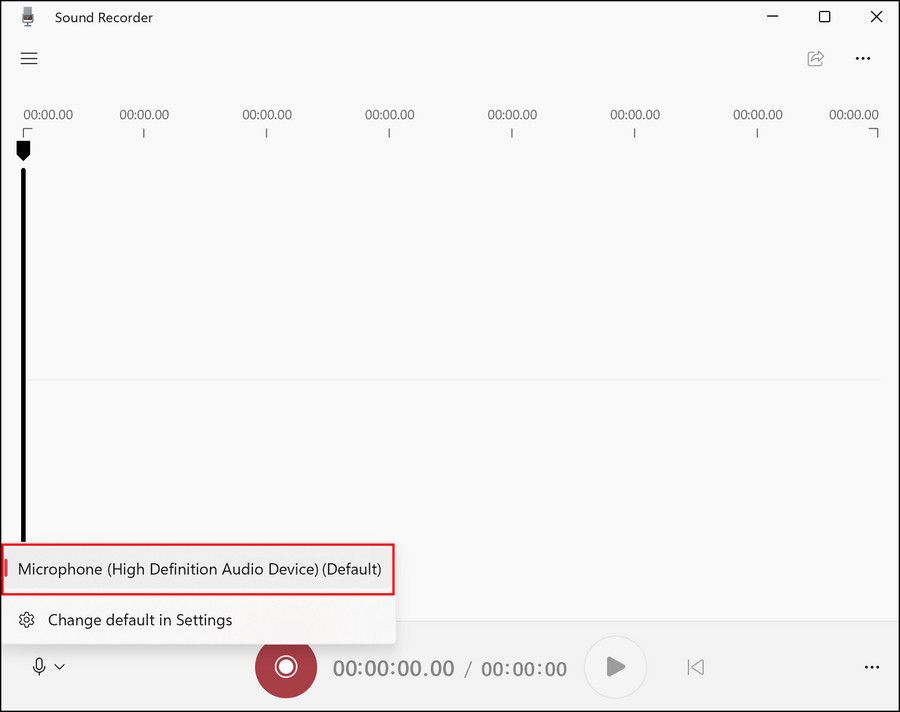
In the app, choose your preferred sound device on the left side of the window.

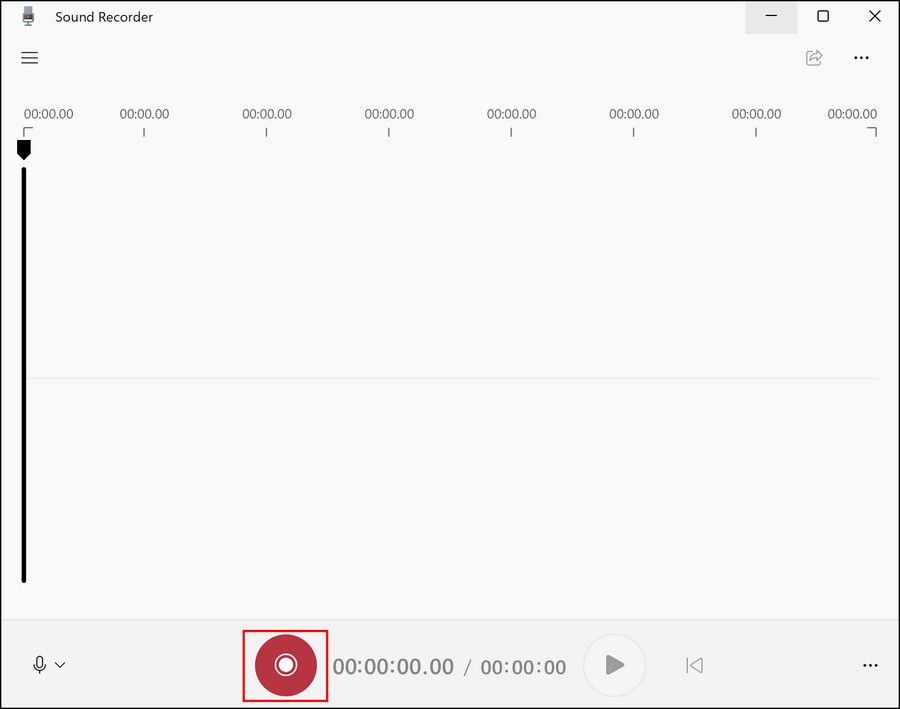
Once done, click on the recording button to begin the recording when you are ready.
Alternatively, press the Ctrl + R keys on the keyboard to start the recording.
ClickYes in the User Account Control prompt to grant the app permission to access your sound device.
Press thePause button or press the Alt + P keys together to pause the recording.
To stop the recording, press theStop button or press the Esc, Enter, or Space keys on your keyboard.
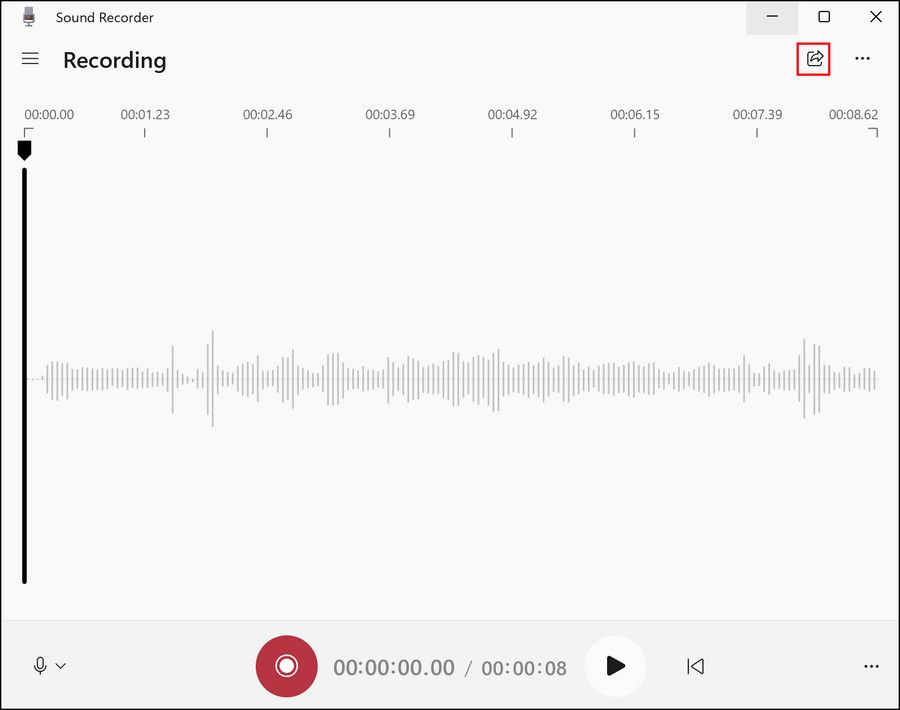
Once the recording has stopped, you can share it by pressing theShare icon in the top right corner of the window.
To access more options, click on the three dots in the top right corner. You can choose to rename and delete the recording or access the settings menu.

Your recording is now ready to be used.
In case the Voice Recorder app fails to record, it might be because the Stereo Mix mixer is disabled. In that case, you should first enable it and then follow the steps we have listed above.
Follow these steps to proceed:
Press theWin + R keys together to open a Run dialog.
Type “mmsys.cpl” in the text field of the dialog box and click Enter.
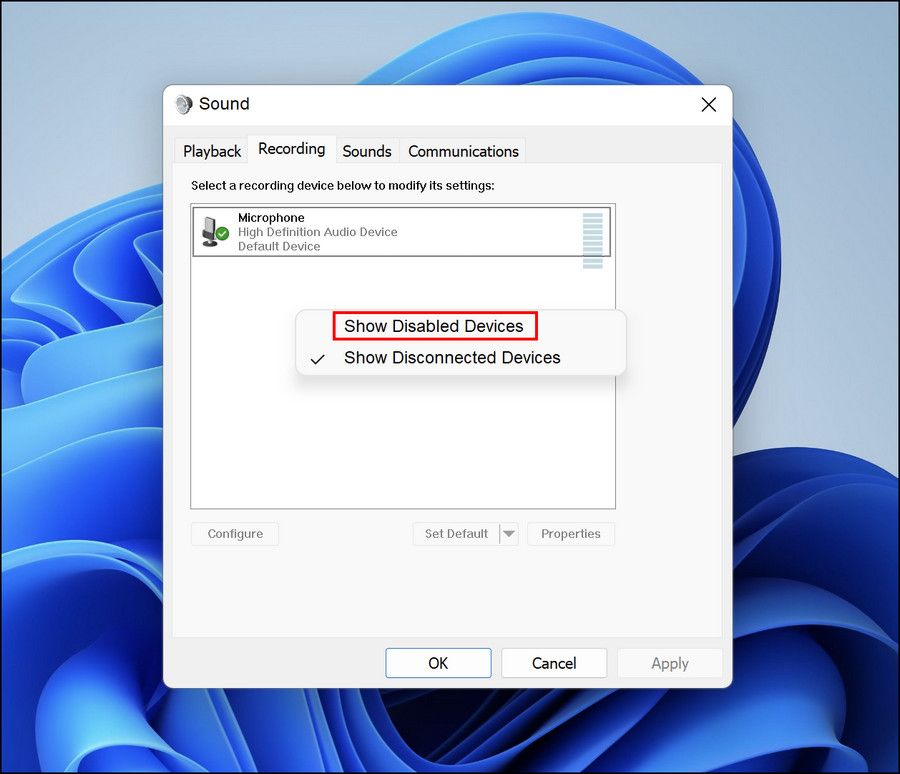
Now, head over to theRecording tab and right-click on an empty space.
ChooseShow Disabled Devices from the context menu.
You should now see Stereo Mix in the dialog. Right-click on it and chooseEnable .
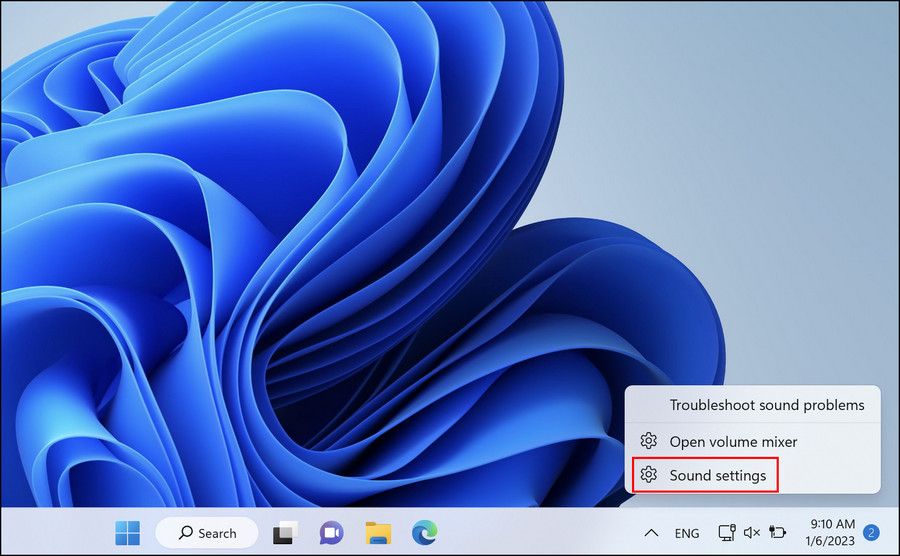
Once done, right-click on the sound icon in your taskbar.
ChooseSound settings >More sound settings .
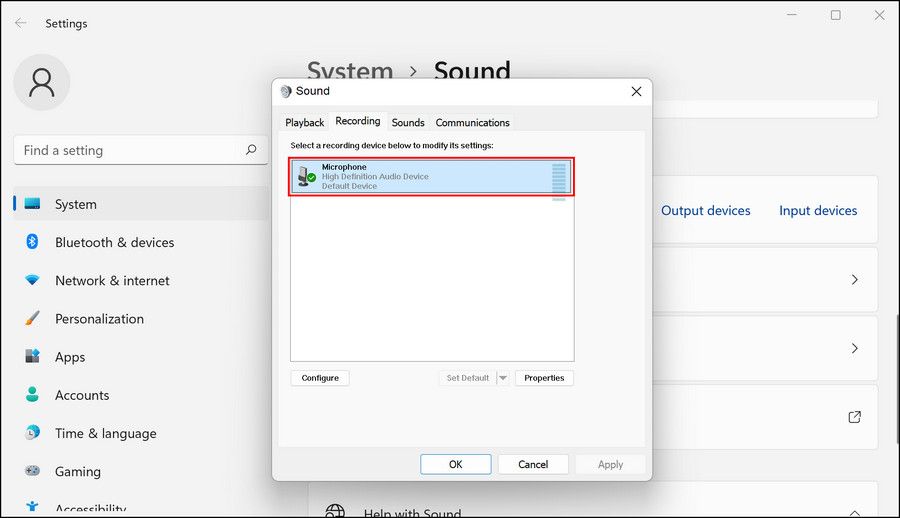
Head over to theRecording tab and click on your microphone.
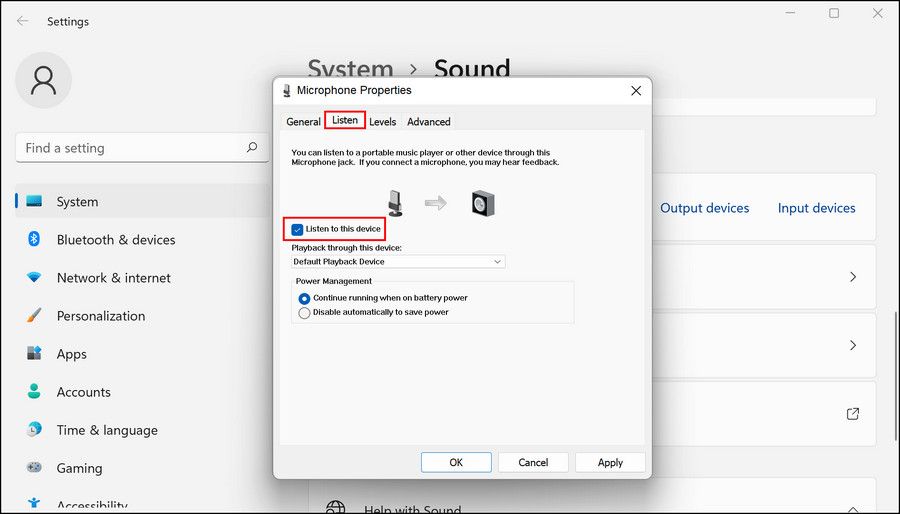
Go to theListen tab and checkmark the box associated withListen to Device .
ClickApply >OK to save the changes.
Once this is done, you can use the recorder app of Windows to successfully record the calls. You can alsoset up a voice recorder shortcut on your keyboard to access this feature even quicker.
2. Use a Third-Party App
If the built-in Windows app does not do the trick for you, then you can also try using a third-party application to record calls.
In this method, we will be using the Audacity app to record voice calls. This app is available to Windows users for free. Due toGoogle’s crackdown on call-recording apps , you can download it from your browser rather than the Play Store.
Here is how you can use it:
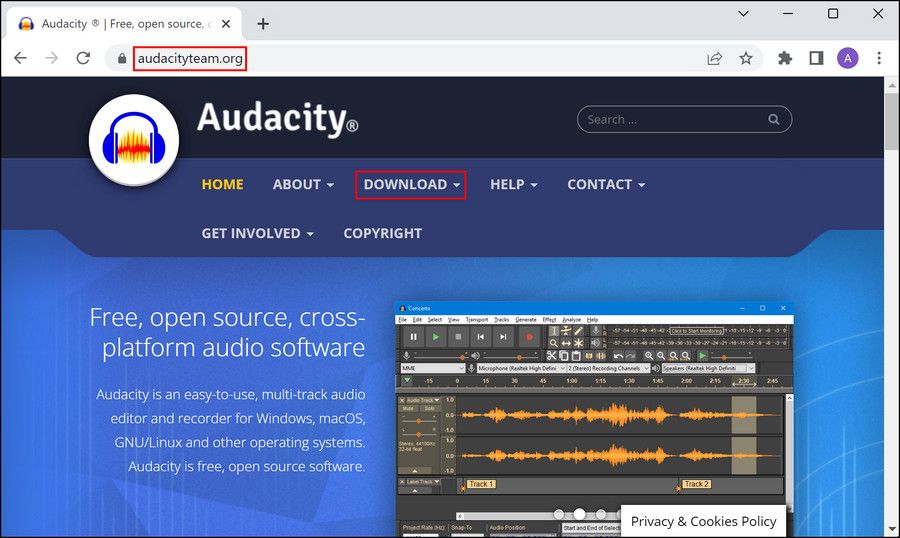
- Head over to theofficial download page for Audacity and click on theDownload button.
- Once the file is downloaded, click on it to launch it.
- Follow the on-screen instructions to install the app.
- Once the app is installed, open it.
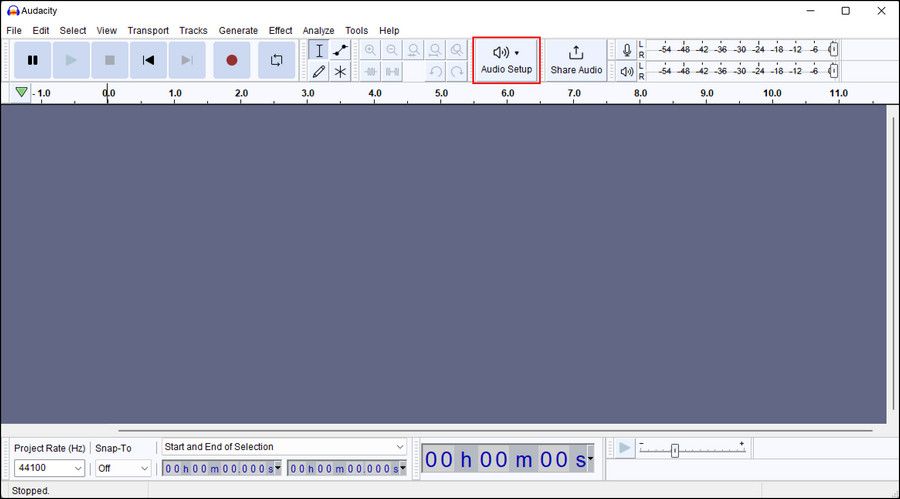
- Expand the dropdown forAudio Setup and choose your preferred device.
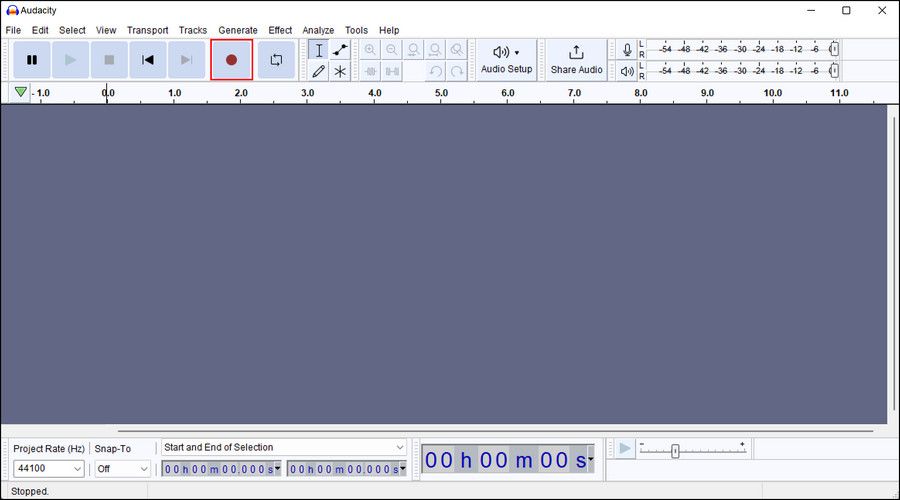
- To start recording, click on the redRecord button in the top pane. You can also use the Shift + R keyboard shortcut.
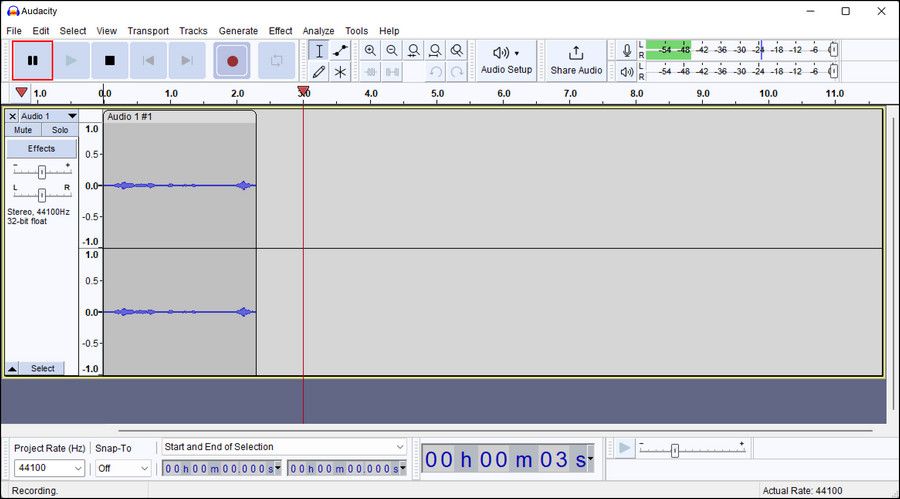
7. To pause, click on thePause button or press P on your keyboard.
8. Finally, once you are done recording, click on theStop button in the toolbar to end the recording. You can use theShare option in the toolbar to transport the file.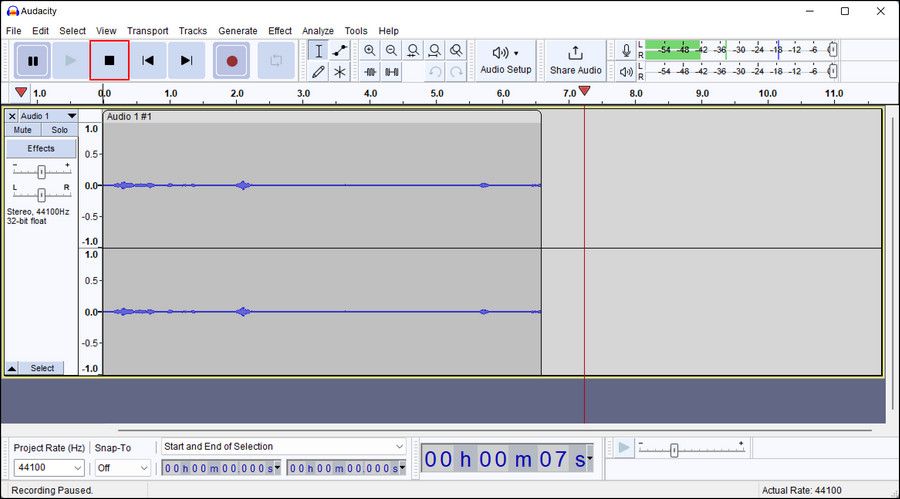
This app comes with a variety of advanced options to customize your recordings, which you can make use of as well.
Record Important Calls on Windows, Easily
The benefit of call recordings can’t be overstated, whether you’re attending an important work call and don’t want to forget important points, or if you’re chatting with a shady person whom you fear will blackmail you later on.
The methods mentioned above should help you set up a call recording system on your Windows computer. You can use it to record and share calls easily, but we highly recommend keeping the legal guidelines in mind.
Also read:
- [Updated] Accelerate Engagement - The Best 12 Ways to Increase Video Popularity for 2024
- [Updated] Essential Tips & Techniques for OBS Setup, Use, on a Mac
- [Updated] In 2024, Easy Setup Making a Direct Path for YouTube Subscribers
- [Updated] Your Journey Through the Maze of Uploading Videos on YouTube
- Enhance Gameplay on Dell G3: Update Essential Graphics and Audio Drivers
- Future-Proofing Visuals Evaluating AV1's Standpoint over VP9 for 2024
- How to Enable Windows Subsystem for Linux
- In 2024, How To Track IMEI Number Of Vivo S17t Through Google Earth?
- In 2024, Unlock Mastery The Beginner's Guide to Editing Excellence
- Mastering Device Connection with Windows 11'S Phones
- Mastering Multi-File Unzipping on Windows
- Personal Touch for Your WT Terminal Display
- Rectifying Windows Logins Not Allowed Issue (Top 8 Ways)
- Remedying Data Transfer Issues with Faulty USB Sticks (Windows)
- Resolving Defective Windows Disk Organizer Errors
- Smooth Sailing: Effortless App Management in Windows 11
- Strategies for Lengthening GoPro's Electric Life for 2024
- Thriving in a Multi-Task World on Windows 11
- Update Your Windows System with New PL2303 Serial Port Drivers – Free Downloads Available
- Title: Navigating Windows' Voice Logging Features
- Author: Richard
- Created at : 2024-11-13 18:15:10
- Updated at : 2024-11-17 18:07:55
- Link: https://win11-tips.techidaily.com/navigating-windows-voice-logging-features/
- License: This work is licensed under CC BY-NC-SA 4.0.