
Overcoming File Access Barriers with PowerShell
Overcoming File Access Barriers with PowerShell
So you’ve downloaded files onto a directory on your PC, but Windows doesn’t trust them? This is understandable because some files from the internet can harm your computer, but what if you know for sure that the files are safe? Luckily there’s an easy PowerShell command you can use to unblock all of them.
How Do I Unblock Multiple Files Using PowerShell on Windows?
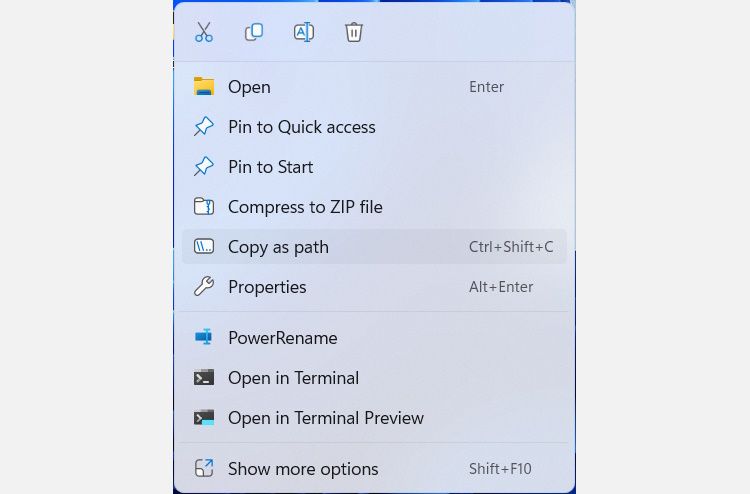
You can easily unblock a file by right-clicking on it and going toProperties — If you’re on Windows 11, you’ll need to clickShow more options first before you can see theProperties option in the context menu. And once you’re there, select theGeneral tab and tickUnblock at the bottom in theSecurity section.

But what if you have more than one file you need to unblock? Doing this one by one can get tedious. Alternatively, you can execute a single PowerShell command to unblock multiple files in a directory. Here is the command structure you need to use:
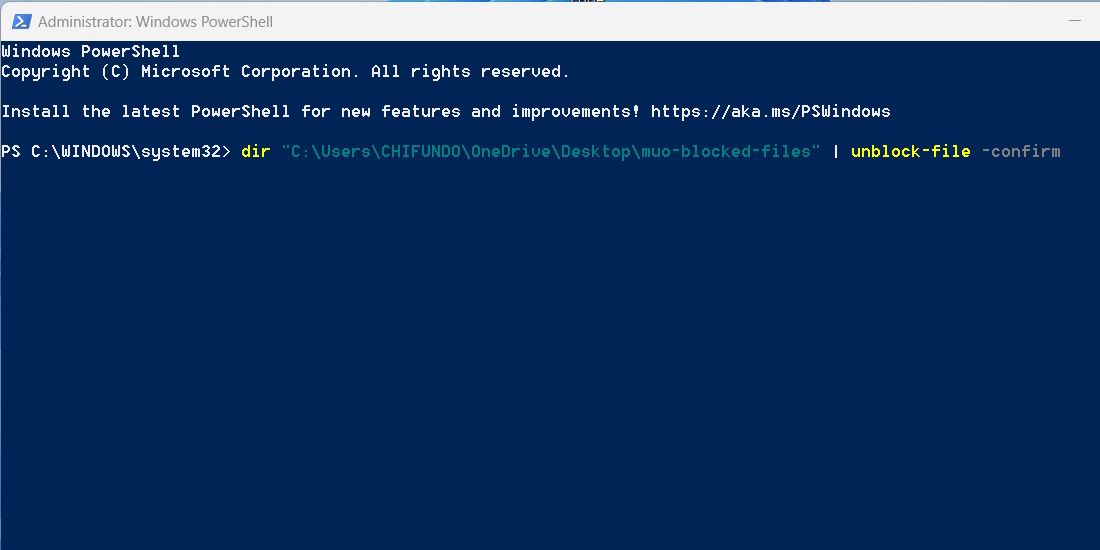
dir [path] | unblock-file -confirm
Just replacepath in the square brackets with the file path of the directory that has the blocked files. You can grab the file path of the directory by right-clicking on it and selectingCopy as path .
With the file path handy, follow the instructions below to use the unblock command in PowerShell:
- PressWin + S to open Windows Search.
- Typepowershell in the search box and when the program appears in the search results, right-click on it and selectRun as administrator . For more ways to open it, please read our guide on ways to open PowerShell on Windows .
- Enter the unblock command in PowerShell and hit theEnter key to run it. This is what it looks like on our computer:

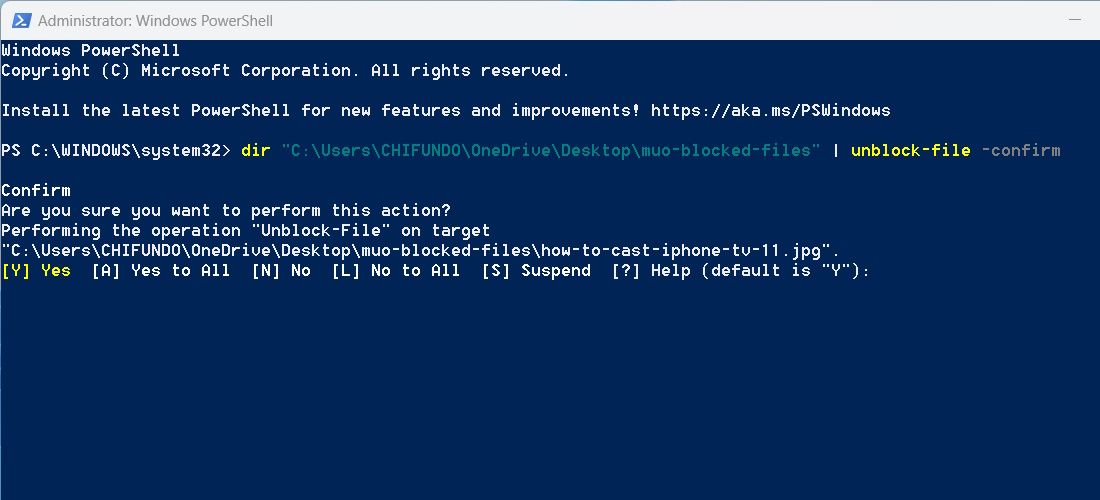
- You will be asked to confirm each file you want to unblock, so type eitherY forYes orN forNo and hit theEnter key. This confirmation step is due to the-confirm portion of the command. It is completely optional, and you can omit it or typeA to confirm all the files in the directory.
There’s a way you can tell Windows to always trust files you download from the internet. To do that, please read our guide on how to stop Windows 10 from blocking your downloaded files . The instructions in the tutorial use the Registry Editor and Local Group Policy Editor, so they should also work on Windows 11.

Now You Know How to Unblock Files You Know Are Safe
With the instruction above unlocking a bunch of downloaded files in a directory should be easier. Keep in mind that you shouldn’t do this on files you don’t trust. The last thing you want to do is put your Windows PC at risk unnecessarily
- Title: Overcoming File Access Barriers with PowerShell
- Author: Richard
- Created at : 2024-08-16 02:32:00
- Updated at : 2024-08-17 02:32:00
- Link: https://win11-tips.techidaily.com/overcoming-file-access-barriers-with-powershell/
- License: This work is licensed under CC BY-NC-SA 4.0.