Overcoming Windows Failure to Detect PowerShell

Overcoming Windows Failure to Detect PowerShell
PowerShell is a handy tool that lets you automate tasks, troubleshoot various errors, and manage a variety of Windows settings. But what if it suddenly goes missing from your computer?
If you use PowerShell frequently, it can be aggravating when Windows cannot find it. Thankfully, it’s possible to restore the missing PowerShell with a few troubleshooting tips. In this post, we’ll walk you through all of them.
1. Make Sure Windows PowerShell Is Enabled
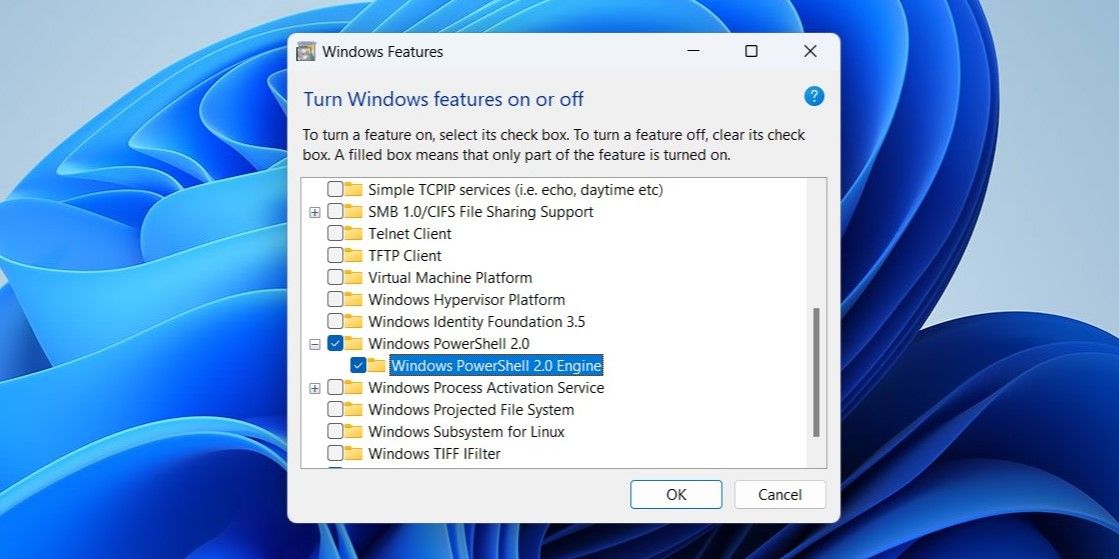
On Windows, you can enable or disable optional features and programs from the Control Panel. To start, you need to ensure that PowerShell isn’t disabled on your computer. Here’s how to check.
- PressWin + R to open the Run dialog.
- Typecontrol in the box and pressEnter to open Control Panel.
- Click the drop-down menu in the top right corner to selectLarge icons .
- Go toPrograms and Features .
- Click theTurn Windows features on or off link from the left pane.
- When the User Account Control (UAC) prompt appears, selectYes to continue.
- In the Windows Features dialog, locateWindows PowerShell and select its checkbox.
- ClickOK to save the changes.

Restart your computer after this (seehow to restart a Windows computer ) and then try to launch PowerShell using the search menu.
2. Launch PowerShell Using Run Command or File Explorer
If you are unable to open PowerShell via the search menu, you can try using the Run dialog box. PressWin + R to open the Run dialog. Typepowershell in the box and pressEnter . If you want to launch PowerShell with admin rights, pressCtrl + Shift + Enter instead.
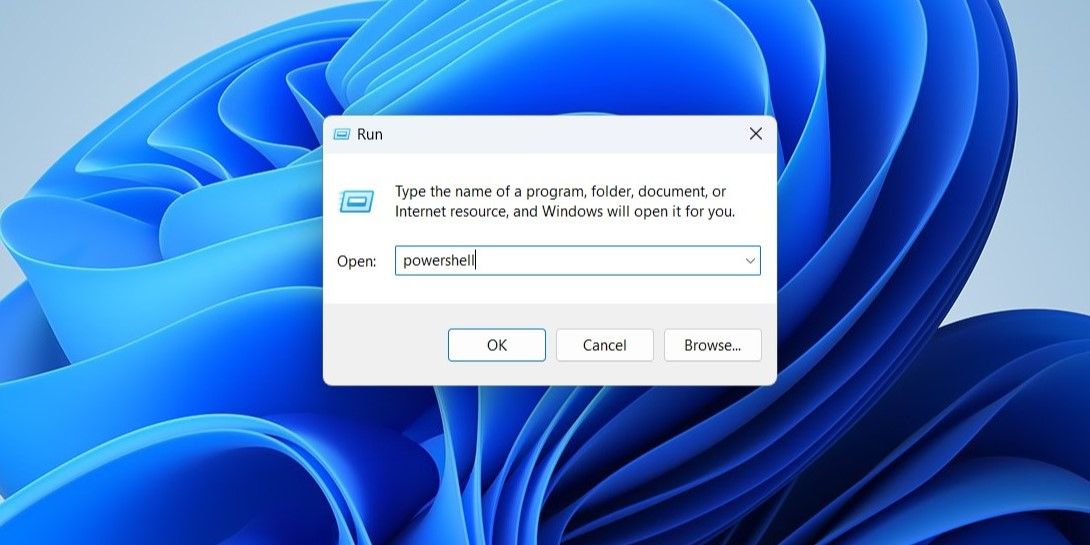
You can also open PowerShell from the File Explorer address bar. To do so, pressWin + E to open File Explorer. TypePowerShell in the address bar and pressEnter .
3. Create a Desktop Shortcut for PowerShell
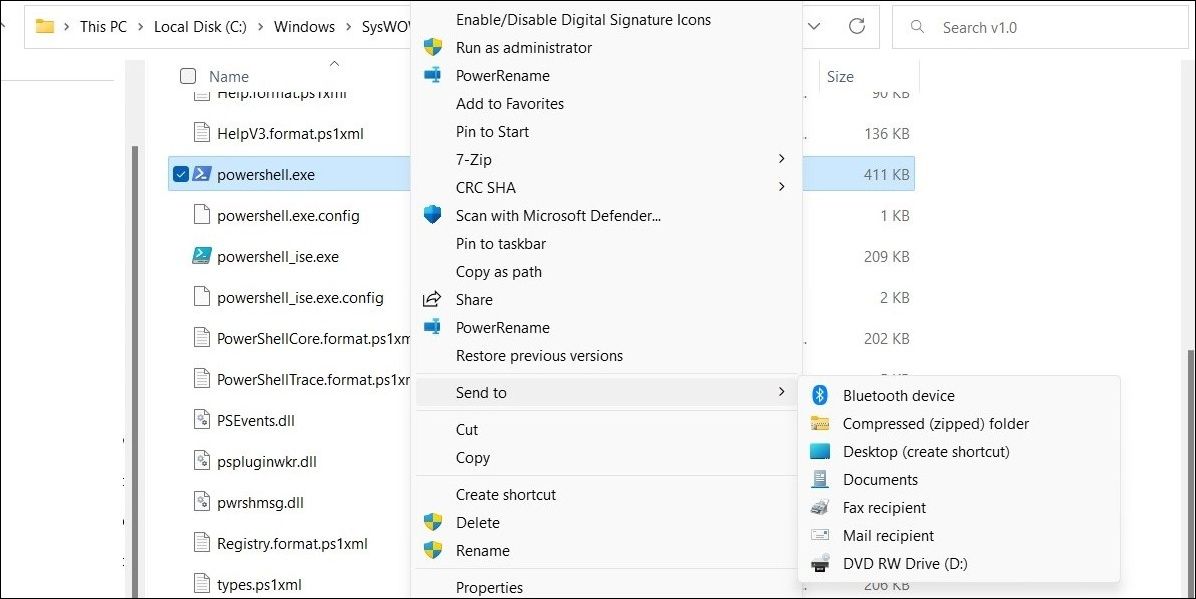
Windows may fail to open PowerShell if it does not know the exact file path to the PowerShell executable file. If that’s the case, you can manually locate the PowerShell executable file on your computer and create a desktop shortcut for it. Here are the steps for doing the same.
- Right-click on theStart icon to open the Power User menu and selectFile Explorer from the list.
- Navigate toThis PC .
- Head over toC: > Windows > SysWOW64 and locateWindowsPowerShell folder.
- Open the WindowsPowerShell folder and go to thev1.0 folder.
- Double-click on the PowerShell executable file and see if it works. If it does, right-click on it and selectSend to > Desktop (create shortcut) .

You can then use the newly created desktop shortcut to launch PowerShell. For added convenience, you can assign a keyboard shortcut to PowerShell. To learn more about this, check our guide onhow to assign keyboard shortcuts to programs in Windows .
4. Scan Your Computer for Corrupted System Files
Damaged or corrupted system files can also interfere with Windows operations and prevent PowerShell from launching. Fortunately, your Windows PC comes with a few built-in tools, such as SFC (System File Checker) and DISM (or Deployment Image Servicing and Management) that can help you with such issues. If Windows suffers from system file corruption, running these tools will fix the problem.
To run the SFC scan on Windows:
- Click the magnifying glass icon on the taskbar or pressWin + S to open the search menu.
- Typecommand prompt in the search box and selectRun as administrator from the right panel.
- SelectYes when the User Account Control (UAC) prompt appears.
- TypeSFC /scannow in the console and pressEnter .
The SFC scan will start verifying the integrity of your system files and fix any issues with them. The scan might take a while, so be patient.
Next, you need to run the DISM scan. This is another diagnostic tool that Windows offers. It can automatically detect any issues with the system image and fix them. If you want to learn more about them, check out our guide on thedifferences between CHKDSK, SFC, and DISM .
To run DISM,open Command Prompt with admin rights again. Paste the following command in the console and pressEnter .
DISM.exe /Online /Cleanup-image /Restorehealth
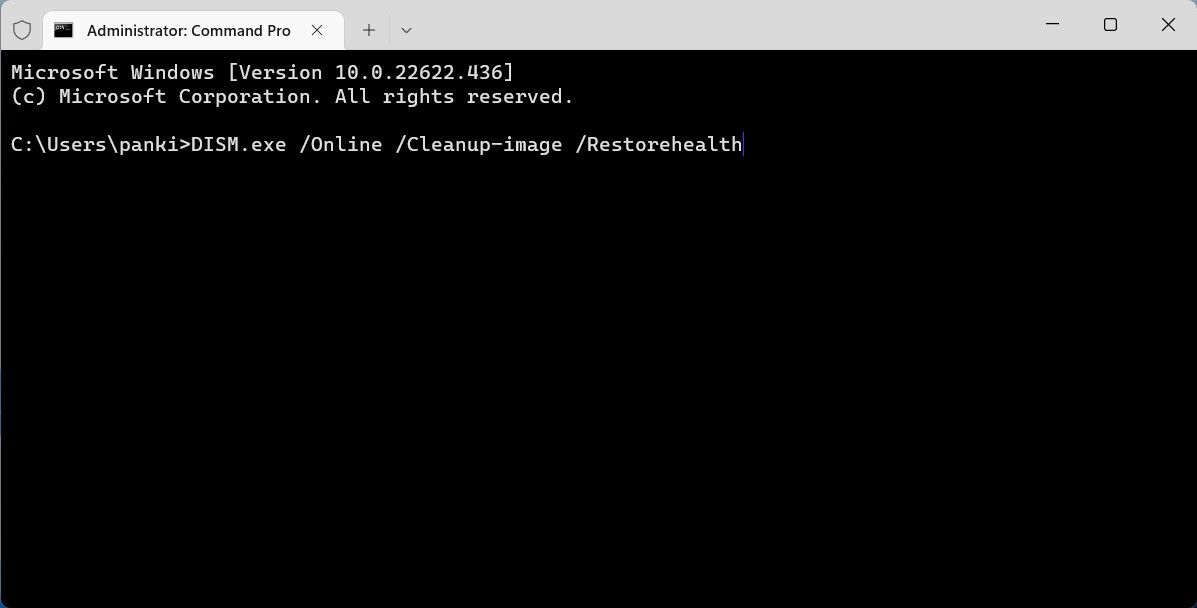
Wait for the command to execute successfully, and then restart your PC. Following that, see if Windows can find PowerShell on your computer.
5. Update Windows PowerShell
If Windows still can’t find PowerShell at this point, there could be a problem with the PowerShell app itself. You can try updating the PowerShell app to see if that makes any difference.
To update PowerShell on Windows:
- PressWin + X to open the Power User menu.
- SelectTerminal (Admin) from the list.
- When the User Account Control (UAC) prompt shows up, selectYes .
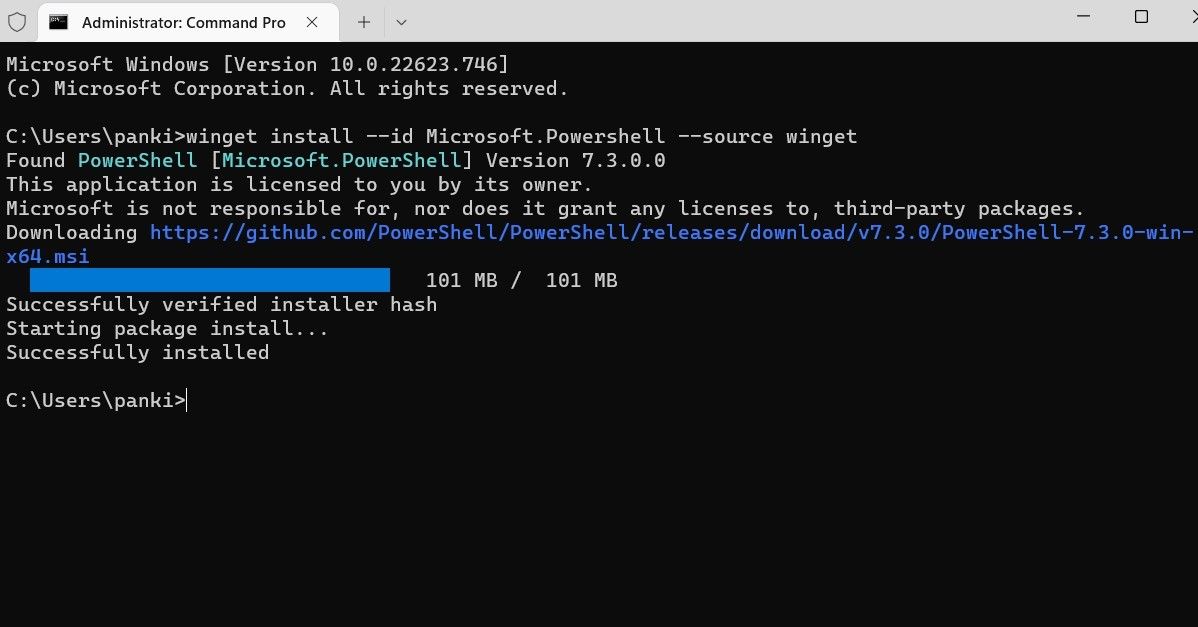
- Type the following command and pressEnter .
winget install --id Microsoft.Powershell --source winget
Windows will download and install the most recent version of PowerShell. Following that, you should be able to access PowerShell.
Using Command Prompt isn’t the only way to update PowerShell on Windows. If you want to learn other methods, check our guide onhow to install or update PowerShell on Windows .
6. Create a New User Account
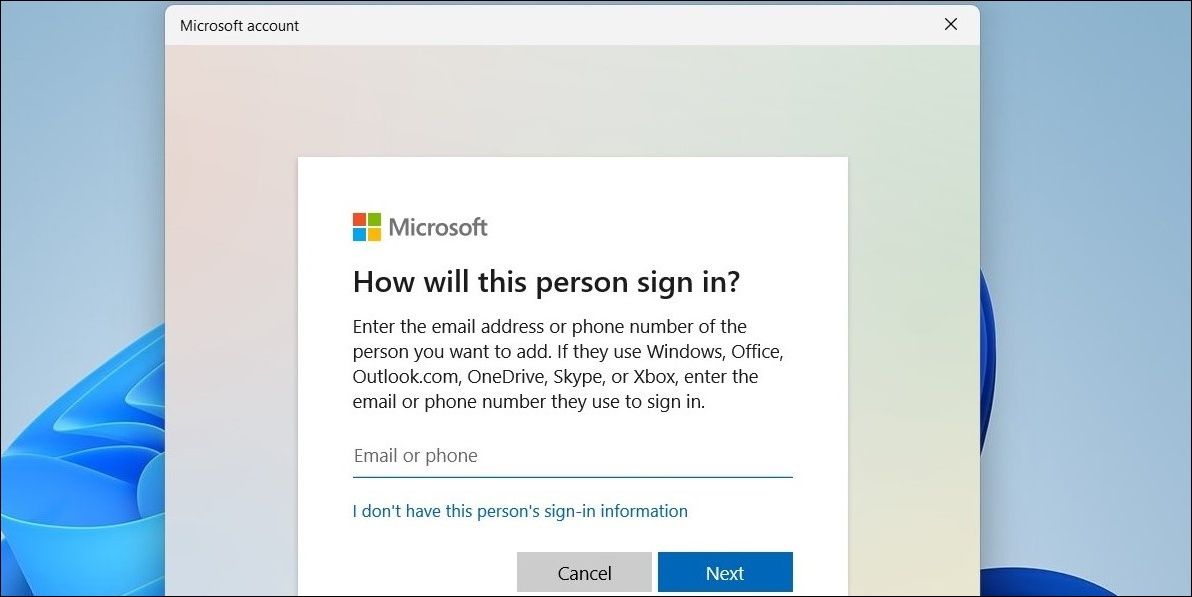
It’s possible that the PowerShell not opening problem is limited to your current user account. In that case, you can create and switch to a new user account and see if that works.
To create a new user account on Windows, use these steps.
- Open the start menu and click thegear icon to open the Settings app.
- Navigate toAccounts .
- SelectOther users .
- Click theAdd account button.
- Click on I don’t have this person’s sign-in information and follow the on-screen prompts to create a new user account.

Sign in with your newly created account, and see if Windows can find PowerShell now.
Access Windows PowerShell Again
Hopefully, one of the above fixes has proven useful, and you’re able to access PowerShell once again. If not, you may have to consider resetting your Windows computer as a last resort.
PowerShell isn’t the only command-line tool available on Windows. You can also use the Command Prompt to communicate with your system.
Also read:
- [New] 2024 Approved The Instagram Edge Vertical Footage Editing Techniques on Final Cut X
- [New] United Experts EaseUS Expert Reviews
- A Comprehensive Analysis of Windows LAV Filter Usage and Outputs
- Affordable Flight Masters Top Drone Selections Below $500
- ASUS Vivobook S 15 - A Comprehensive Compromise of Design
- Ensuring Top-Visibility of Your Notebooks on Win
- In 2024, A Perfect Guide To Remove or Disable Google Smart Lock On Infinix Note 30i
- In 2024, Bypassing Google Account With vnROM Bypass For Gionee
- In 2024, How To Check if Your Vivo Y27 4G Is Unlocked
- In 2024, How To Unlock A Found Apple iPhone 11 Pro Max? | Dr.fone
- Reactivate Your Windows 11 Explore with Ease
- Schritt-Für-Schritt-Guide: Löschte Dateien Wiederherstellen Unter Windows XP
- The 2019 Game-Changer in VegasPro for 2024
- The Essential Tips for Sticky Note Backup
- Title: Overcoming Windows Failure to Detect PowerShell
- Author: Richard
- Created at : 2025-01-10 21:47:27
- Updated at : 2025-01-12 20:08:56
- Link: https://win11-tips.techidaily.com/overcoming-windows-failure-to-detect-powershell/
- License: This work is licensed under CC BY-NC-SA 4.0.
