Perfect Your Data Presentation with Effective Spell Check Functions in Excel

Perfect Your Data Presentation with Effective Spell Check Functions in Excel
Quick Links
Excel’s spell check feature doesn’t have all the bells and whistles that Word’s does, but it does provide basic spell-checking functionality. You can check the spelling of words in the cells of a worksheet and add words to the dictionary.
Unfortunately, Excel does not check your spelling as you type (by underlining them in red) like Word does. You are only notified that a word is spelled wrong when you run the spell check.
How to Spell Check the Current Worksheet
To spell check a worksheet, click the tab at the bottom of the screen for the worksheet on which you want to run the spell check.

When you run the spell check, it starts from whichever cell is currently selected, so, if you want to start the spell check at the “beginning” of the worksheet, put the cursor on cell “A1” before starting.
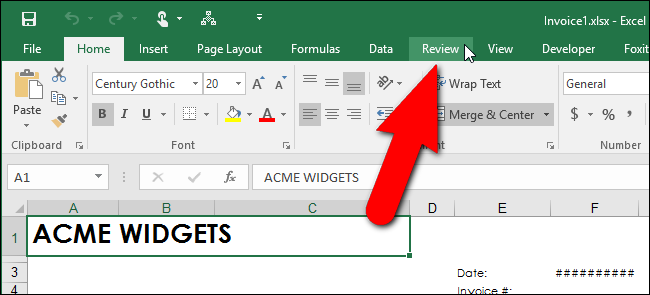
When you’re ready to start the spell check, click the “Review” tab.
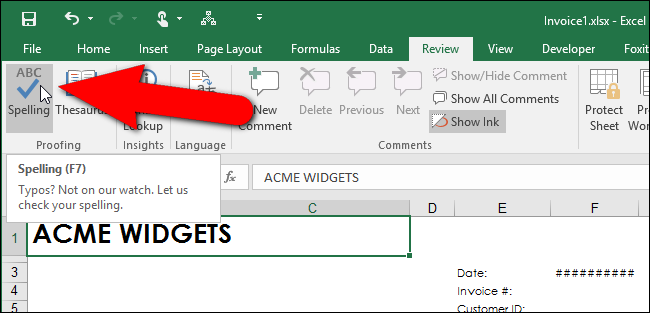
Click “Spelling” in the “Proofing” section. You can also press “F7” with any tab on the ribbon active to start the spell check.
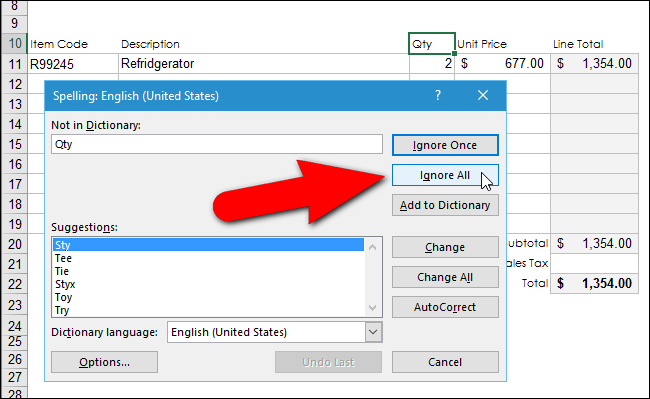
The cell containing the first word not found in the dictionary is highlighted and the “Spelling” dialog box displays. The questionable word displays in the “Not in Dictionary” edit box. You can choose to “Ignore Once” or to “Ignore All” occurrences of the misspelled word if the word is actually correct for your purposes. If that’s the case, you can choose to “Add to Dictionary” if the word is one you use often.
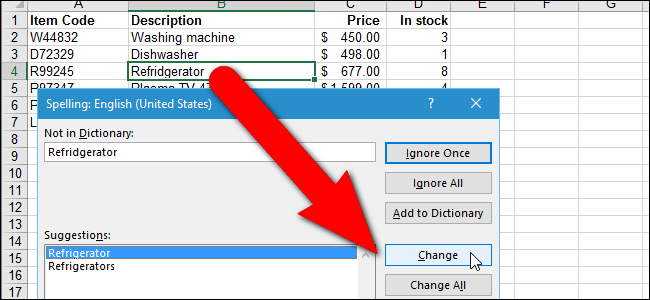
If you’ve actually misspelled a word, you can either select the correctly spelled word from the list of “Suggestions” or enter the correct spelling in the “Not in Dictionary” edit box (if it’s not listed in the “Suggestions” list). Then, click “Change”. To change all occurrences of this error with the same change, click “Change All”.
Related: How to Assign Keyboard Shortcuts to Symbols in Excel 2013
If the questionable word is one you tend to mistype often, you can quickly set up an AutoCorrect entry for it so it will be automatically corrected the next time you make the mistake. To do this, either enter the correct word in the “Not in Dictionary” edit box or choose it from the “Suggestions” list and click “AutoCorrect” on the “Spelling” dialog box. In addition to correcting the word in your worksheet, an AutoCorrect entry is automatically created. The next time you type the incorrect word the same way, it will be automatically replaced with the replacement word you specified. We talk about AutoCorrect entries and how to create them in our article about assigning keyboard shortcuts to symbols in Excel .
When the spell check has finished, a dialog box displays telling you so. Click “OK” to close it.
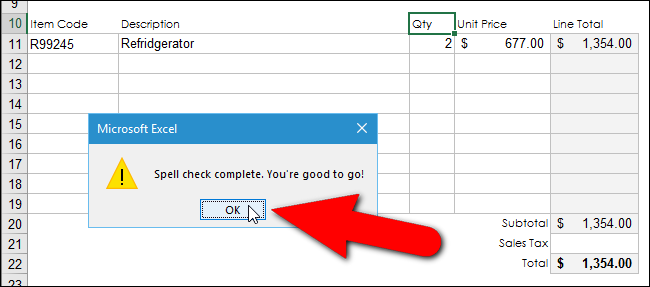
Notice that the word “Refridgerator” on the “Invoice” worksheet was not found in the spell check of this worksheet. That’s because it’s the result of a formula in that cell that grabbed the word from a cell on the “Product Database” worksheet based on the “Item Code” entered on the “Invoice” worksheet. To correct “Refridgerator”, we need to run a spell check on the “Product Database” worksheet, which we will do in the next section.
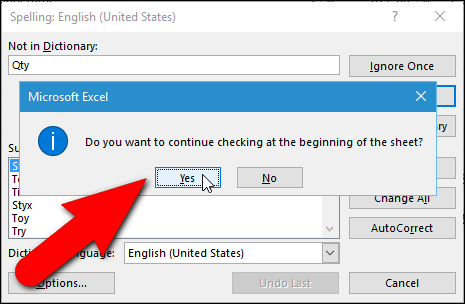
Remember when we said you should select the first cell of a worksheet (“A1”) before starting a spell check? If you forgot, and started the spell check from any other cell than “A1”, you will be asked at this point whether you want to continue checking the spelling at the beginning of the worksheet before the spell check completes. Click “Yes” to check the remainder of the worksheet that has not been checked yet and then you will see the “Spell check complete” dialog box pictured above.
How to Spell Check All Worksheets in a Workbook at Once
By default, Excel spell checks your current worksheet. But what if you have a lot of worksheets in your workbook and you want to check them all? No worries. You can easily do that in one go.
In our example, there are two worksheets in our workbook, “Invoice” and “Product Database”. In the previous section, we only checked the “Invoice” worksheet. Now, we will select both of the worksheets in our workbook so they will both be spell checked without having to do each separately.
To spell check all the worksheets in a workbook, right-click on the current worksheet tab at the bottom of the Excel window and select “Select All Sheets” from the popup menu.
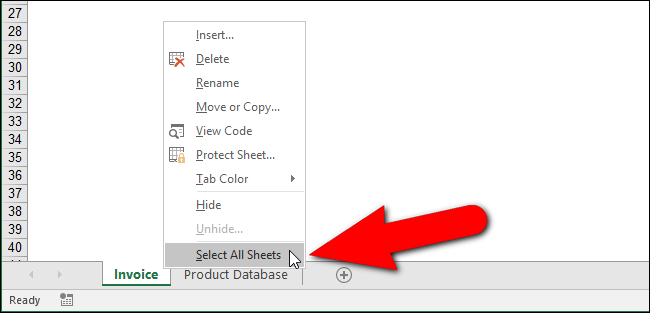
Notice in the above image that the currently selected worksheet tab displays in white and the inactive tab displays in gray. When all worksheet tabs are selected, they all display with a white background, as shown below.
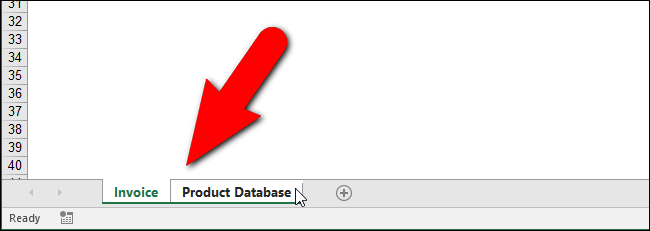
Now when you start the spell check, it will check all the worksheets in the workbook. In our case, when the spell check gets to the second worksheet, or the “Product Database” worksheet, it finds a spelling error. To correct the error, we select the correct word in the “Suggestions” list box and click “Change”. As we mentioned earlier in this article, if we think we misspelled the same word the same way in other cells in our workbook, we can click “Change All” to correct them all at once with the same corrected word.
Remember, you can also type the correct word in the “Not in Dictionary” edit box and click “Change” to correct the error.
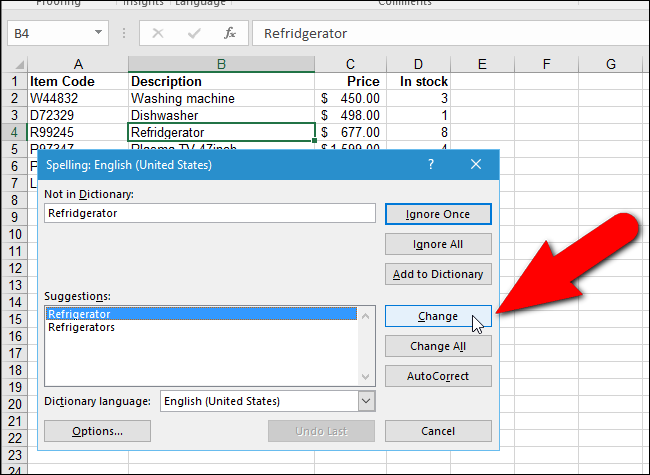
When the spell check is complete, and the “Spell check complete” dialog box displays, you may notice that the last corrected error doesn’t seem to have been corrected in the cell on the worksheet.
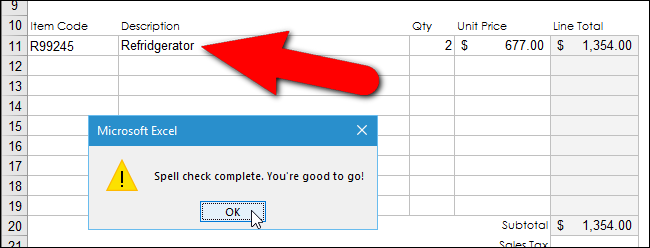
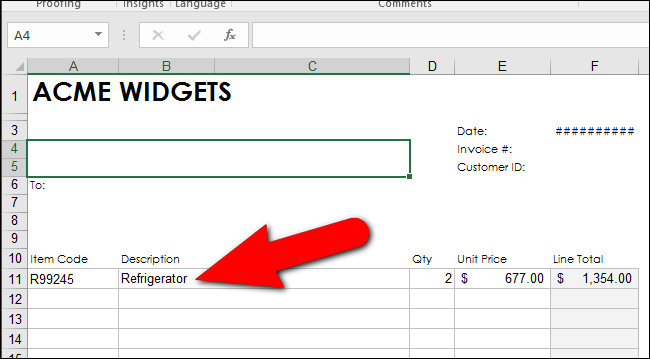
Don’t worry. When you click “OK” to close the dialog box, the corrected word displays in the cell.
Related: How to Limit Spell Checking to the Main Dictionary Only in Word
You can use custom dictionaries to add words you use often to the dictionary, that are not already in the default built-in dictionary, as well as delete words you added using the “Add to Dictionary” button on the “Spelling” dialog box. You can even create additional custom dictionaries. The spell check can also be limited to use of the main dictionary only , even if there are custom dictionaries available.
Also read:
- [New] In 2024, Elite 5 Video Snapshot Recorders
- [New] In 2024, Live Transmission via OBS to Instagram
- [New] Premier UAV Choices for Optimal GoPro HD Imaging for 2024
- 2024 Approved How to Use Story Remix to Edit a Video in Windows 10 Photos
- Counteracting Steam's Refusal: Decode VAC Denial
- Expert Advice on How to Take Perfect Screenshots with Your Acer Notebook
- Inexpensive Quality Camera Solutions
- Instagram's Innovative Move: Shift to WhatsApp for 2FA Codes
- Journey Through Time: Discovering 7 Classic Windows Traits in 11
- Reign Over Your Routine - Top 6 Task Organizers For Win 11 OS
- The Moto G with Stylus – Unmatched Performance & Satisfactory Energy Reserves for Effortless Note-Taking
- The Ultimate Way to Visualize and Tame Your Disk Space
- Unlock Desktop Potential: Custom Snap Designs Using PowerToys
- WinOS Troubleshooting: How To Rectify Task Runner Failure (Error 0X8007000f)
- Title: Perfect Your Data Presentation with Effective Spell Check Functions in Excel
- Author: Richard
- Created at : 2024-12-02 01:11:31
- Updated at : 2024-12-06 21:02:15
- Link: https://win11-tips.techidaily.com/perfect-your-data-presentation-with-effective-spell-check-functions-in-excel/
- License: This work is licensed under CC BY-NC-SA 4.0.