Personalizing Thumbnail Heights for Images

Personalizing Thumbnail Heights for Images
Have you ever had trouble identifying your images in Windows because their thumbnail size was too small? If so, you’ve come to the right place. In this article, we’ll share two efficient ways to change the image thumbnail size, allowing you to easily organize and locate your files.
Disclaimer: This post includes affiliate links
If you click on a link and make a purchase, I may receive a commission at no extra cost to you.
1. Change Image Thumbnail Size Using the File Explorer
Whether you need to perform simple tasks like viewing images or more complex operations like managing Folder options , the Windows File Explorer has you covered. And if you want to adjust image thumbnail sizes to your liking, you can do that too using File Explorer.
Here’s a step-by-step instruction on how to use File Explorer to change image thumbnail size:
- Press the Win key to open the Start Menu.
- In the search bar, type File Explorer and press Enter. Alternatively, you can press the Win + E hotkey to launch the File Explorer.
- Head towards the target image folder.
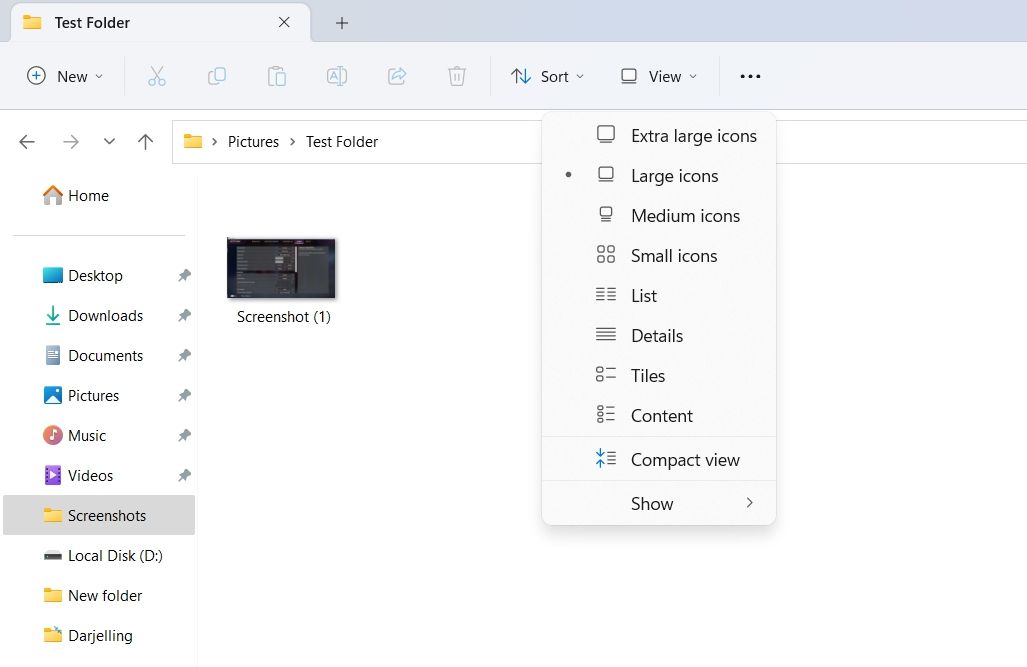
- Click the View option at the top and choose the image thumbnail size from the context menu. Windows offers four thumbnail sizes – extra large, large, medium, and small. You can choose either of the thumbnail sizes as per your preference.

2. Change the Image Thumbnail Size Using the Registry Editor
The Registry Editor is a crucial Windows utility that allows you to configure various system settings. However, it’s important to note that editing the registry can be risky, as one mistake could cause your system to become unstable. Therefore, it’s essential to back up the registry and create a restore point before proceeding with any changes.
Once you’ve completed these prerequisites, follow the steps below to use the Registry Editor to change the image thumbnail size:
Open the Start Menu, type Registry Editor, and press Enter. If this method doesn’t work, check out other ways to launch the Registry Editor .
In the Registry Editor, head toward the following location:
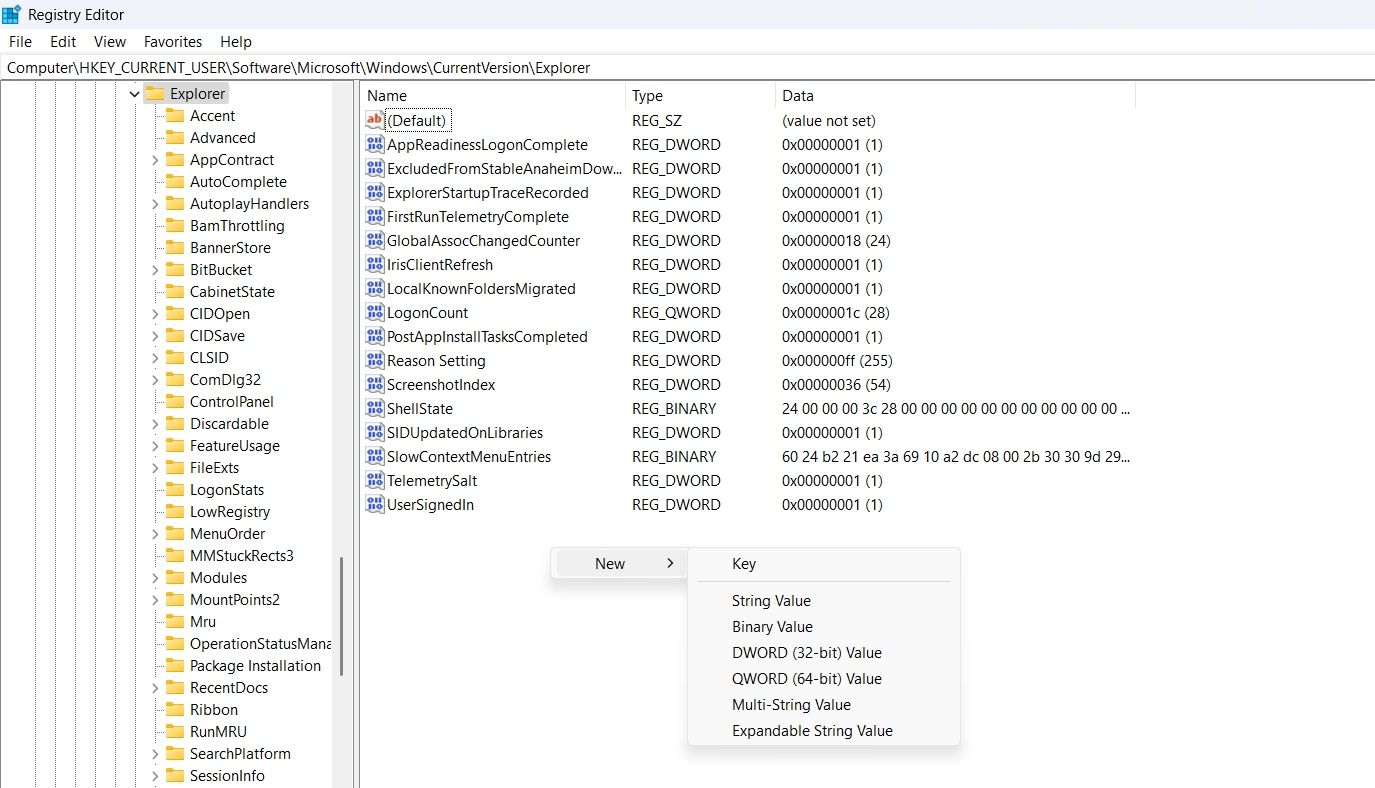
Computer\HKEY_CURRENT_USER\Software\Microsoft\Windows\CurrentVersion\ExplorerRight-click the blank space in the right pane, hover the cursor to New, and select DWORD (32-bit) Value.

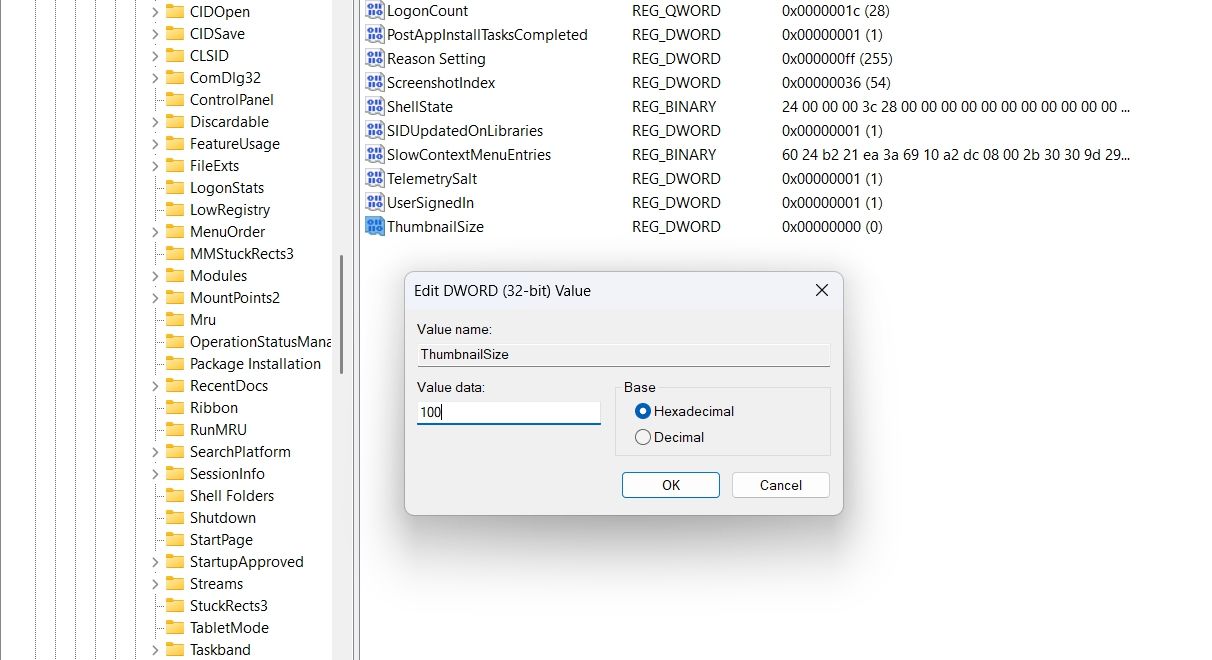
Name the value ThumbnailSize.
Double-click on ThumbnailSize, and enter the value between 32 and 256. The higher the number, the larger the image thumbnail.

Click OK to save the changes.
Everything Is Large and Clear on Windows
Thumbnails are small representations of the original image, allowing you to identify and organize your images easily. However, if the image thumbnail size is too small, identifying and organizing your images can be challenging. Fortunately, the above methods can help you change the image thumbnail size according to your preference, making it easier to manage your files.
Also read:
- [New] 2024 Approved Zero Pay Zone How To Watch, Record, and Edit Soccer for Free
- [New] Cutting-Edge Cinema Teasers
- [New] In 2024, Funny Flicks Compilation of Chuckle-Inducing Short YouTube Videos
- [New] Unlocking The Secrets To Becoming An Exceptional Interviewer
- [Updated] In 2024, Understanding Apple’s Audio Content Guidelines
- [Updated] Spectrum Perfection Color Grading Basics
- How To Simulate GPS Movement With Location Spoofer On Honor 90? | Dr.fone
- In 2024, Can I use iTools gpx file to catch the rare Pokemon On Samsung Galaxy A05s | Dr.fone
- Optimizing Playback Settings for Flawless Media Streams
- Understanding and Altering Win 11'S Keyboard Settings
- Unleash Creativity on Win10 with These 7 Art Tools
- Unleash Creativity: Desktop Drawing in Win 10/11
- Unshackling the Gamer: Solve Full-Screen Freezes for Sonic Games (Windows 11)
- Title: Personalizing Thumbnail Heights for Images
- Author: Richard
- Created at : 2024-12-03 20:28:53
- Updated at : 2024-12-06 23:18:36
- Link: https://win11-tips.techidaily.com/personalizing-thumbnail-heights-for-images/
- License: This work is licensed under CC BY-NC-SA 4.0.


