Preventing BSOD: Interrupt Exception Troubleshoot

Preventing BSOD: Interrupt Exception Troubleshoot
The INTERRUPT_EXCEPTION_NOT_HANDLED BSOD occurs when a hardware device or a software program launches a request to the processor, but the processor fails to execute it. This can make the Windows operating system crash, leading to a Blue Screen of Death.
In the following sections, we examine the most common causes of this issue and the troubleshooting methods you can try to resolve it permanently.
Understanding the Causes
This error typically occurs when you install a new program or update your PC. The program or update you have installed might cause conflicts with the drivers or other software in the system, leading to a crash. Alternatively, it might itself be corrupt.
Apart from this, here are a few other potential causes that can cause this problem:
- Faulty Registry keys : if a critical Registry key is missing or contains incorrect information, it can cause the system to malfunction and trigger the error at hand.
- Outdated drivers : the essential drivers may contain bugs or be outdated, leading to system instability.
- Corrupted system files : the critical system files needed to operate the system might be dealing with some sort of inconsistency, preventing you from using the system properly.
Now that we know the potential causes, let’s look at the solutions that helped several affected users fix the issue. Proceed with the one that fits your situation the best.
1. Boot Into WinRe if Your PC Won’t Launch
If the BSOD error is preventing you from booting into the system at all, you will need to access the recovery environment of Windows to perform the troubleshooting methods.
This diagnostic tool comes with several different troubleshooting utilities to help you fix problems like startup issues, hardware problems, and crashes like a Blue Screen of Death. To launch this environment, simply turn on your computer. But as soon as it turns on, repeatedly press the F11 key to launch WinRE.
However, remember that this key may be different for you, depending on your device. In some devices, it is F9 or F12 key. It is best to check your manufacturer’s official website for this information.
If using a key does not work, you can also try hard rebooting your computer a couple of times. Usually, upon the third attempt, Windows automatically launches WinRE.
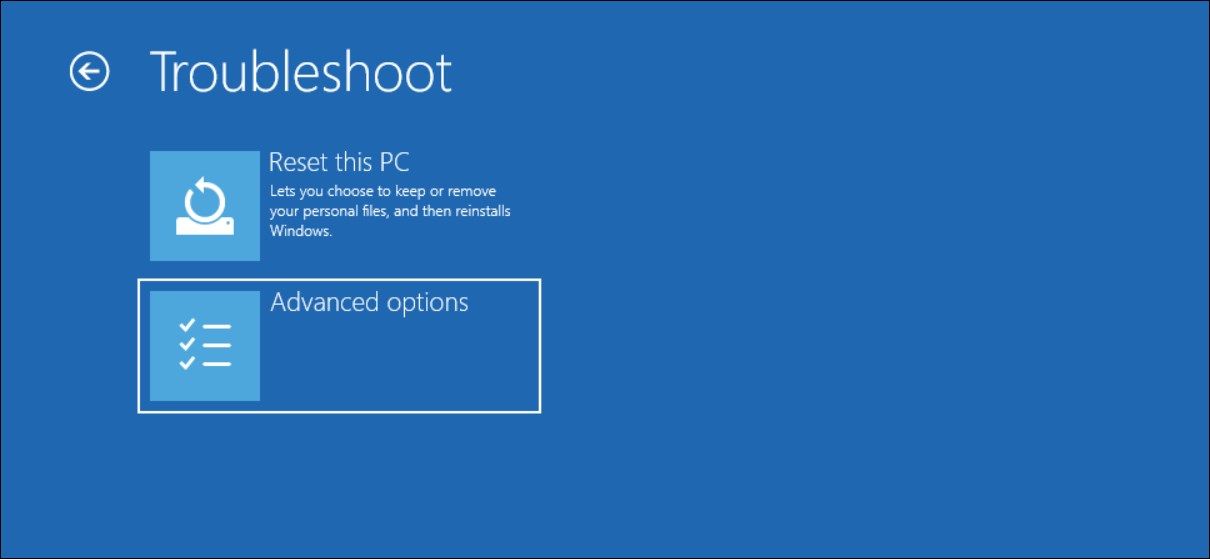
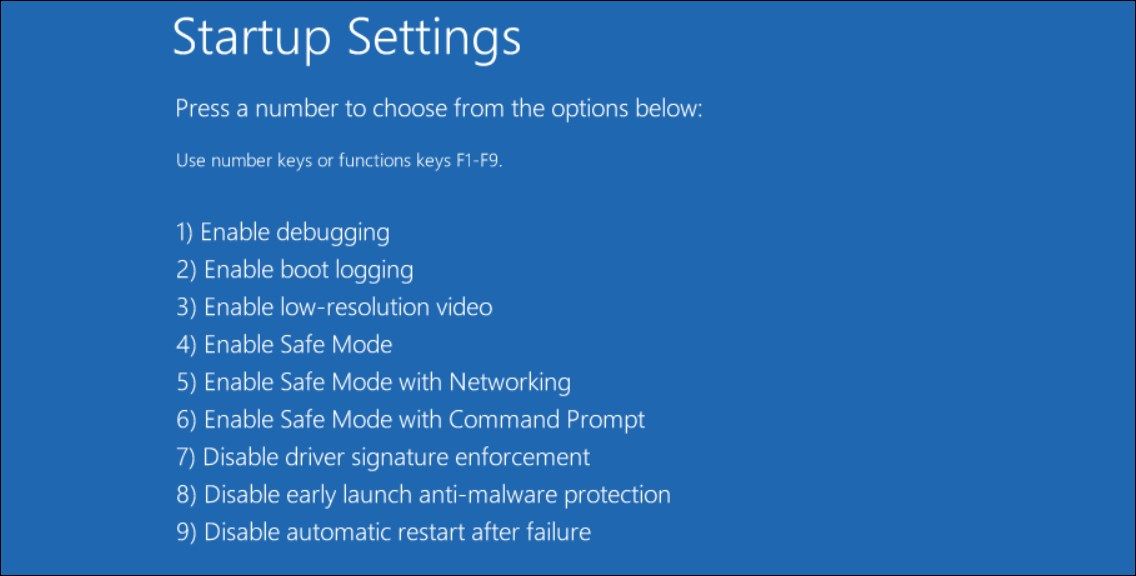
Once in the Recovery Environment, navigate toTroubleshoot >Advanced Options >Startup Settings .
Here, click on theRestart button. Once the system reboots, you should see a list of options. Choose5 or press theF5 key to boot intoSafe Mode with Networking . After booting into Safe Mode, you can perform the solutions below.
2. Delete the Problematic Registry Keys
As mentioned above, several Registry entries might be corrupted or have incorrect information, causing the problem. In the case of this specific error, several users noticed that the Registry keys related to a tech program were leading to the issue.
This is why the first thing we recommend doing is deleting the problematic keys. However, before proceeding, we highly suggestcreating a Registry backup to be safe. You will also need to perform these steps in Safe Mode, so if you haven’t yet booted into it using WinRE, follow thesesteps to boot your computer into Safe Mode .
Once that is done, you can proceed:
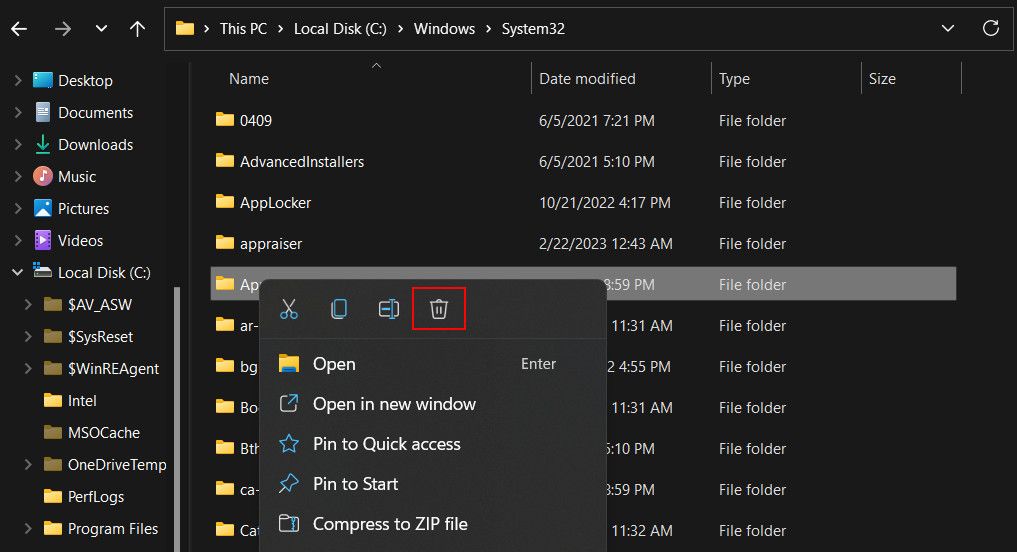
- Launch File Explorer and navigate to the following location:
C:\Windows\System32\ - Here, delete the APOIM32.EXE. APOMNGR.DLL, and CMDRTR.DLL files.

- Now, press the Win + R keys together to open Run.
- Type regedit in Run and click Enter.
- ClickYes in the User Account Control prompt.
- Once you are inside the Registry Editor, navigate to the location mentioned below if you are using a 32-bit system:
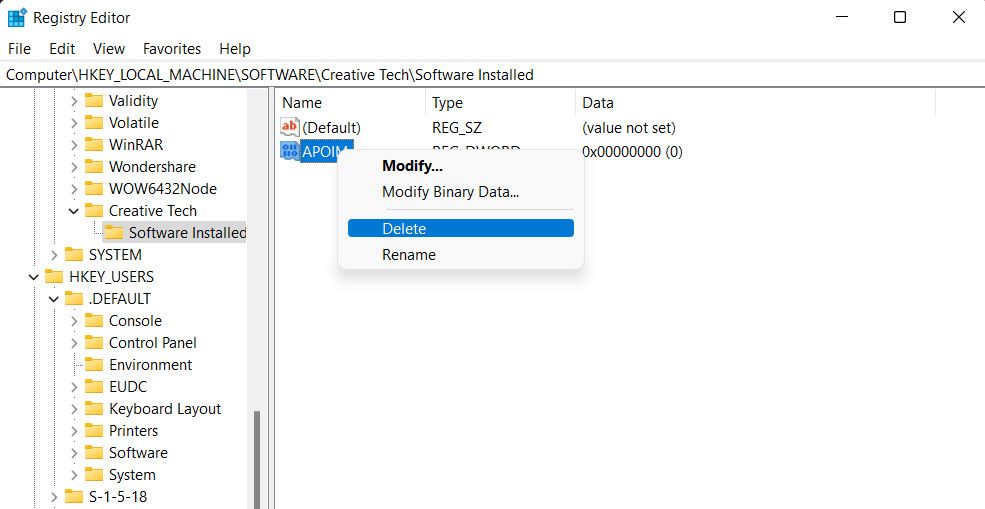
HKEY_LOCAL_MACHINE\SOFTWARE\Creative Tech\Software Installed\APOIMHKEY_LOCAL_MACHINE\SOFTWARE\Creative Tech\Installation\CTRedist\APOIM - Delete the APOIM values from here by right-clicking on the value and choosingDelete .

- If you are using a 64-bit operating system, navigate to the following locate and delete the APOIM value using the same method from here:
HKEY_LOCAL_MACHINE\SOFTWARE\Wow6432Node\Creative Tech\Software Installed\APOIMHKEY_LOCAL_MACHINE\SOFTWARE\Wow6432Node\Creative Tech\Installation\CTRedist\APOIM
Finally, you can close the Registry Editor and restart your computer. Hopefully, you should no longer face the Blue Screen of Death error upon reboot.
3. Remove the Problematic Software
If you recently installed new software and the issue started appearing after that, it’s possible that the new software is conflicting with existing software, leading to the problem. In this case, removing the software from the system is the best solution.
Here is what you need to do:
- Press the Win + R keys together to open Run.
- Type control in Run and click Enter.
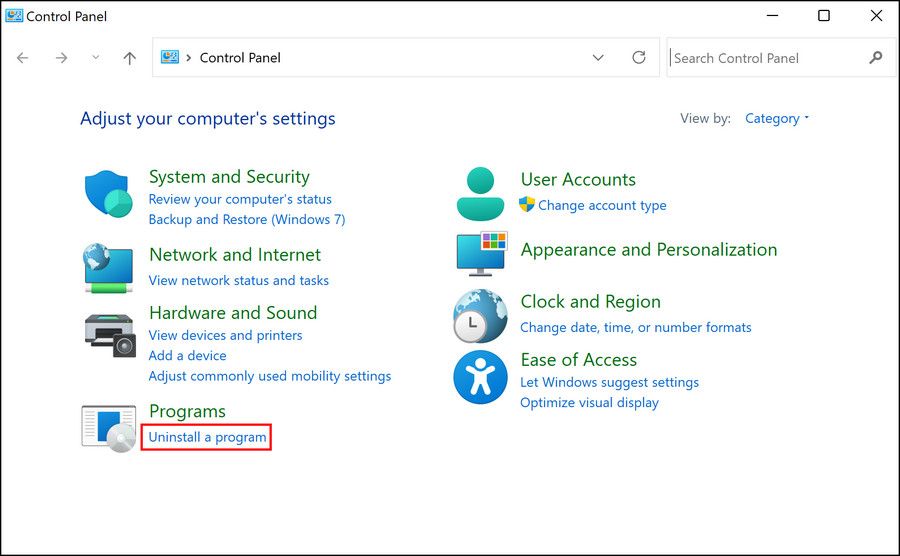
- In the Control Panel, navigate toPrograms >Uninstall a program .

- You should now see a list of installed apps in the system. Right-click on the targeted app and chooseUninstall from the context menu.

5. Follow the on-screen instructions to complete the process.
Once the app is uninstalled, restart your computer and check if the issue is resolved.
4. Run Driver Verifier
If you encounter a blue screen error, it may be due to an issue with the critical drivers on your computer. Identifying the problematic driver manually can be time-consuming, which is where the Driver Verifier utility comes in handy.
It helps you identify the problematic driver quickly and efficiently by subjecting your system to multiple stress checks. Keep in mind that this utility only helps narrow down the issue and won’t fix it for you. We have a detailed guide onhow to use the Driver Verifier utility to fix blue screen errors in Windows which you can head over to for step-by-step instructions on how to use the tool.
Once you’ve identified the problematic driver, you can update it using the Device Manager utility to resolve the issue.
5. Other Generic Fixes to Try
Apart from the solutions discussed above, severalother troubleshooting methods for BSODs can help you fix blue screen errors such as this one. This includes scanning the critical system files, restoring the system to an older working state, and checking the hardware for problems.
BSOD Error, Now Fixed
The Blue Screen of Death is always frustrating, especially because they do not provide much information about the cause of the problem, making them harder to troubleshoot. Hopefully, the methods we have listed above will help you fix the INTERRUPT_EXCEPTION_NOT_HANDLED BSOD for good.
And to prevent the issue from occurring again in the future, make sure to keep your system and its drivers updated at all times.
Also read:
- [New] Heroic Quests Ranking Gaming Epics in Action-Adventure for 2024
- [Updated] The Importance of Diversity & Inclusion in Market Research Samples
- 必見!SDメモリから消えた重要データの回収法と再生手順
- Audiovisual Expertise Selecting Top Video Minds for 2024
- Enabling an Easier Way to Check for Windows 11 Software Updates UI-Wise
- Energy Healing for Beginners | Free Book
- Get to Know Your PC's RAM: Simple Windows Approach
- Get Your Skype Microphone Working Again: Essential Tips for Windows 10 Operating Systems
- In 2024, How to Stop Google Chrome from Tracking Your Location On Tecno Pova 5? | Dr.fone
- Master the Art of Resolving Windows Photography Problems
- Optimizing Dual Network Connectivity in Windows OS
- Quick Guide: Implementing Search in Win11 Task Manager
- Reinstating Java: Fixing the Setup Failure Issue
- Seamless Setup: How To Make Your AirPods Compatible with an HP Device
- Unlocking Speed: Mastering Windows Task Shortcuts
- Title: Preventing BSOD: Interrupt Exception Troubleshoot
- Author: Richard
- Created at : 2024-11-29 21:46:47
- Updated at : 2024-12-07 00:03:28
- Link: https://win11-tips.techidaily.com/preventing-bsod-interrupt-exception-troubleshoot/
- License: This work is licensed under CC BY-NC-SA 4.0.
