Proactive Performance: Perfecting Your Win11 Startups

Proactive Performance: Perfecting Your Win11 Startups
There are several system components that contribute to the overall speed of your operating system. One of these is the startup programs that load immediately after you launch Windows.
If you wish to improve the performance of your system, optimizing the startup programs by removing unnecessary items and utilizing a start-up cleaner utility is going to be helpful. In this guide, we’ll explain how you can modify Windows startup programs to make your system run faster.
Disclaimer: This post includes affiliate links
If you click on a link and make a purchase, I may receive a commission at no extra cost to you.
1. Clean the Startup Folder
To get started, the first thing that we recommend doing is cleaning the start-up folder in File Explorer. You can remove the shortcuts of the programs that you do not want to start at startup as well as remove the junk files that you may no longer need.
To access this folder, launch File Explorer and navigate to this location:
C:\Users\>User Name>\AppData\Roaming\Microsoft\Windows\Start Menu\Programs\Startup
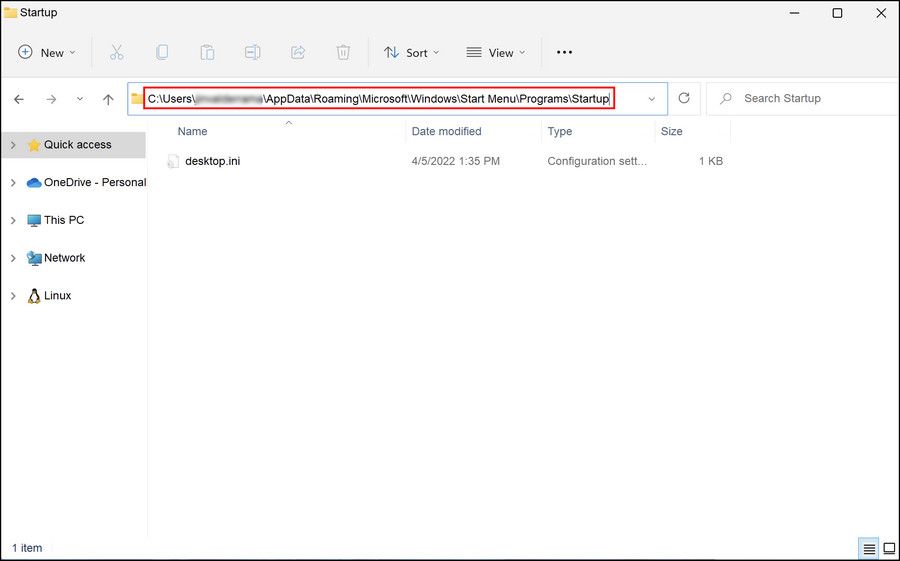
Once you have made the changes in the folder, restart your computer and check if you notice any difference in the boot time.
2. Delay Item Start
Windows allows you to prevent apps from booting at startup but if you do not want to take the extreme route, you can simply delay the startup time of the targeted program. We have listed two methods of delaying the load time in Windows. Proceed with the method that suits your situation the best.
2.1 Use the Task Scheduler Utility
In this method, we will first disable the program from the Startup list and then use the Task Scheduler utility to delay the boot time.
Here is all that you need to do:
- Press theWin + R keys together to open a Run dialog.
- Typemsconfig in the text field of Run and pressEnter .
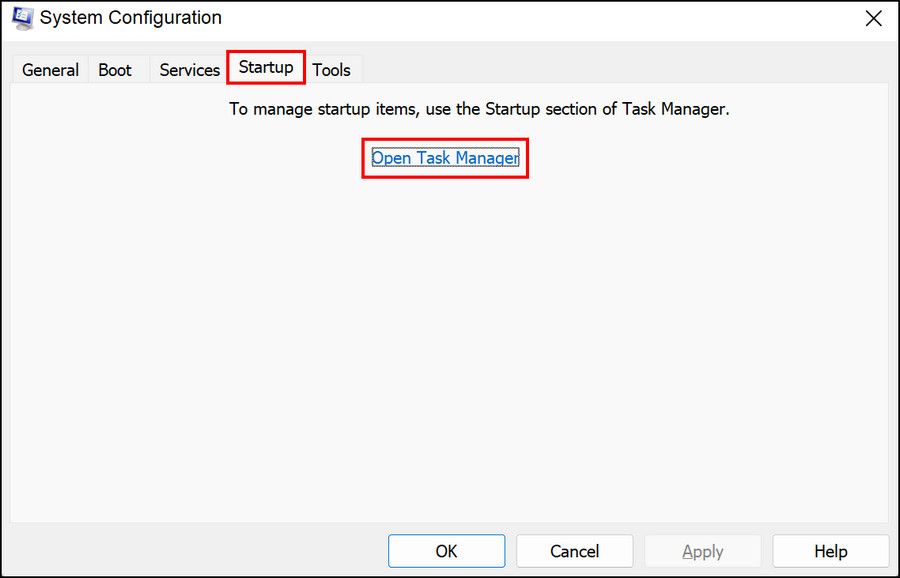
- Head over to theStartup tab and click onOpen the Task Manager .

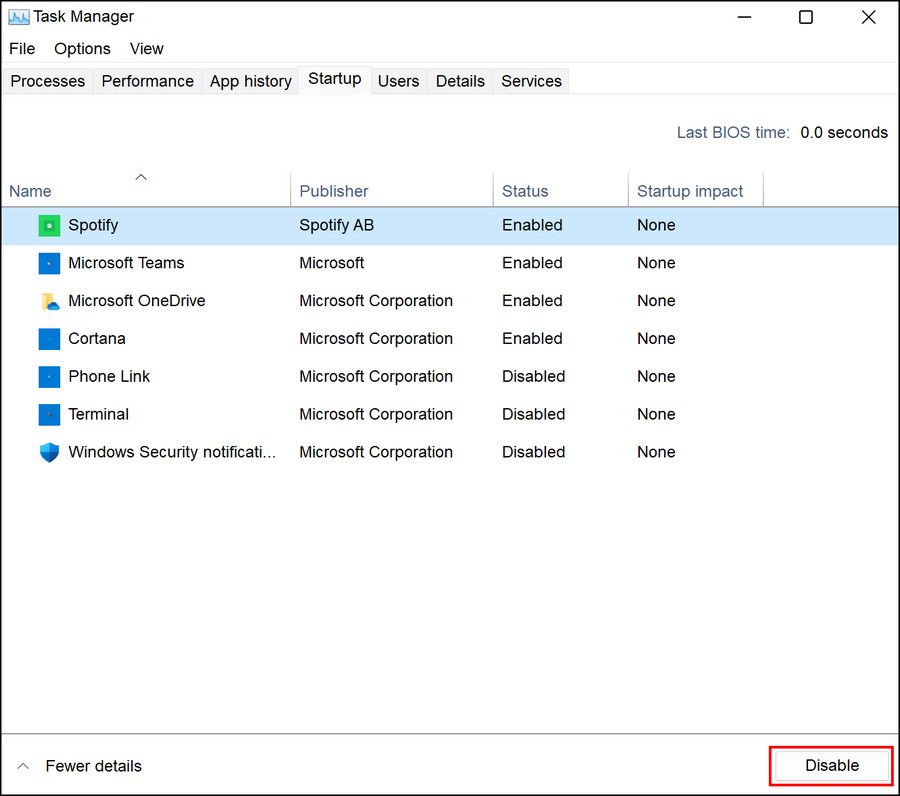
- Go to theStartup tab in the following window and click on the targeted program.
- Click on theDisable button as shown below.

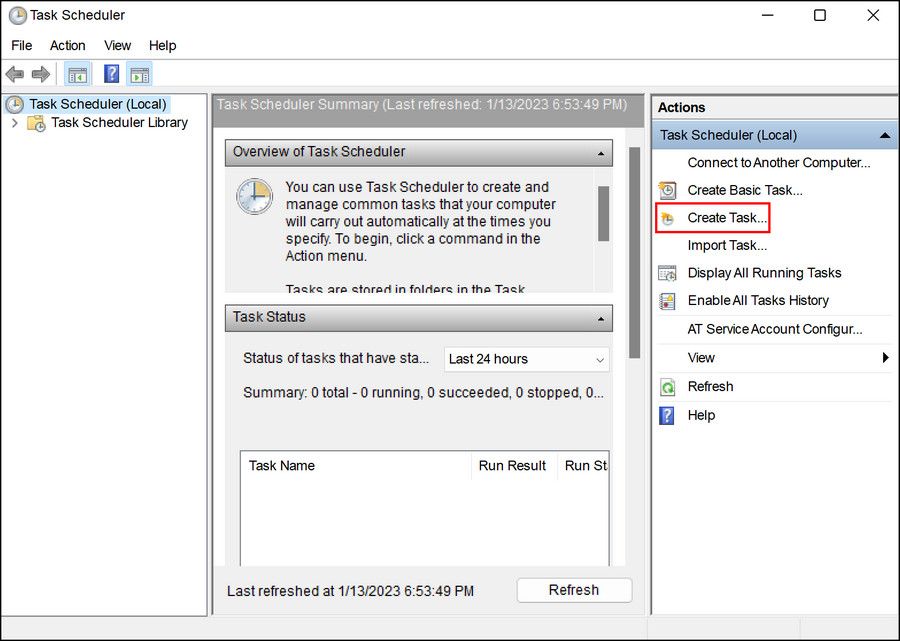
Once done, search forTask Scheduler using the Windows Search utility and launch it.
Click on theCreate Task option in the left pane and enter a name for the task. You can enter the name of the application whose startup time you want to delay.

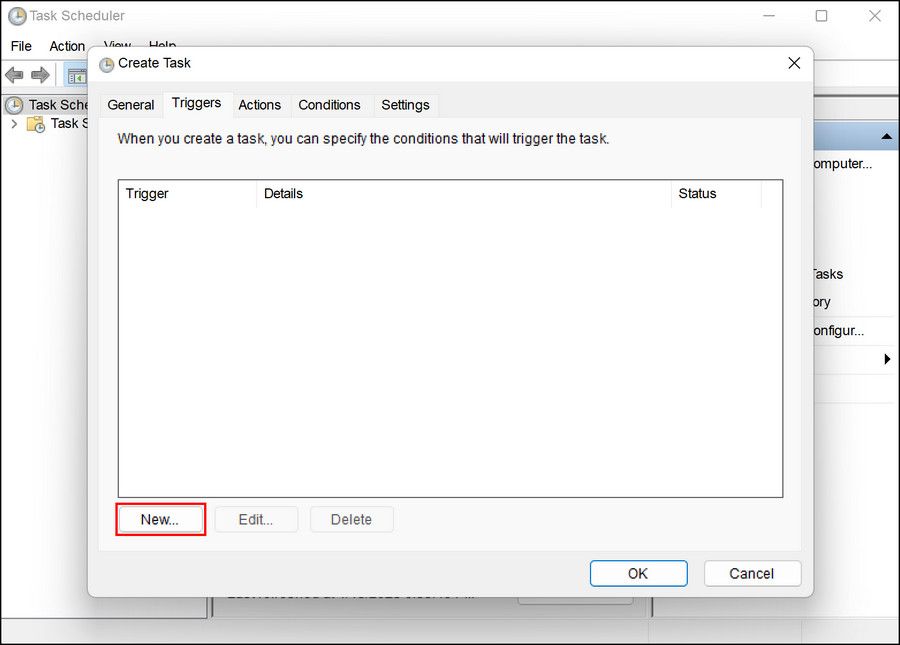
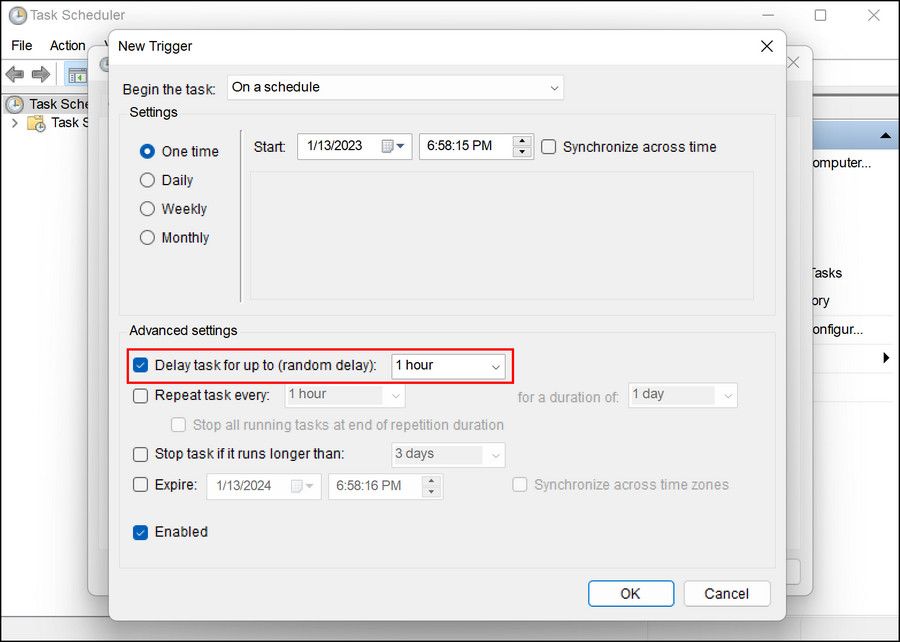
Now, head over to theTrigger tab and click on theNew button.

Expand the dropdown forBegin the task and chooseAt log on .
Checkmark the box associated withDelay task for .

Expand the dropdown and choose your preferred time.
ClickOK to save the changes.
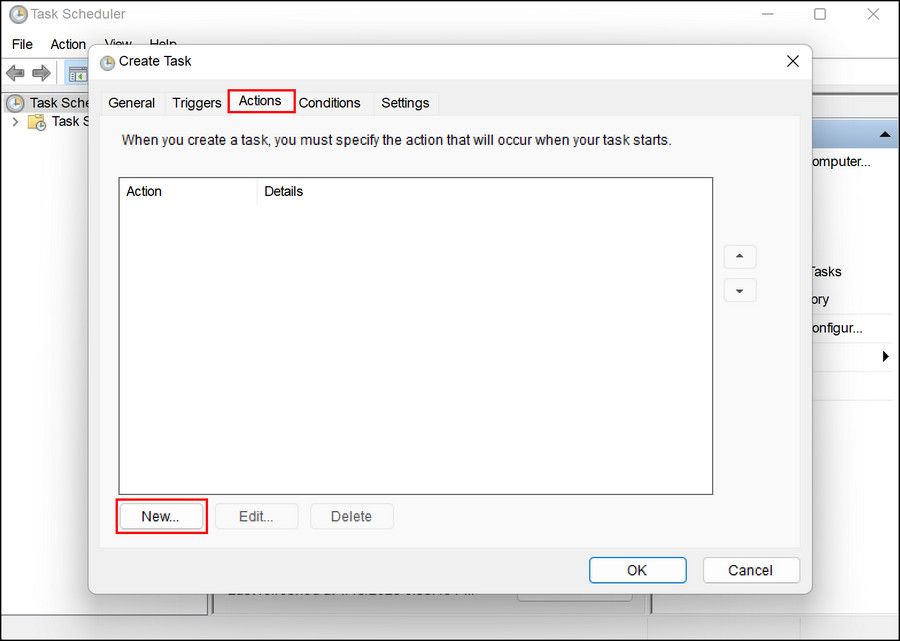
Now, navigate to theAction tab and selectNew .

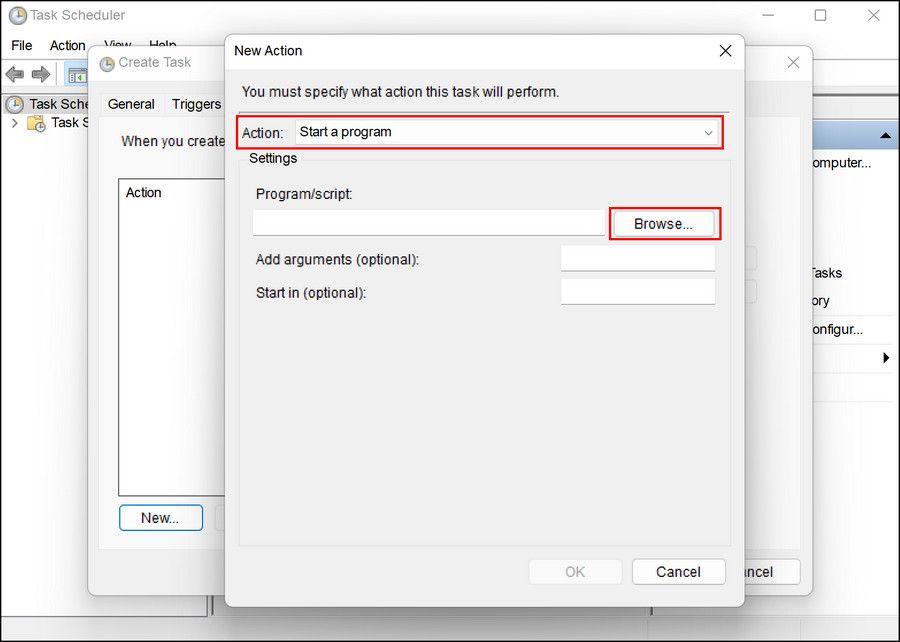
In the dropdown forAction , chooseStart a program >Browse option.

Next, navigate to the EXE file of the application and clickOpen >OK .
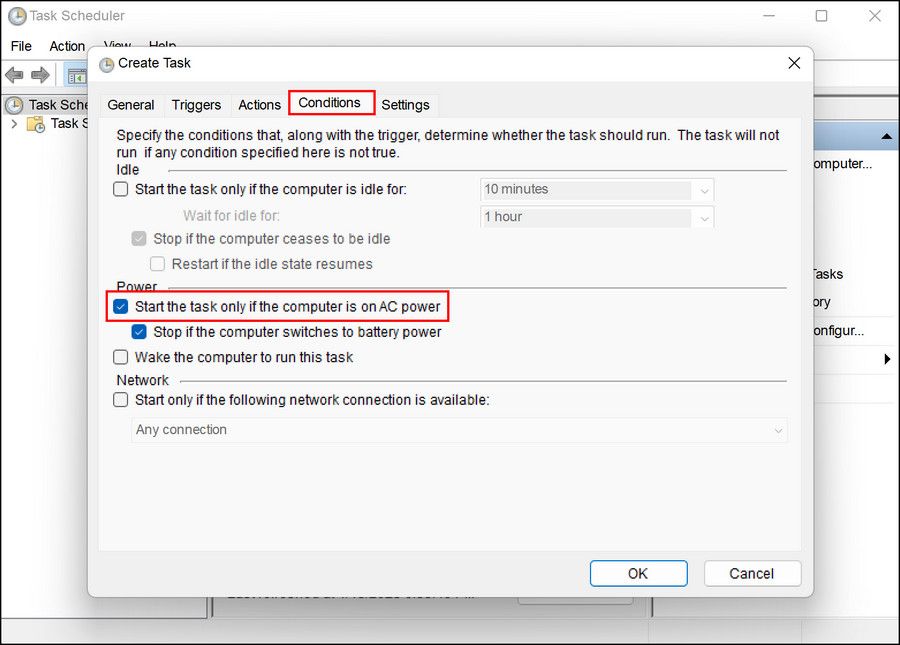
- Go to theConditions tab and uncheck the box associated withStart the task only if the computer is on AC power .

- Finally, clickOK and close the Task Scheduler.
2.2 Use a Third-Party App
You can also use a third-party application to delay the start time for an application. There are several free options available online, but we will be demonstrating the process using the Windows Startup Helper utility.
Here is how you can proceed:
- Download theWindows Startup Helper .
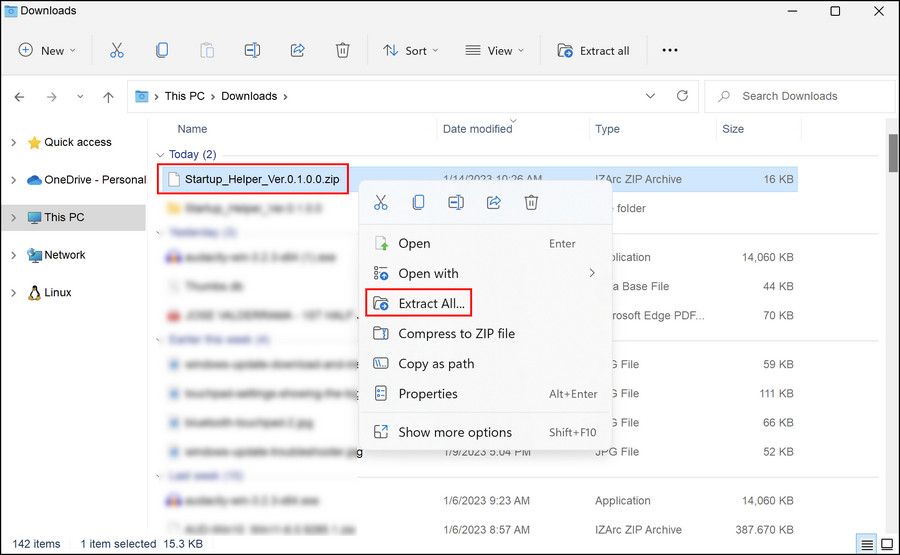
- Once the file is downloaded, right-click on it and chooseExtract all .

- Then, double-click on the file and follow the on-screen instructions to complete the installation process.
- After the program is installed, launch it.
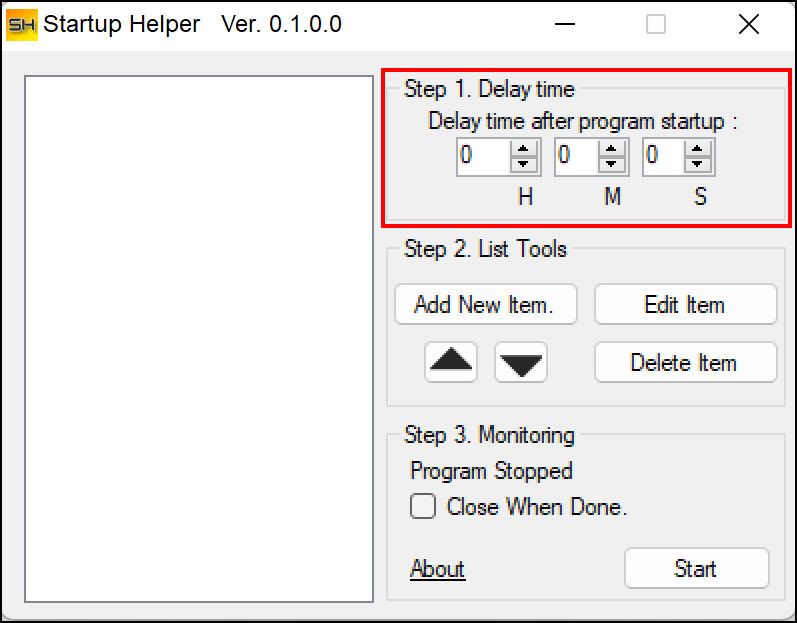
- Enter your preferred delay time underDelay time .

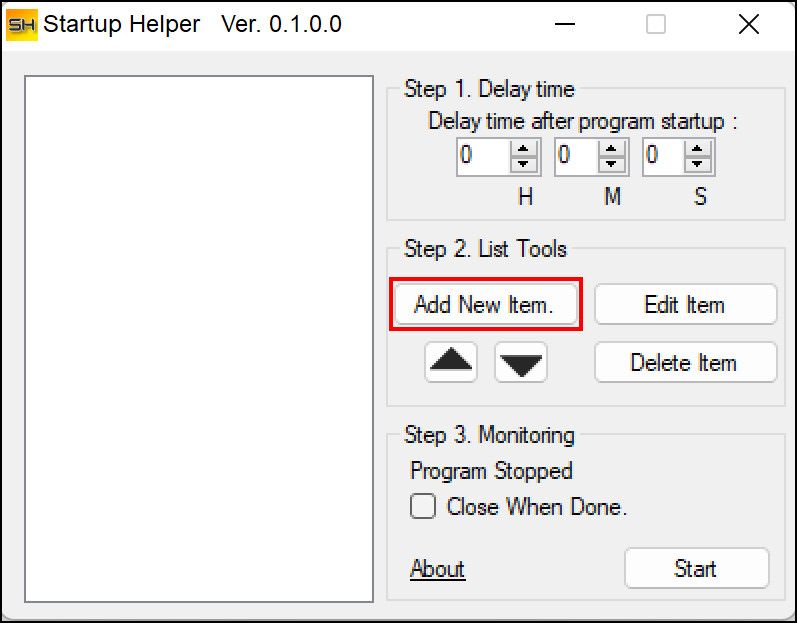
- Now, click on theAdd New Item button under the second step.

- Enter the program name, its path, and the parameters.
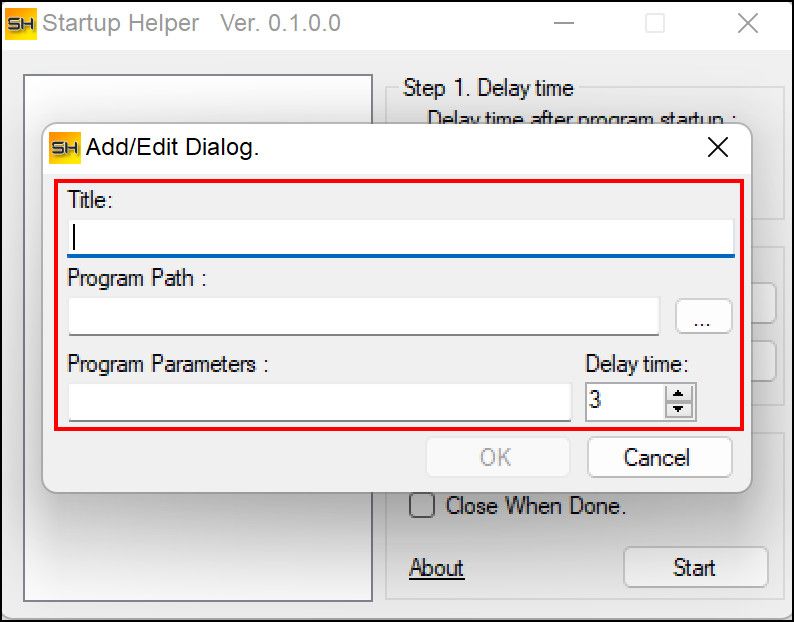
8. Once done, click on theStart button.
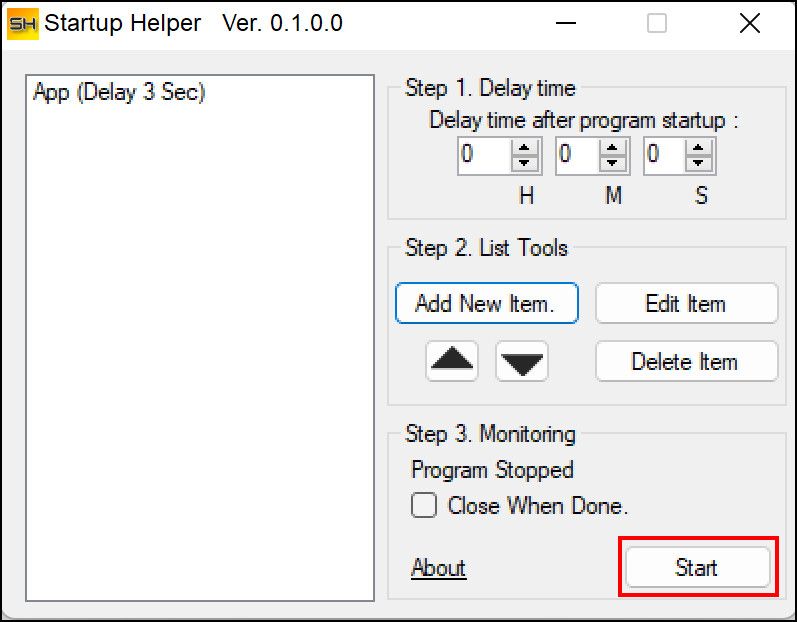
The targeted app will now launch after the time you selected on the app.
3. Run a Startup Cleaner Utility
Alternatively, you can run a startup cleaner utility that can help you view and modify all the programs, services, scheduled tasks, and context menu items that run automatically when you boot into Windows.
In this method, we will be using the Startup cleaner utility of CCleaner. You can proceed with any third-party cleaning app that you prefer, but we recommend CCleaner if you’re looking for an all-around app that can effectively clean the junk out of your computer.
This utility is available in both a free and a premium version.
Follow these steps to proceed:
- Download and Install CCleaner using your browser.
- Once installed, launch the app.
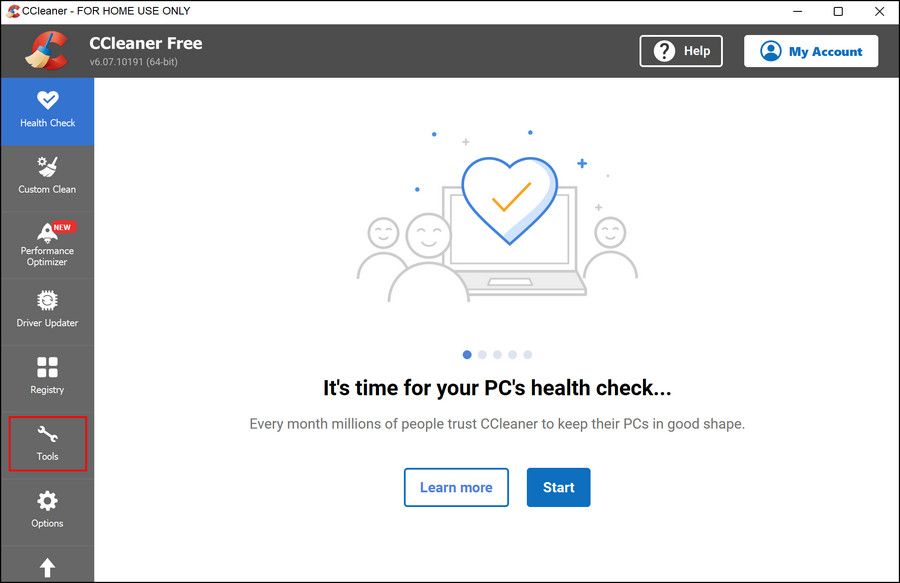
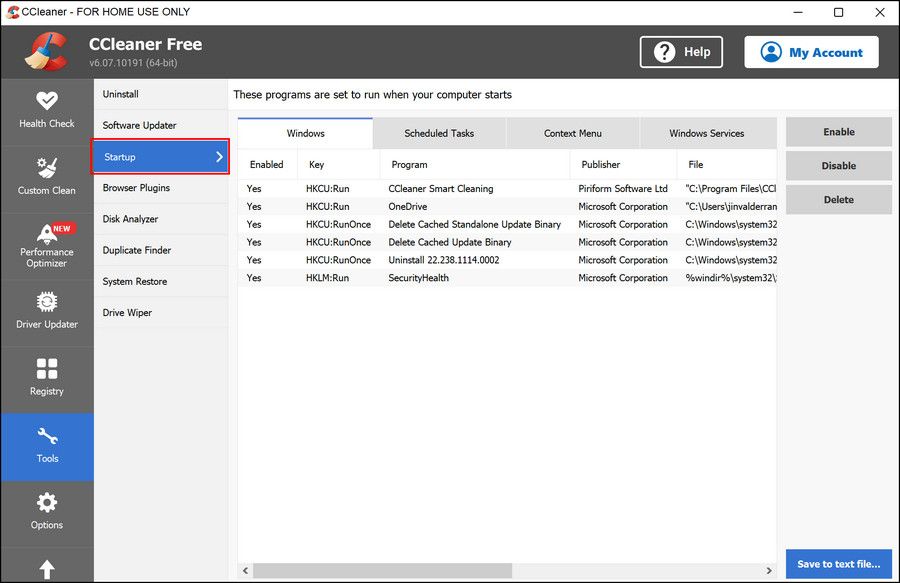
- Click on the Tool icon in the left pane.

- ChooseStartup in the following window.

- In the following four sections, you will be able to see all the components that run when you boot into Windows. Locate the unnecessary ones, click on them, and chooseDisable orDelete .
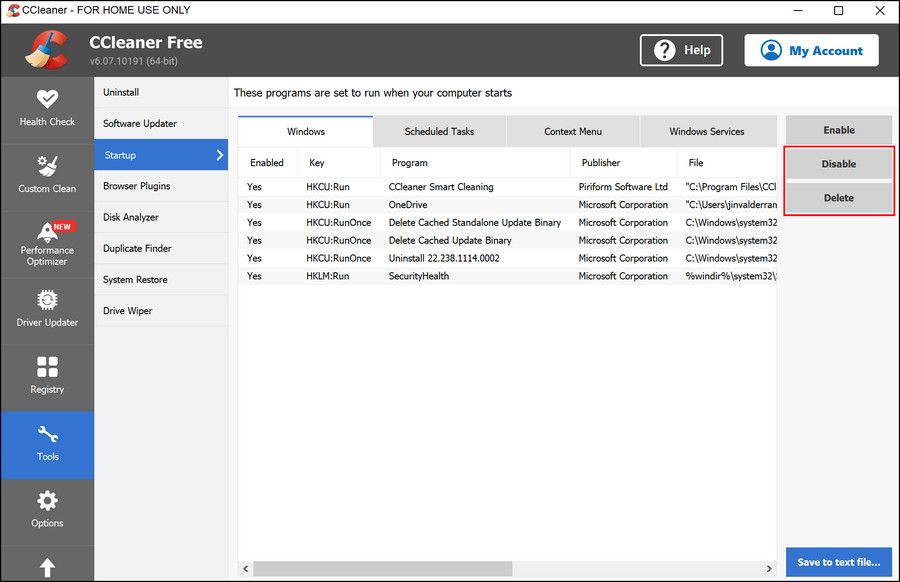
6. Once done, restart your computer and check if you notice any difference.
4. Uninstall Any Unnecessary Programs
The unnecessary programs installed on the system can also slow down the overall performance and load times.
This is why we recommend taking some time to identify the programs you longer use and uninstall these apps using the Control Panel. There are also several ways ofuninstalling Windows programs in bulk , which might be needed if you have a bunch of unneeded apps installed.
See our guide onways to uninstall software in Windows 11 for more information.
5. Keep Your Windows Updated
This may seem trivial, but keeping your Windows up-to-date at all times can help prevent a number of issues such as frequent lagging and sudden crashes.
We highly recommendinstalling the Windows updates as soon as they are released. You can view all the pending system updates in the Windows Updates section of the Settings app.
Manage Your Windows Startup Apps to Improve Your System’s Performance
Slow computers are no fun to use. They do not just cause unnecessary delays but can also result in a lot of frustration.
One way to maintain a good system is by optimizing the startup programs. The methods mentioned above should help you do this, in detail. Keeping the startup folder clean will help you avoid startup programs interfering with the system’s functioning in the future.
Also read:
- [New] Ultimate Sound Editing Solutions for Online Bloggers
- [Updated] Advanced Strategies for Mass Message Purge on Discord Networks
- [Updated] In 2024, Maximize Communication Video Conferencing Tips for Android
- Elevate Your Channel with These Top 11 Budget-Friendly Tools for 2024
- Five Essential Steps to Overcome Windows OS Hypervisor Faults
- In 2024, Which Pokémon can Evolve with a Moon Stone For Xiaomi Redmi Note 12 4G? | Dr.fone
- Mastering Command Line Integration in Windows 11'S Task Manager
- Understanding the Law Screencasting YouTube Videos
- Unlocking System Potential: Enhancing Virtual Memory
- What to Do When Your Update Fails at 0X800F0845?
- Title: Proactive Performance: Perfecting Your Win11 Startups
- Author: Richard
- Created at : 2024-12-06 01:06:59
- Updated at : 2024-12-13 00:36:20
- Link: https://win11-tips.techidaily.com/proactive-performance-perfecting-your-win11-startups/
- License: This work is licensed under CC BY-NC-SA 4.0.
