Reactivating Frozen Windows Audio Services

Reactivating Frozen Windows Audio Services
Although Windows includes a dedicated audio troubleshooter that can help resolve most audio-related issues, it may not always be effective. At times, the Windows audio troubleshooter may fail to resolve the underlying issue and display the “Audio services not responding” error.
If the audio services on your Windows computer have become unresponsive, don’t fret. This guide packs some useful troubleshooting tips that should help you resolve the issue in no time.
Disclaimer: This post includes affiliate links
If you click on a link and make a purchase, I may receive a commission at no extra cost to you.
1. Restart the Windows Audio Service
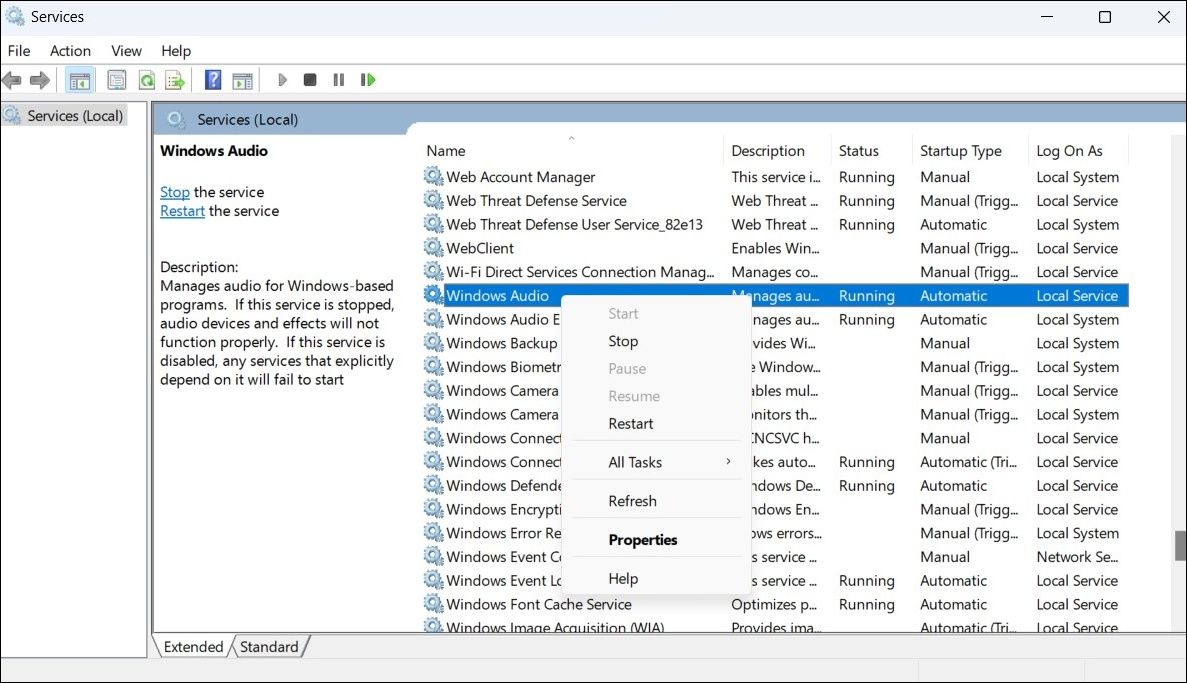
Typically, the Windows Audio service starts automatically when your computer boots. However, if the service encounters any problems during startup, it may malfunction. If it’s just a one-off glitch, restarting the Windows Audio service should fix the issue. Hence, you should start with that.
To restart the Windows Audio service:
- PressWin + S to open the search menu.
- Typeservices in the text box and pressEnter .
- In the Services window, scroll down to locate theWindows Audio service on the list. Then, right-click on it and selectRestart .

2. Make Sure the Supporting Audio Components Are Running
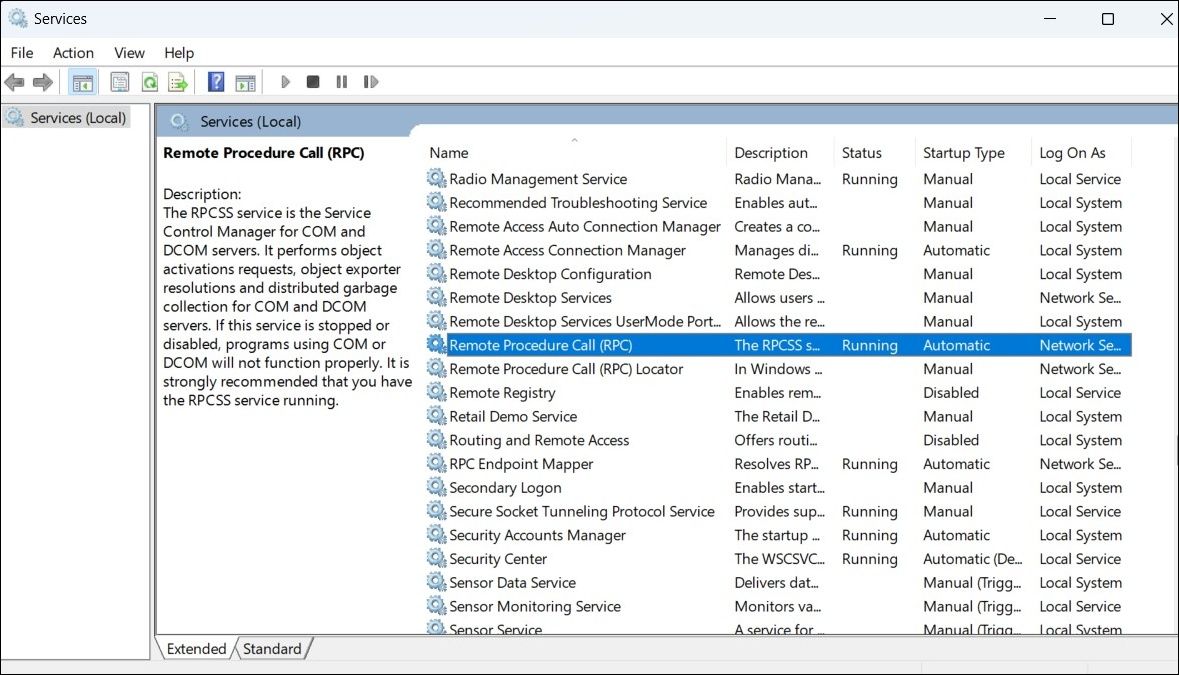
Windows Audio service relies on several system components to function properly on your PC. If one of these components is not running, audio services may stop responding.
Here’s how to check if the required services are running.
- PressWin + R to open the Run dialog box.
- Typeservices.msc in the Open field and pressEnter .
- Locate theRPC Endpoint Mapper service on the list and double-click on it to open its properties.
- Click the drop-down menu next toStartup type to selectAutomatic .
- ClickApply followed byOK .
- Similarly, change the startup type forRemote Procedure Call (RPC) andDCOM Server Process Launcher services as well.

Restart your PC after this and check if the issue is still there.
3. Add Local and Network Services Using Command Prompt
Another thing you can do to resolve this issue is to register local and network services on Windows using Command Prompt. Here are the steps for the same.
- Right-click on theStart icon or pressWin + X to open the Power User menu.
- SelectTerminal (Admin) from the list.
- SelectYes when the User Account Control (UAC) prompt appears.
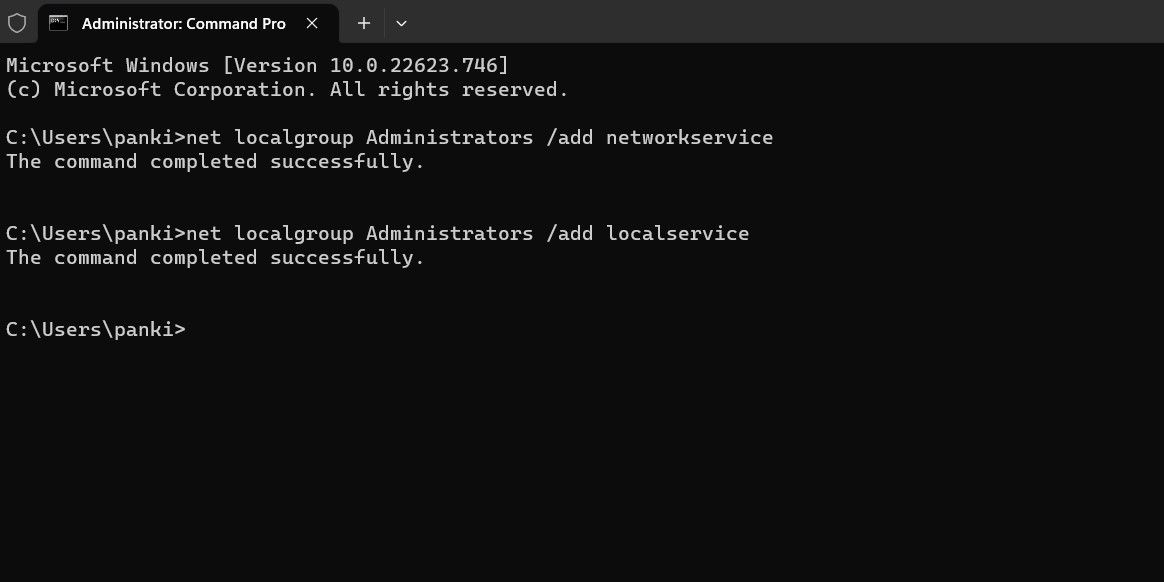
- Type the following command in the console and pressEnter to register network services on your system.
net localgroup Administrators /add networkservice - Now run the following command to register local services:
net localgroup Administrators /add localservice - Exit the Command Prompt window and then restart your PC.

Like using Command Prompt? Check our guide to learnhow to master Command Prompt on Windows .
4. Update Audio Drivers
Outdated or incompatible audio drivers on your PC can also cause the audio services to malfunction. If that’s the case, updating the audio drivers on your PC should do the trick. If you need help with that, check our guide onhow to update audio drivers on Windows and follow the steps outlined there.
If updating audio drivers manually sounds like a tedious task, you can get one of thebest driver updater for Windows to ease the process.
5. Switch to the Default Sound Drivers
Your Windows computer comes with its own set of sound drivers. If updating your current audio drivers does not help, you can switch to Windows’ default sound drivers and see if that works. To do so, use the following steps:
Click themagnifying icon on the taskbar or pressWin + S to open the search menu.
Typecontrol panel in the text box and select the first result that appears.
Navigate toSystem > Advanced System Settings .
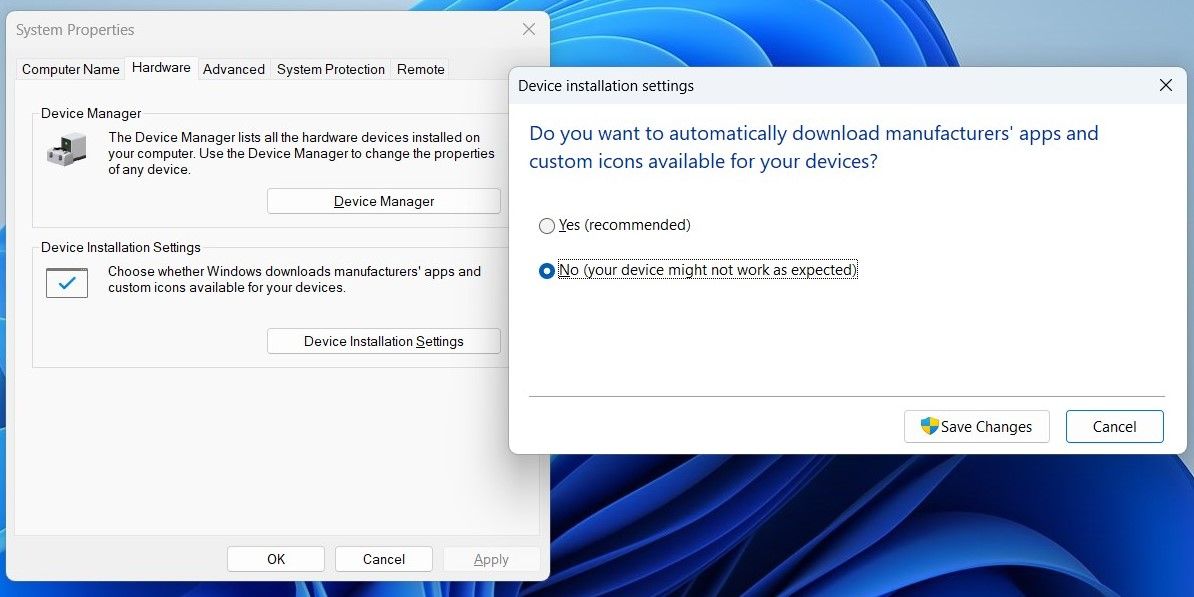
In the System Properties window, switch to theHardware tab and click theDevice Installation Settings button.
Select theNo (your device might not work as expected) option and clickSave Changes .
SelectYes when the User Account Control (UAC) prompt appears.

Now use one of themany ways to open Device Manager .
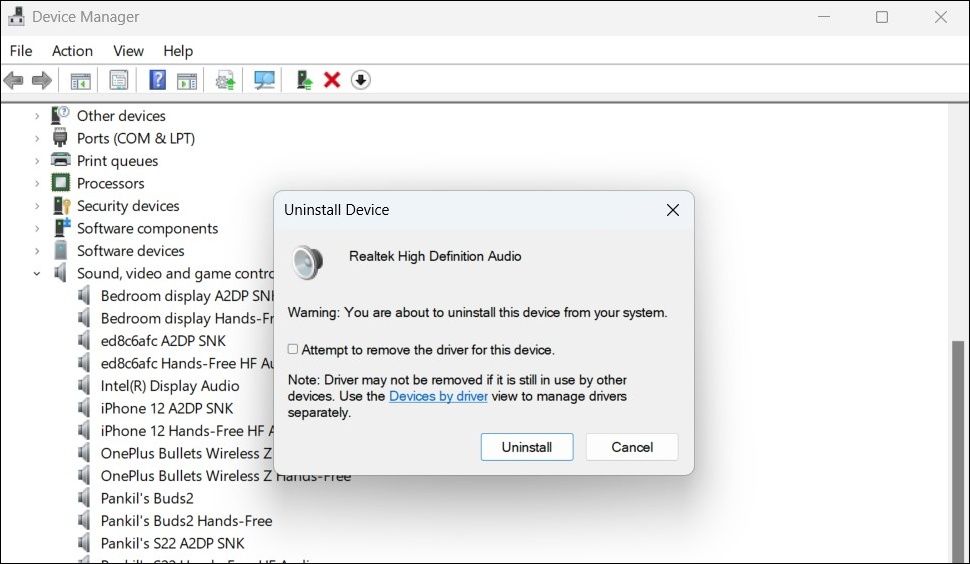
- Expand theSound, video, and game controllers .
- Right-click on your sound driver and selectUninstall device .
- SelectUninstall to confirm the action.
- In the Device Manager window, click theAction menu at the top and selectScan for hardware changes from the list.

6. Run the SFC and DISM Scans
Corrupt or damaged system files on Windows can also cause audio services to stop responding. System File Checker (SFC) and Deployment Image Servicing and Management (DISM) are two Windows tools that can help you identify and repair such system files.
The SFC scan will check your computer for missing or corrupt system files, whereas DISM will repair the Windows system image. You can run these tools using Command Prompt. To know more, check our guide onhow to repair corrupt Windows files with Windows built-in tools and follow the steps outlined there.
7. Perform a System Restore
System Restore is a useful feature on Windows that creates a backup of your entire system at predefined intervals. It can help you restore your system to the point before the problem occurred.
System Restore will undo any recent changes made to your computer and resolve the issue for good. Don’t worry, this process won’t affect any of your personal data.
To perform a system restore on Windows, use these steps:
- Right-click on theStart icon and selectRun from the list.
- Typesysdm.cpl in the box and pressEnter .
- In the System Properties window, switch to theSystem Protection tab.
- Click onSystem Restore .
- ClickNext .
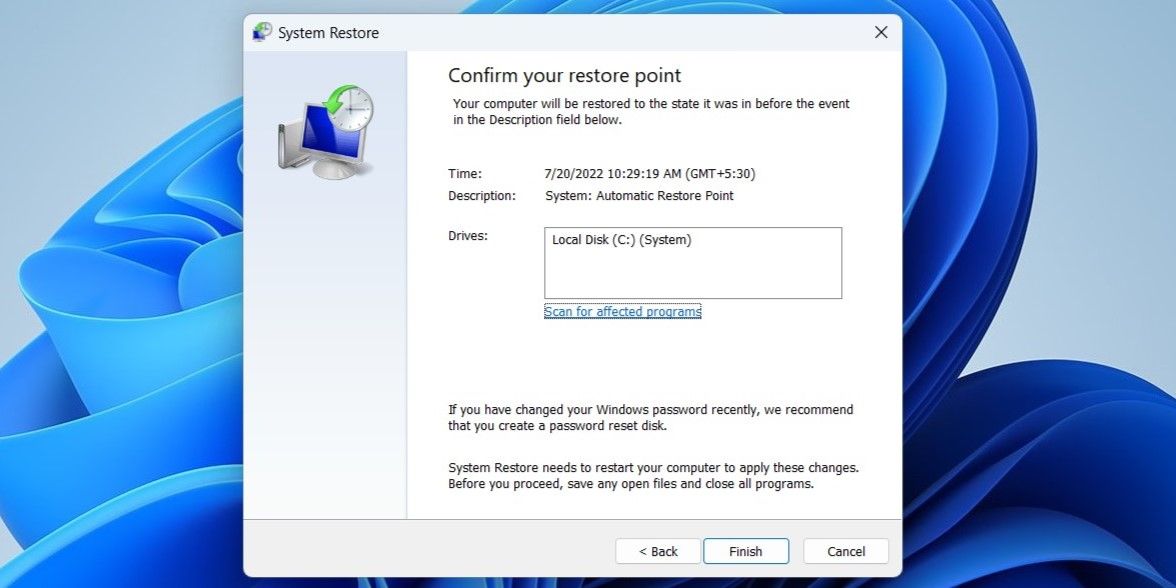
- Select a restore point before the issue first appeared and hitNext .
- Review all the details and clickFinish .

Wait for Windows to restart and revert to the specified restore point. After that, the audio services should work fine.
Fixing Audio Services on Windows Is Easy
It can be confusing if the audio services on Windows suddenly become unresponsive. In most cases, manually restarting the audio services should resolve the issue. If not, you may have to go through the trouble of scanning the system files or performing a system restore.
That said, if none of the above solutions work, you can consider resetting your Windows computer or performing an in-place upgrade as a last resort.
Also read:
- [New] 2024 Approved The Ultimate Android Video Editor App Roundup
- [Updated] Elite Architects Best-of-Breed Instragram HLV Artisans for 2024
- [Updated] Navigating Stock Photos Free, Flawless, and Legal for 2024
- Discover How to Modify Window Glow on Your PC
- Enabling Reading View as Default in Word for Email Attachments
- Enabling/Disabling Microsoft’s SmartFilter in Win11
- Fix Hidden 5GHz Network Issues in Windows 11 Effectively
- How To Pause Life360 Location Sharing For Oppo A78 | Dr.fone
- Mastering Drones in Media Production for 2024
- New In 2024, Fake It! Top Online Face Generators for Creating Artificial Faces
- Recommendations for Setting a Preferred CLI Window
- Step-by-Step Instructions on Linking an Epson Printer to Wireless Internet
- Step-by-Step Tutorial on Installing an Upgrade SSD in Lenovo Legion 5 - Click to Learn More
- Strategies that Clear Up Common System Errors
- Tailoring Win11 Mouse Access for Comfort
- Turbocharge Office Performance on Windows With Key Shortcuts
- Ultimate PicsArt Analysis & Tutorial
- Unraveling File Writing Obstructions in Windows Devices
- Updated 2024 Approved Edit FLV Files with Ease Top Windows 8 Video Editing Software
- Title: Reactivating Frozen Windows Audio Services
- Author: Richard
- Created at : 2024-10-17 21:16:28
- Updated at : 2024-10-21 01:22:55
- Link: https://win11-tips.techidaily.com/reactivating-frozen-windows-audio-services/
- License: This work is licensed under CC BY-NC-SA 4.0.
