
Rectifying Windows Logins Not Allowed Issue (Top 8 Ways)

Rectifying Windows Logins Not Allowed Issue (Top 8 Ways)
While trying to sign in on your Windows device, you suddenly bump into an error message that reads, “the sign-in method you’re trying to use isn’t allowed.” What causes this issue, and how do you resolve it?
We’ve got all the solutions for you! So, let’s dive in and explore how you can tackle this problem once and for all.
Disclaimer: This post includes affiliate links
If you click on a link and make a purchase, I may receive a commission at no extra cost to you.
1. Sign Into Windows Using a System Administrator Account
The issue at hand usually pops up when using a local account. So, the easiest solution is to use a system administrator account when you’re on the “sign-in” page.
But if you’re using someone else’s PC, then maybe the system administrator has blocked some sign-in methods. In this case, you can only sign in on the device once the owner configures some system settings.
2. Enable the “Allow Log On Locally” Option in the Local Group Policy Editor

Experiencing this issue while using your other local account? If so, then the issue might be coming from your administrator account.
If you’re the system administrator, it’s highly likely that you’ve prevented others from signing in to your device with local accounts. In this case, this will also prevent you from signing in on the device using your other local accounts.
To resolve this problem, you need to tweak a few settings in the Local Group Policy Editor (LGPE) as follows:
- Log in to your administrator account. If you’re using someone else’s device, then you’d have to ask them to perform these methods.
- Press Win + R to open the Run command dialog box.
- Type gpedit.msc and click OK to open the LGPE.
- Navigate to Computer Configuration > Windows Settings > Security Settings > Local Policies > User Rights Assignment.
- Locate and double-click on the Allow log on locally policy.
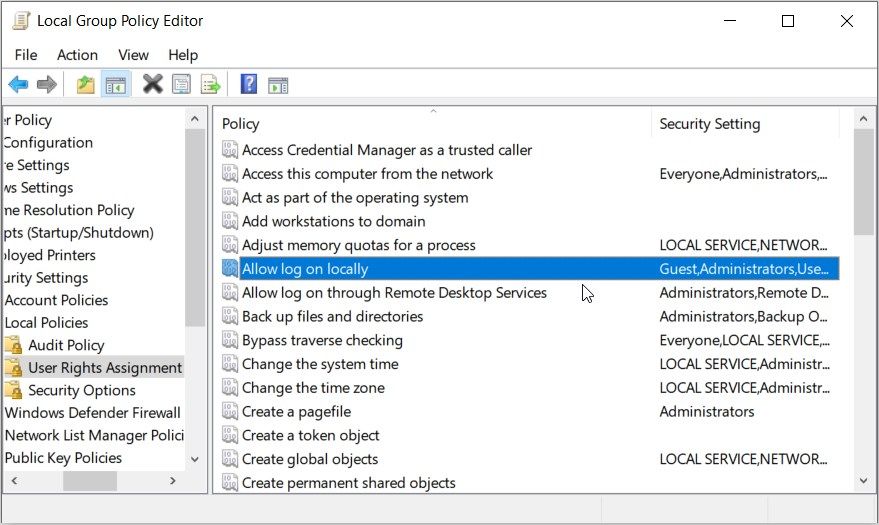
From there, follow these steps:
- Navigate to the Local Security Settings tab.
- Click the Add User or Group option to add your local account to the list.
- Click the Advanced button to access the account selection page.
- Click the Find Now button on the right-hand side pane to get a complete list of local accounts. The search results will appear at the bottom of the same window.
- Locate and click the local account that you’re facing issues with. From there, click OK and then follow the on-screen steps to finalize the process.
3. Sign In Using a Different Local Account
In some cases, this issue might be specific to a certain local account. So, signing in with a different local account might help.
Now, here’s how to sign in to Windows using a different local account:
- Press Win + I to access the system settings.
- Select Accounts from the menu items.
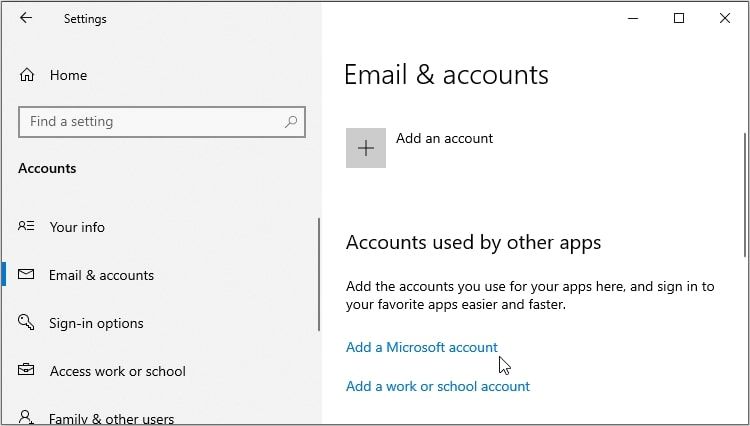
- Select the Email & accounts option on the left.
- Click the Add a Microsoft account option on the right and then follow the on-screen instructions.
4. Scan and Repair Issues That Prevent You From Signing In to Windows
By now, the “sign-in” method issue should be resolved. But if that’s not the case, then maybe the error is caused by some system bugs. Now, an easy way out here is to scan your computer and fix any issues it might have.
In this case, you can use the Check Disk (CHKDSK) tool to scan and repair system issues .
Here are the steps you need to follow:
- Type Command Prompt in the Start menu search bar.
- Right-click on the Best match result and select Run as administrator.
- Type the following command and press Enter:
chkdsk C: /f
In this case, the C: command represents the letter of the hard drive. If you’ve installed Windows on a different drive, then replace this command with the letter of the correct hard drive.
Once the scan is complete, restart your device to save these changes.
5. Scan and Repair PC Issues Using Built-In System Scanning Tools

Couldn’t resolve the issue using a Check Disk scan? If so, then scanning your PC and removing bugs with other Windows tools might help.
Here are the steps you need to follow:
- Press Win + I to open the system settings.
- Select Update & Security from the options.
- Click Windows Security on the left.
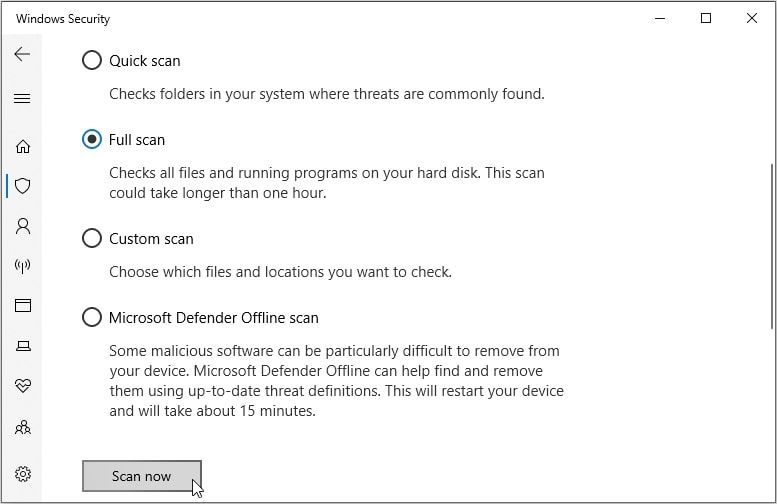
- Select Virus & threat protection on the right.
- Click Scan options in the middle pane.
- Select any relevant scan option from the list and then press the Scan now button.
6. Repair the Hardware-Related Problems That Prevent You From Signing In to Windows
In some rare instances, you might be dealing with a hardware-related problem. In this case, the Windows Hardware and Devices troubleshooter could help.
So, let’s check out how you can use this tool to tackle the “sign-in” issue:
- Press Win + I to access the system settings.
- Type Troubleshoot settings in the search bar and select the relevant option.
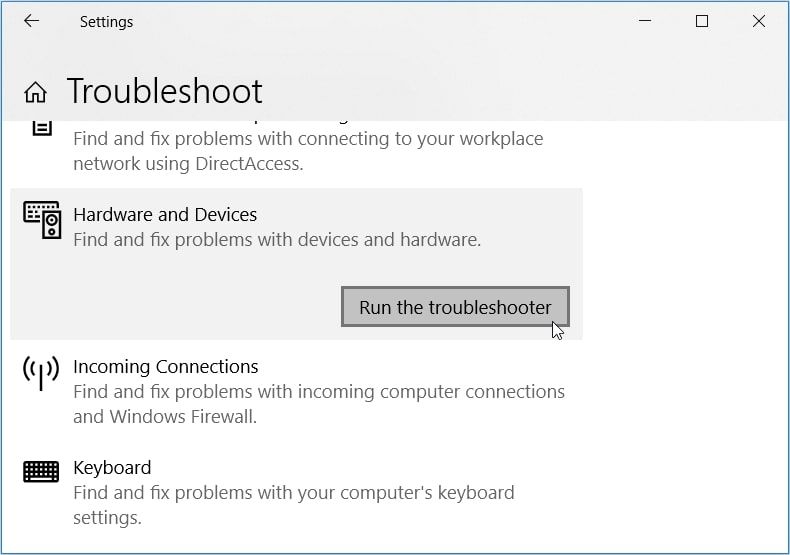
- Click the Additional troubleshooters option on the right.
- Select the Hardware and Devices troubleshooter on the right and then click the Run the troubleshooter button.
7. Install the Latest Windows Updates
Maybe you’re not able to use a specific sign-in method because your system is outdated. In this case, you can easily tackle the problem by installing the latest Windows updates.
So, here are the steps for updating your Windows computer
- Type Settings in the Start menu search bar and select the Best match.
- Click Update & Security from the options.
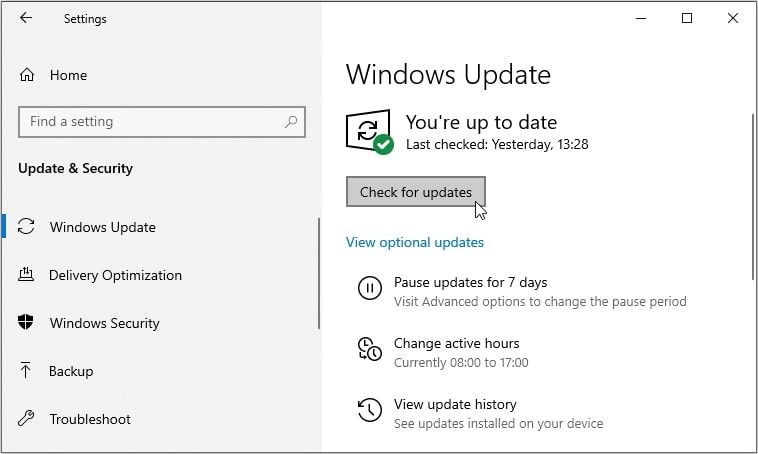
- Select the Windows Update option.
- Click the Check for updates button on the right and follow the on-screen steps.
8. Restore Windows to Its Factory Settings
If all else fails, then resetting your device to its factory settings might be the best solution.
However, resetting your device could be a risky process. So, be sure to back up your Windows data before proceeding.
Here are the steps for resetting your Windows PC:
- Press Win + I to open the system settings.
- Select Update & Security from the menu items.
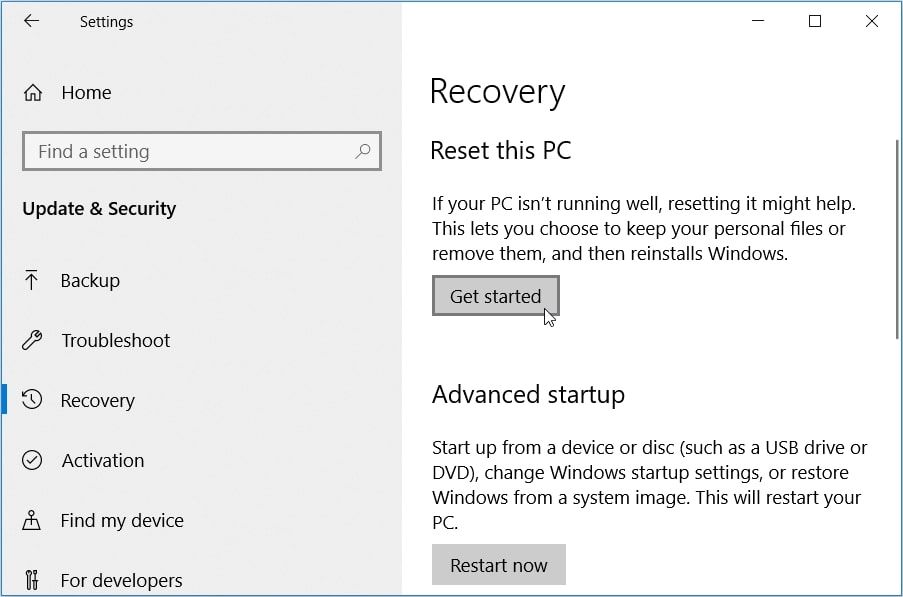
- Select Recovery on the left-hand side.
- Click the Get started button and then follow the on-screen instructions.
You Can Now Sign In to Your Windows Device Using Any Method
This error usually pops up when you’re using a local account. So, one of the best ways to resolve it is to switch to an administrator account. Alternatively, you can tackle the problem by applying any of the solutions we’ve covered.
From there, you can then check out cool tricks such as how to automatically sign in to a user account on Windows.
Also read:
- [New] In 2024, Maximizing Impact on Insta Story with Multiple Images
- [Updated] In 2024, Football Film Study Premier Insights Infographic
- 2024 Approved Ensuring Total Sound From Partially Muted FB Media
- 8 Pitfalls: Going for Low-Cost Windows License Keys
- Addressing Non-Detected Proxy Settings on Windows Immediately
- Addressing Unsolicited File Explorer Activity
- Beyond BIOS: Artificial Intelligence for Windows
- Boosting Android Studio Speed on Windows PCs
- Finding Sanctuary in Nature | Free Book
- Hassle-Free Ways to Remove FRP Lock on Infinix Phones with/without a PC
- How to Edit Memoji on Android and iPhone for 2024
- Question Your Thinking, Change the World | Free Book
- Total Data Consumption Day's Long Movie
- Title: Rectifying Windows Logins Not Allowed Issue (Top 8 Ways)
- Author: Richard
- Created at : 2024-11-15 17:45:41
- Updated at : 2024-11-17 17:09:11
- Link: https://win11-tips.techidaily.com/rectifying-windows-logins-not-allowed-issue-top-8-ways/
- License: This work is licensed under CC BY-NC-SA 4.0.