Rediscover Classics: AtlasOS Refresh

Rediscover Classics: AtlasOS Refresh
Your old PC has started showing its age, and you can’t run the latest and greatest games on it. Still, that doesn’t mean it’s time for a costly upgrade. If you’re not dealing with hardware issues, the problem’s not that the PC itself “got old”, but that newer software demands more from it. And this “software” includes the OS itself, Windows.
Let’s see how you can squeeze more life out of your old PC with AtlasOS, boosting its responsiveness and increasing your games’ framerates.
What Is Atlasos, and Why Should You Use It?
Despite being originally lighter than their ancestors, both Windows 10 and Windows 11 became increasingly bloated with each update. From ads you don’t care about to apps and services you never use, the latest and fully updated Windows demand more from your PC than before. And the creators of AtlasOS decided to do something about it.
Unlike Linux distributions, which are the base for a whole different software ecosystem and expect you to jump through some hoops to run Windows software and games , AtlasOS is Windows, literally. With AtlasOS, you aren’t installing a new OS on your computer but modifying an existing version of Windows 10 or 11 “to lighten it up” and remove all its fluff.
The project describes itself as “a transparent and streamlined modification of Windows, designed to maximize your system’s performance and optimize latency”. It achieves that by reconfiguring Windows’ own installation, prioritizing what’s needed for gaming, and minimizing (or altogether getting rid of) everything else.
You could try micromanaging your PC by changing the priority level for your programs or automating CPU thread management with an app like Process Lasso . Or you could try overclocking your PC to push it over its usual limits.
Still, AtlasOS may be a better choice for many people. It automatically frees up more resources than you could ever do manually by removing even Windows features & turning off non-essential services. Also, it doesn’t affect your hardware in any way that could potentially damage it.
Despite AtlasOS being Windows and not modifying your hardware settings, some software may still break because of its tweaks. If you’re mostly gaming, browsing, and watching some videos, AtlasOS can make your old PC more responsive. However, we don’t suggest you use it on any PC you use for your work, where you prioritize compatibility and stability.
How to Download AtlasOS
AtlasOS works by modifying your existing Windows installation. Up to the time of writing, it was available for Windows 10, and that’s what we’ll be using for this article.
If you’re using Windows 11, you’ll have to wait for a new version of AtlasOS that’s underway for that OS—it might be available by the time you’re reading this. Otherwise, you’ll have to downgrade to Windows 10 or perform a fresh installation of Microsoft’s previous OS to use it.
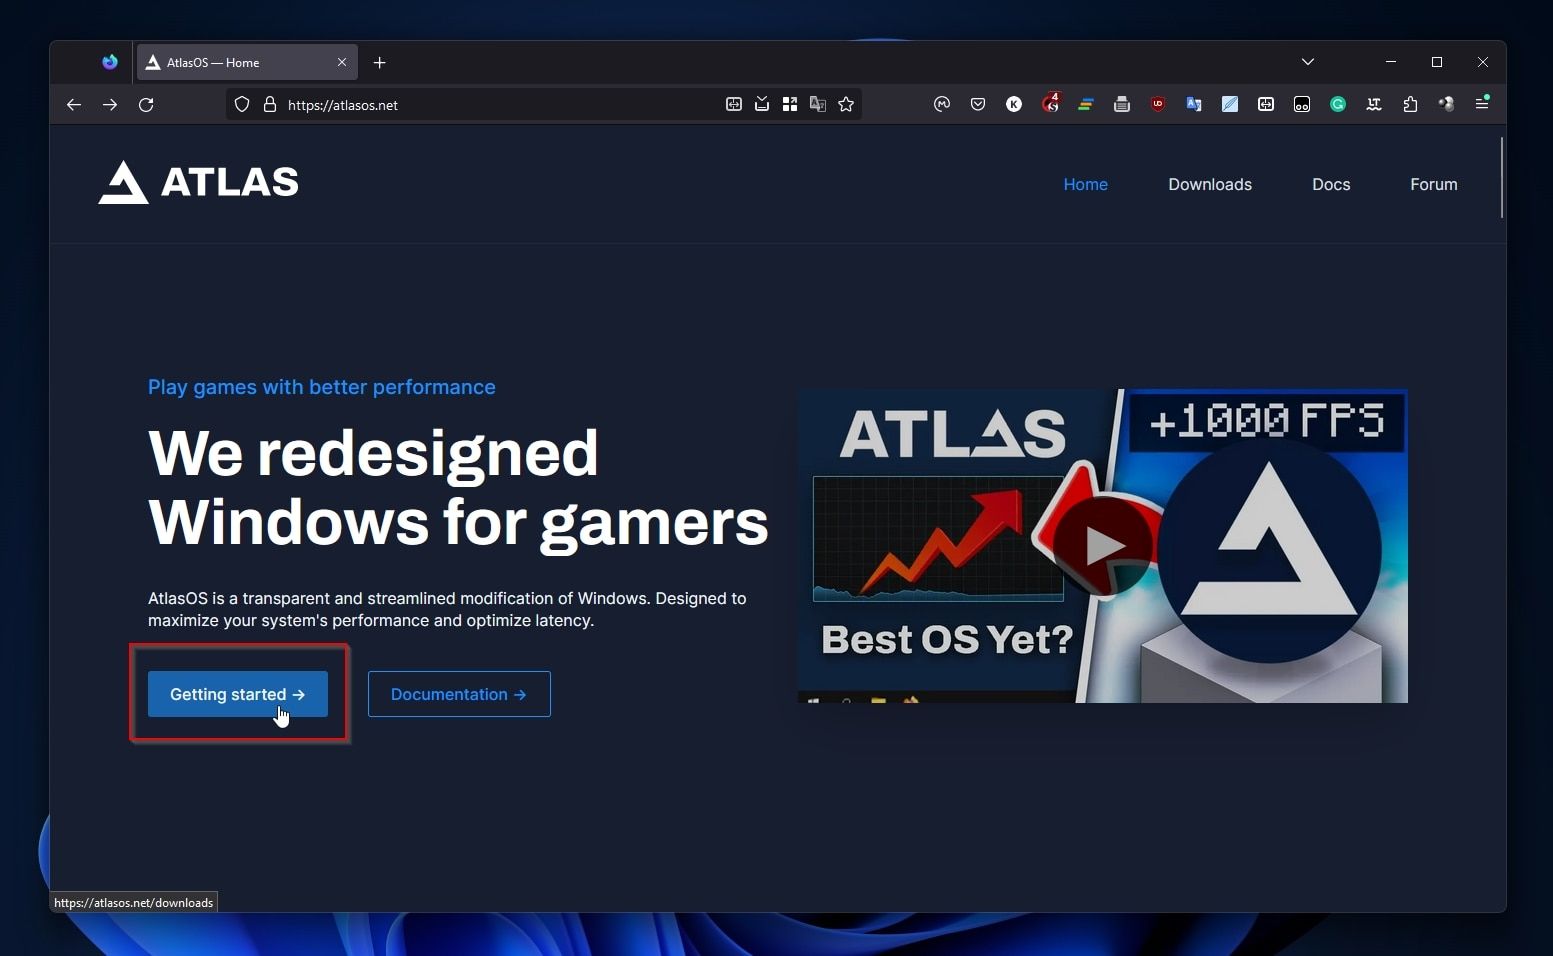
- Visit AtlasOS official site and click on Getting started.

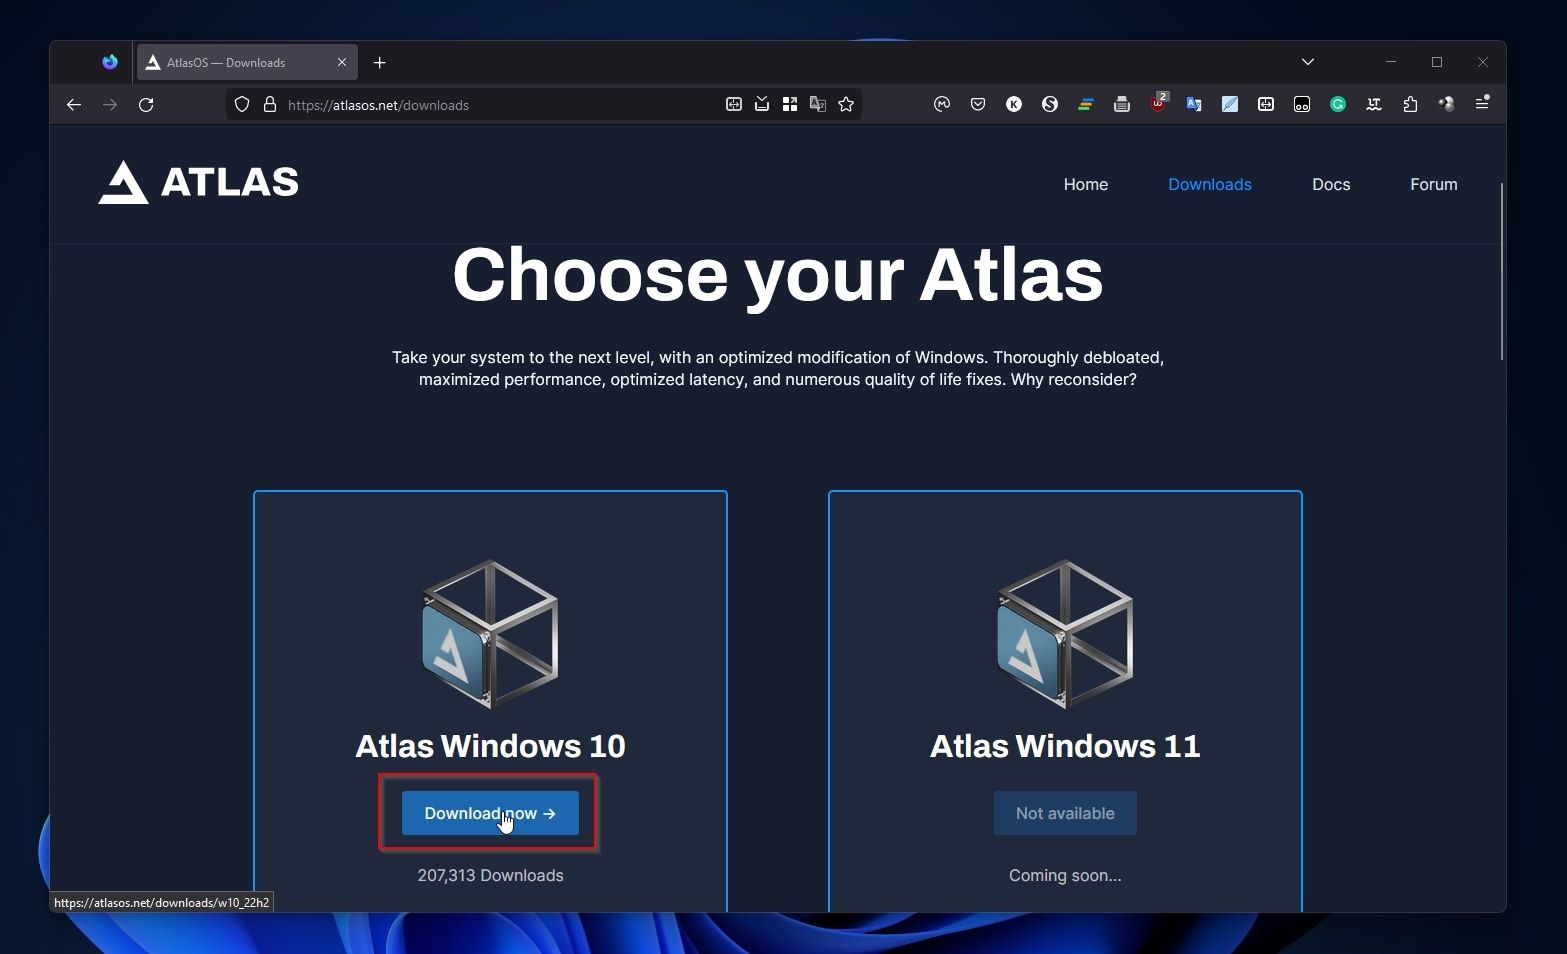
- Select the version of AtlasOS you want to download. As mentioned above, up to the time of writing, only Atlas Windows 10 was available, with Atlas Windows 11 “coming soon”.

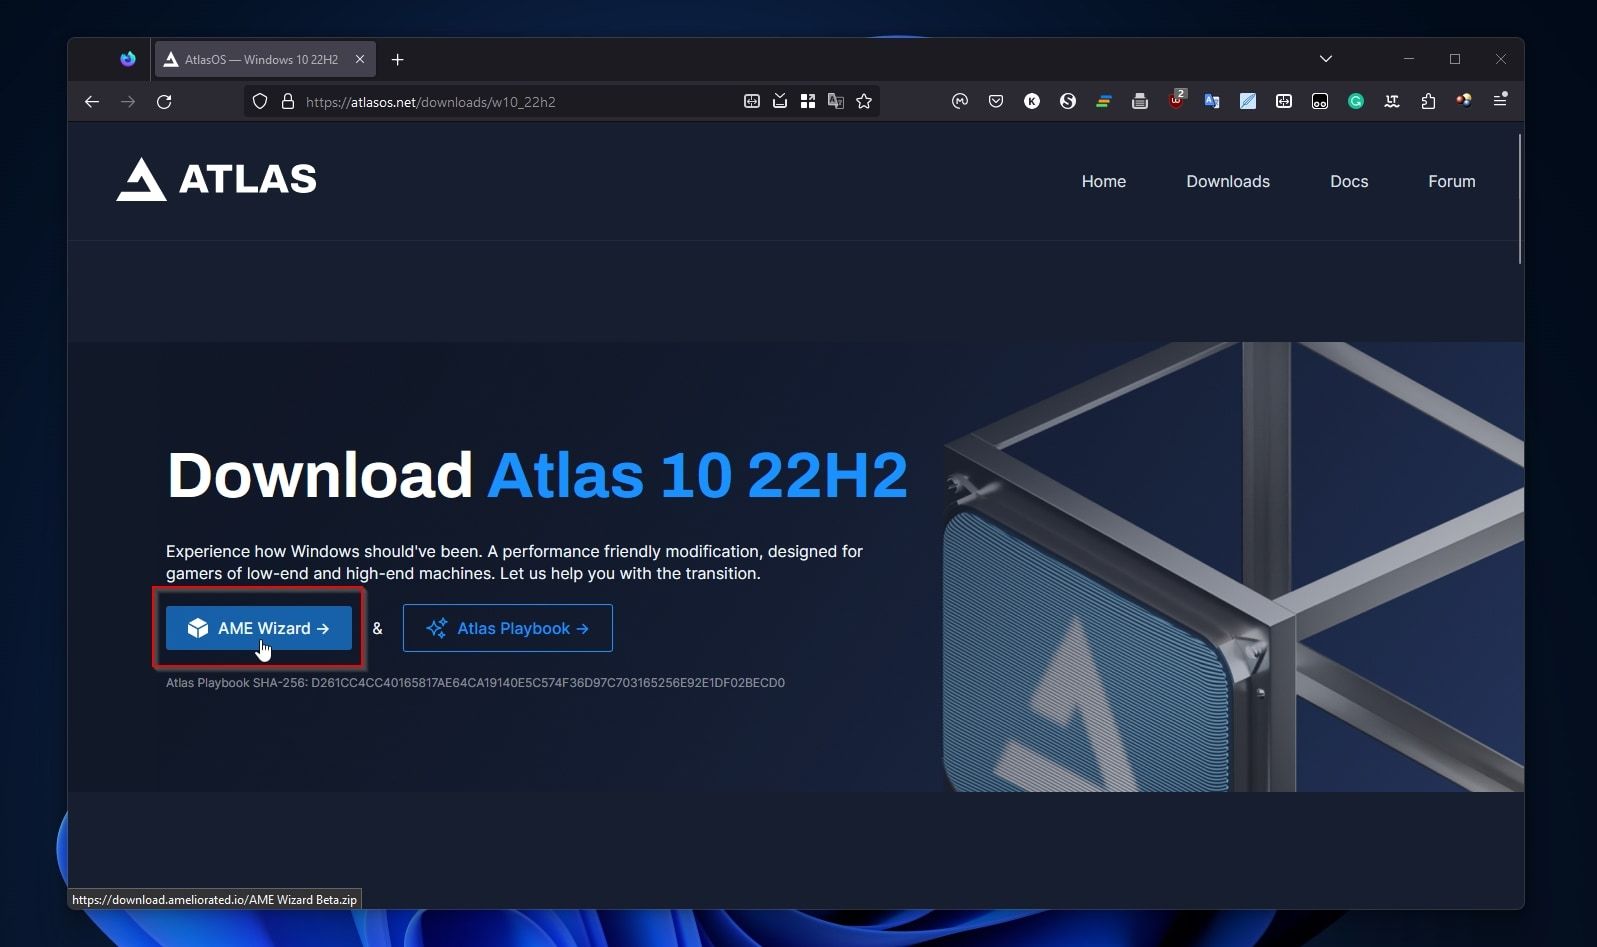
- Download both the AME Wizard and Atlas Playbook from the next page. For ease of use, make a new folder, and save both files inside it.

Before We Continue, Back Up Your Data
Although AtlasOS doesn’t install a brand-new version of Windows and shouldn’t affect your data or installed apps, it is a radical collection of tweaks for Windows to the point it feels like an alternative OS.
Thus, although your data and apps should be safe, it’s always best to back up everything in such scenarios. It’s even better to also take a full OS backup using a tool like Macrium Reflect to ensure you’ll be able to return to your “normal” Windows in case you decide AtlasOS isn’t for you.
Preparing the AtlasOS Setup
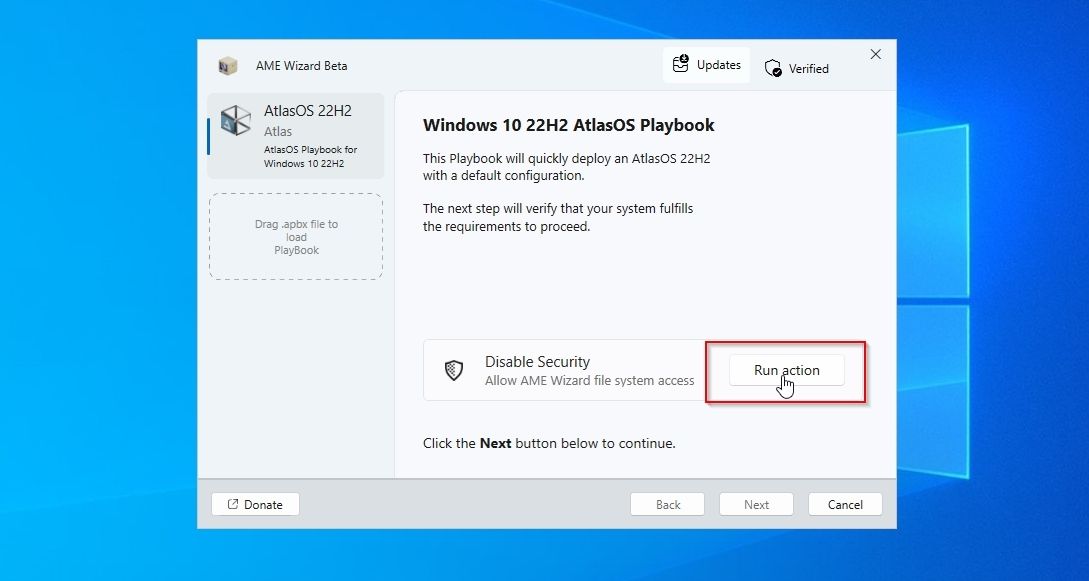
During this initial bit, AtlasOS will check your current Windows installation to ensure it doesn’t diverge from what it’s expecting, download updates, and guide you through turning off security measures (to allow it to modify Windows system files and settings).
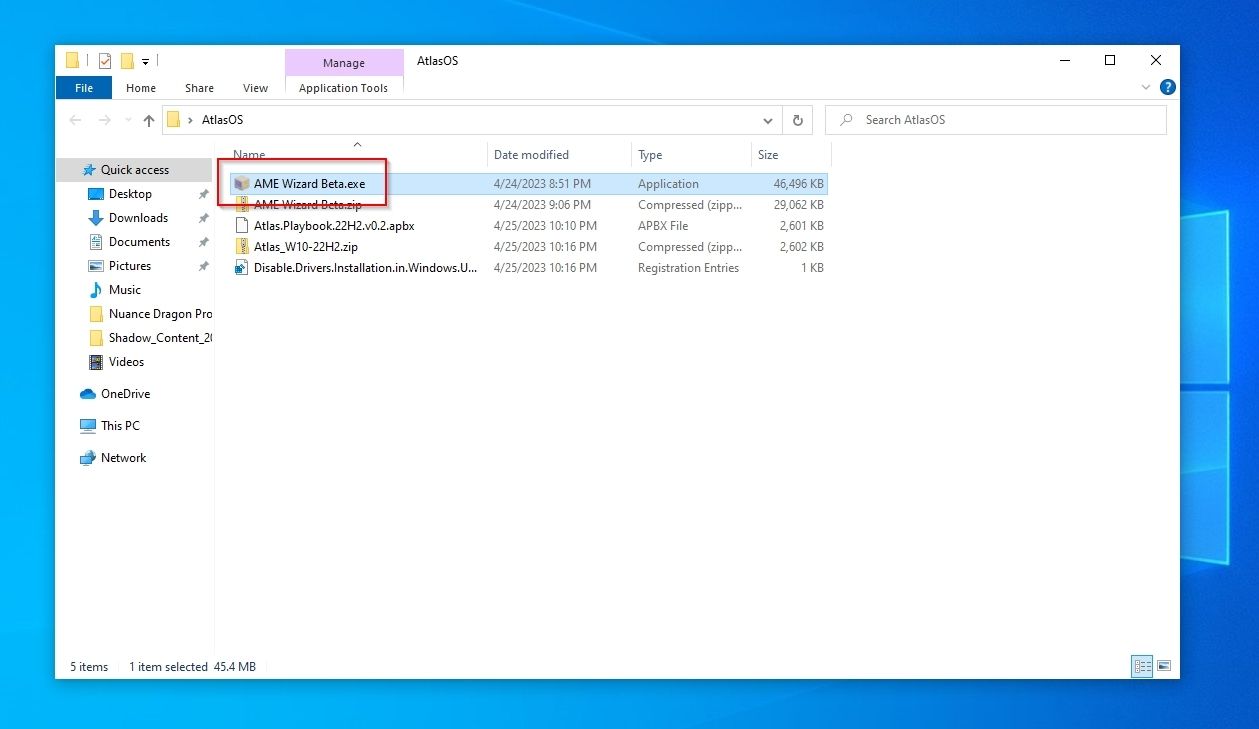
- Run your favorite file manager (or press Windows Key + E to launch Windows File Explorer) and navigate to the folder where you saved AtlasOS’s AME Wizard executable and its Playbook for your version of Windows. Run the AME Wizard executable.

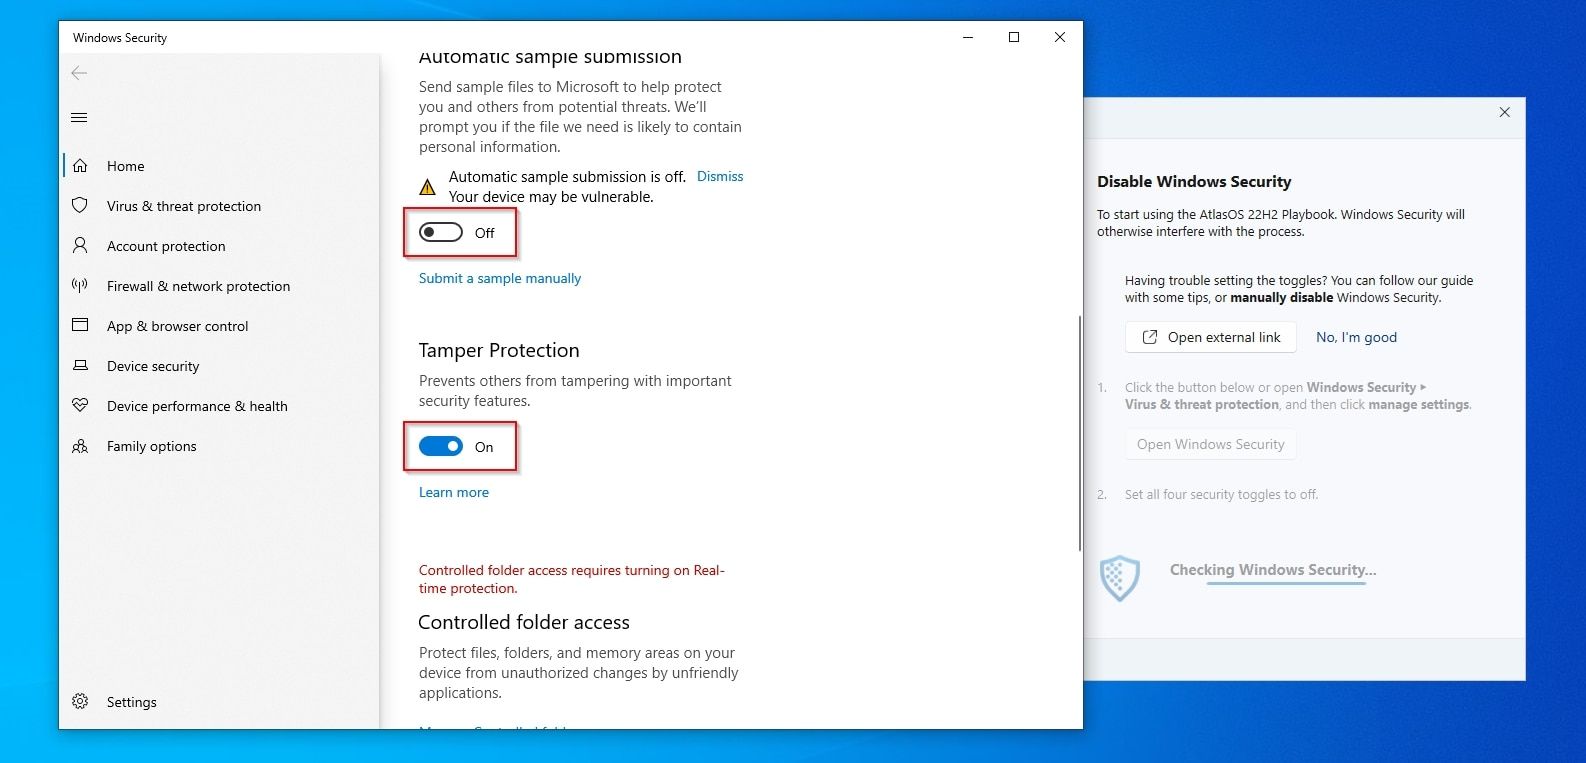
- If AtlasOS’s setup wizard doesn’t present a loaded Playbook on the left of its window, drag and drop the one you downloaded there. With an appropriate Playbook loaded, AtlasOS’s setup will ask you to Disable Security to “allow AME Wizard file system access”. Click on Run action to do that.

- AtlasOS’s setup wizard will show you a button, Open Windows Security, which you can click to jump to that part of Windows settings quickly.
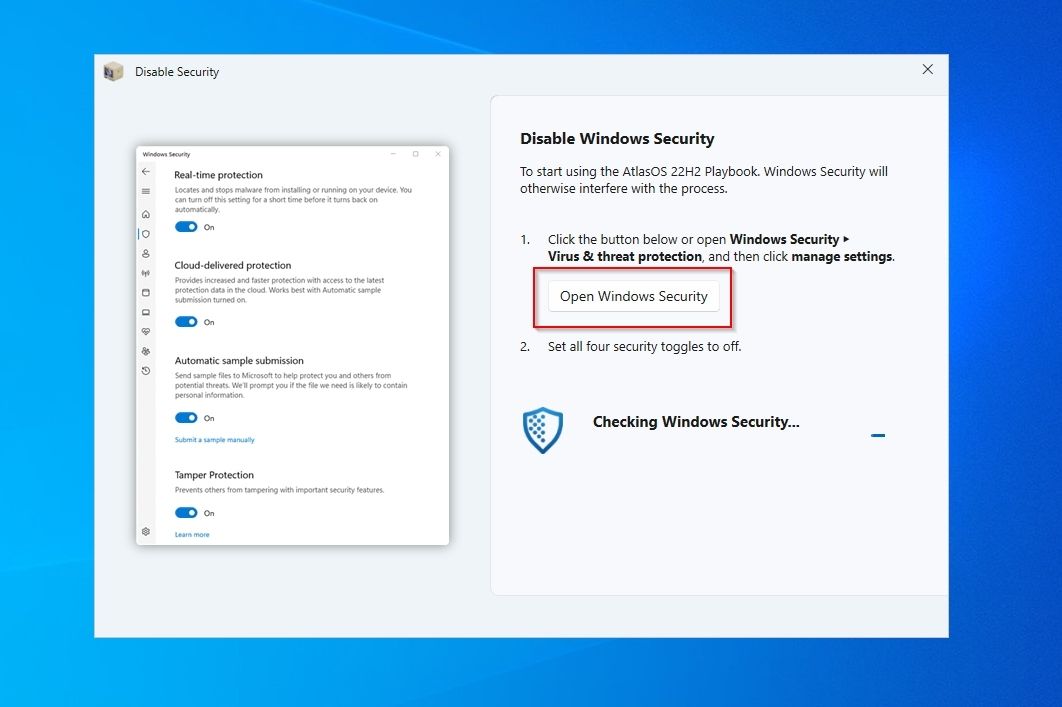
4. Turn off all four types of security measures on the Windows Security settings page.
5. When done, AtlasOS’s setup will detect the changes and inform you that “Windows Security is disabled”, prompting you to close that settings window and move to the next step.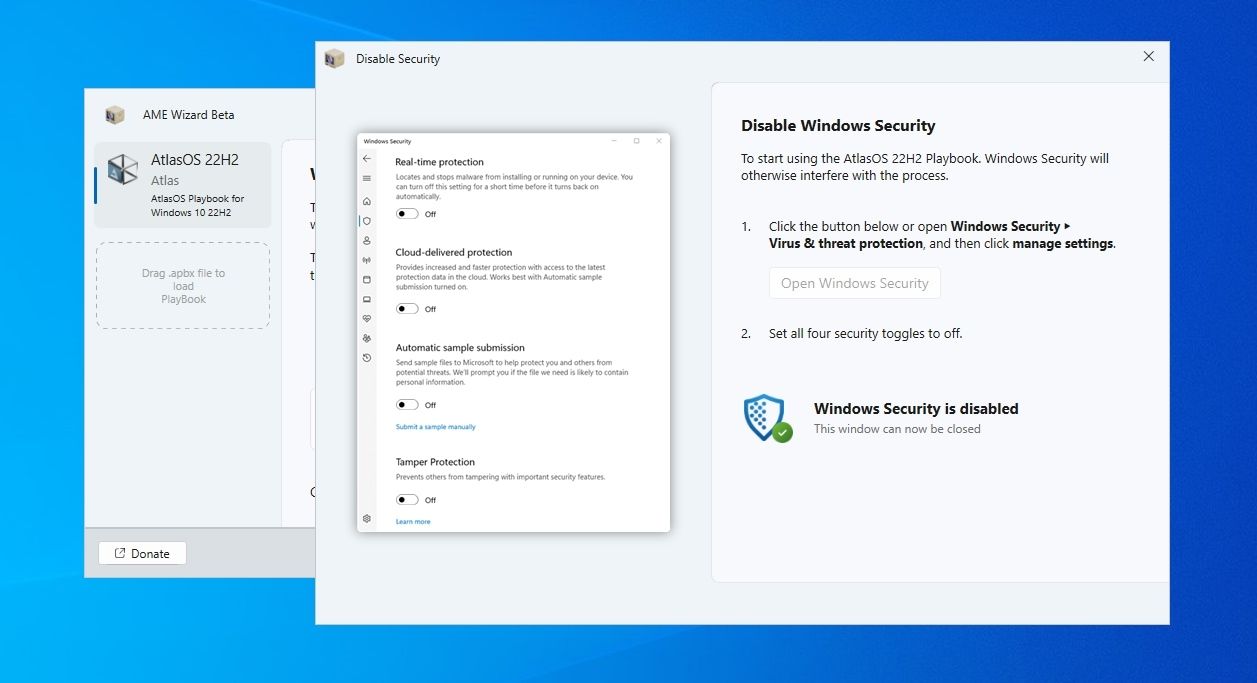
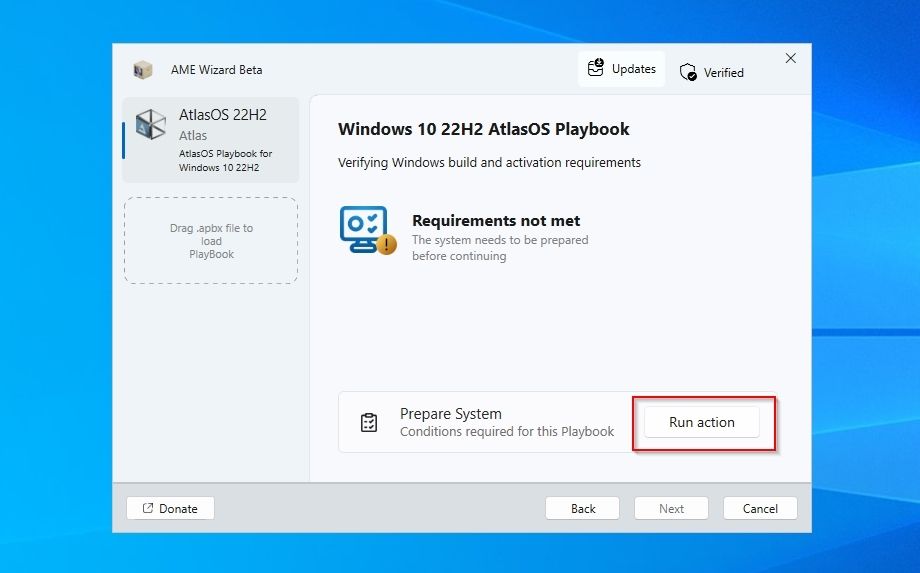
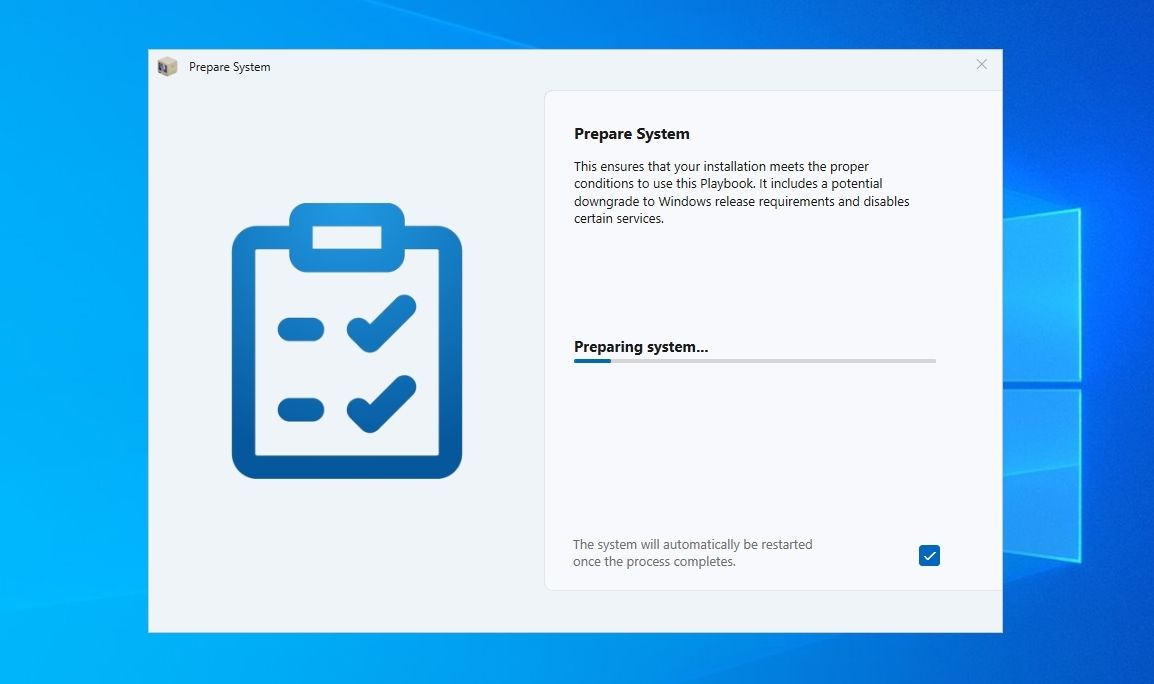
- AtlasOS is designed for a specific combination of a particular Windows version and some updates, and will inform you if those requirements aren’t met. Usually, it will also offer the option to “Prepare (the) System“ according to the conditions required by the loaded Playbook. Click on Run action to do that.

- The setup wizard will start “Preparing (your) system” by installing, removing, or modifying components and settings. Your PC might restart during that part of the process, but apart from that, no user intervention should be required.
3. You will also have to allow the AME Wizard “to make changes to your device“ for that part to work.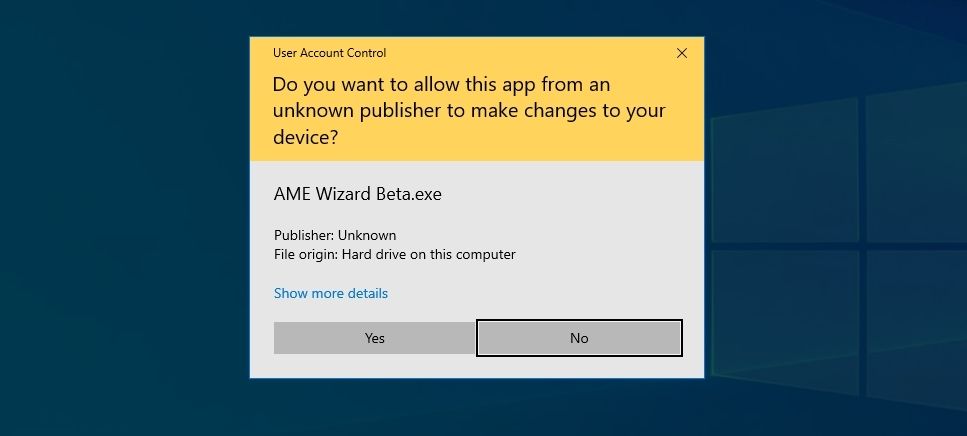
4. If the AME Wizard prompts you to do so after that, or it fails, you should manually download the latest updates for your version of Windows.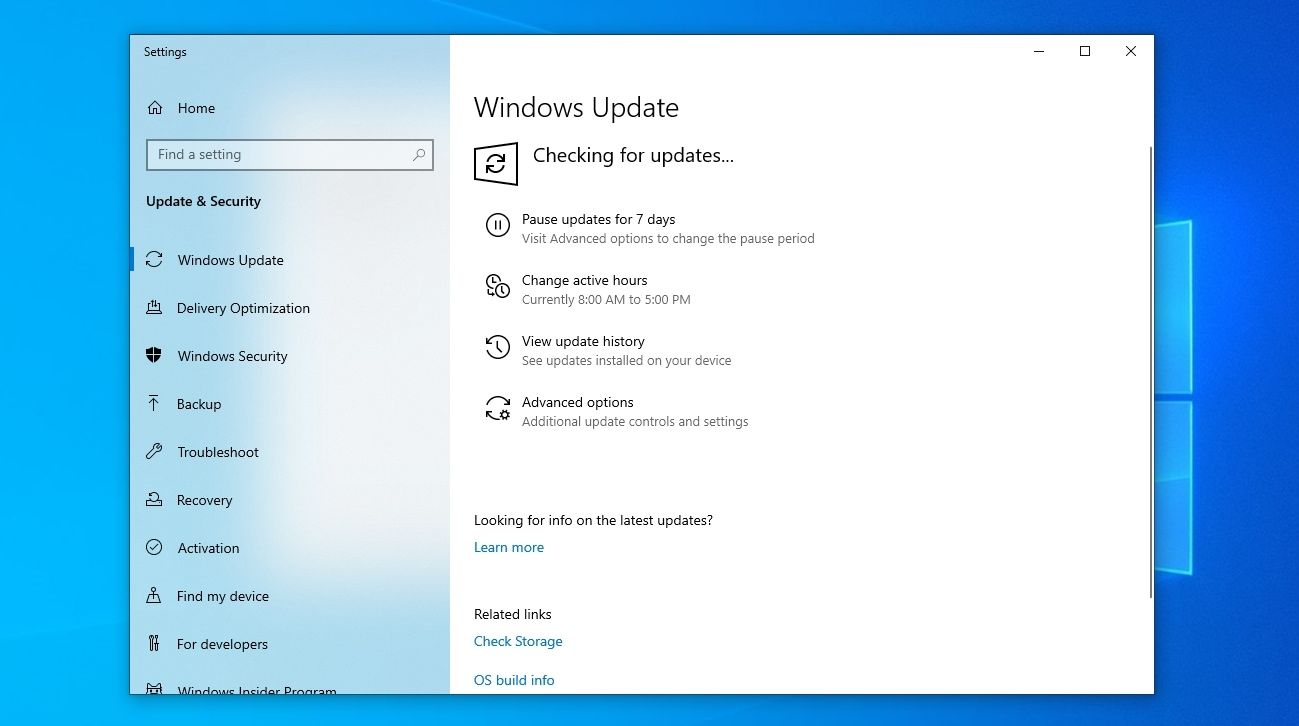
5. When, finally, AME Wizard reports that all “Requirements (are) met“, click on Next to proceed to the actual installation.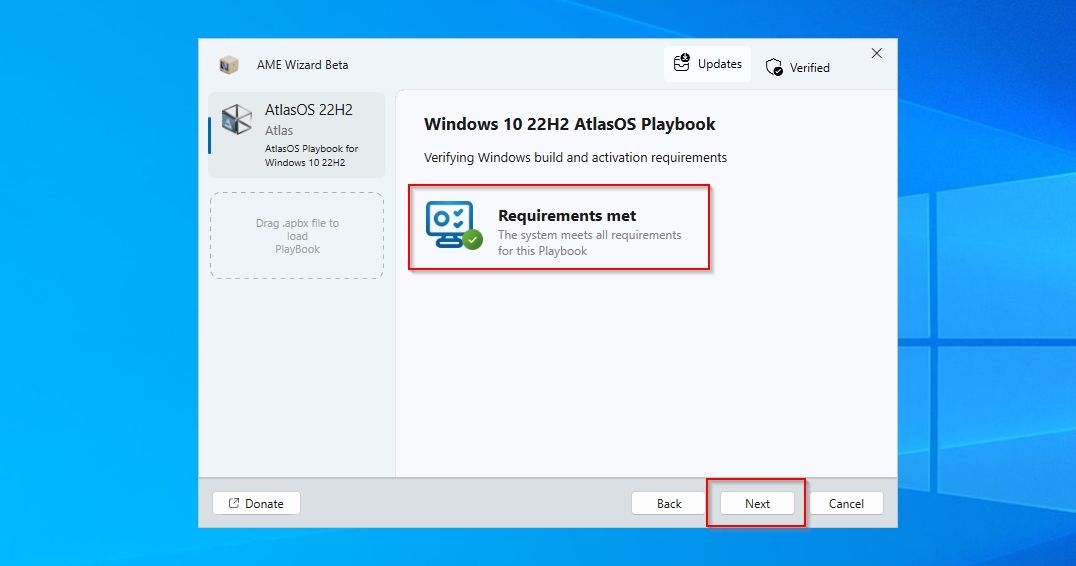
Installing AtlasOS
Up to now, your Windows installation is (mostly) untouched, and you can still cancel AtlasOS’s installation. We must strongly suggest once more you take a complete Windows OS backup if you haven’t done so yet, to be able to revert the changes that will be applied in the next steps.
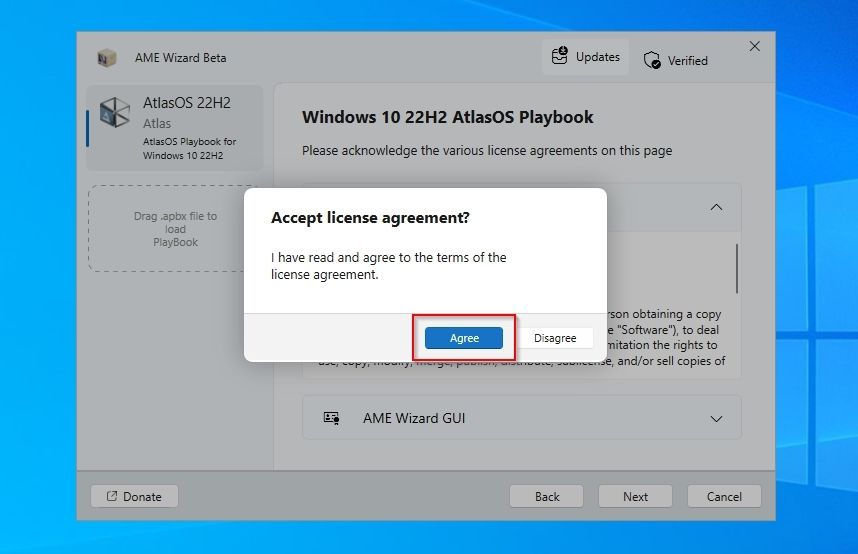
- AtlasOS setup wizard will show you a typical license agreement. Click Next to proceed to the next step, or cancel if you’ve changed your mind about modifying your Windows installation.

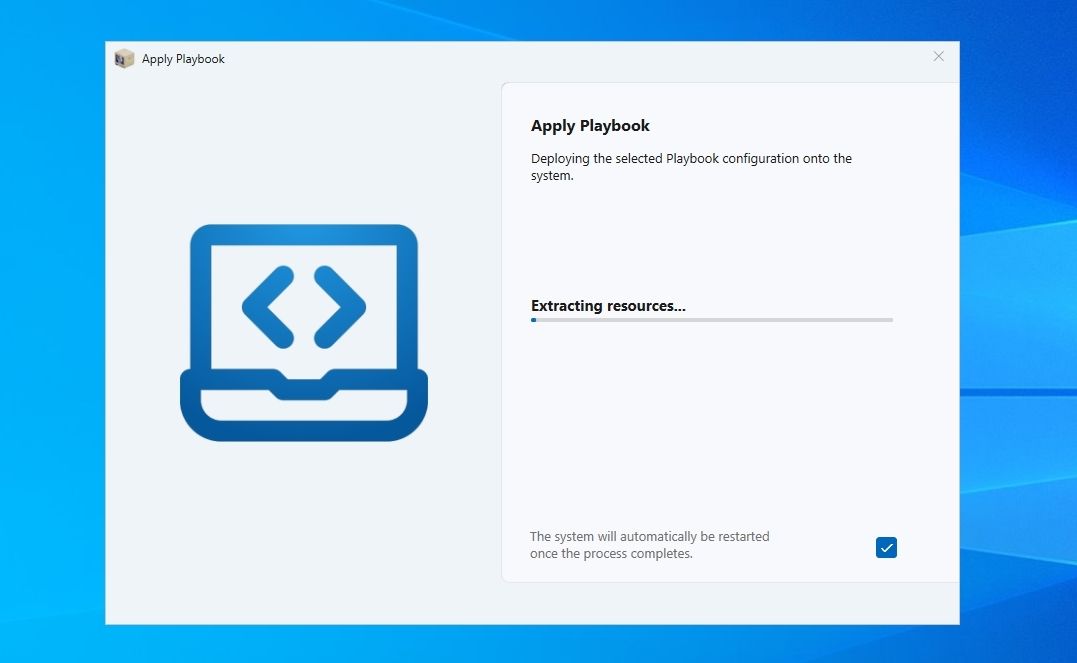
- During the next step, AtlasOS’s installer will extract needed resources and may also download additional files.

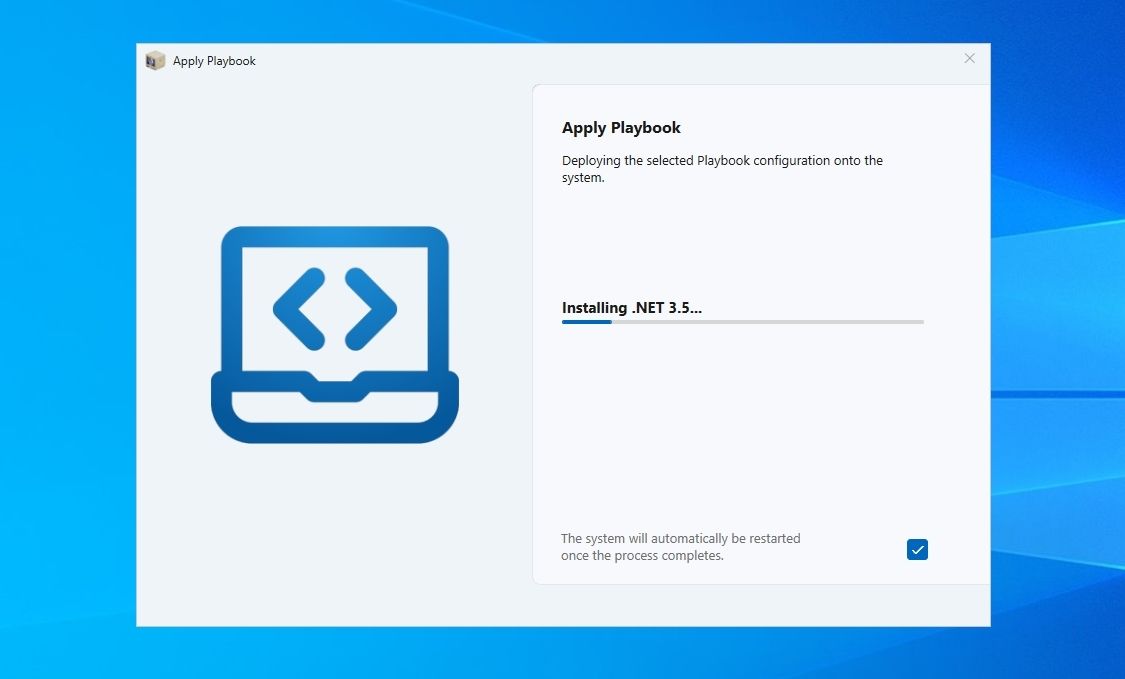
- The installer might download resources like .Net 3.5…

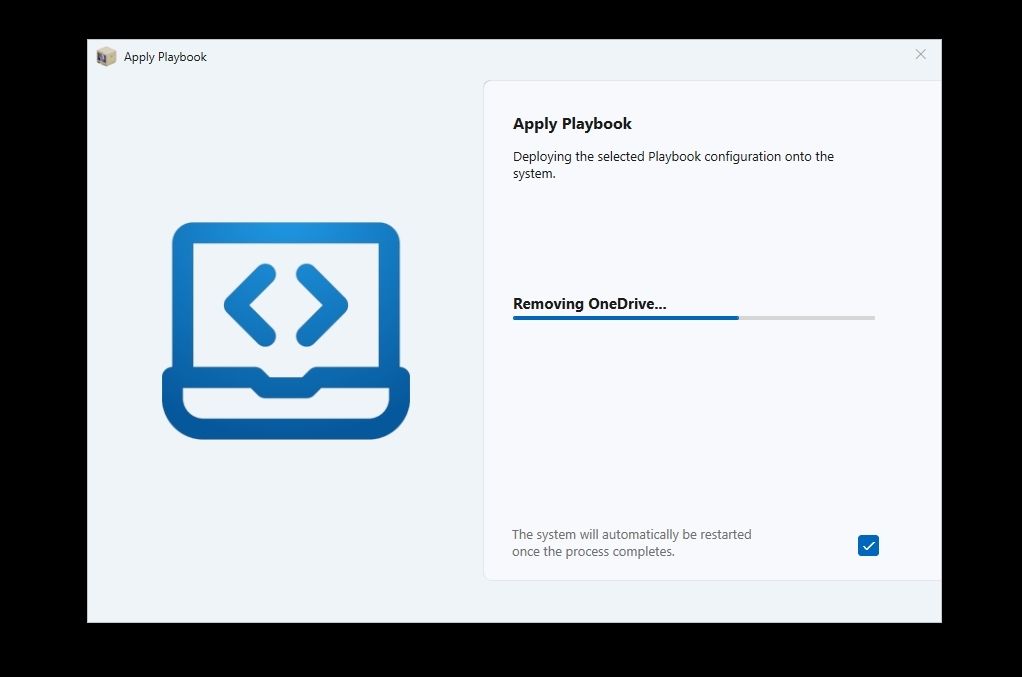
- …and remove what the loaded Playbook deems “useless fluff”, like Microsoft’s OneDrive cloud storage solution.

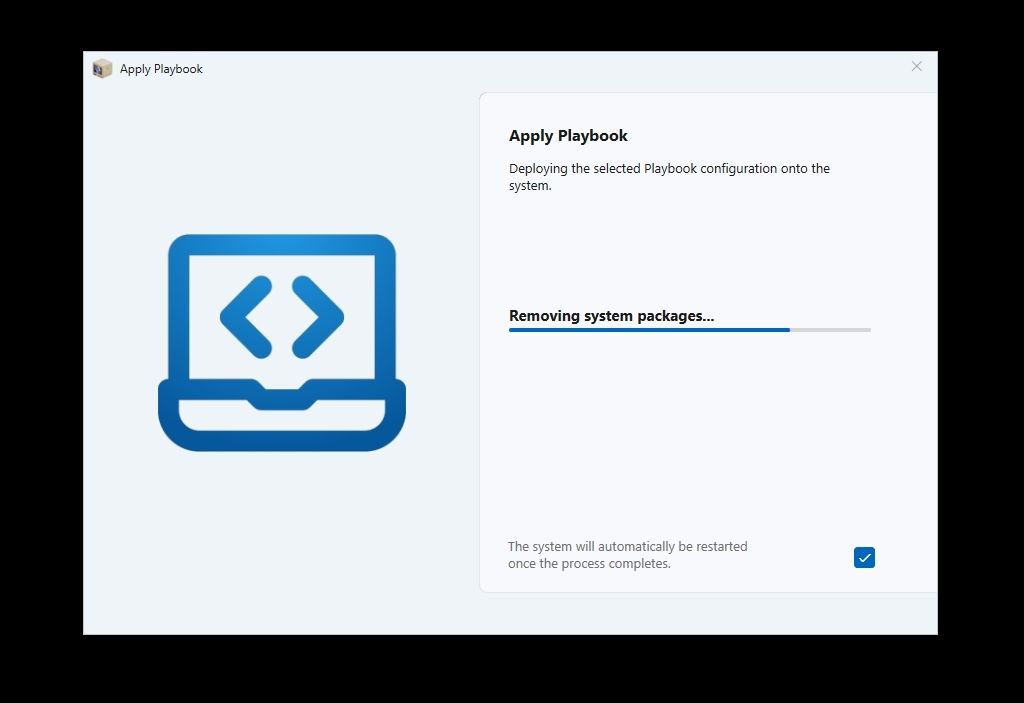
- AtlasOS will also “lose” a lot of system packages and turn off many services to “Lighten up” your OS.

- You’ll also be given the option to choose how you deal with Security Mitigations. We won’t dive into details about them, but you can consider them extra security software patches for older CPUs. If your CPU is newer (released within the last five years), it’s (usually) better not to disable them. If your CPU is relatively old, by disabling Security Mitigations, you’ll be trading reduced security for a boost in performance. It’s your choice, but AtlasOS will automatically disable them if you don’t answer within 5 minutes.
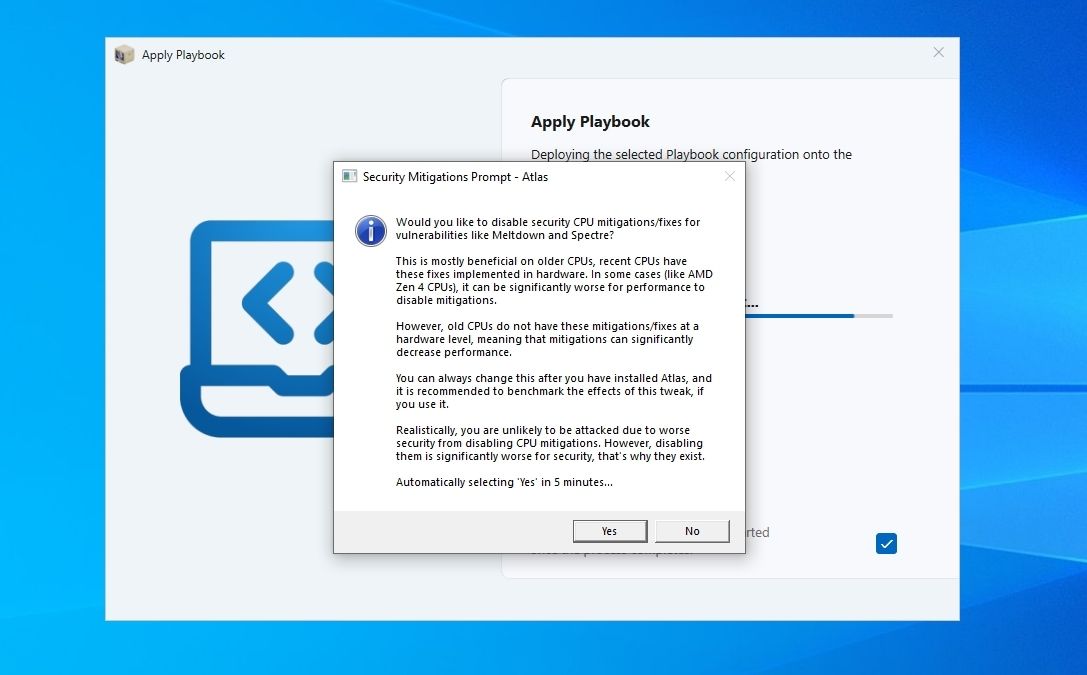
7. When it’s mostly done, AtlasOS wizard will inform you that it’s “Finalizing (the) configuration“.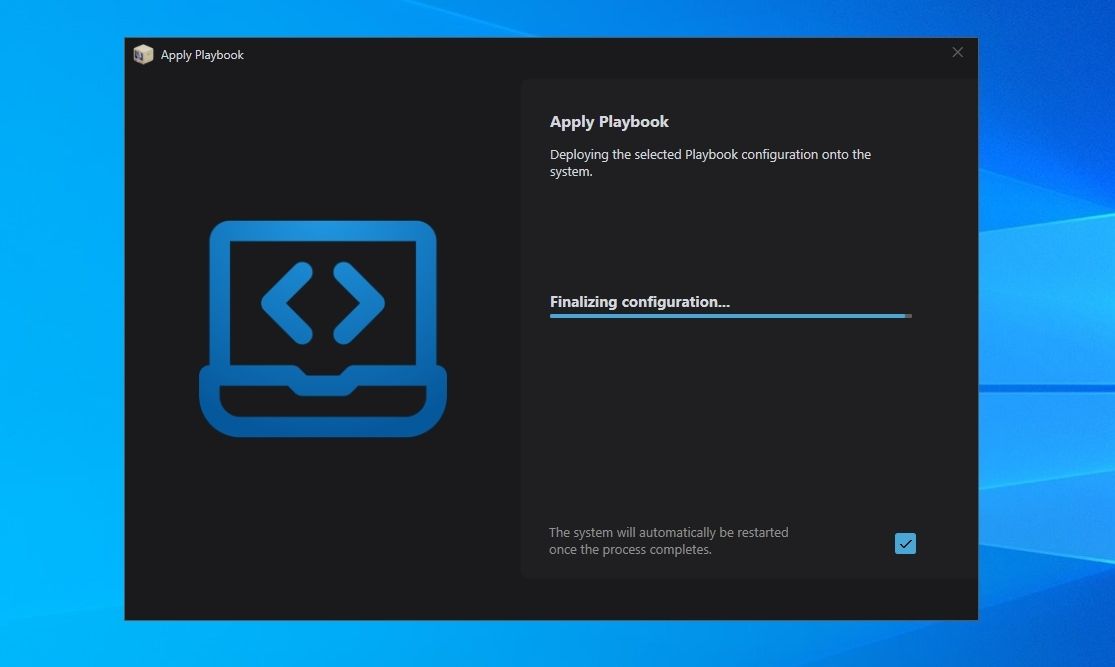
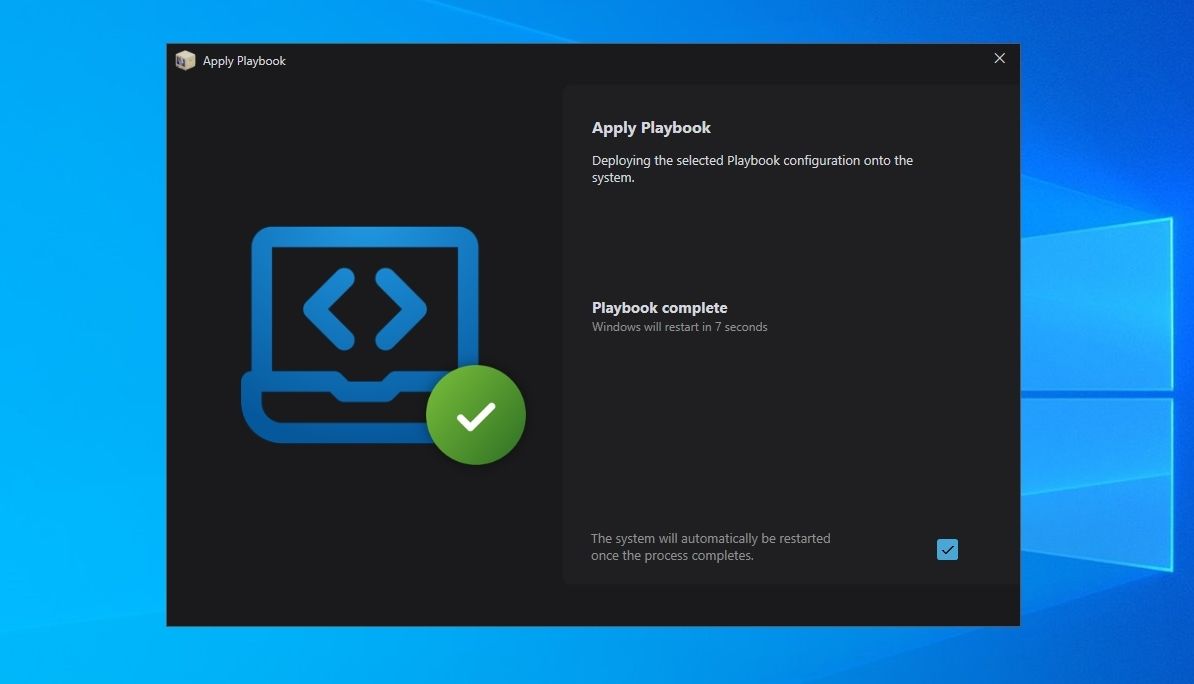
8. After all steps are complete and all rules in AtlasOS’s Playbook are applied, your PC should restart automatically.
9. Windows might have to perform a reconfiguration during the next startup.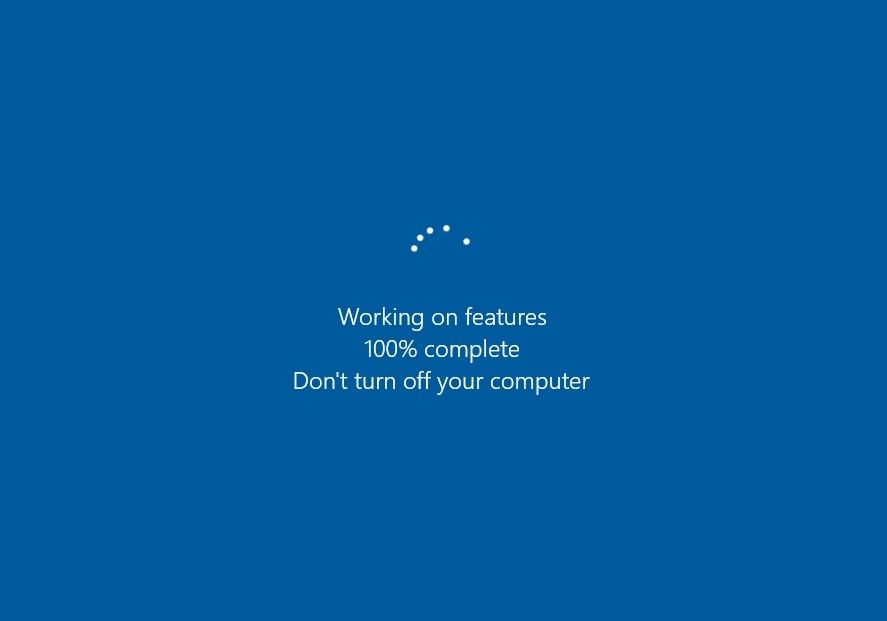
The Differences Between AtlasOS and Vanilla Windows
AtlasOS’s difference in responsiveness compared to “vanilla” Windows can be stunning, although that also depends on your hardware. It also has a cleaner aesthetic and feels simpler, closer to the classic Windows XP.
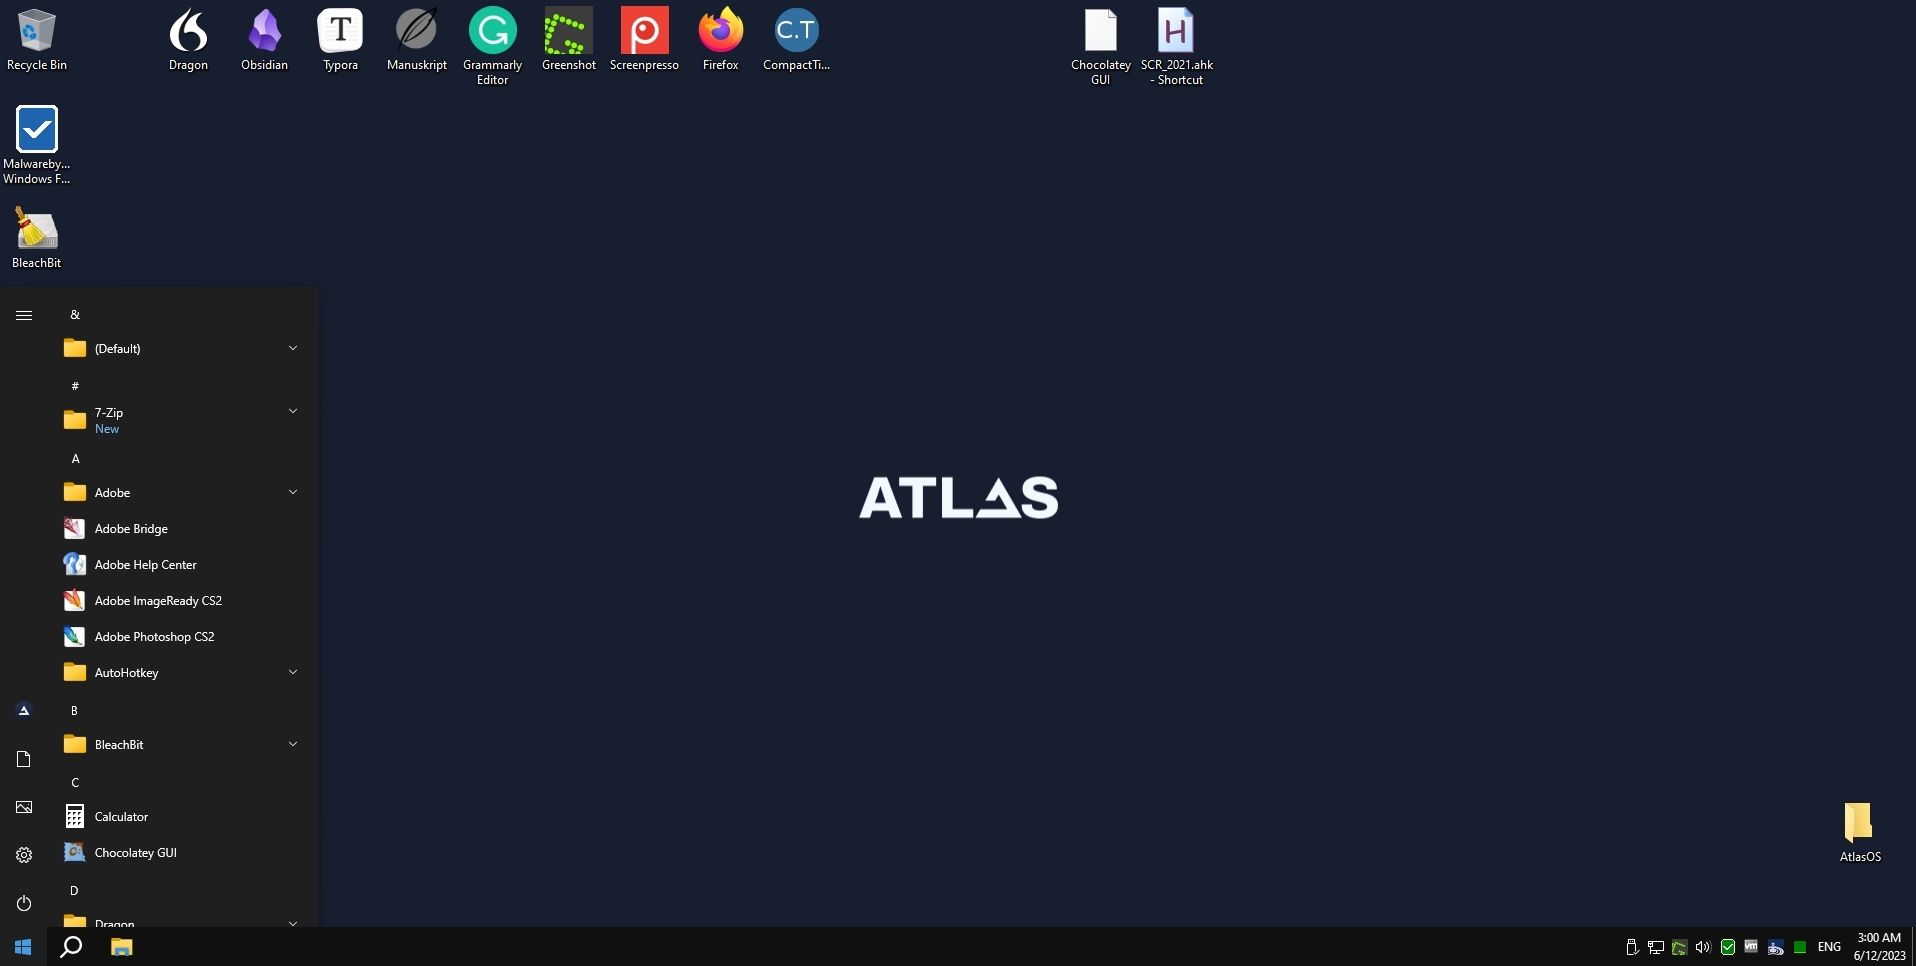
However, not everything is perfect: you might not agree with everything AtlasOS disables, removes, or changes. For example, from now on, you’ll have to manually download and apply updates to your Windows installation, for AtlasOS also removes the Windows Update option.
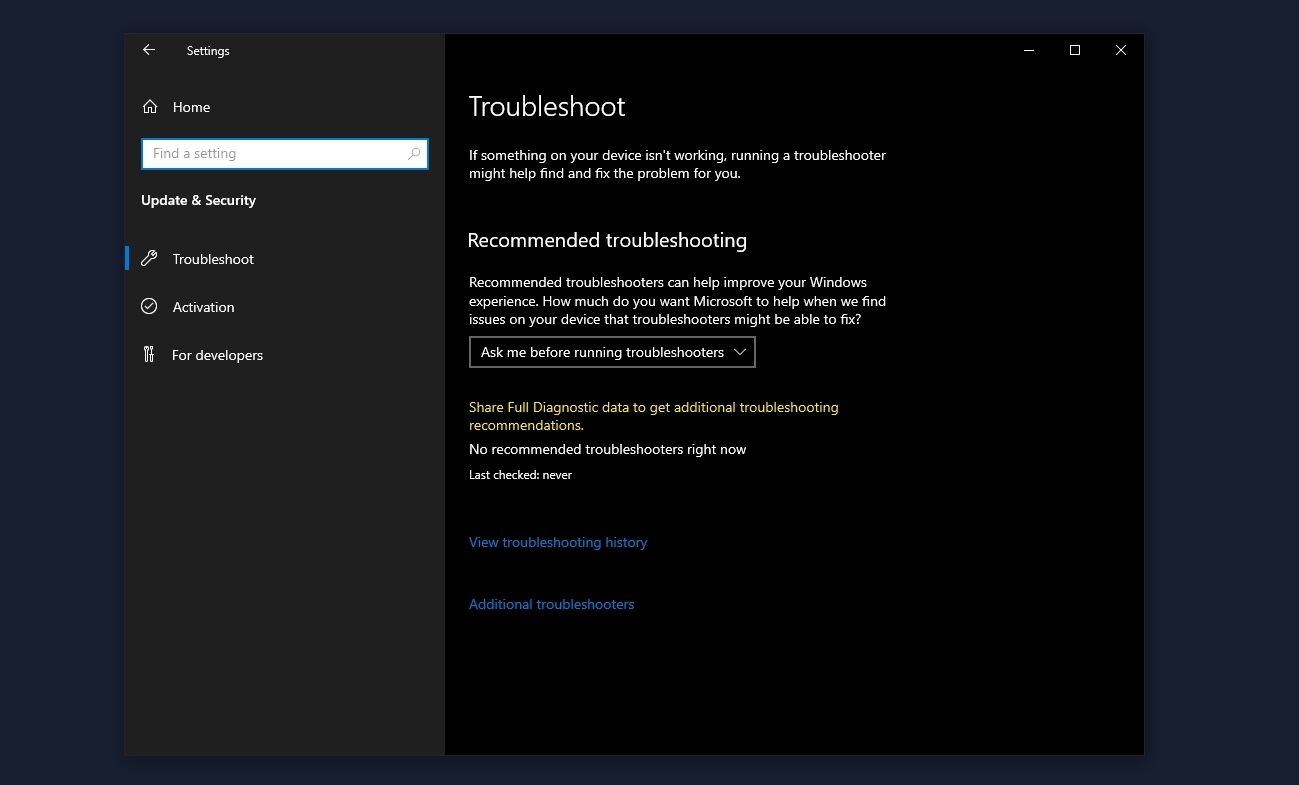
You can feel the difference compared to a “normal” Windows installation, and it’s also apparent if you check the OS’s demands on resources.
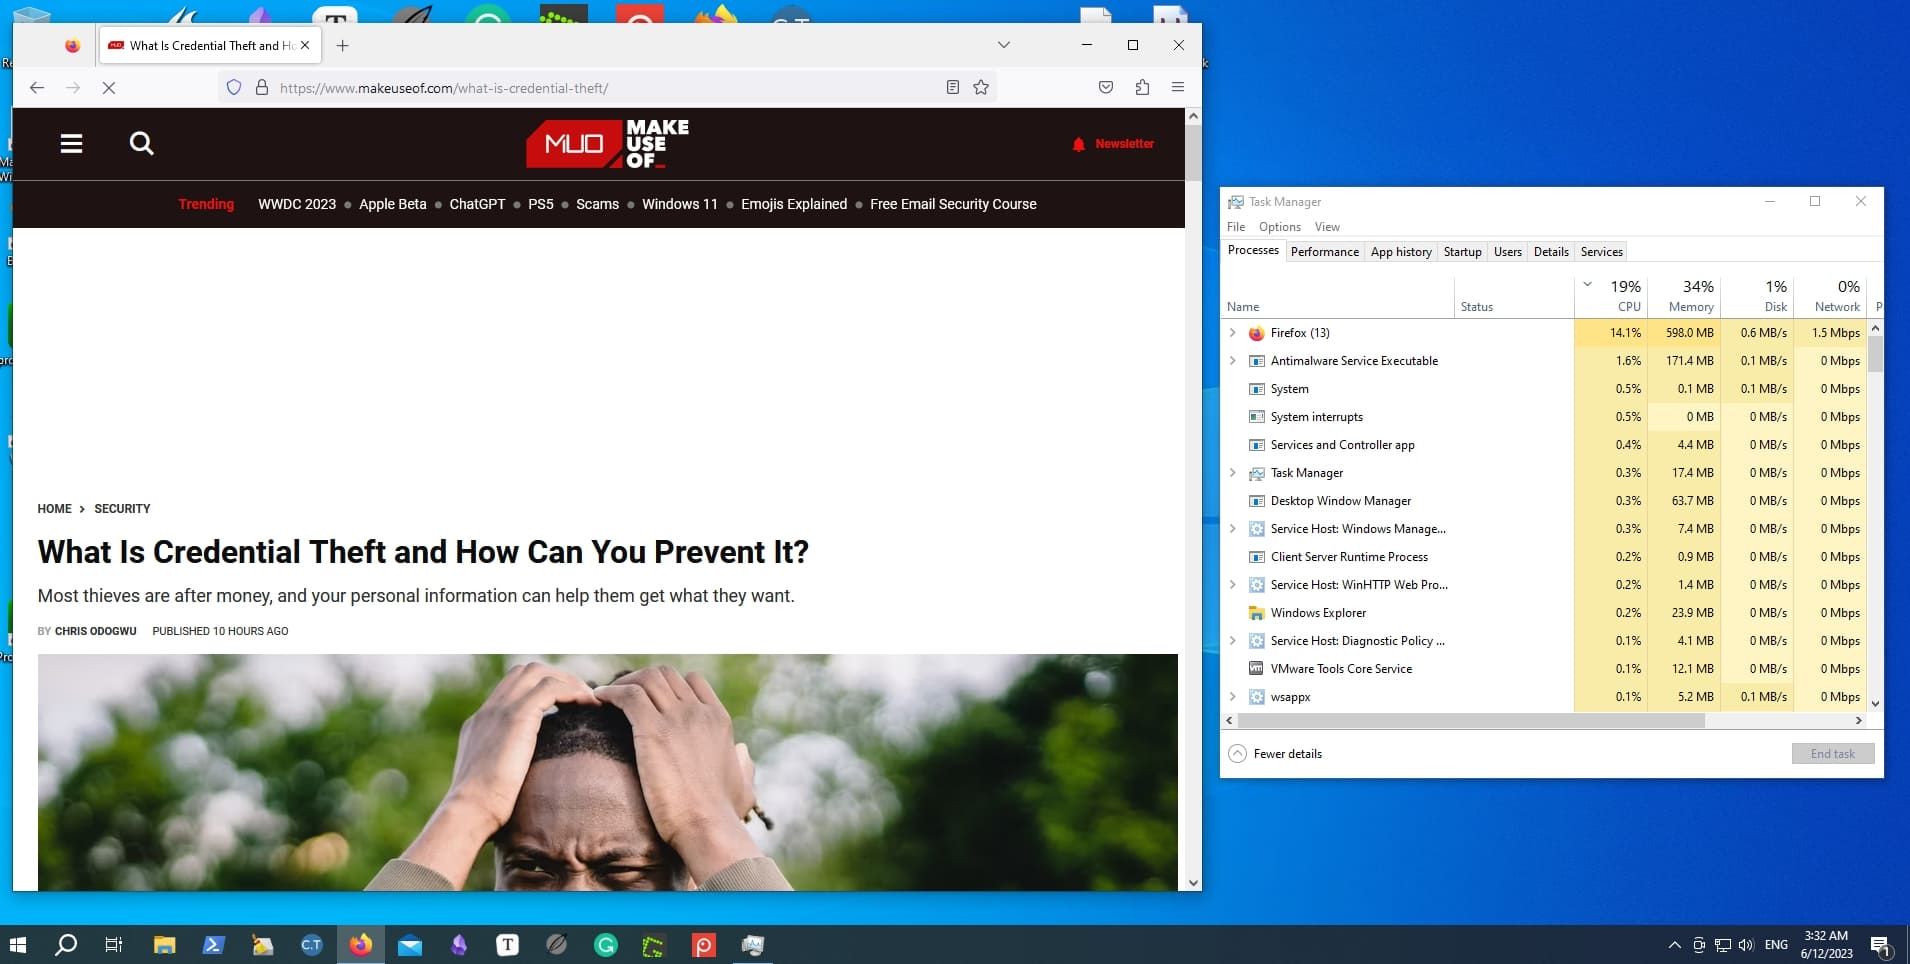
In our case, the “vanilla” version of Windows 10 we used before side-grading it to AtlasOS consumed around 8%-10% more resources while idle.
A Leaner Version of Windows
As you’ll see for yourself, AtlasOS’s pros are quite enticing. It feels like a new, cleaner, and snappier version of Windows. It’s what many would expect from a modern version of what many consider Microsoft’s best version of Windows, Windows XP. Your PC will respond quicker, apps will seem faster, and you may also gain some gaming performance.
AtlasOS is perfect for a secondary, older PC, which isn’t crucial for your daily needs. Yes, you will miss some Windows updates that could be useful, and an app here or a game there might fail to run. And yet, if AtlasOS can make your old PC usable again and help postpone an upgrade, that’s a small price to pay.
Let’s see how you can squeeze more life out of your old PC with AtlasOS, boosting its responsiveness and increasing your games’ framerates.
Also read:
- [New] Exclusive List 11 Pioneering, Cost-Free Online Title Makers for YT for 2024
- [New] Finding the Perfect Screen Recorder for Games
- [New] In 2024, Cognitive Clash - Ultimate GK Video Quizzes
- [New] Instagram Craftsmanship Incorporating Descriptive Texts for 2024
- [New] Shopping Guide to Top 10 Mystery Boxes Purchase Sites
- [New] TomTom Bandit Cam Unboxed 2023 Insights for 2024
- Confining Insider Builds Within the Enterprise
- Discover the Ideal Retiree Cellphone Deals – Our Top Picks
- Efficient Registry Management Using PowerShell and CMD
- Enhancing Device Recognition for Synapse and Razers in Win 11
- How to Factory Reset OnePlus 12R If I Forgot Security Code or Password? | Dr.fone
- Immediate Resolution: Eliminating Win10/11 Blackouts
- Mastering Steam Library Management in Windows 11
- Mending Windows Update Disruption: Error 0X80073712
- Seamless iPhone and PC Integration: Preserve Your Data During Transfer
- Simple Steps: Reactivating and Customizing the Old Photo Viewer in Win11
- Strategies to Handle LoadLibrary Failure 87
- Techniques to Re-Enable Razer Device Detection in Windows 11
- Win11 Shortcut Sequence Collection for Narrator
- Title: Rediscover Classics: AtlasOS Refresh
- Author: Richard
- Created at : 2025-01-01 05:05:36
- Updated at : 2025-01-05 16:58:10
- Link: https://win11-tips.techidaily.com/rediscover-classics-atlasos-refresh/
- License: This work is licensed under CC BY-NC-SA 4.0.
