Resizing Photos Made Simple: The Top 6 Tricks for Windows 11 Users

Resizing Photos Made Simple: The Top 6 Tricks for Windows 11 Users
Users often need to resize images to fit them better on websites, blogs, documents, or even within frames for printed output. Almost every general image-editing app for Windows has options for resizing pictures. Windows 11 also includes pre-installed apps you can utilize for resizing images to more ideal dimensions.
Here are some ways to resize images in Windows 11 with its pre-installed Microsoft apps and some third-party software alternatives.
Disclaimer: This post includes affiliate links
If you click on a link and make a purchase, I may receive a commission at no extra cost to you.
1. How to Resize Images With Photos
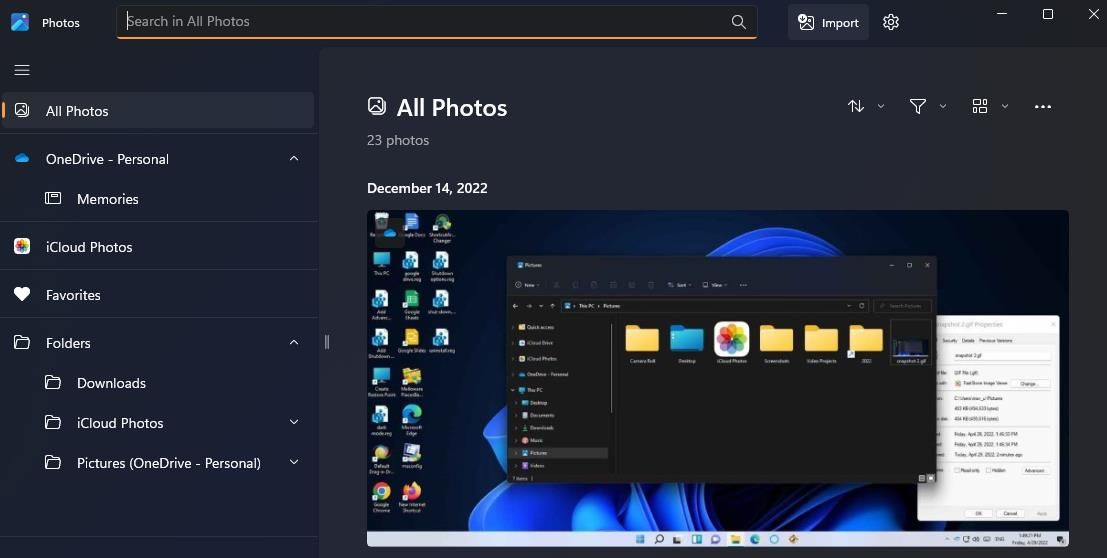
Photos is primarily a default image viewer app that comes with Windows 11, but it does include some basic editing options. You can use that app to resize your images in pixels and percentage terms. These are the steps for resizing pictures with Photos:
Open Photos by clicking Windows 11’s Start button and selecting that app’s pinned menu shortcut.
ClickAll Photos to view your images.

Right-click an image for resizing and selectOpen .
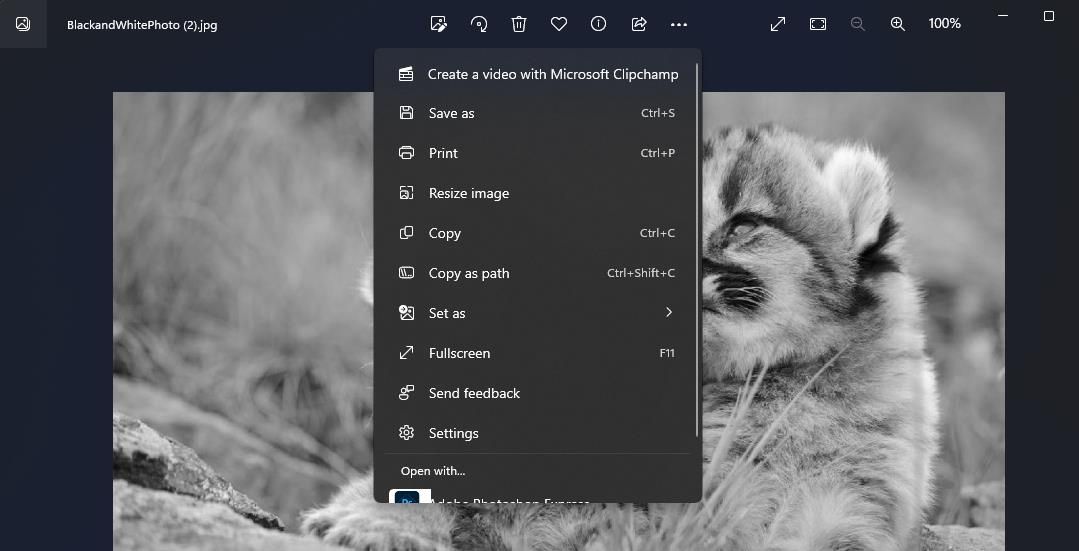
Click theSee more (ellipses) button in the editing window that opens.
Select theResize image option.

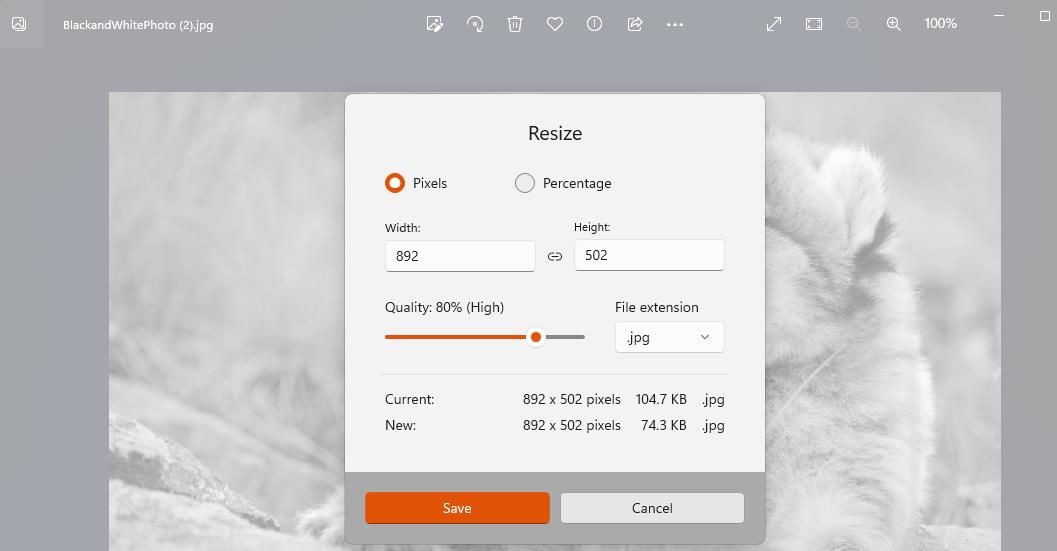
Select thePixels option.
Then input different pixel values in theWidth andHeight boxes. If you only modify one value, the other one will be automatically proportionally changed to retain the same aspect ratio.

ClickSave to apply the resize.
Users who select the alternativePercentage option need to enter percentage values in theWidth andHeight boxes. Entering values like 80 and 90 will reduce the size of the image by 20 and 10 percent. Inputting higher numbers like 110 and 120 will increase the image’s size by 10 and 20 percent. Thus, the percentage size change amounts to how much the values are above or below 100.
TheResize box in Photos also includes aQuality bar setting. However, you can only use that setting for JPG output. Select the .jpg option in theFile extensio n drop-down menu. Then drag the bar’s slider left or right to set the picture quality in the resized image.
2. How to Resize Images With Paint
Microsoft Paint is the raster graphics app bundled with Windows 11. It’s a relatively basic drawing and image-editing software compared with the likes of PhotoShop. However, utilizing Paint is fine for basic stuff like resizing and cropping images. OurPaint guide to resizing and cropping images includes full instructions for how you can change your images’ dimensions with that app.
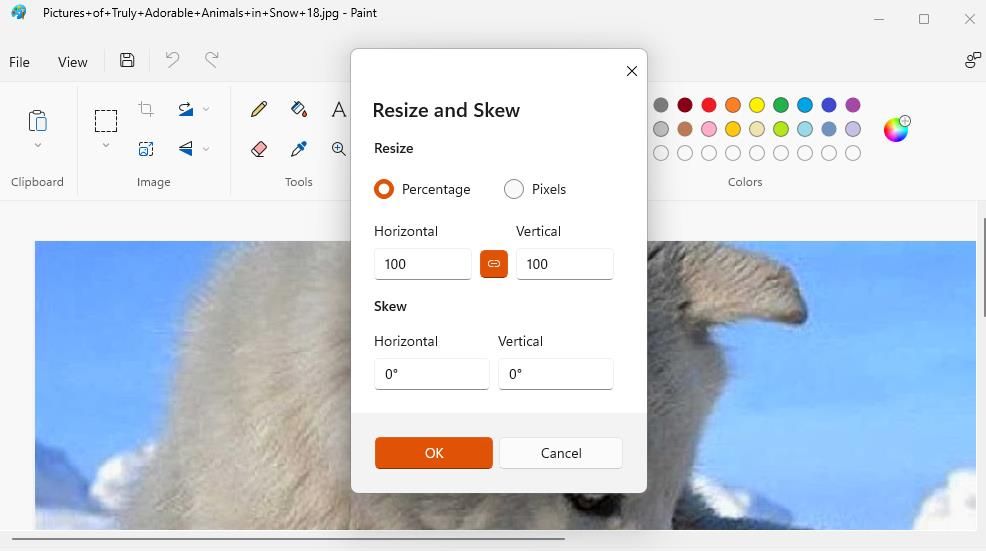
The resize image options in Paint
3. How to Resize Images With Paint 3D
Paint 3D is an advanced version of the aforementioned Paint with options for adding and modifying three-dimensional objects. That Microsoft app also incorporates a tool for resizing images with your mouse and inputting values. This is how you can resize your images within Paint 3D in Windows 11:
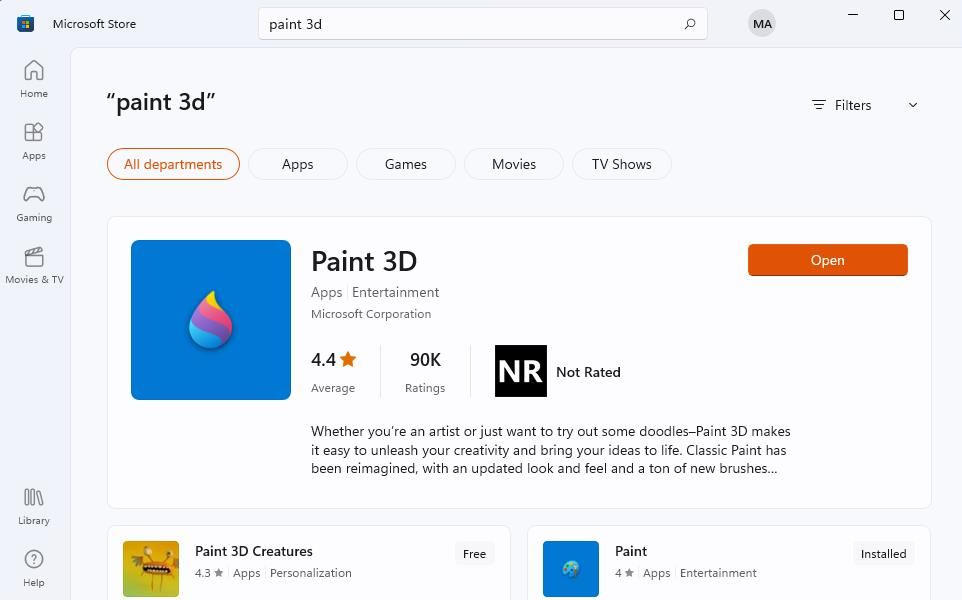
Paint 3D isn’t a pre-installed Windows 11 app. If you don’t have that app, open thePaint 3D page on the Microsoft Store website.
ClickGet in Store app on the Paint 3D app page.
Select theOpen Microsoft Store option to bring up Paint 3D in the app.

ClickGet (the install option) to add Paint 3D to your app library.
SelectStart >All apps to view installed software on the menu.
Scroll down and select Paint 3D.
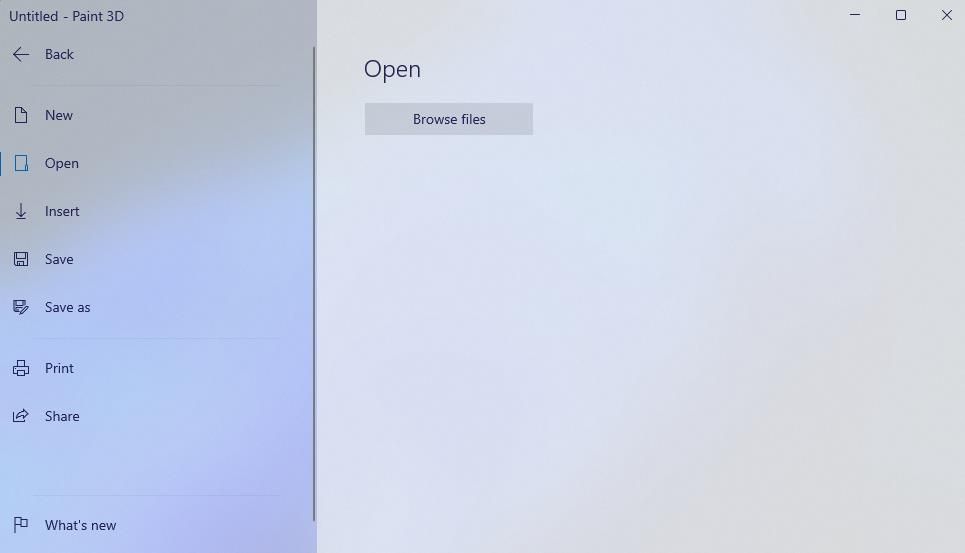
Then clickOpen andBrowse files .

Select an image to resize, and click theOpen option.
Click theView more options (three-dot) menu button.
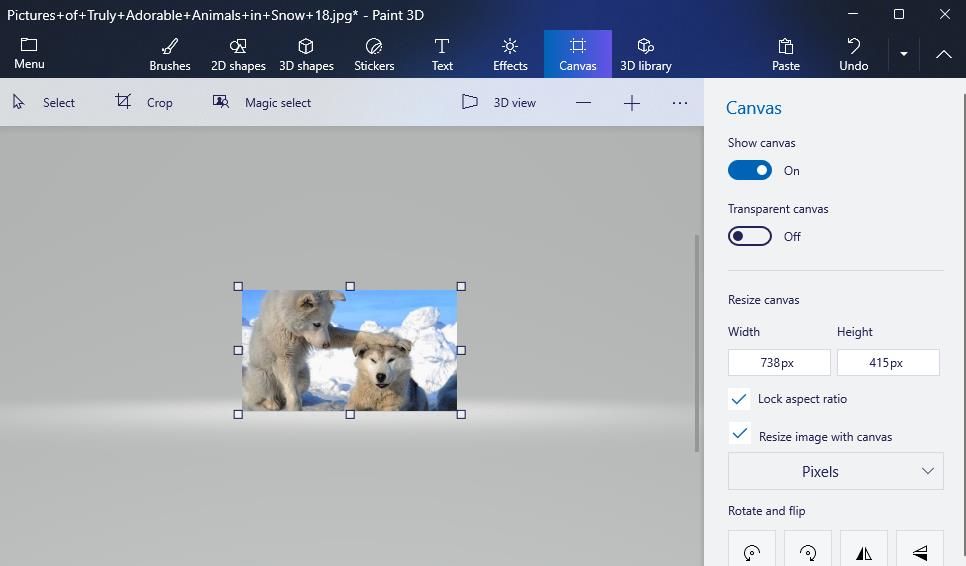
SelectCanvas options to access options for resizing the image’s dimensions.

Click theResize image with canvas checkbox to select that option.
Now left-click a corner of the image, hold the mouse button, and drag the mouse cursor left/right to reduce or expand the picture. The values in theHeight andWidth boxes change as you drag the mouse.
When you’re done resizing, click theMenu button.
Select theSave option. Or you can selectSave as if you prefer not to overwrite the original file.
You can also enter different values in theWidth andHeight boxes to resize the image. SelectPixels orPercentage on the drop-down menu to change the value type. Deselect theLock aspect ratio option if you don’t want to retain the image’s proportions.
4. How to Resize Images With Edge
Canary and beta versions of the Edge web browser include a built-in image editor feature with which you can resize images. You can try out that feature as covered in our article aboutediting images in Edge . However, you’ll have to make do with extensions (or web apps) for resizing images in Edge stable for now. This is how you can resize your pictures in Edge with the Image Magic Extension:
Open theImage Magic page in Microsoft Edge.
ClickGet to add Image Magic to Edge.
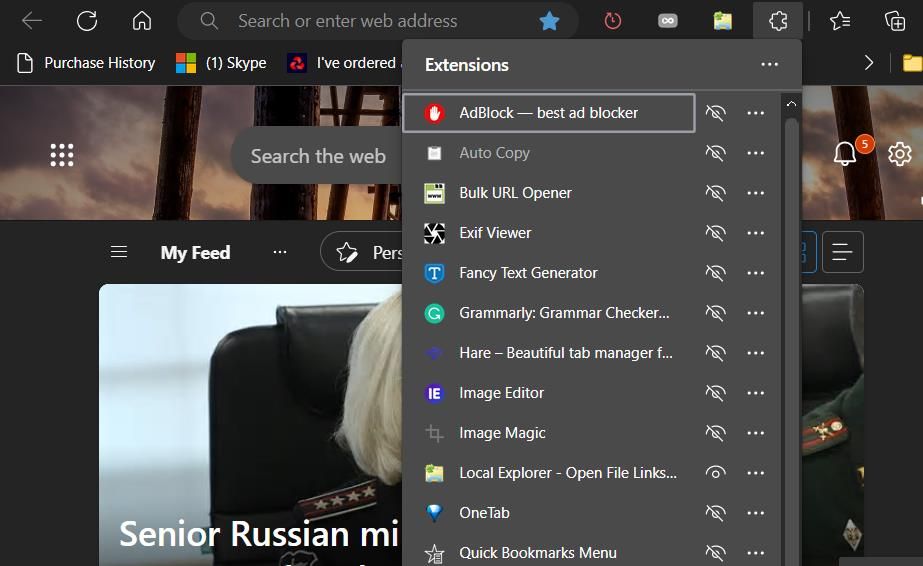
Then press theExtensions (jigsaw piece) button in Edge.

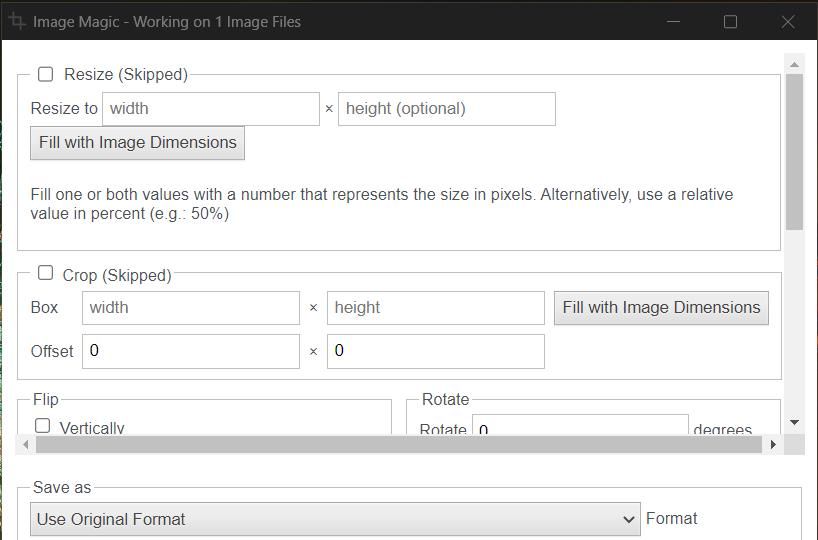
ClickImage Magic to bring up that extension’s window.
You’ll need to drag and drop a picture file onto the Image Magic window to resize it. Open a folder containing some images and drag one onto the Image Magic window.
Select theResize checkbox.
ClickFill with image dimensions for theResize option to see the current values for the selected picture in theWidth andHeight boxes.

Input alternative pixel values in the twoWidth andHeight boxes.
Press theConvert button to download the resized image. You’ll find that image in whatever folder you’ve set Edge to download files in.
5. How to Resize Images via Windows 11’s Context Menu
Some third-party editing apps for images integrate with File Explorer’s context menu. CoolTweak and Image Resizer are two such apps that add options for resizing images to the context menu. Those options enable you to resize images by right-clicking their files in Explorer. Check out our guide aboutadding resize image options to the context menu for further details about CoolTweak and Image Resizer.
6. How to Batch Resize Images With FastStone Photo Resizer
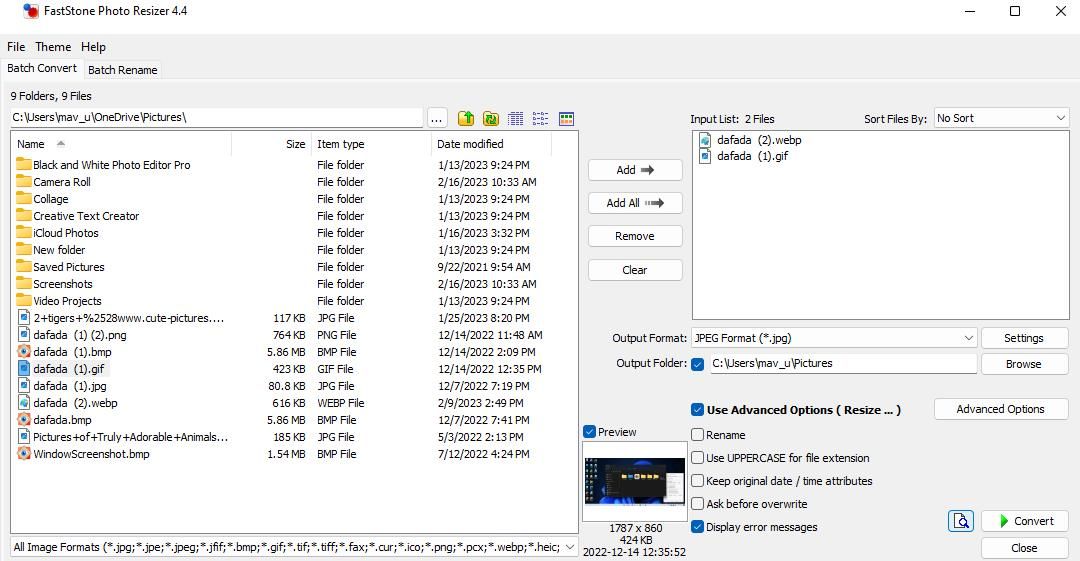
FastStone Photo Resizer is a freeware app designed for applying basic image editing to multiple files. You can utilize that software to batch resize, crop, rename, and convert image files. It also includes options for adding watermarks and text to pictures. You can batch-resize images with FastStone Photo Resizer as follows:
Open theFastStone Photo Resizer download page.
Click the greendownload option for the EXE file.
Double-clickFSResizerSetup44.exe in whatever folder includes the downloaded FastStone Photo Resizer setup file.
SelectNext >I Agree >Install within the software’s setup wizard.
Open the FastStone Photo Resizer software.
Select images to resize in theBatch Convert tab by clicking their files and pressing theAdd button.
Then select theUse Advanced Options checkbox.
Press theAdvanced Options button.

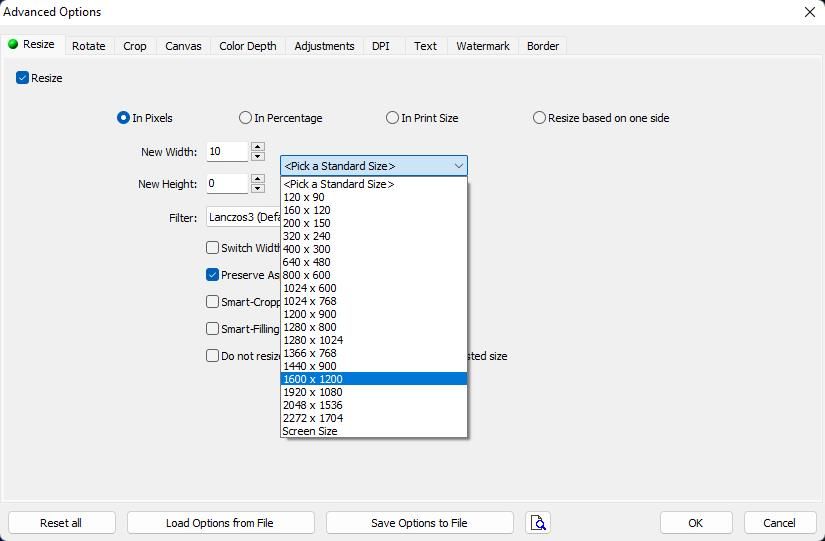
Click theResize checkbox if it’s not already selected.
Select theIn Pixels radio button.
Input values in theNew Width andNew Height boxes. Or select an option on thePick a Standard Size drop-down menu.

ClickOK to exit Advanced Options.
SelectBrowse for theOutput Folder option. Choose a folder to include the resized files, and click theOK button.
PressConvert to resize the images.
FastStone Photo Resizer also includes additionalIn Percentage ,In Print Size , andResize based on one side options for resizing. You can select quarter, half, double, or triple options on the percentage preset drop-down menu. TheIn Print Size option enables you to resize images in centimeters and inches for printing purposes.
Make Your Images Fit Better by Resizing Them in Windows 11
So, there are various ways you can resize photographs and pictures with different Windows 11 apps. The pre-installed Photos and Paint apps are sufficient for resizing images in pixels and percentages. However, you can resize images with your mouse in Paint 3D. FastStone Photo Resizer is an especially useful app for users who need to resize single or multiple images for printing. Or check out CoolTweak to resize your photos from the context menu.
Also read:
- [Updated] In 2024, Innovative VR Experiences From Elite Designers
- [Updated] The Ultimate Camera for Video Enthusiasts - Nikon's J5 Review
- 5 Ways to Track Apple iPhone 11 without App | Dr.fone
- How to Address Image Capture Fail in Windows OS
- How to Rectify Unresponsive Windows Folders, Double-Clicked
- How to Unlock Nokia C300 PIN Code/Pattern Lock/Password
- In 2024, Top 10 AirPlay Apps in Itel P40+ for Streaming | Dr.fone
- Master RGB Settings in Windows 11
- Reviving Display Issues: Windows 11 Tech Tips
- The Art of Utilizing LAV Filters for Optimized Windows Performance
- Vipassana | Free Book
- Virtual Excellence In-Depth Review of Premium Rift Models
- Win Fixes for Easing Up Locked Software Installation Checks
- Title: Resizing Photos Made Simple: The Top 6 Tricks for Windows 11 Users
- Author: Richard
- Created at : 2025-03-01 21:14:43
- Updated at : 2025-03-04 22:58:54
- Link: https://win11-tips.techidaily.com/resizing-photos-made-simple-the-top-6-tricks-for-windows-11-users/
- License: This work is licensed under CC BY-NC-SA 4.0.
