Revoking Read-Only Restriction on Windows Documents

Revoking Read-Only Restriction on Windows Documents
When a file is marked as read-only on Windows, you can only view it and not change it in any way. This essentially protects important files from unauthorized changes.
On Windows, you can set or remove the read-only attribute for a file by modifying its properties. Alternatively, you can also run a command in Command Prompt or Windows PowerShell to do the same. In this article, we take a look at all of them.
1. How to Change the Read-Only Attribute for Files by Modifying Properties
The easiest way to set or remove the read-only attribute for a file on Windows is by modifying its properties. Here’s how you can go about it.
- Open File Explorer and navigate to the file for which you want to change the read-only attribute.
- Right-click on your file and selectProperties .
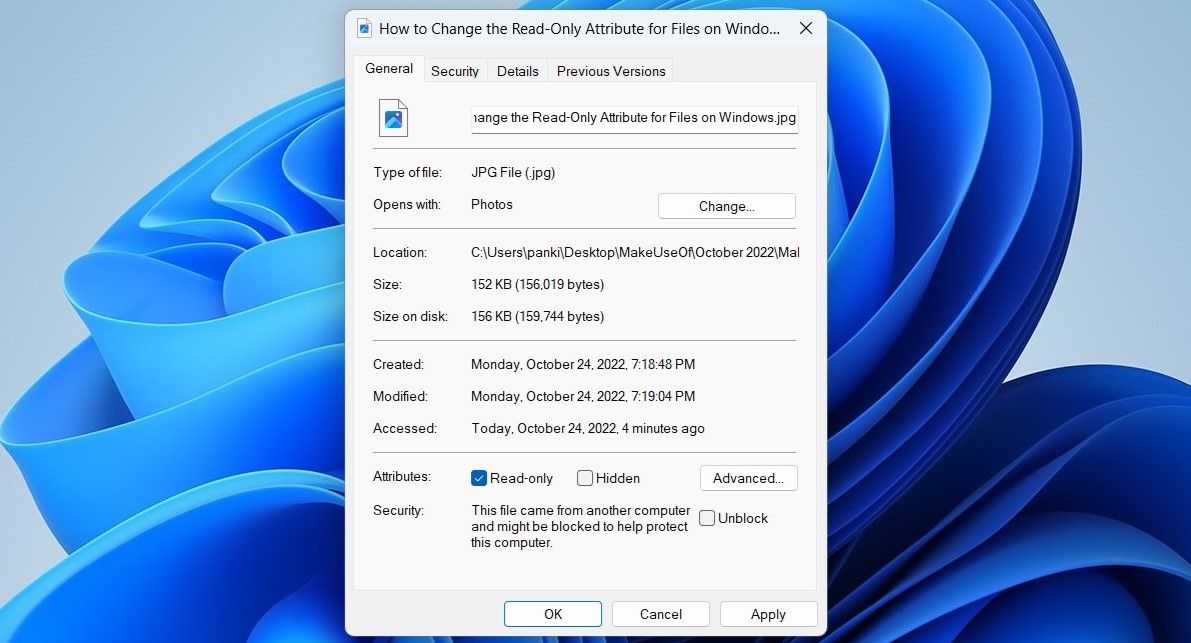
- Under theGeneral tab, check or uncheck theRead-only box.
- ClickApply followed byOK .

Note that Windows may prevent you from changing the read-only attribute of a file if you don’t have the necessary permissions to modify the folder in which the file is located. In that case, you must take ownership of the folder first. If you need help, check our guide on[how to take ownership of folders on Windows](http://How to Take Ownership of Folders in Windows 10 & 11) .
2. How to Change the Read-Only Attribute for Files Using the Command Prompt
Command Prompt is one of two command-line tools available on Windows. You can use it to run batch files, troubleshoot errors, and perform various other tasks. It also lets you change a file’s read-only attribute with a single command. Here are the steps you need to follow.
- Right-click on the file for which you want to modify the read-only attribute and selectCopy as path .
- PressWin + X to open the Power User menu.
- SelectTerminal (Admin) from the list.
- SelectYes when the User Account Control (UAC) prompt appears.
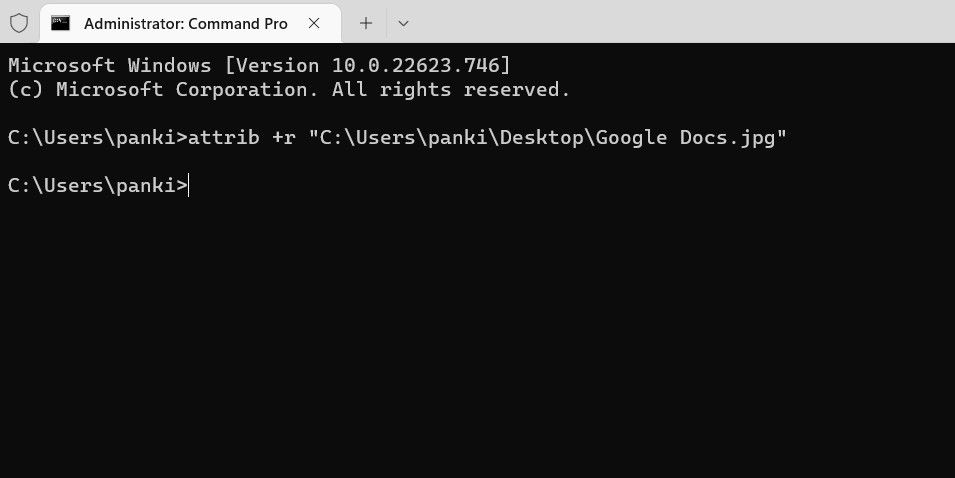
- In the console, type the following command and pressEnter to set your file as read-only.
attrib +r "FilePath"
ReplaceFilePath in the above command with the actual path of the file copied earlier.

Once you run the above command, the file will be set as read-only. Likewise, if you want to remove the read-only attribute for a file, use this command:
attrib -r "FilePath"
Once you remove the read-only attribute for a file, you should be able to edit or modify it.
Like using Command Prompt? Check our guide to learnhow to master Command Prompt on Windows .
3. How to Change the Read-Only Attribute for Files Using Windows PowerShell
You can also run a command inWindows PowerShell to change the read-only attribute for a file.
To change the read-only attribute using PowerShell:
- Right-click on the file for which you want to change the read-only attribute and selectCopy as path .
- Click the magnifying icon on the taskbar or pressWin + S to open the search menu.
- TypeWindows PowerShell and selectRun as Administrator .
- SelectYes when the User Account Control (UAC) prompt shows up.
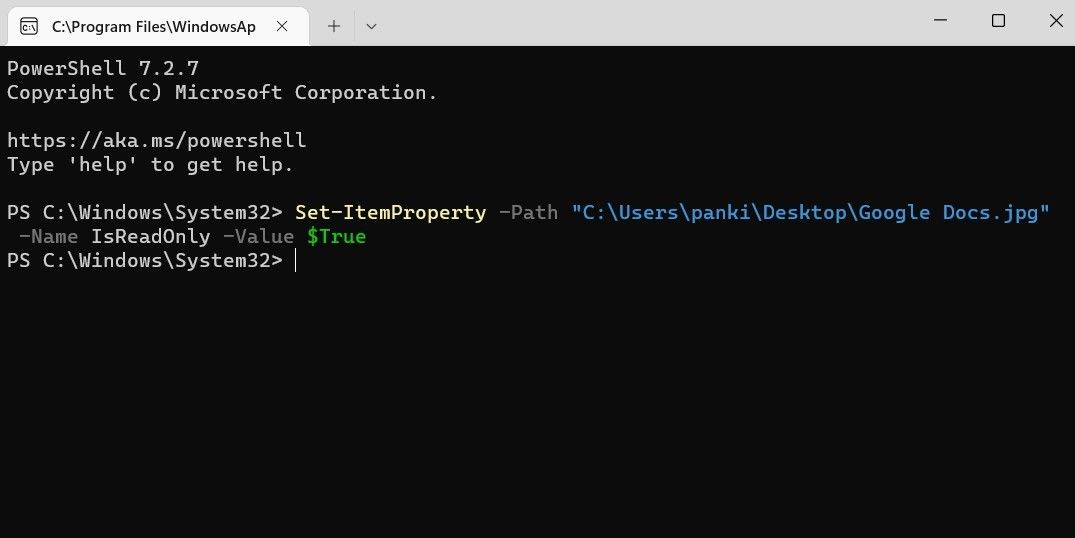
- Paste the following command and pressEnter to set your file as read-only.
Set-ItemProperty -Path "FilePath" -Name IsReadOnly -Value $True
ReplaceFilePath in the above command with the actual path of the file copied earlier.

Alternatively, if you want to remove the read-only attribute for a file, use this command:
Set-ItemProperty -Path "FilePath" -Name IsReadOnly -Value $False
Modifying the Read-Only Attribute for Files on Windows
It’s worth noting that most system files on Windows will have the read-only attribute by default. So, make sure you don’t modify them by mistake. For your other files, you can pick any of the above methods listed above to set or unset their read-only attribute.
Also read:
- [New] Building Brand Buzz The Power of Instagram Story Quizzes
- [Updated] Navigating Through Instagram Video Woes with Ease for 2024
- Enhancing Your Computing Experience Bridging AirPods with Personal Computers
- Essential Steps for Windows Users: ChatGPT Application
- Expert Advice to Correct Microsoft Outlook Access Issues Efficiently
- Fixing Audacity PAudio Glitches in Windows 10/11
- In 2024, How to Change Xiaomi Redmi A2+ Location on Skout | Dr.fone
- Innovative Methods to Log Gaming Sessions for 2024
- Liberate Windows Talk: The FreedomGPT Way
- Mastering New Additions for Efficient Workflow in Windows
- Optimizing File Format Switches: From Word Docs to Windows 11 PDFs
- Proven Tactics for Unblemished Image Sourcing
- Taking Windows Next: Discover New Additions in Update W.x.x
- The Ultimate Streamer's Guide to Selecting a Peak Provider for 2024
- Win 10 & 11 Efficiency: Custom Keybindings to Copy Text
- Windows Store Fix: Overcome Error 0X80072F17
- Your Complete PlayStation Portal Guide: Launch Date, Cost Breakdown, Hardware Info & Where to Shop
- Title: Revoking Read-Only Restriction on Windows Documents
- Author: Richard
- Created at : 2024-12-30 00:22:54
- Updated at : 2025-01-06 09:36:49
- Link: https://win11-tips.techidaily.com/revoking-read-only-restriction-on-windows-documents/
- License: This work is licensed under CC BY-NC-SA 4.0.
