
SnipGear Gone Wrong? Nine Effective Tips to Get It Running Again
SnipGear Gone Wrong? Nine Effective Tips to Get It Running Again
The Snipping Tool is an important feature of any Windows operating system; it allows users to capture, edit, and save screenshots directly onto their PC.
However, since Windows Vista, the program hasn’t been the most stable. Even as we moved onto Windows 10 and 11, the Snipping tool tended to run into strange issues. Such issues prompt the “Snipping tool not working” error repeatedly, which might hinder your workflow and slow you down.
We have tracked down a few reasons why the Snipping Tool can stop working and how to easily resolve them. Let’s have a look at how they can be dealt with.
1. Restart the Windows File Explorer
Let’s start by going to the root of the problem. Since the Snipping Tool is a subset of the File Explorer service, it is most probable that the problem likely came from there. If File Explorer goes unresponsive, so too does the Snipping Tool.
As such, restarting File Explorer may dislodge whatever’s keeping the Snipping Tool from working correctly. To do this, press Ctrl + Alt + Del, then select Task Manager. Alternatively, you can press CTRL + Shift + ESC to jump directly into the Task Manager.
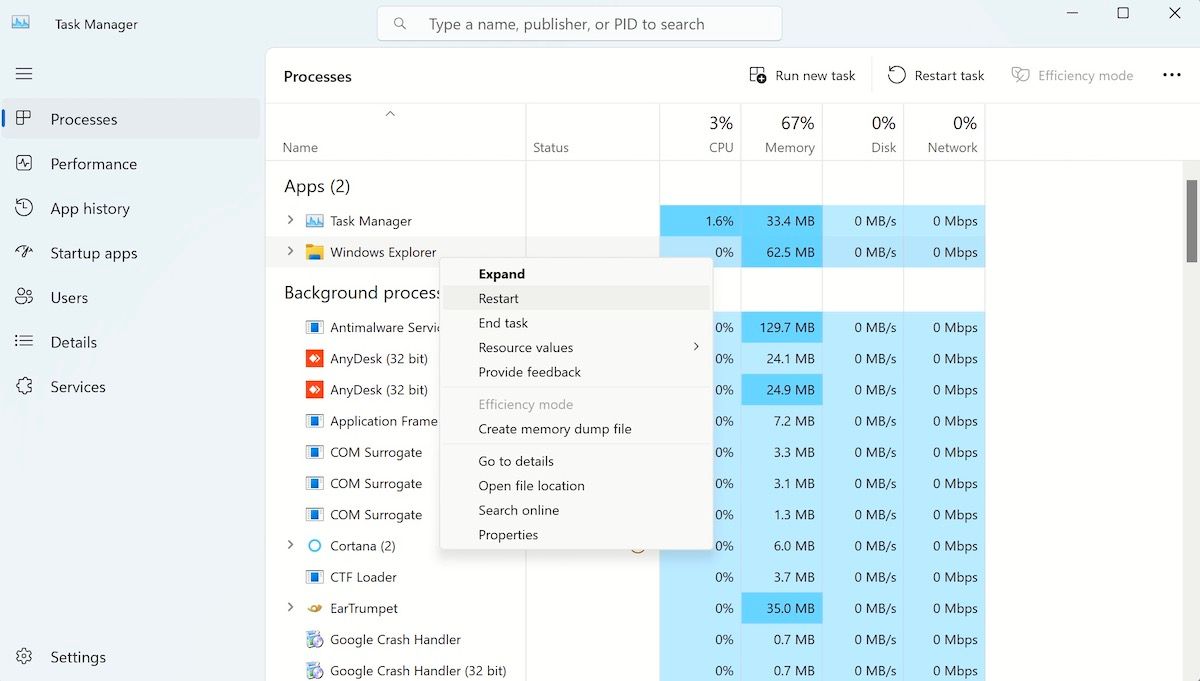
Scroll down until you find Windows Explorer and right-click it. In the drop-down menu that appears, select Restart.
You will notice your desktop will go through some weird changes while File Explorer restarts.
For example, the taskbar will vanish, and your desktop wallpaper will turn completely black. However, this is totally normal, as all of these elements rely on File Explorer. When you restart the service, it forces all of these elements to restart too.
Once everything looks okay again, try opening the Snipping Tool and using it.
2. Look for Interfering Third-Party Software
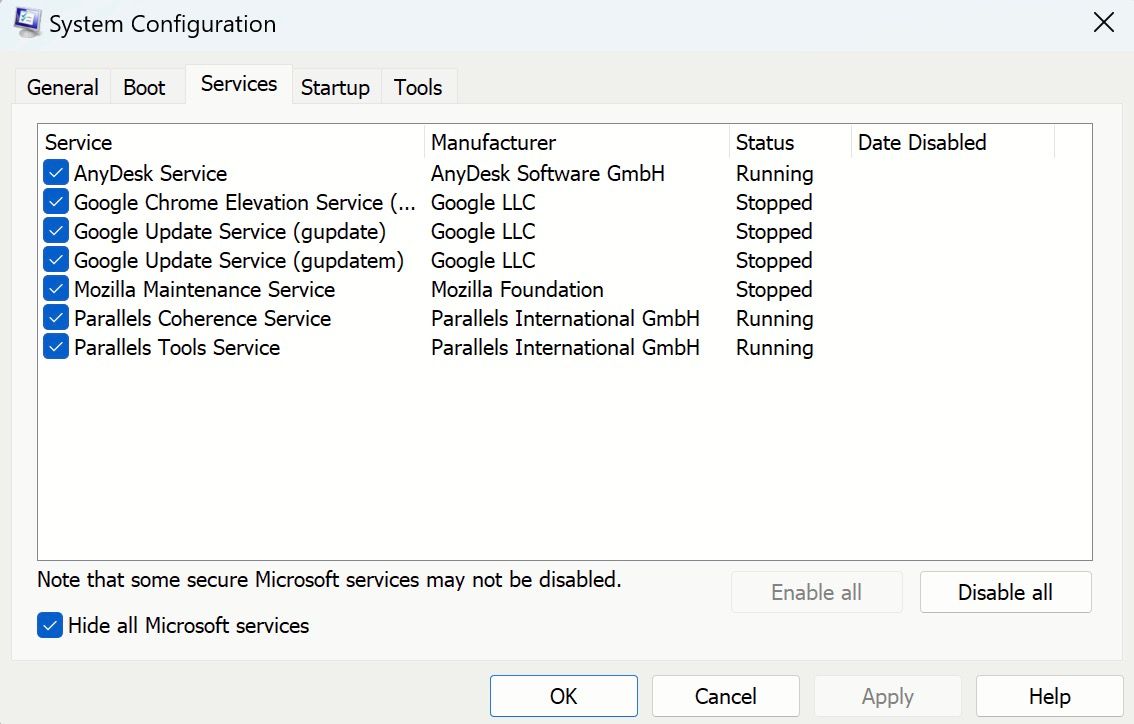
Sometimes, a program you’ve recently downloaded can interfere with the smooth running of the Snipping Tool. If you want to reach the bottom of all this mystery, one way to know for sure is by following these steps given below:
- Type in “system configuration” in the Start menu search bar and open the System Configuration panel.
- Switch to the Services tab on the top, and then select the option to hide all the Microsoft services at the bottom.
- Disable any service that you think might be interfering with the Snipping Tool.
- Once you disable it, try running the Snipping Tool once again. If it works properly, it means that the app was in conflict with the Snipping Tool. It should be kept disabled to keep the Snipping Tool on your Windows working properly.
3. Run the Scannow Tool
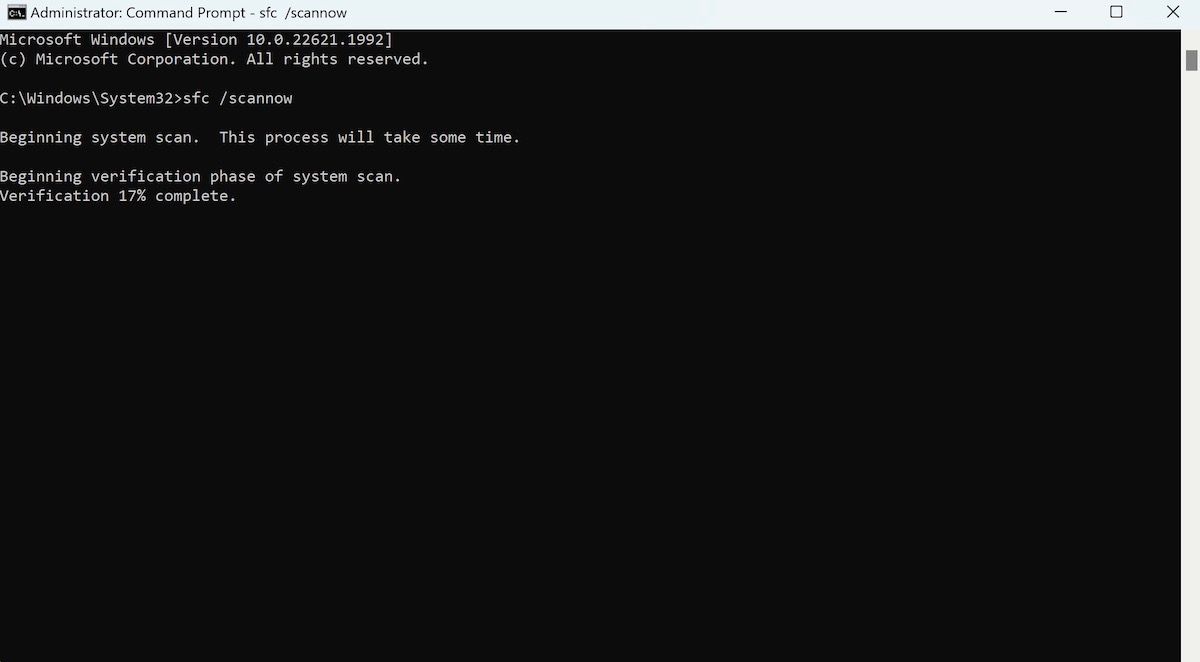
If all else fails and your Snipping Tool still isn’t working, you can still use the scannow command to repair and restore the damaged files that cause it to malfunction. You can achieve this with the help of the Command Prompt feature .
Follow these steps to continue:
- Type “command prompt” in the Start menu search bar and run it as administrator. To do this, either click on Run as Administrator on the right panel, or right-click the search result and click Run as Administrator.
- Once inside Command Prompt, type the following command and hit Enter:
sfc /scannow - Next, type the following command to launch the Snipping Tool manually:
snippingtool.exe
Once done, check to see if the error still persists.
4. Permit Snipping Tool to Run in the Background
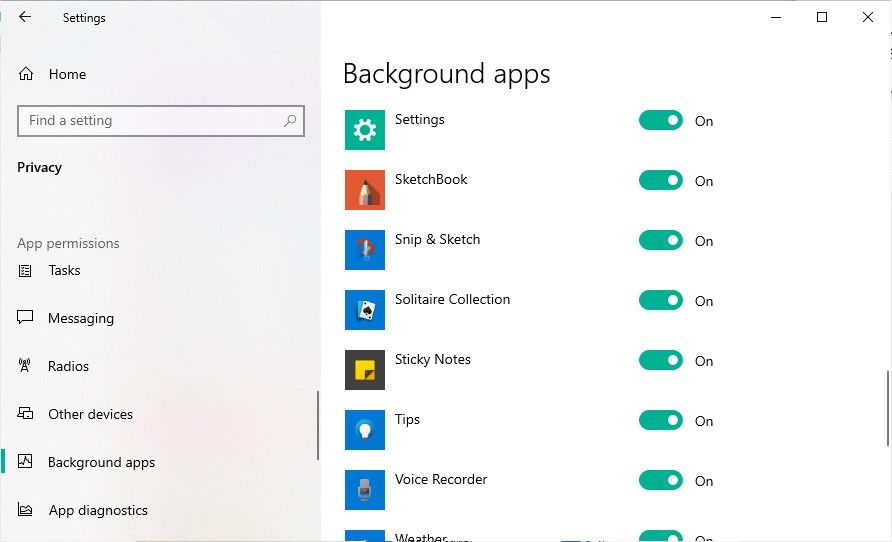
Snipping Tool also might not work if it lacks the necessary permission to run in the background. This means the app won’t work unless you are active in the app’s window. To rectify this, authorize the Snipping Tool’s application to run in the background by following these steps:
- Click the Windows icon and select Settings from the context menu.
- Hit the Privacy button on the Settings page.
- Scroll down to the panel on the left to locate Background apps.
- Search for Snip & Sketch from the app list and ensure it’s toggled on.
 PCDJ DEX 3 for Windows & MAC is the total entertainment DJ software solution, offering audio, video, and karaoke mixing ability. Automatic beat-sync, smart looping, 4 decks, DJ MIDI controller support, Karaoke Streaming and much more.
5. Update Graphics Drivers
Sometimes outdated or corrupt graphic drivers are the culprit behind a non-functioning Snipping Tool. Their core responsibility is capturing and processing the screenshot into a format the Windows device understands.
If it’s outdated, it won’t translate the images appropriately and become incompatible with your computer, resulting in the “Snipping Tool not working” error. Hence, in this scenario, the key is to update these drivers to their latest build.
Follow these steps to continue:
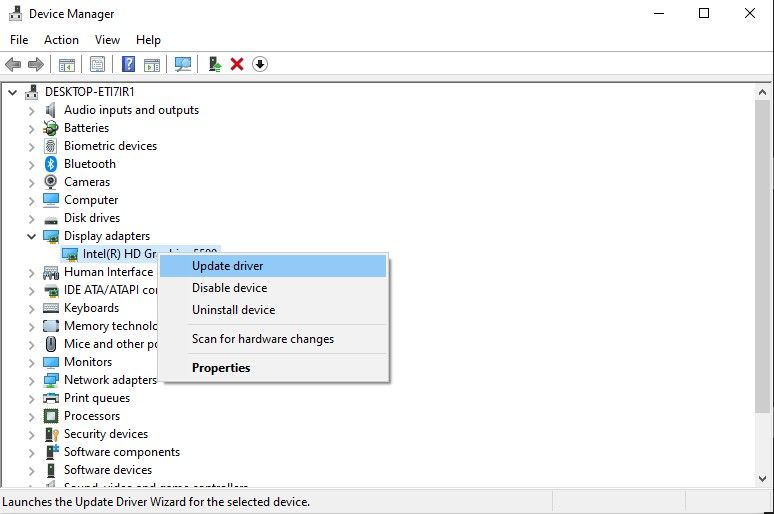
- Right-click on the Windows icon and select Device Manager from the pop-up list.
- Navigate to Display adapters, expand it, and right-click on the available driver.
- Select Update driver > Search automatically for drivers. The system will quickly scan for any available drivers and install them.
- Restart your Windows device.

6. Update Your Windows Computer
Windows regularly releases updates that fix your PC’s bugs, bring in new features and security-related patches, and generally make your Windows experiences much more accessible and better than before.
If you haven’t done so in a while, now might be a good time to update your Windows version . Because this outdated Windows version might very well be the cause of your PC’s bugs or errors.
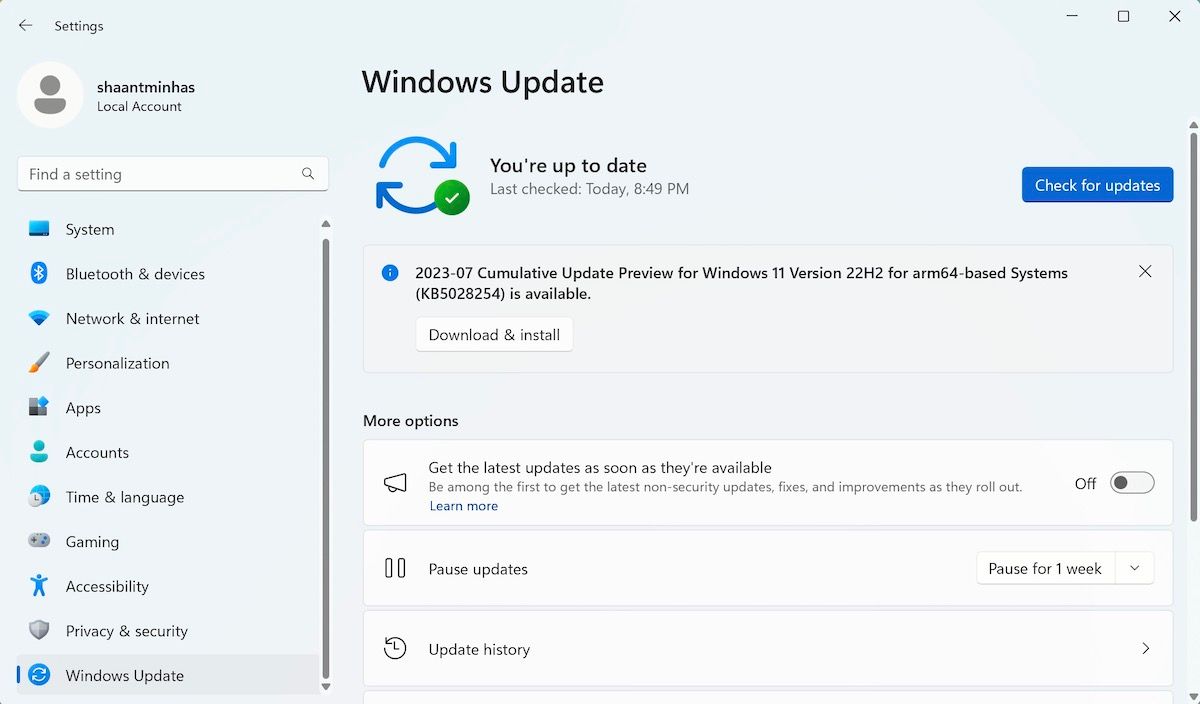
So, head to Settings by pressing Windows Key + I and select Windows Update. The Windows Update app will start scanning your system automatically, and from there, all you have to do is click on Download & installand your Windows will be updated.
If this didn’t fix the Snipping Tool on your Windows either, jump to the next trick below.

7. Disable Focus
Focus, earlier known as Focus Assist , is one of those apps that proves everything has pros and cons. If you’re prone to distraction, you might have used the app already and successfully wiped out many distractions from notifications and random pop-ups.
However, along with these notifications and other random pings, the feature also blocks out many useful apps—this includes Snipping Tool as well. So, disabling the Focus Assist app can help out here.
Follow these steps to disable Focus Assist on Windows:
- Head to the Start menu search bar, type in ‘settings,’ and select the best match.
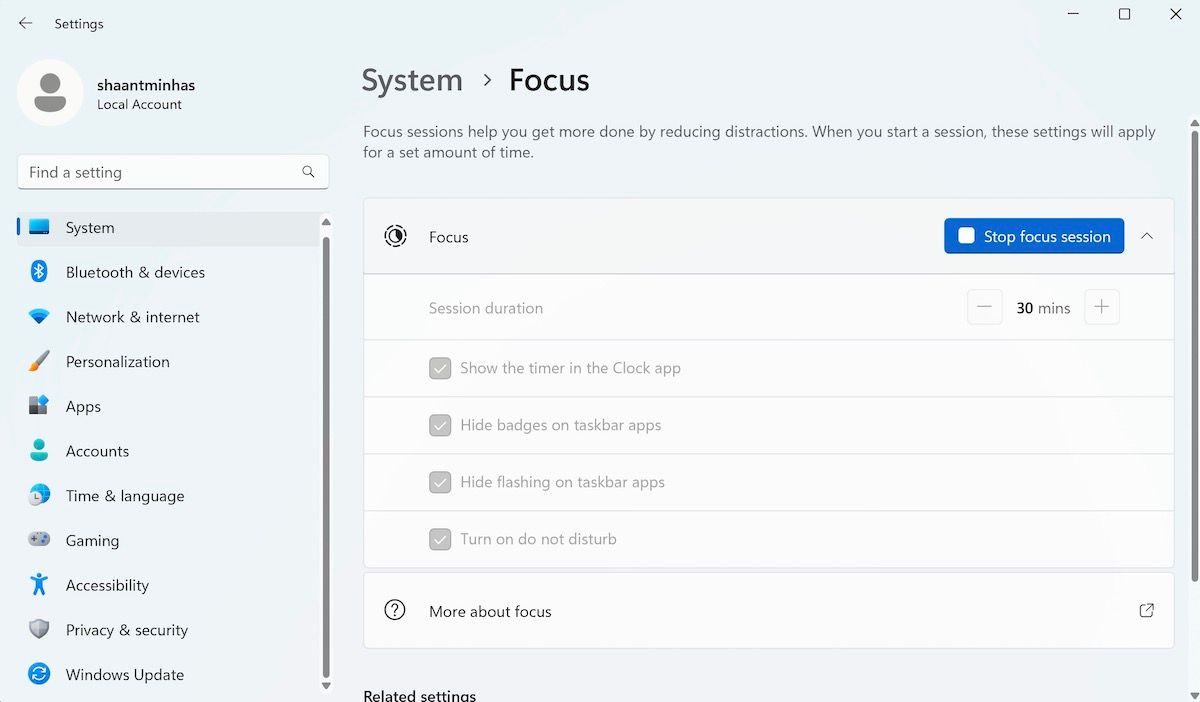
- From the Settings window, choose System > Focus Assist.
- Now toggle off the Focus assist features, and you’ll be good to go.
That’s it—when you have the Focus feature disabled, try out the Snipping Tool again. It should be working now in most cases.
8. Reset the Snipping Tool App
Sometimes things go awry for the weirdest reasons you can’t explain; your apps on Windows are no exception from accidents of such kind.
When you find any of your Windows apps in a place like this, one of the best tricks is to give the app a quick reset. The reset will bring your app to default settings where everything works smoothly.
Follow these steps to reset the Snipping Tool app:
- Launch the Settings app and head to Apps > Installed apps.
- From there scroll down, find the Snipping tool, and then click on Advanced options.
- Find the Reset section and then click on the Reset button.
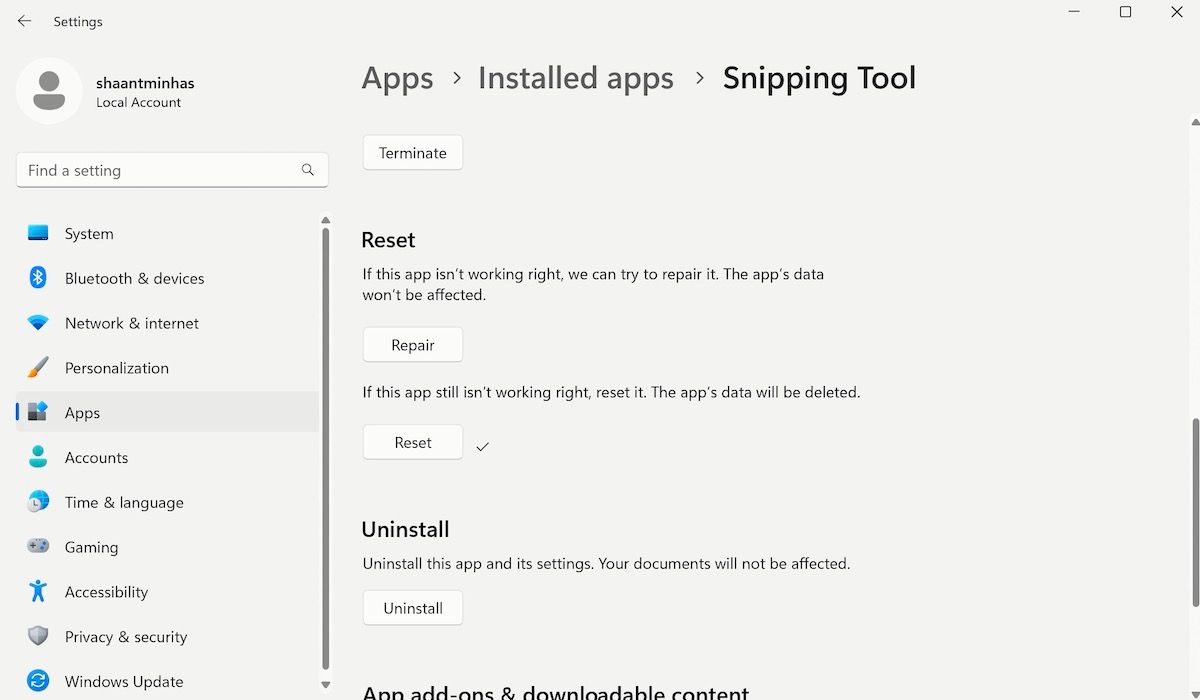
You’ll get asked for a confirmation for the reset. Click on Reset to finally go ahead with the reset, and wait for a check sign to appear before the button. As soon as the button appears, your app will have been reset.
If the Snipping Tool error was caused because of an abrupt mistake in the app, it should be resolved by the end of the above steps.
 CalendarBudget - Monthly subscription membership to CalendarBudget via web browser or mobile app. Support included.
 9. Enable the Auto Copy Feature
If someone has disabled the auto-save feature on Snipping Tool, the screenshots won’t be saved in your default location automatically.
To make sure that’s not the case, launch the Snipping Tool and click on the Settings menu (the ellipses icon from the top-right corner).
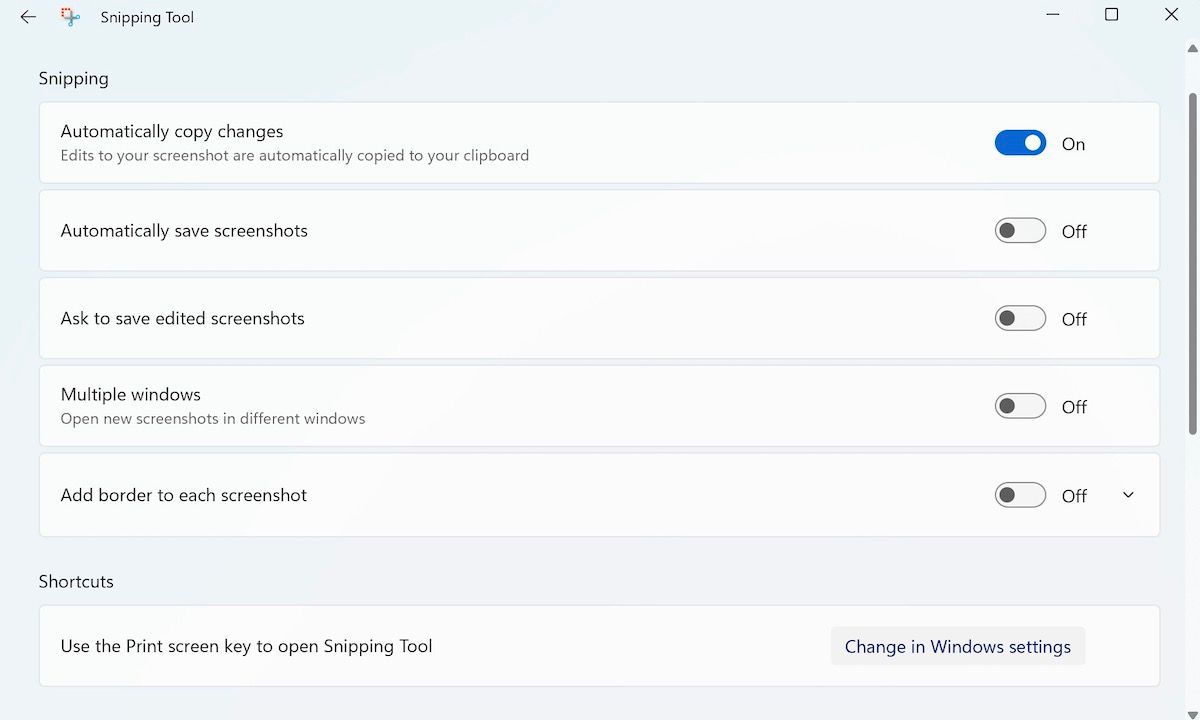
Once done, toggle on Automatically save screenshots. When you have this setup your screenshots will be saved instantly, solving your Snipping Tool errors for good.
Expanding More on the Snipping Tool
Because the Snipping Tool is associated with taking screenshots, its importance can’t be understated. Screenshots are an easy way to communicate data and not being able to use this function can leave you in a lurch.
There’s no doubt about the Snipping Tool being an integral part of the Windows OS; therefore, it is also essential to make full use of this function. Knowing all the useful tips and tricks, shortcuts, and how to make your own hotkeys will make it much easier to capture, edit, and save your screenshots on your Windows PC.
However, since Windows Vista, the program hasn’t been the most stable. Even as we moved onto Windows 10 and 11, the Snipping tool tended to run into strange issues. Such issues prompt the “Snipping tool not working” error repeatedly, which might hinder your workflow and slow you down.
We have tracked down a few reasons why the Snipping Tool can stop working and how to easily resolve them. Let’s have a look at how they can be dealt with.
- Title: SnipGear Gone Wrong? Nine Effective Tips to Get It Running Again
- Author: Richard
- Created at : 2024-08-16 02:29:55
- Updated at : 2024-08-17 02:29:55
- Link: https://win11-tips.techidaily.com/snipgear-gone-wrong-nine-effective-tips-to-get-it-running-again/
- License: This work is licensed under CC BY-NC-SA 4.0.