Steel Your System's Start with 5 Fixes to Secure Boot Snags in Windows

Steel Your System’s Start with 5 Fixes to Secure Boot Snags in Windows
Secure Boot is a security feature that helps to ensure that only trusted applications are installed on the computer. Although this feature is enabled by default on most computers, you will still likely see the “Secure Boot state unsupported” error while installing Windows 11.
The error mainly appears when TPM is disabled on your computer. As such, if you’re also facing the same problem, follow the fixes below to troubleshoot the problem for good.
Disclaimer: This post includes affiliate links
If you click on a link and make a purchase, I may receive a commission at no extra cost to you.
What Causes the “Secure Boot State Unsupported” Error?
Secure Boot is a feature of modern computers that uses a digital signature to verify the authenticity of the system’s software, especially the operating system’s files. It is one of the minimum requirements to install Windows 11.
Although you can easily bypass Windows 11’s minimum requirements , doing so would adversely affect your computer. You could expect your device to slow down or even crash on a frequent basis.
Some of the common reasons behind the “Secure Boot state unsupported” error are:
- You’ll likely see the error message if TPM is disabled or not installed on your computer.
- The error message will appear if Secure Boot is disabled in the BIOS.
- You’ll also encounter the error if BIOS mode is set to Legacy instead of UEFI.
Now, let’s dive into fixes that will help you eliminate the problem.
1. Enable Secure Boot in BIOS
You must enable Secure Boot in BIOS if you want to install Windows 11 on your computer. But before doing that, view Secure Boot’s current state. Here’s how to do it:
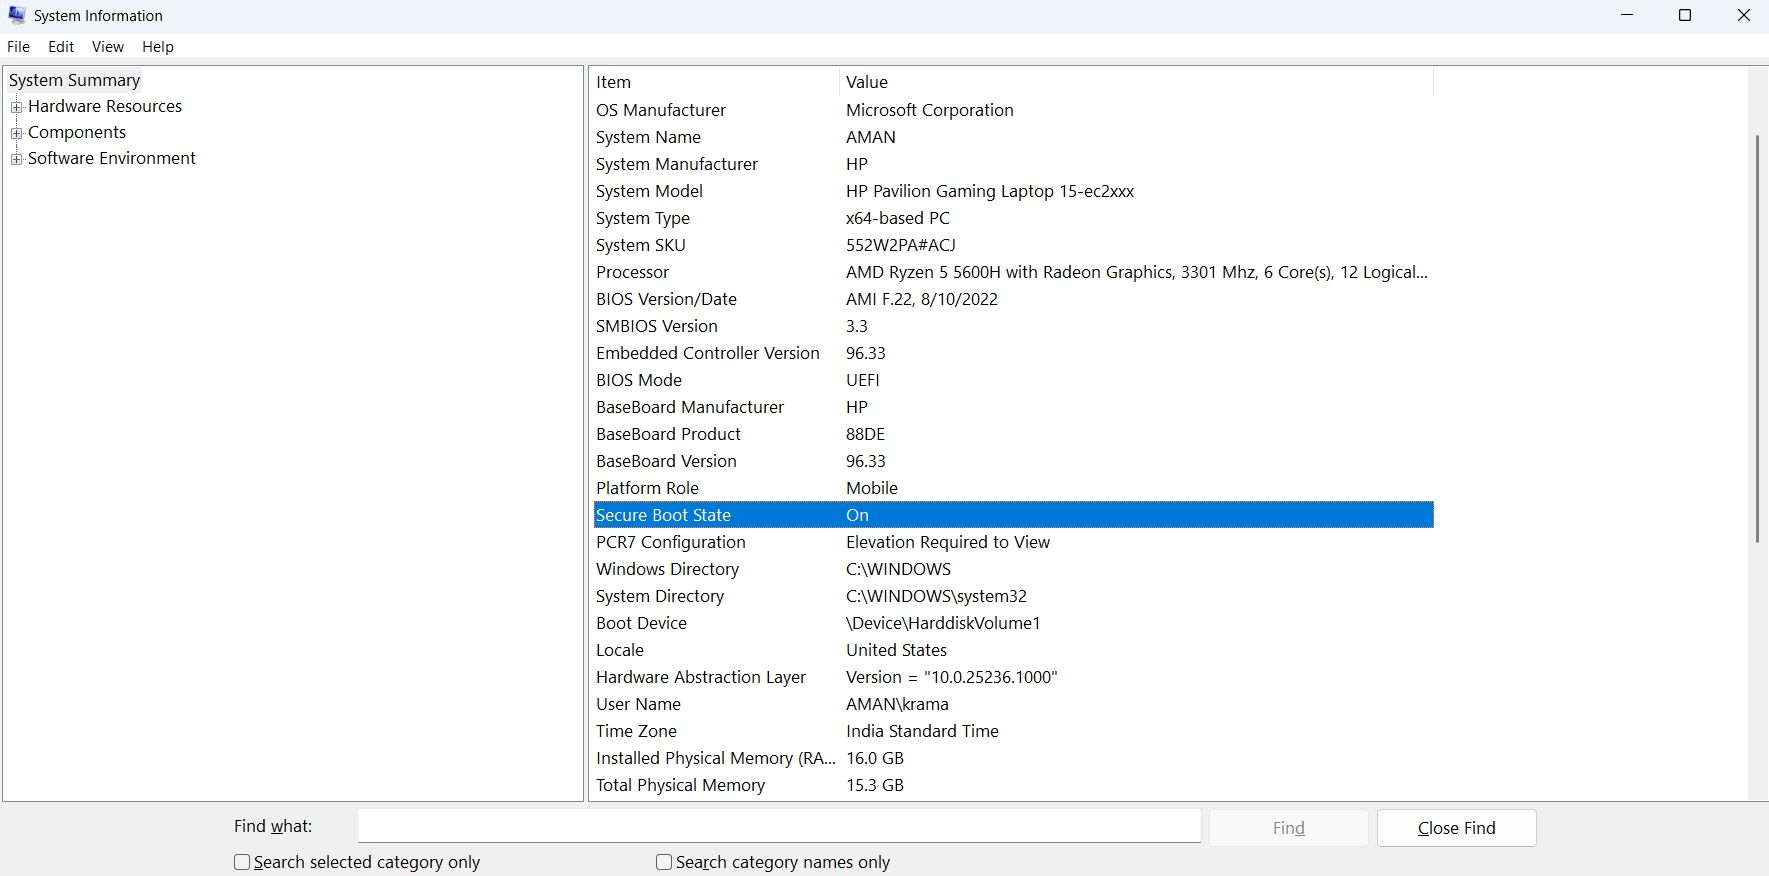
- Press the Win + R hotkey to open the Run dialog box. Then, type msinfo32, and press Enter. It’ll open the System information window .
- Click System Summary in the left panel.
- Check the Secure Boot State in the right pane.

If the Secure Boot status is Off, you’ll have to enable it through your BIOS. To do that, follow the instructions:
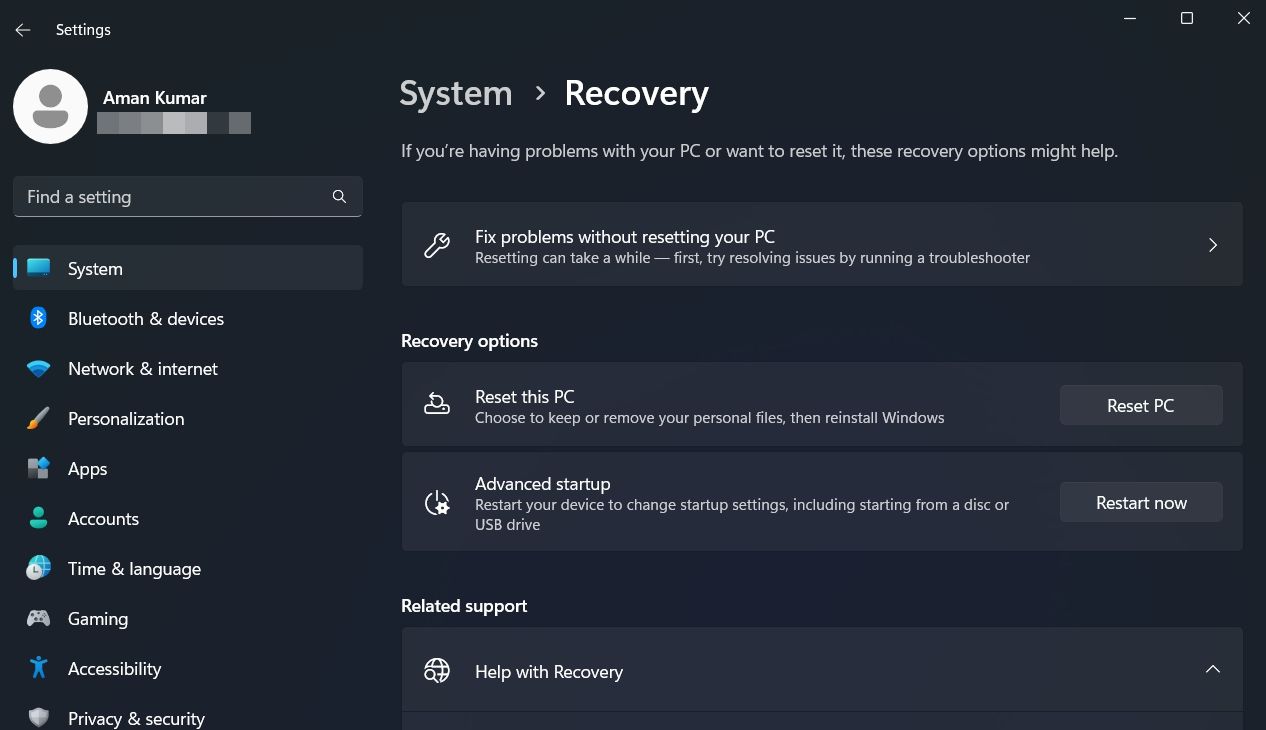
Open the Settings menu by pressing the Win + I hotkey, and navigate to System > Recovery.
Click Restart now next to Advanced startup. It’ll restart your computer.

In the Advanced startup mode, choose Troubleshoot and then Advanced options.
Choose UEFI Firmware Settings and click Restart. I’ll boot you straight into Windows UEFI BIOS.
Choose BIOS Setup.
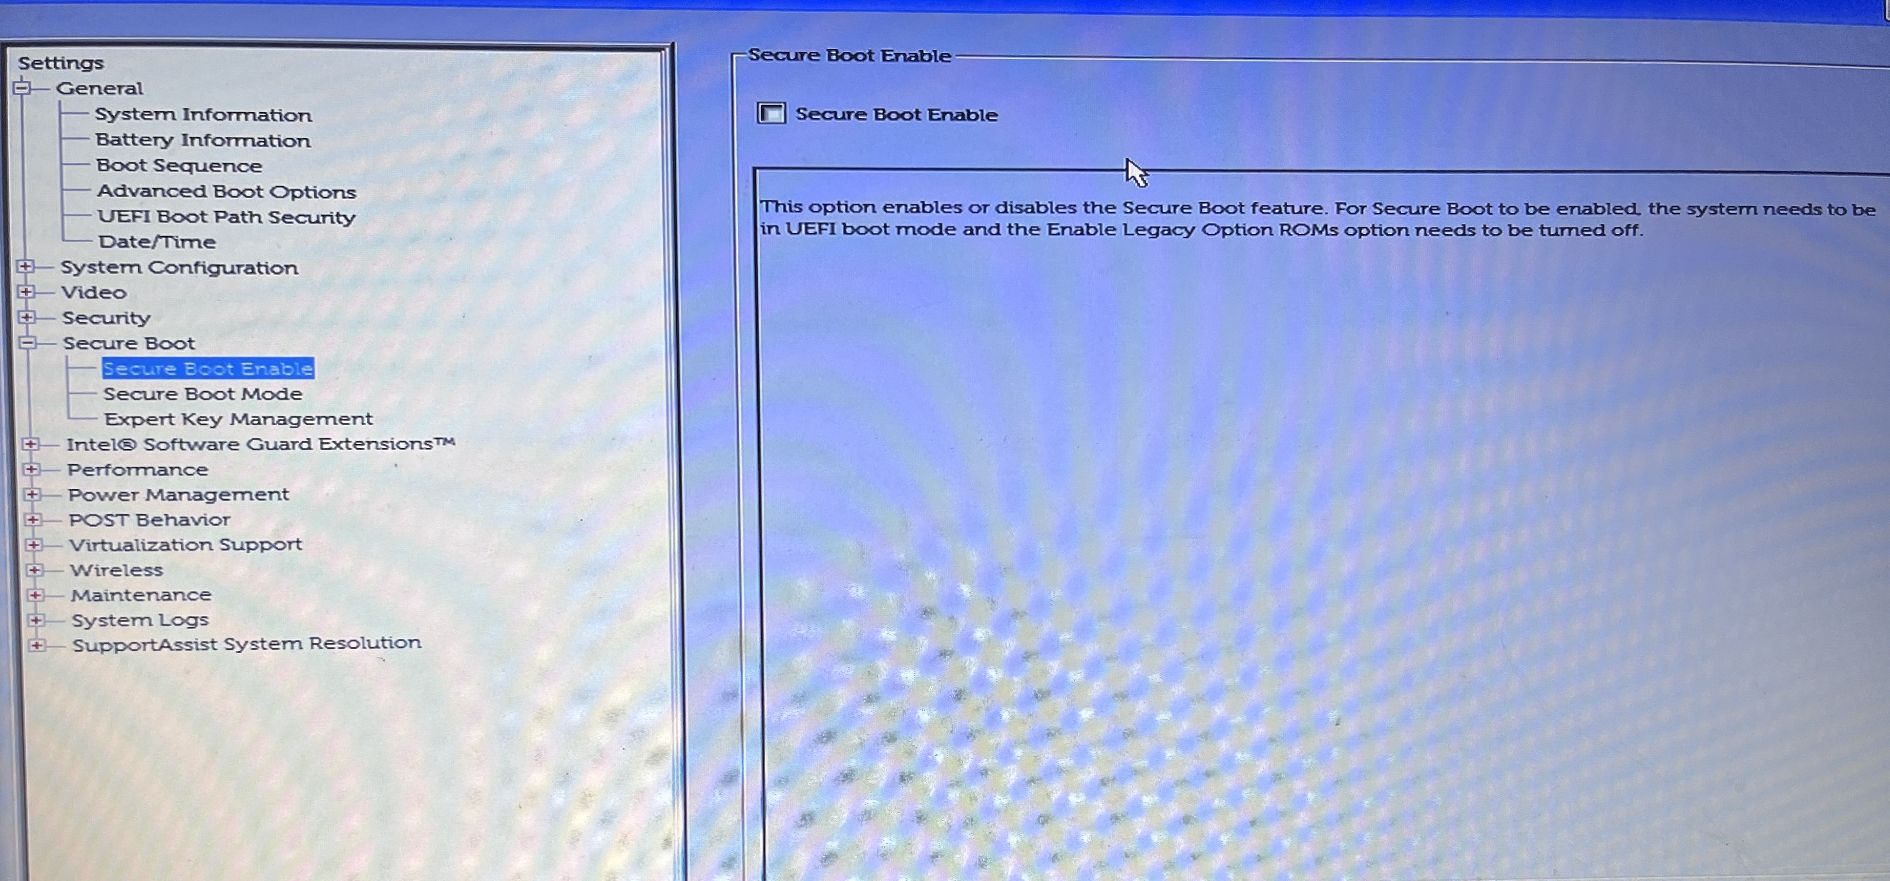
Switch to Secure Boot.
Check the box before Secure Boot Enable.

Note that the steps to enable Secure Boot will be different for different manufacturers. You can check out your manufacturer’s BIOS page to know how to do it on your computer.
Once you’ve enabled Secure Boot, try to install Windows and check if the problem continues. If yes, then try the next solution on the list.
2. Check and Enable TPM Support
You must have the TPM chip installed on your computer to download Windows 11. If the TPM chip is missing, you can still install Windows 11 by bypassing the minimum requirement, but then the “Secure Boot state unsupported” error will continue to bother you now and then.
The problem in the discussion can also appear if TPM is disabled on your computer. To enable TPM, follow the below instructions:
- Open the Run dialog box.
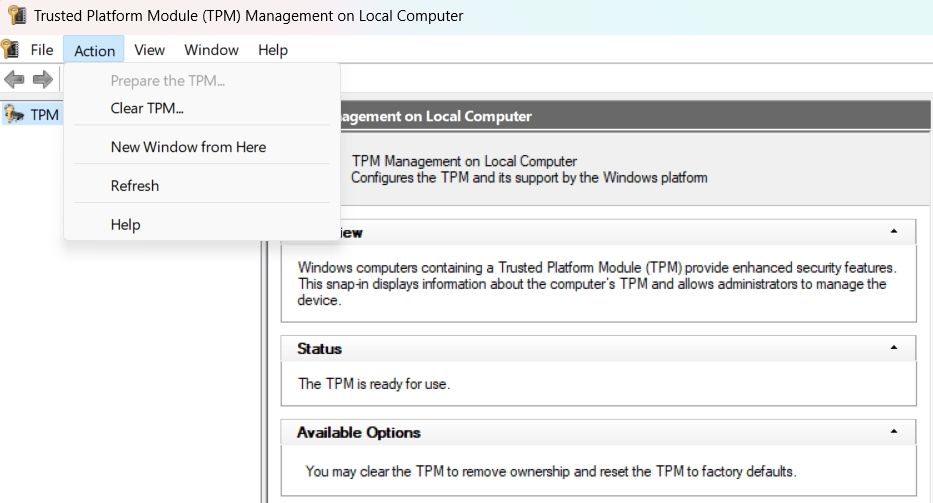
- In the search bar, type tpm.msc and press Enter.
- In the TPM management window, click Actions in the top bar.
- Choose Prepare the TPM from the context menu.

Restart your computer and check for the problem.
3. Choose UEFI as the BIOS’ Mode
Windows supports two BIOS modes–UEFI and Legacy. The difference between these two modes is in the process that the firmware uses to locate the boot target.
You must install Windows using the new UEFI mode as it offers more security features than the Legacy BIOS mode.
To choose UEFI as the BIOS mode, follow the below steps:
- Open the BIOS page on your computer.
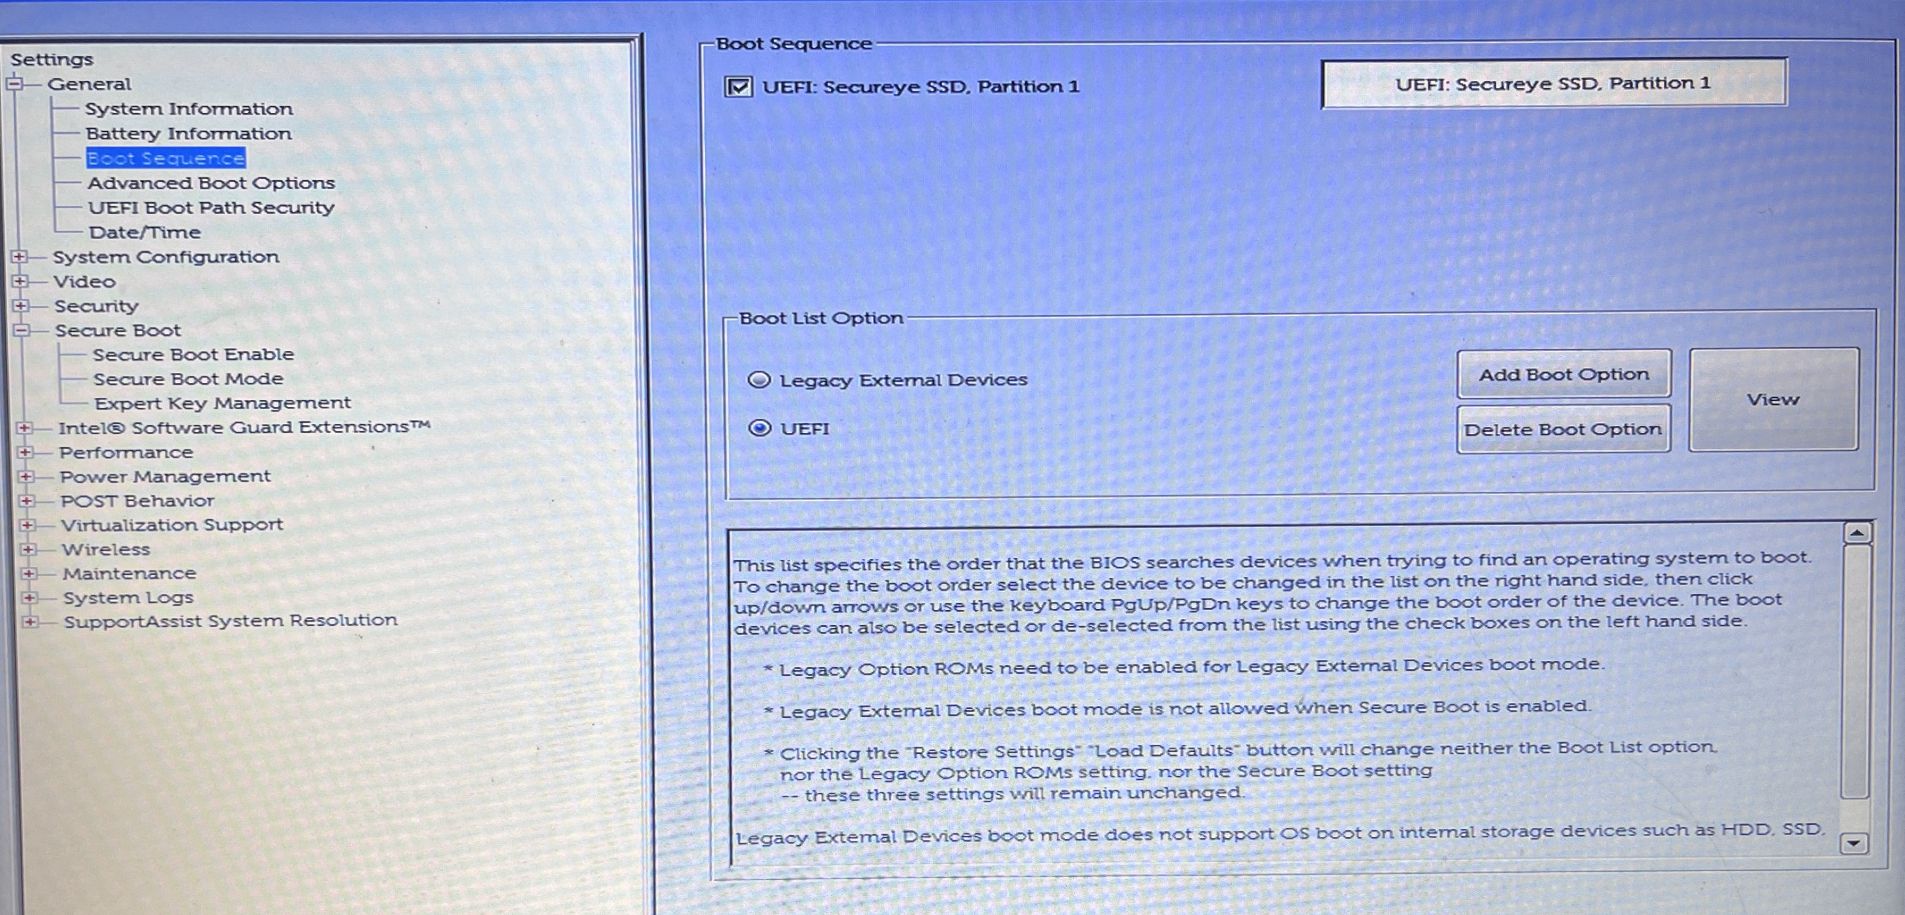
- Choose Boot Sequence from the left panel.
- Check the UEFI option under Boot List Options.

- Save the changes and restart your computer.
Again, the process will differ for different manufacturers; therefore, you must check your manufacturer’s BIOS page to know how to do it on your computer.
4. Convert the Partition Style From MBR to GPT
In modern computers, the boot mode is set to UEFI and has GPT (GUID Partition Style) partition style. However, if your computer is using Legacy Boot mode and MBR (Master Boot Record) partition style, then you will face the problem at hand.
The solution, in this case, is to convert the partition style from MBR to GPT. But before doing that, you must check your computer partition style. Here’s how:
Press Win + X to open the Power menu.
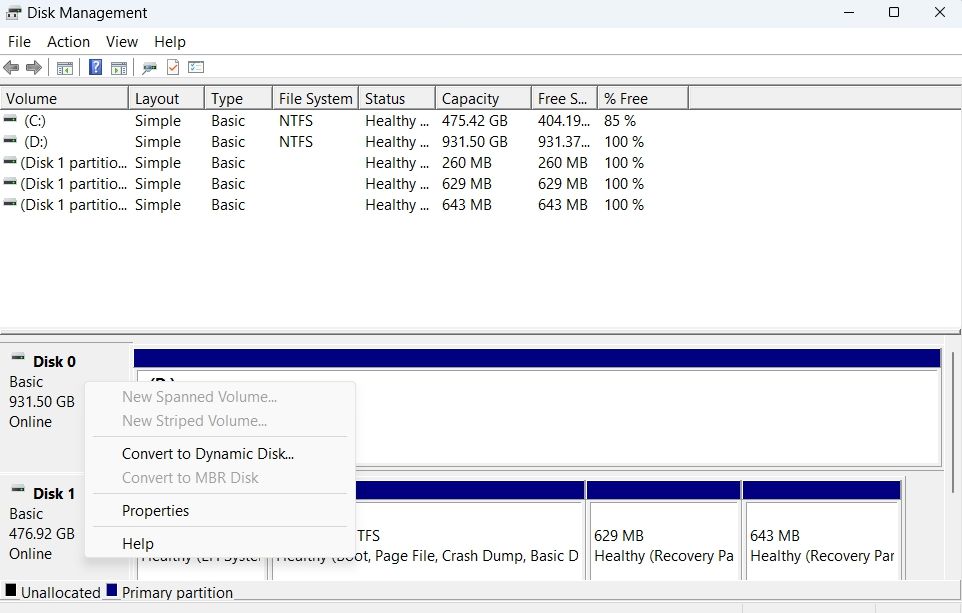
Choose Disk Management.
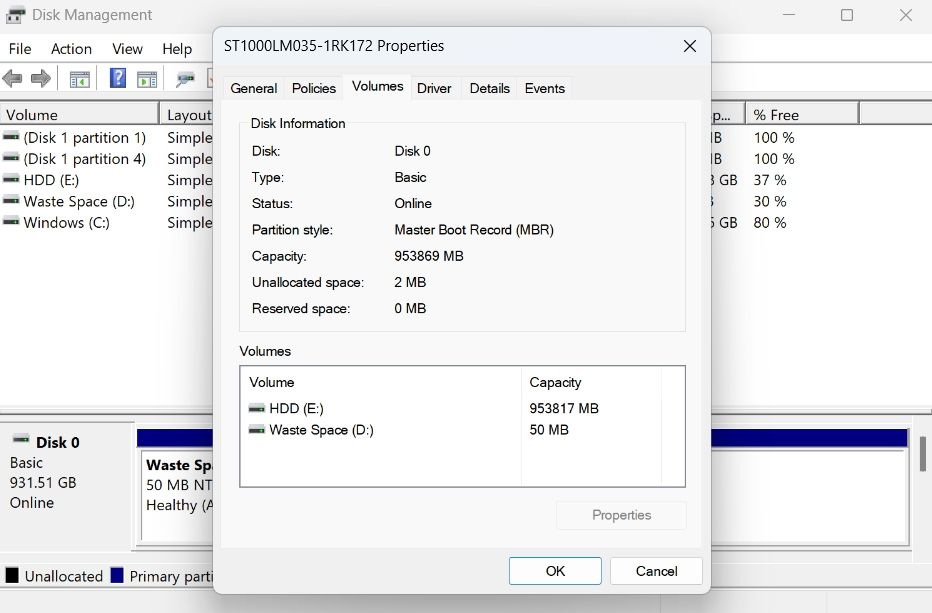
In the Disk Management window, right-click on the hard disk drive and choose Properties from the context menu.

Switch to the Volumes tab.
Check the Partition style. If it shows Master Boot Record (MBR), then you will have to convert it to GPT.

To convert the MBR partition style to GPT, follow the below steps:
- Open the Start Menu by pressing the Windows key.
- Type Command Prompt in the search bar and click the Run as administrator option in right pane.
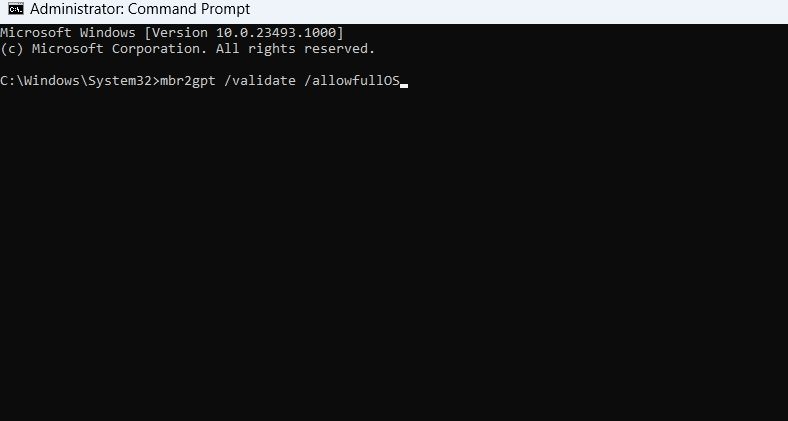
- Type mbr2gpt /validate /allowfullOS and press Enter. This command will validate the partition.

- Once the validation is complete, type mbr2gpt /convert /allowfullOS and press Enter.
That’s it. Windows will start converting the partition style. The process may take some time, depending on the size of your drive.
5. Perform a Clean Boot
Are you still facing the “Secure Boot state unsupported” error? If yes, then you will have to perform a clean boot to troubleshoot the issue. Check out our guide on how to perform a clean boot on Windows for more information.
In the clean boot state, check if you’re facing the error message again or not.
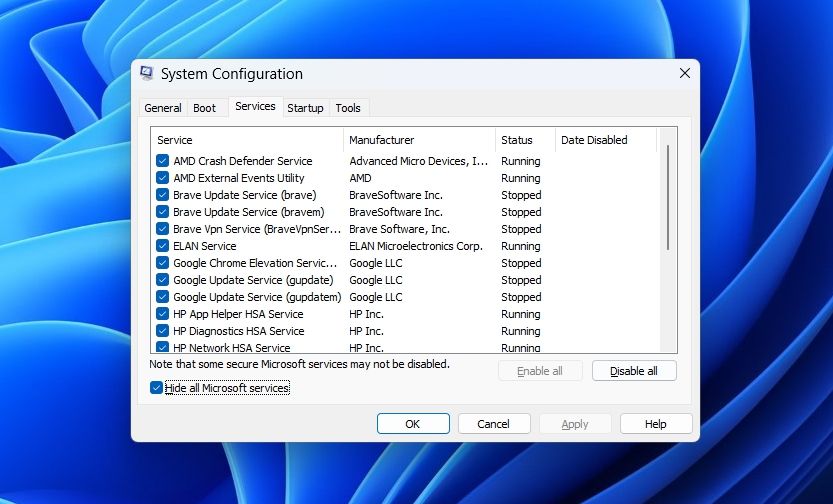
If not, then it indicates that one of the services you disabled was causing the problem. To narrow it down, repeat the above process while slowly re-enabling the services until you see the error again.
Once you find out which service is the culprit, consider downloading its driver update or running an SFC scan if it’s a Windows-based service.
The “Secure Boot State Unsupported” Error, Fixed
The “Secure Boot state unsupported” error is a very common issue that appears when you try to install Windows 11. Fortunately, you can quickly troubleshoot this error by following the above fixes.
But in the worst-case scenario, if none of the above fixes were helpful, then you will have to clean install Windows.
The error mainly appears when TPM is disabled on your computer. As such, if you’re also facing the same problem, follow the fixes below to troubleshoot the problem for good.
Also read:
- [New] 2024 Approved Decoding YouTube's SRT Download with 3 Methods
- [New] Experience Freedom in Viewing FREE MOVIE PLAYER Software
- [Updated] Boost Your Drive 10 Top Motivation Films for 2024
- [Updated] Essential Techniques for Enhanced YouTube Long-Form Videos for 2024
- Cryptic File Migration: Protecting Data on WinOS Platforms
- DirectX: A Comprehensive Update and Download Handbook for PCs
- Dive Into Immersive Gaming Bliss - No Extra Cost Required!
- Elevate Your Digital Life with Exclusive MS Choice
- Enhance Windows Automation: Tackling Scheduler Snags
- From Fuzz to Fine: Nine Tactics for Window 11 Visual Perfection
- How to Unlock Discord Install Glitches on Windows 11
- Meet the Power Players: Discovering the Executive Minds at ABBYY – From Its Inspiring Founder to Driven CEO and Finance Guru
- Resolving ScanDisk Errors on Windows Systems: A Comprehensive Fix Guide
- Restoring Colors in the Windows Store UI
- Steps for Overcoming WinError 0XC004F050
- Strategies for Fixing System Call Failure in Win11
- Top Terranomes Uncovering Treasure in Virtual Landscapes for 2024
- Title: Steel Your System's Start with 5 Fixes to Secure Boot Snags in Windows
- Author: Richard
- Created at : 2025-03-04 04:09:13
- Updated at : 2025-03-04 19:10:19
- Link: https://win11-tips.techidaily.com/steel-your-systems-start-with-5-fixes-to-secure-boot-snags-in-windows/
- License: This work is licensed under CC BY-NC-SA 4.0.
