
Step-by-Step: Creating Self-Extracting FX in Win11
Step-by-Step: Creating Self-Extracting FX in Win11
An SFX archive is a special type of self-extracting archive you can create on Windows platforms. It is an executable archive that users can extract without any third-party extraction tools.
You can use such archives to share groups of files with other users via emails, which they can easily extract by double-clicking SFX packages. This is how you can set up a self-extracting SFX archive in Windows 11.
How to Set Up an SFX Archive With Windows 11’s IExpress Wizard
Windows 11 includes an IExpress wizard with which you can set up an SFX. You can utilize that tool to set up SFX archives for extracting files only or ones that run installation commands. Selecting that wizard’sExtract files and run installation command option enables you to set up archives for installing apps.
This is how to create an SFX archive for extracting files only with IExpress Wizard in Windows 11:
Open your Start menu and click inside the search box on it.
TypeIExpress within the search box.
Right-click theIExpress search result and open that wizard with elevated permissions by selectingRun as administrator .
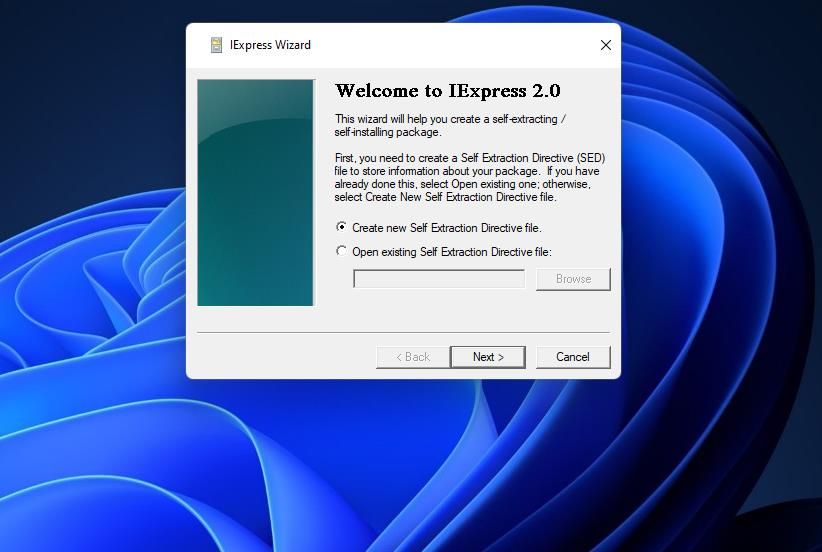
Click theCreate new Self Extraction Directive file radio button.

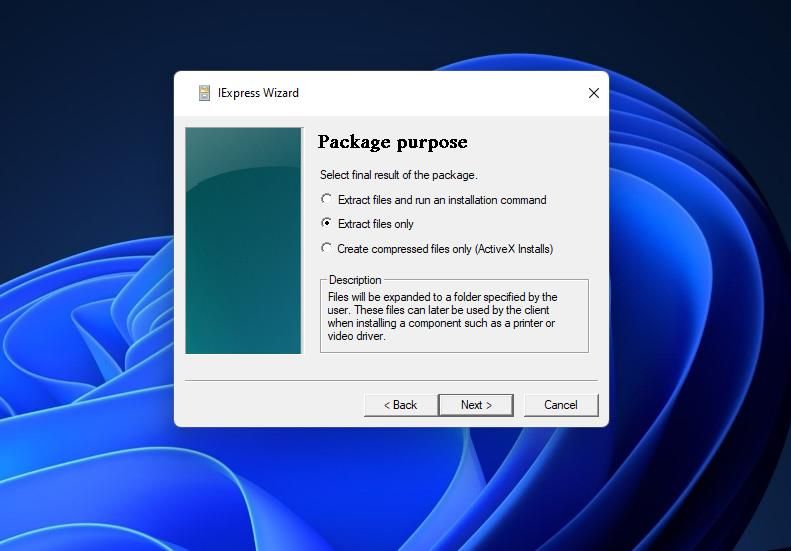
Select theExtract files only option andNext .
Enter the titleSFX archive for the package title and clickNext .
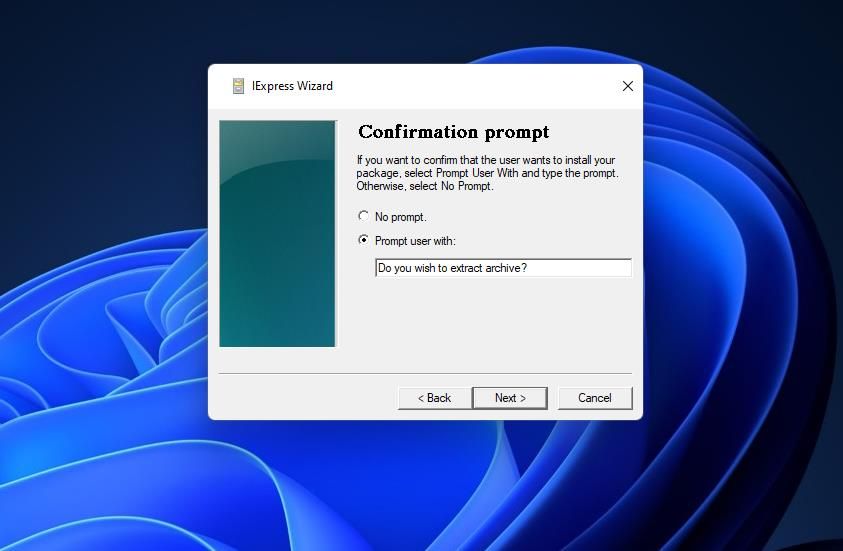
A confirmation prompt for extracting is an optional extra, but it’s a good idea to add one. To do so, select “Prompt user with” and input a confirmation message like “Do you wish to extract archive?”
ClickNext and select theDo not display license radio button.
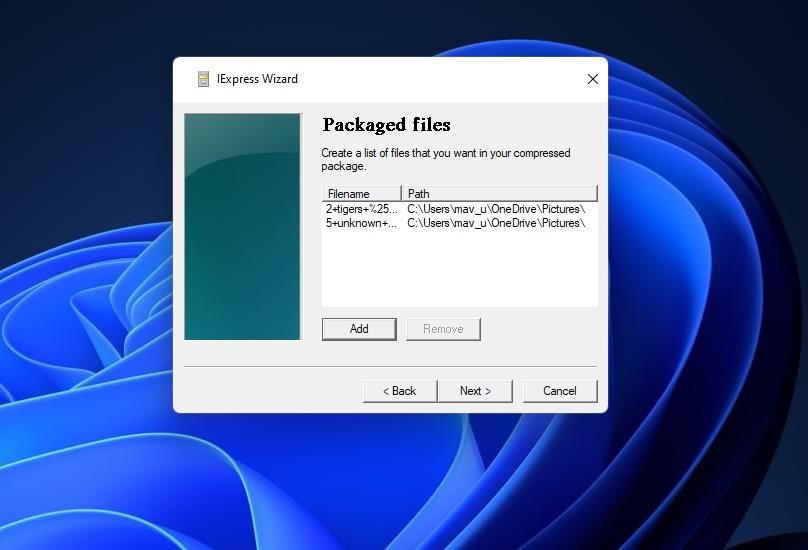
SelectNext again and then click theAdd button. Hold theCtrl key to choose all the files you want to include within the archive and clickOpen .
ClickNext to proceed to a Show window step. Select theDefault (recommended) option there.
Then selectNext again to go to the finish message step. As it’s not especially important to have a finishing message, select theNo message radio button.
Now we can get started using IExpress Wizard:
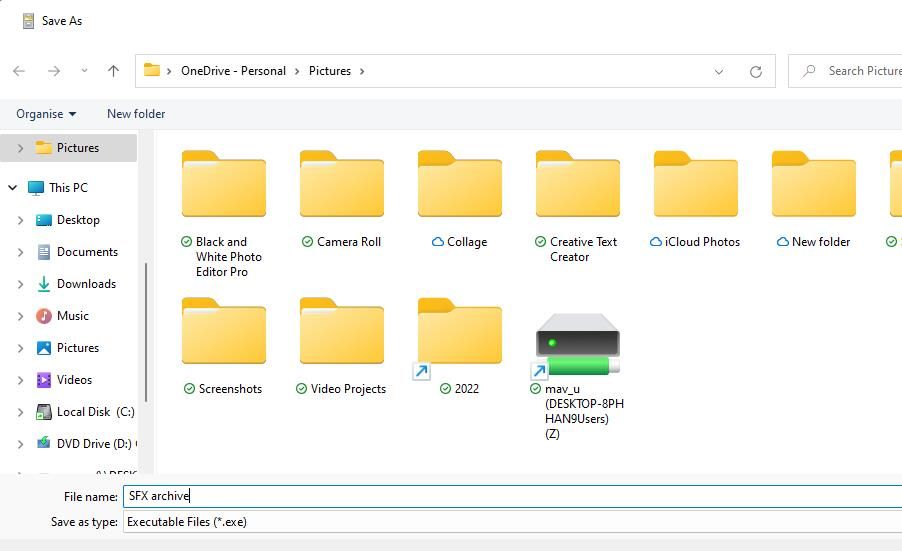
- ClickNext and press theBrowse button to select the folder that will include your archive.
- InputSFX archive in theFile name box to match the one entered at step six and clickSave .
- PressNext to reach the options for saving a SED. Click theDon’t Save option there.
- ClickNext twice more to create the archive.
- Wait for the package creation process to finish. Then click the Finish button on the IExpress wizard window.


company, user or members of the same household. Action! - screen and game recorder</a>
Testing the SFX Archive Made With IExpress
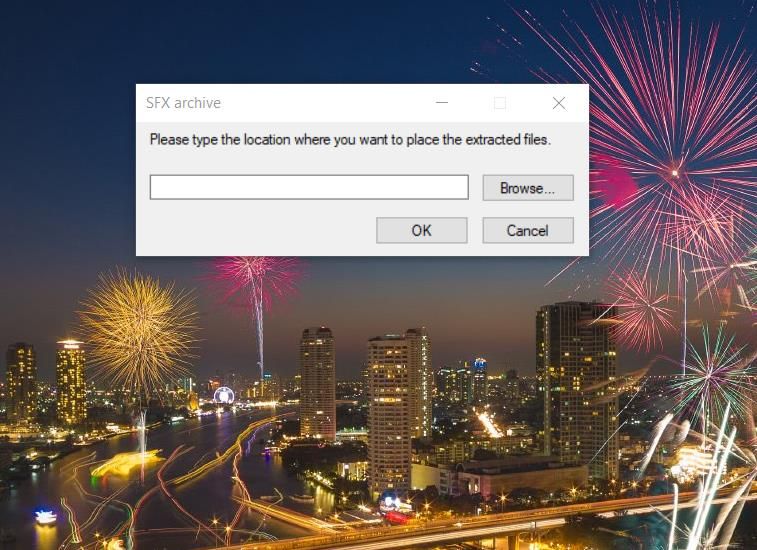
Now try extracting the files from your new self-extracting archive. Open the folder you selected to save the archive in. Then double-click the SFX archive.exe archive package.
A confirmation message will pop up if you set one up as instructed for step seven. ClickYes and then press theBrowse button to select a folder to extract the files. SelectOK to extract the files in the archive to the chosen folder. Then go to whatever folder you extracted the archive’s files in to open them from them.

Selecting theDon’t save SED option means you can’t modify the self-extracting archive after creating it. If you would prefer the archive to be editable, select theSave Self Extraction Directive option instead. Then you can change the archive later by selecting theOpen existing Self Extraction Directive file radio button within IExpress Wizard.

How to Set Up an SFX Archive With 7-ZIP
7-Zip is a freely available third-party extraction utility for Windows with which you can also set up self-extracting archives. You can set up SFX archives that have variable compression levels with 7-Zip. That software also enables you to encrypt your files within SFX packages. These are the steps for setting up SFX archives with 7-Zip.
- Go to the 7-Zip download page.
- Install Z-Zip on your PC.
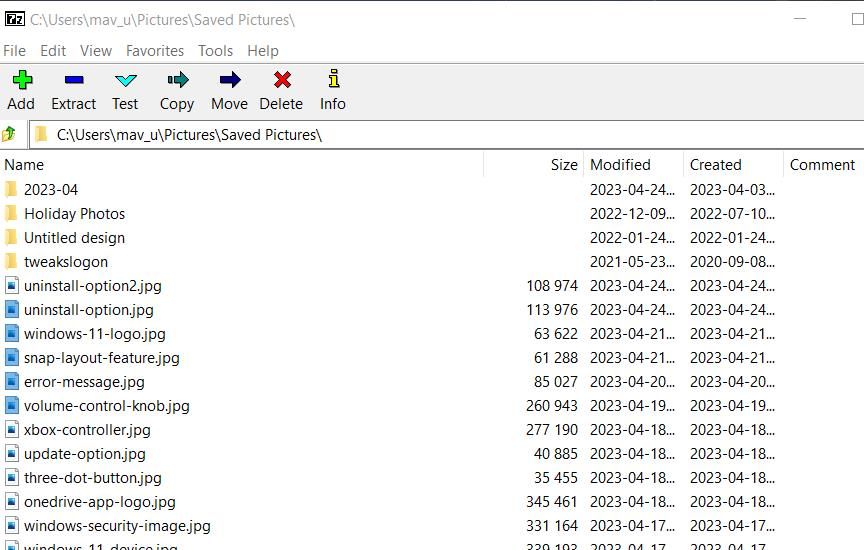
- Open the 7-Zip File Manager software, and navigate to a folder that includes some files to include in the archive within 7-Zip’s window.
- Select multiple files to add to an SFX archive by holding theCtrl key.
- Click theAdd button.
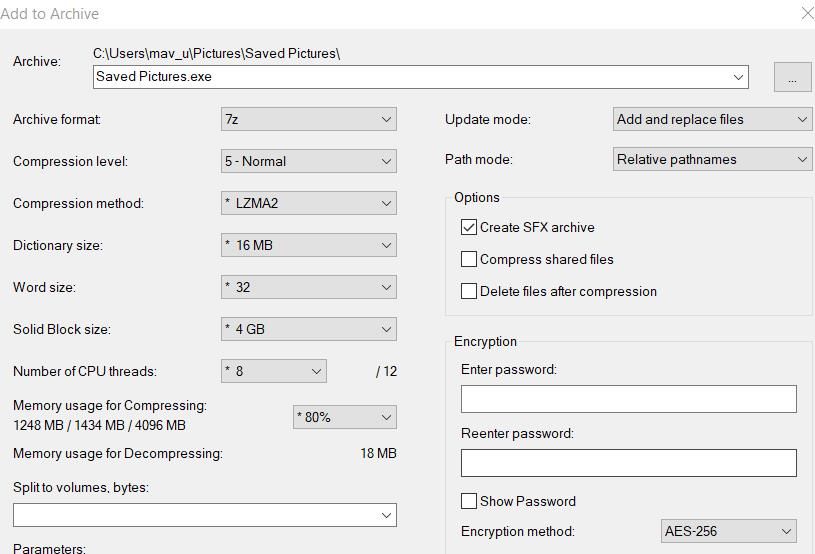
- Select theCreate SFX archive checkbox.
- Click theArchive box’s ellipses button.
- Choose a folder to save the SFX archive in and clickOpen .
- Input a file name within theArchive box.
- Press theOK button to create your new self-extracting archive.

Testing the SFX File With 7-ZIP
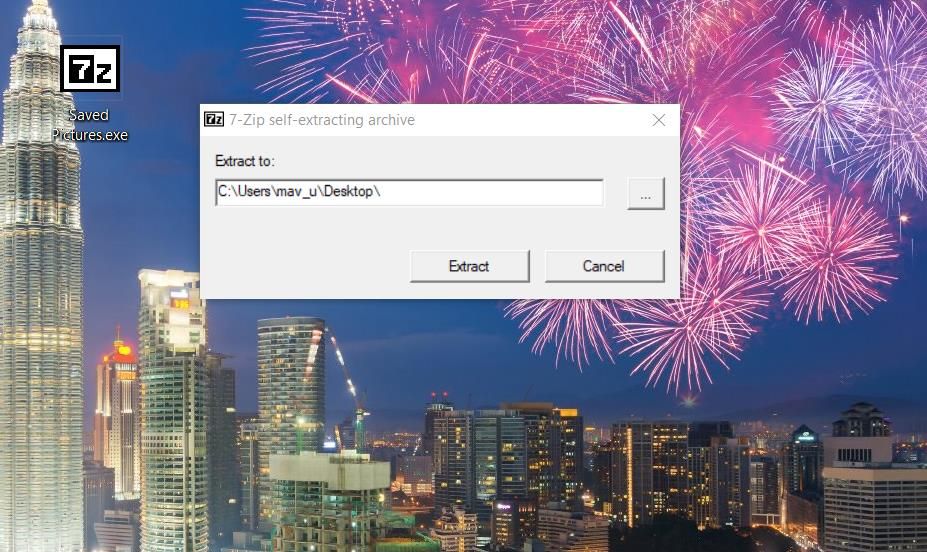
Check out the new self-extracting archive in whatever folder you saved it in. Double-clicking the archive will bring up a 7-Zip self-extracting archive window. Click the button for theExtract to box to select a folder. Then clickExtract to access the archive’s files in the selected folder.
 SwifDoo PDF 2-Year Plan
If you want to set a password for the archive, you can do so within 7-Zip’s “Add to archive” window. Input some text in theEnter password box there. Then users will need to input a password after double-clicking the self-extracting archive. The archive will have an AES-256 encryption method set.
By default, compression is set to a standard level five. However, you can change that by clicking theCompression level drop-down menu. SelectMaximum orUltra on that menu to increase the compression. However, those compression options are also the slowest.
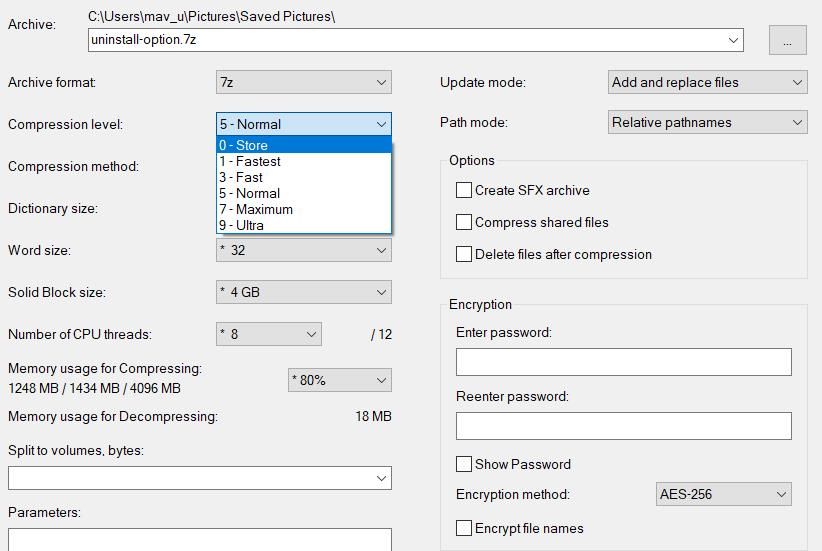

You can also configure the archive’s compression with theWord size andDictionary options. Setting a higherDictionary size setting increases the compression. A higherWord size setting can also enhance the compression ratio for the LZMA method.
Share Your Files Within Self-Extracting SFX Archives
It’s easy to set up self-extracting SFX archives with both IExpress and 7-Zip. Creating such archives will enable you to attach more files to emails because they reduce the overall attachment data sizes. Furthermore, recipients of such archives won’t need any extraction software installed to open them up.
However, note that self-extracting SFX archives aren’t cross-platform compatible. Users can only extract the archives on the same platform in which it was created. So, make sure you send your SFX archives to users with Windows PCs.
- Title: Step-by-Step: Creating Self-Extracting FX in Win11
- Author: Richard
- Created at : 2024-08-16 01:52:12
- Updated at : 2024-08-17 01:52:12
- Link: https://win11-tips.techidaily.com/step-by-step-creating-self-extracting-fx-in-win11/
- License: This work is licensed under CC BY-NC-SA 4.0.