Step-by-Step for Enabling Windows Assistants Using ViveTool

Step-by-Step for Enabling Windows Assistants Using ViveTool
Microsoft is incorporating AI technologies into all its popular services, including Windows 11, Microsoft 365, and more. Windows Copilot is Microsoft’s AI agent in Windows 11, designed to help you work more productively and get things done faster.
In this article, we will guide you through enabling Windows Copilot AI on Windows 11, though you’ll need a third-party tool.
Disclaimer: This post includes affiliate links
If you click on a link and make a purchase, I may receive a commission at no extra cost to you.
What Is ViveTool and Why Do You Need It to Enable Windows Copilot?

The third-party tool you need is ViveTool, a software that can enable hidden features or ones limited to select Windows users. Windows Copilot is one such functionality: at the time of writing, the feature is limited to select Windows users running Windows 11 Dev Insider builds.
You can join the Windows Insider Program and enroll your PC in the Dev Channel with a few simple steps to proceed with enabling Windows Copilot.
Once you’ve joined the Dev Channel, it’s time to download the ViveTool. To help you with the process, we have a detailed guide on downloading and using ViveTool to enable unreleased features .
To enable Windows Copilot using ViveTool, you’ll need to install Windows 11 Dev build 23493 or later.
How to Enable Windows Copilot Using ViveTool

Now that you’ve successfully installed ViveTool, you’re halfway through enabling the Windows Copilot on your PC. All you have to do now is enable some IDs using Command Prompt and update the Microsoft Edge browser. Below is the step-by-step guide on enabling those feature IDs and updating the browser.
- Open Command Prompt as an Administrator (see how to open Command Prompt as Administrator for steps).
- Type the below-mentioned command, and then hit Enter on your keyboard.
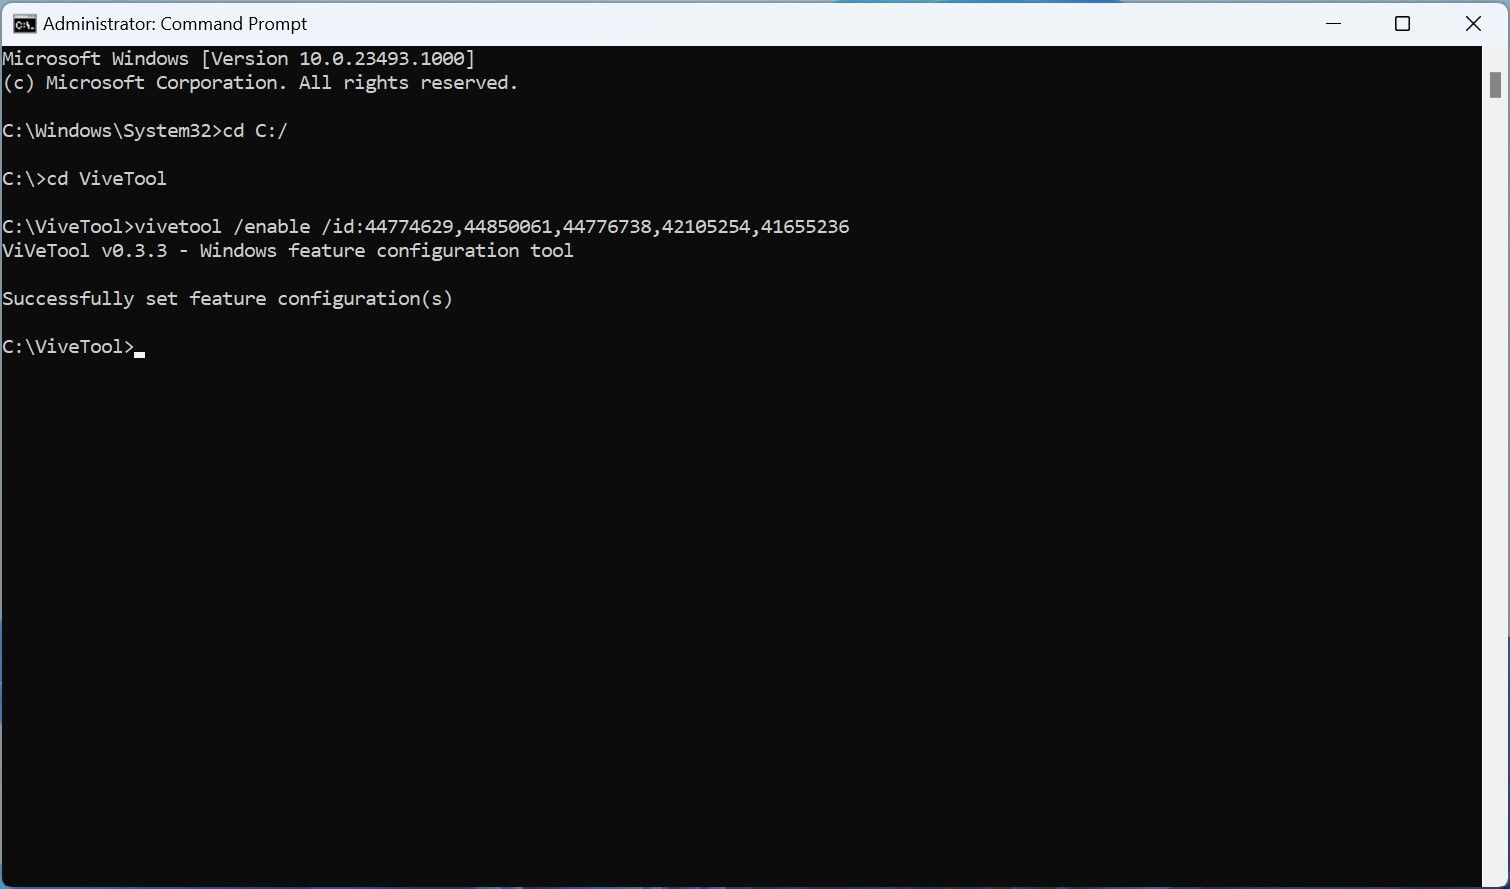
cd C:\ViveTool
If confused about where to put the extracted content of ViveTool, the most convenient route is C:/ViveTool. We did the same while enabling it, so we used the “cd C: \ViveTool” in the Command Prompt. - Copy and paste the following command and press Enter.
vivetool /enable /id:44774629,44850061,44776738,42105254,41655236 - Open Microsoft Edge, go to Help and Feedback, and then click About Microsoft Edge.
- Wait until the browser download and install an update.
- Restart your PC to make the change take effect.
You might have to restart the PC multiple times if you are not seeing the Windows Copilot logo on the taskbar.
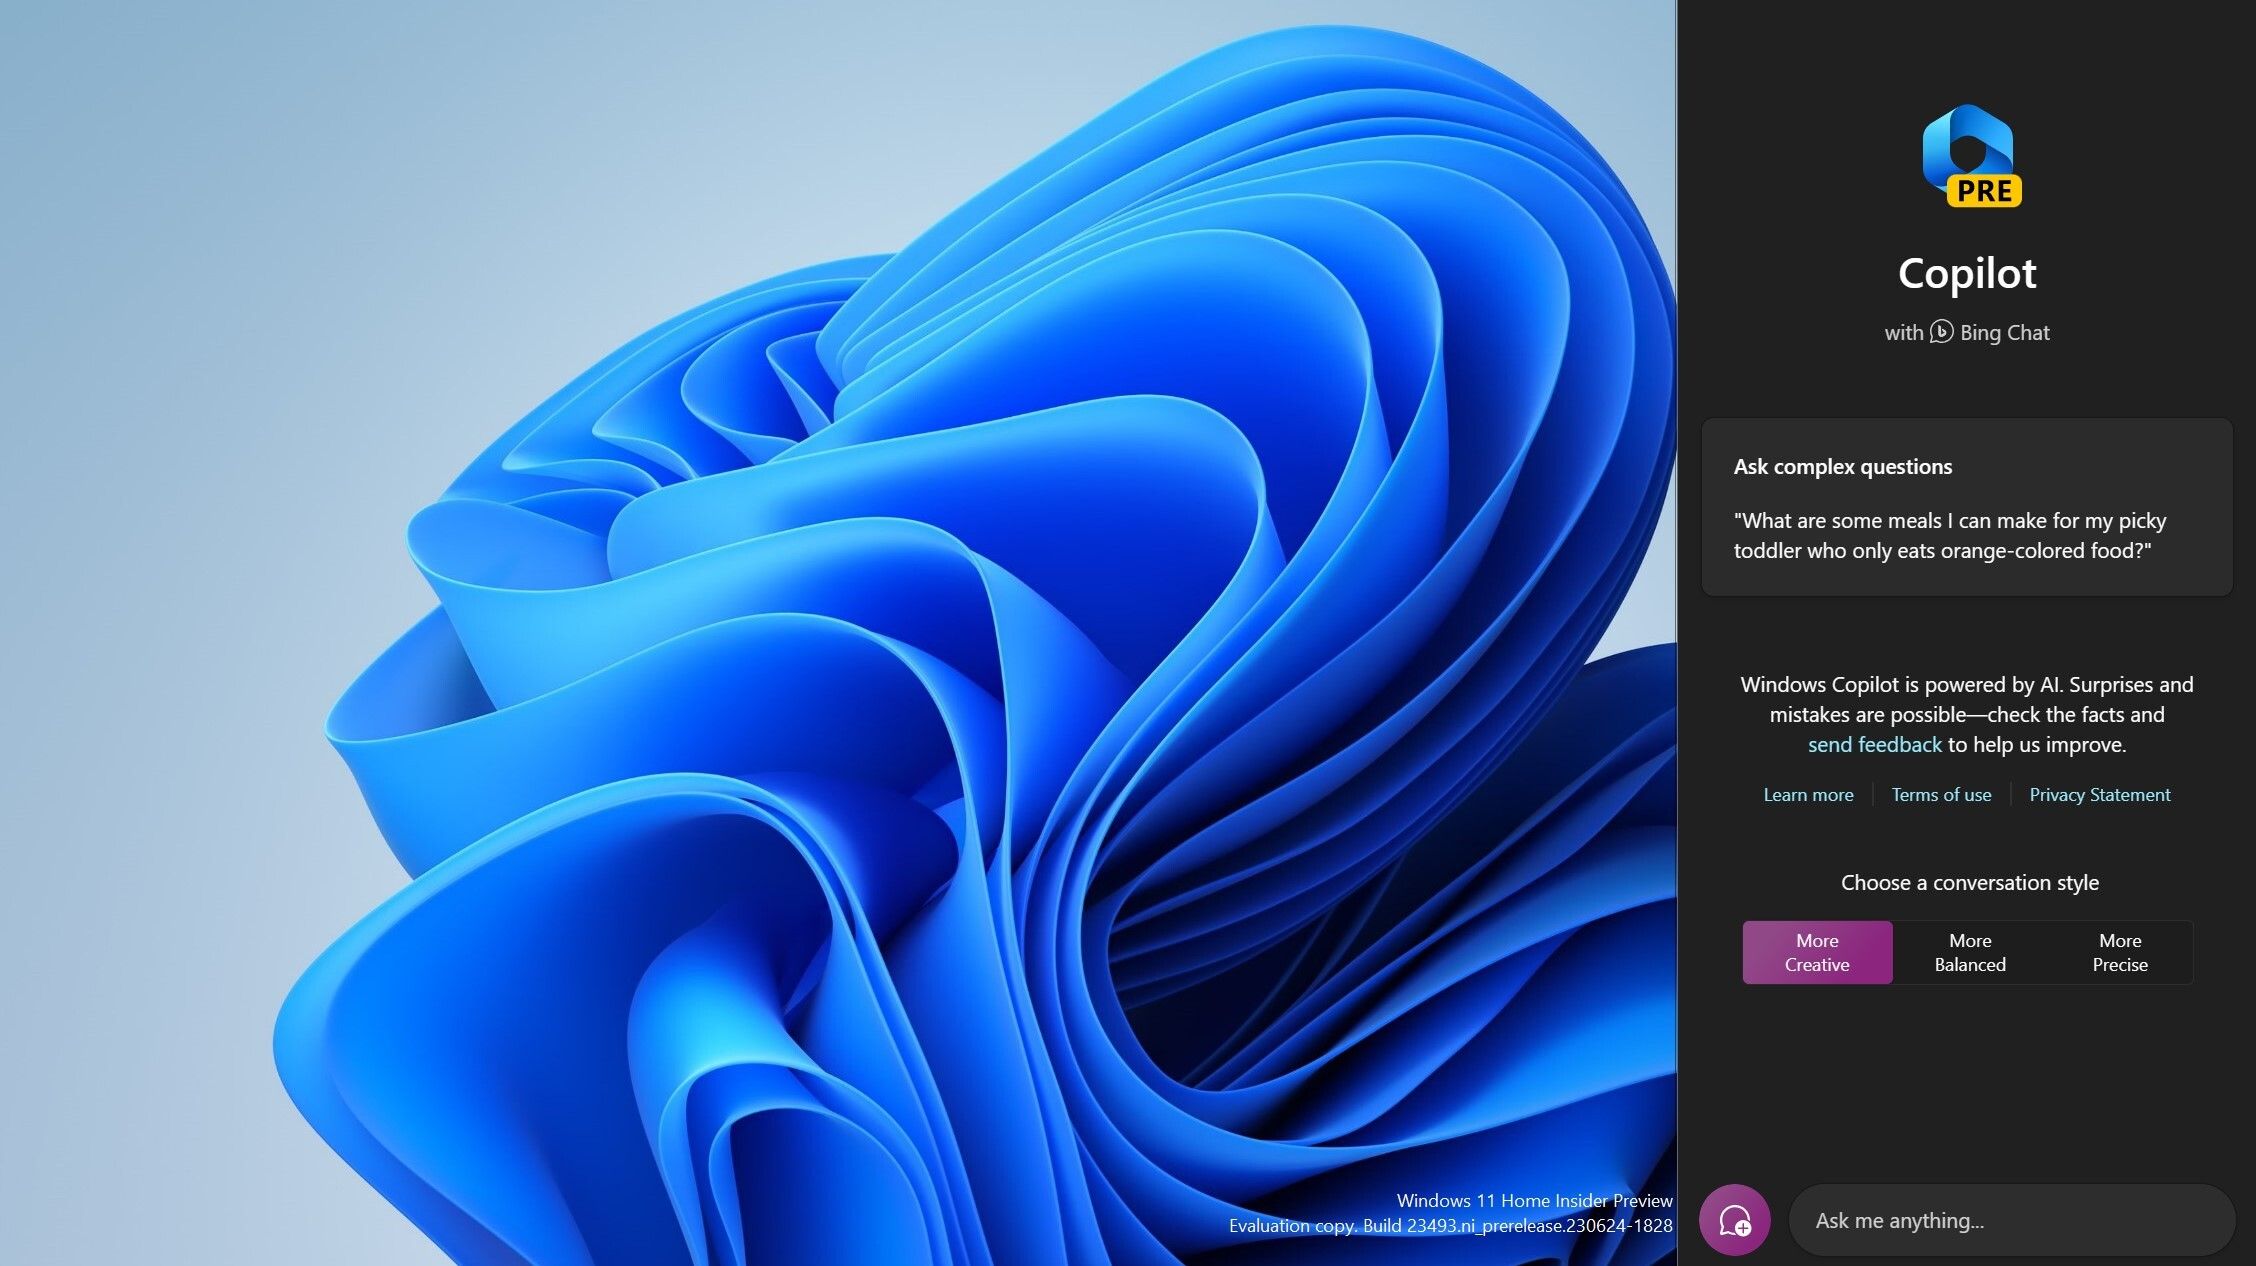
You can now launch the Windows Copilot on your PC by clicking on the taskbar icon or pressing the Win key + C on your keyboard. Windows Copilot will open on the right side of your screen. Now, you can try asking it to change your current Windows theme and see the magic. Of course, Windows Copilot can do much more than changing themes. Here is what Windows Copilot can do on your Windows 11 PC .
When Windows Copilot becomes available for everyone, you will no longer need ViveTool to enable it. You’ll be able to enable it from the Taskbar page in the Settings app. You’ll find the Copilot toggle in the Taskbar items on the Taskbar page.
Windows Copilot Makes Things Easier… but It’s Not Nearly as Powerful as Bing Chat
Windows Copilot is not available for everyone, and there is a reason for that. Microsoft will continue testing it with Insiders until it becomes ready for the general public. In other words, if you enable Windows Copilot using ViveTool, you will experience some issues. Windows Copilot is essentially Bing Chat built into Windows 11 and has system-level access.
However, the former may not be as good as the latter regarding stability and performance. The only significant advantage Windows Copilot has over Bing Chat is it can control Windows 11’s settings.
In this article, we will guide you through enabling Windows Copilot AI on Windows 11, though you’ll need a third-party tool.
Also read:
- [New] 2024 Approved The Art of Crafting Engaging IGTV Titles
- [New] Ideal Selection of Top 9 Mobile Video Collaboration Tools (iOS, Android) for 2024
- [Updated] 2024 Approved Agrarian Aesthetics Stardew Clones and Cousins
- 2024 Approved A Peek Behind Window's Curtain Top 30 Undisclosed Tips for Windows 11
- Expert Guide to Legally Boosting Your NVIDIA GPU Power While Keeping Warranty Intact
- Guide to Resolving Application Run-Time Problems on Windows
- How to Excel at Old Championship Manager on Windows
- How to Successfully Tackle Windows Update Error 0X80070002 for Smooth Operations
- In 2024, Quantum HDR Everything You May Want to Know About Quantum HDR
- Mastering the Resolution of OpenGL Error #3 in Windows
- Mouse Trail Enhancement for Better Navigation on Win11
- Prioritize Powerful Execution with Easy Terminal Admin Access
- Pushing Boundaries: Windows 11'S Features After Latest Update
- Resolving Invalid INF Configuration
- SnipStream Disrupted? Rekindle Its Seamless Flow Now
- Swift and Simple: How to Update Windows 10'S DeaDriver Seamlessly
- Tailoring Your Files to Win OS Standards (Max 156)
- Unleashing Performance at Your Fingertps: In-Depth Insights Into the Asus Zephyrus G14 Gaming Laptop
- What Causes a Warning Red X on Files?
- Title: Step-by-Step for Enabling Windows Assistants Using ViveTool
- Author: Richard
- Created at : 2024-11-04 12:57:09
- Updated at : 2024-11-07 02:58:45
- Link: https://win11-tips.techidaily.com/step-by-step-for-enabling-windows-assistants-using-vivetool/
- License: This work is licensed under CC BY-NC-SA 4.0.