
Step-by-Step Guide: Adding & Utilizing Microsoft Office Extensions

Step-by-Step Guide: Adding & Utilizing Microsoft Office Extensions
Quick Links
Key Takeaways
- To install an add-in, navigate to Home > Add-ins > More Add-ins and click “Add” when you find one you want.
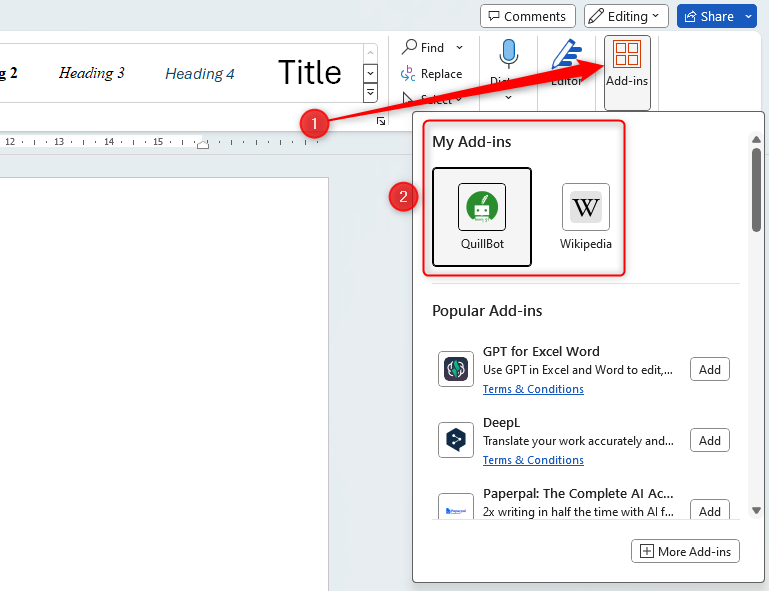
- To open an add-in, click the “Add-ins” button in the Home tab, then select the add-in you want from the list.
Microsoft Office allows you to add more functionality through add-ins. Many modern add-ins also work with Office for iPad, Office Online , and Office for Mac—not just traditional desktop versions of Office for Windows.
Add-ins are available for Microsoft Word, Excel, PowerPoint, Outlook, Project, and SharePoint. They allow you to do everything from citing text from Wikipedia or accessing a foreign language dictionary to using AI in your academic document or distributing meeting minutes.
How to Get Office Add-ins
You can get add-ins in one of two ways. In a Microsoft Office application (we’re using Word 365 as an example), you can click the “File” tab on the ribbon, and click “Add-ins.”
You can then quickly choose any of the add-ins available in the drop-down menu, or click “More Add-ins” for a broader choice.
![]()
The other way is to click the “File” tab on the ribbon and choose “Get Add-ins,” which takes you to the same place.
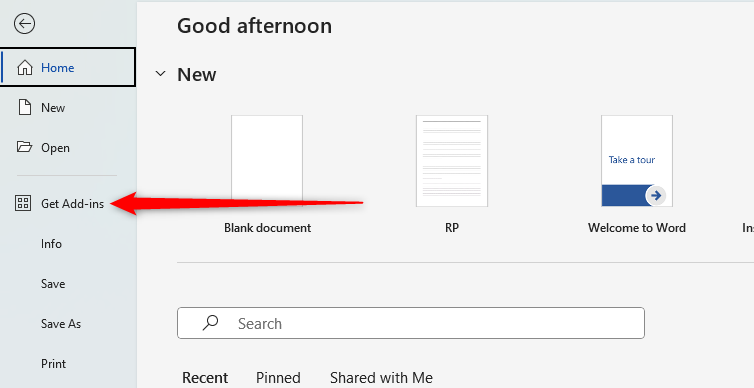
While we’re showing Word in Office 365 in the screenshot here, this option is available in the same place in other Office applications and Word for other platforms, including Word for iPad, Word for Mac, and Word Online.
The Office Ad-ins window will appear, allowing you to browse and search for available add-ins in the “Store” tab, or see which add-ins you already have in the “My Add-ins” tab.
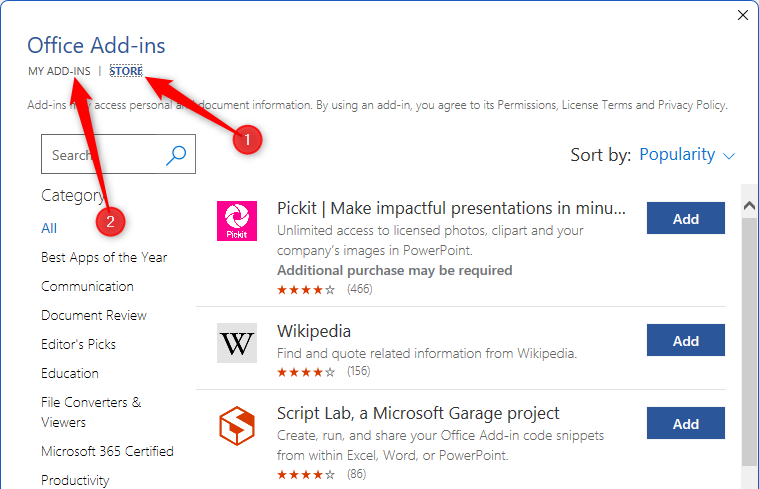
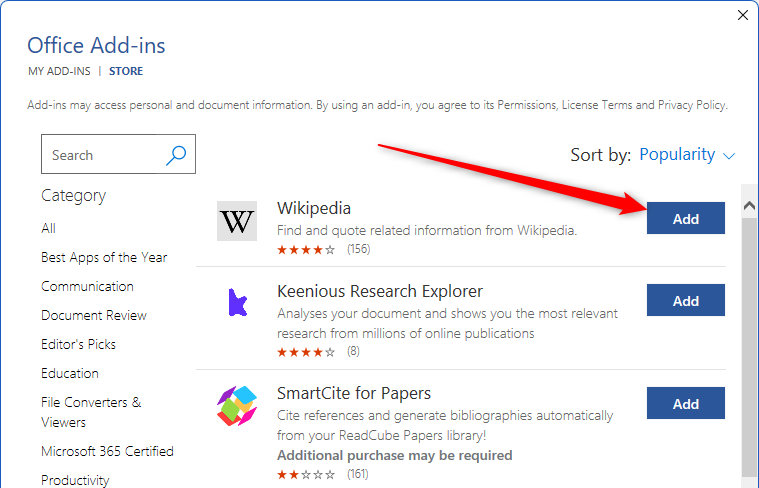
Once you’ve found an add-in you like, click “Add.”
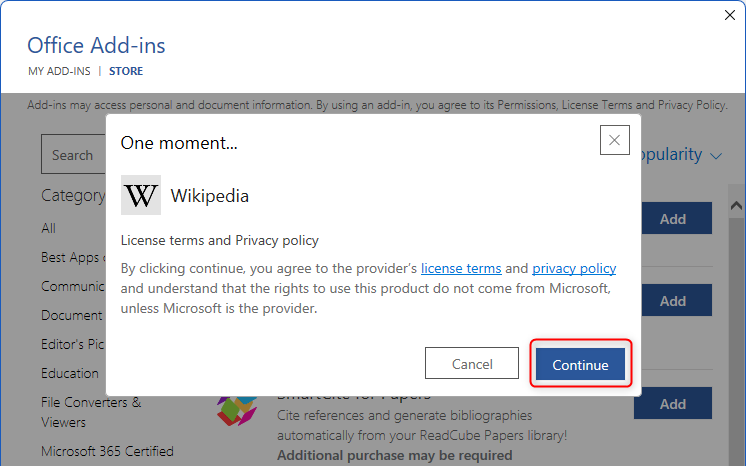
You will then see a privacy notice. If you’re happy with what it says, click “Continue.”
The add-in will immediately appear in a sidebar at the side of your Office document.
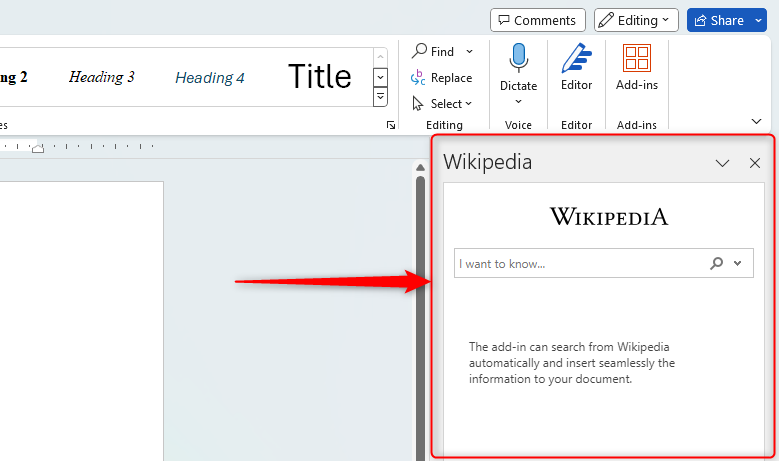
How to Open and Close Add-ins in Office
To load another add-in—or reload an add-in you already closed—go to Home > Add-ins, and click the add-in you want to open. The screenshot below shows what the add-in pane looks like with a second add-in installed to Office. You can even have multiple add-in panels open at once, if you have room for them on your screen.
Certain add-ins are only compatible with certain Office applications—so, for example, you might not see all the add-ins you installed on Word when you open Excel’s add-ins.
Be sure you’re signed in to the Microsoft Office application with the same account when you go to use add-ins in different Office applications online.
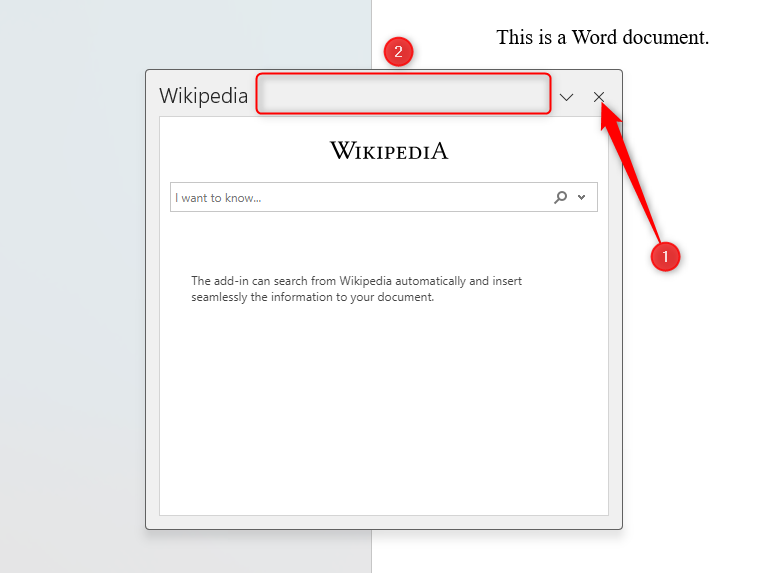
When you’re done with an add-in, you can close it by clicking the “X” button in the sidebar, or drag and drop the top of the add-in pane if you’d like to reposition it at the left-hand side of your document or turn it into a floating window that appears over the document.
How to Delete Office Add-ins
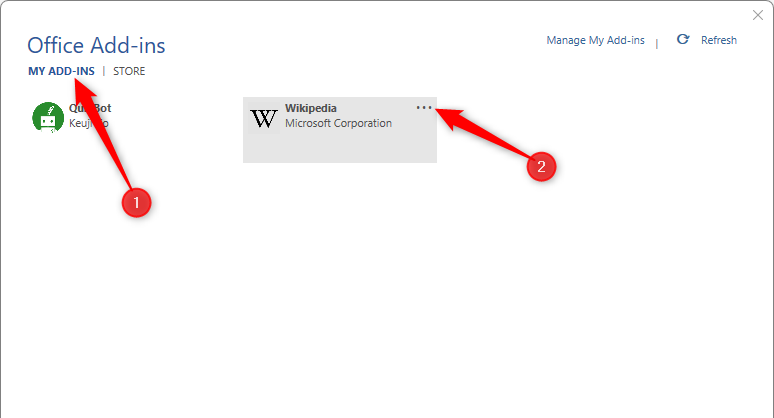
If you no longer want an add-in to be associated with your account, click the “Add-ins” icon, and click “More Add-ins.”
![]()
In the Office Ad-ins window, click “My Add-ins,” and click the three dots next to whichever add-in you want to delete. Finally, click “Remove.”
This will remove the add-in from your account, affecting all Office applications you use.
When you open the Office Ad-ins window, you can browse by category, including the editor’s best choices. We’d suggest starting your search there if you’re not looking for something specific. If you are trying to find something specific, use the search function instead to save yourself some time.
Also read:
- [New] 2024 Approved Access Exclusive Video Artwork – Free, Flawless, and Fast
- [New] FocusFlexZoom 7 Detailed Resizing at a Glance
- [Updated] Leveraging #Hashtags for a Huge Impact on Your YouTube Views
- [Updated] The Remarkable Effects of ASMR on You
- 2024 Approved The Creative Vanguard Top 6 Redefining Digital Arts
- Brief Scene Structure Summary for 2024
- Customizing Group Policies on Single User Profiles in Windows 11 & 11
- Fixing Steam Disk Operations in Windows
- Reclaim Your Microsoft Store: Steps to Fixes in Windows 11
- Solved Warning Camera Failed on Oppo A38 | Dr.fone
- Super User Tools in Windows' Interface Features
- Sync Windows Chronosphere: Time Unification Tactics
- Windows 11 Gets a Lifeline With Annual Patches Beyond Initial Release
- Title: Step-by-Step Guide: Adding & Utilizing Microsoft Office Extensions
- Author: Richard
- Created at : 2024-12-05 21:04:32
- Updated at : 2024-12-06 21:58:55
- Link: https://win11-tips.techidaily.com/step-by-step-guide-adding-and-utilizing-microsoft-office-extensions/
- License: This work is licensed under CC BY-NC-SA 4.0.