Step-by-Step Guide: Making Your Windows ClickLock Work Better

Step-by-Step Guide: Making Your Windows ClickLock Work Better
Enabling Mouse ClickLock when working on a desktop or laptop can make things easier and speedier. Once set, the ClickLock locks mouse clicks and lets you highlight or drag text without holding the mouse button down all the time.
ClickLock can help you use the mouse easily, especially if you are suffering from a hand ailment that hinders movement. Or maybe you find it more convenient to not hold down the mouse button. Either way, here’s how to turn it on.
Disclaimer: This post includes affiliate links
If you click on a link and make a purchase, I may receive a commission at no extra cost to you.
How to Turn On Mouse ClickLock via Settings
Enabling the Mouse ClickLock via Settings is a matter of a few clicks.
- TypeMouse Settings inWindows Search and click onMouse Settings underBest match .
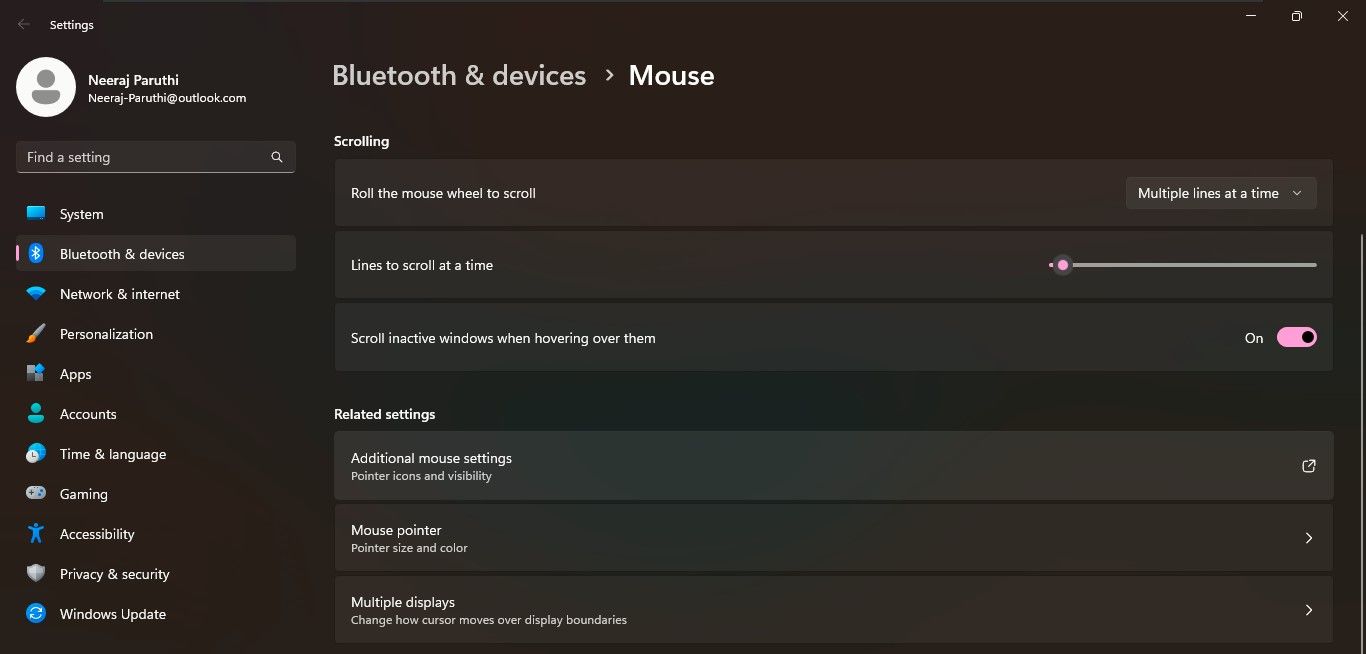
- Mouse settings will open underBluetooth and devices settings. Scroll down to theRelated settings section and click onAdditional mouse settings .

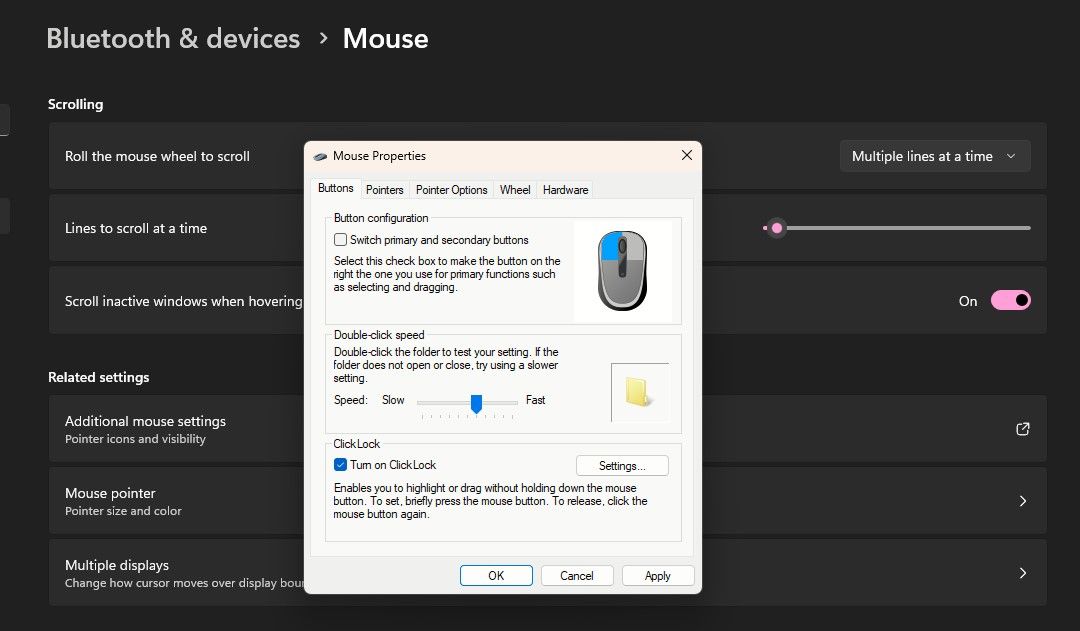
- TheMouse Properties window will open up.

You’ll see theClickLock section under theButtons tab. Simply tick the box next toTurn on ClickLock . Then click onApply andOK . And it’s done.
How to Set the ClickLock Time in Mouse Settings
When you start using the mouse with the ClickLock function, you may want to make the ClickLock time faster or slower. Yes, you can also set the duration for how long you need to hold the mouse down to lock a click.
- For that, go toMouse Settings > Additional mouse settings .
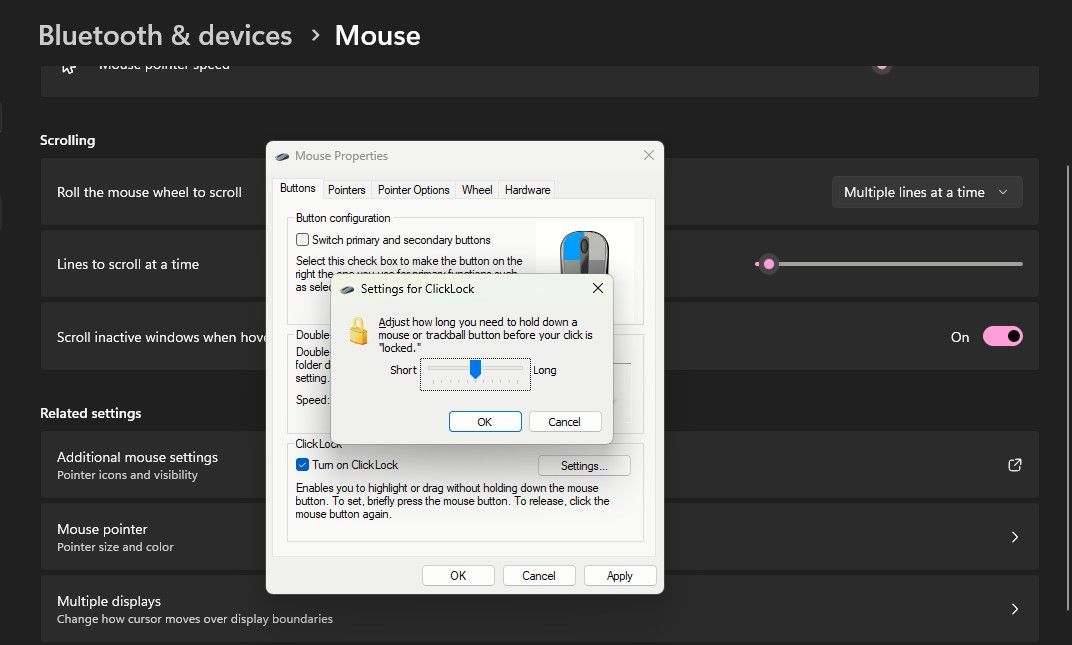
- Then open theMouse Properties window again and click onSettings in theClickLock section.

- A small window will pop up with a slider to let you set the ClickLock duration toShort orLong . Just use the slider to set your preferred time and click onOK .
- Finally, in the ClickLock section, click onApply and thenOK .
How to Set the ClickLock Time via Registry Editor
You can also set a precise ClickLock time in seconds. For that, you’ll need to use the Registry Editor.
But you should set a restore point before editing the Registry to ensure a recovery option. Once done, follow these simple steps:
- Press theWin + R keys, typeregedit in the navigation bar, and clickOK or hitenter to open theRegistry Editor . Or use one of themany ways to open the Registry .

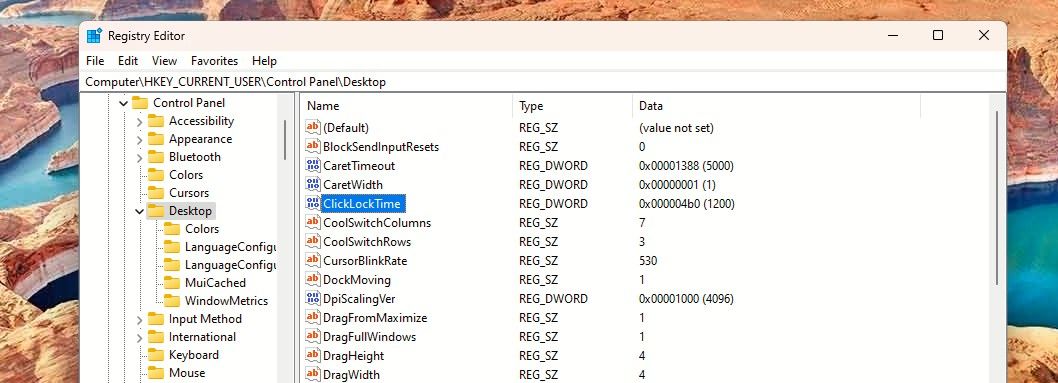
- Navigate to the Desktop key following this path:HKEY_CURRENT_USER\Control Panel\Desktop .
- Click on theDesktop key in the left pane. You will see theClickLockTime DWORD in the right pane.

- Double-click on theClickLockTime to edit the DWORD. Then, underBase , click onDecimal and change theValue Data for a shorter or longer duration in milliseconds.
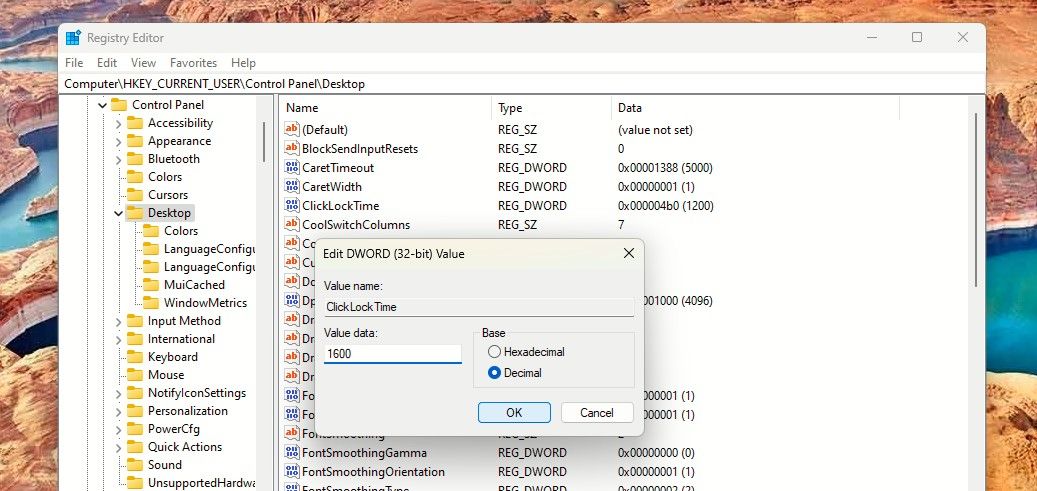
You can set the time between 200 to 2200 milliseconds. The default ClickLock time is 1200 milliseconds.
5. Once done, close the Registry Editor and restart your computer.
With the ClickLock set, you could alsoexplore cleaning the mouse properly for a more accurate experience.
Make Your Windows Experience Easier and Better
Try setting the ClickLock function for your PC mouse. It could make selecting a document text easier and become your preferred way to use the mouse on Windows.
Also read:
- [Updated] Dispatching Dreadful Green Screen Distortion on Mac-Editing Sessions for 2024
- [Updated] In 2024, Unlocking FreenoCam's Webcam Capturing Capabilities
- [Updated] Mastering Sleep Optimal ASMR Experiences & Picks
- 2024 Approved Essential Skills Android's Screen Recording Functionality
- Exploring Apple's Tech Spectacle: The iPhone 16 'Glowtime', AI Advancements, and the New Apple Watch Series 10 | ZDNET
- In 2024, Mastering the Art of PowerPoint Presentation Video Documentation
- Innocuous-Looking Apps, Notorious for Slowing Down PCs
- MOV to Redmi 13C converter-convert .mov files for Redmi 13C
- Overcoming Non-Starting Display on Windows 11 PC
- Patching Up a Purple Problem: Desktop Restoration Steps
- Resolving LSA Error: Local Sec Admin Disabled Alert
- Step-by-Step Guide: Implementing Windows Hello Fingerprints
- Title: Step-by-Step Guide: Making Your Windows ClickLock Work Better
- Author: Richard
- Created at : 2024-10-25 18:36:48
- Updated at : 2024-11-01 18:20:52
- Link: https://win11-tips.techidaily.com/step-by-step-guide-making-your-windows-clicklock-work-better/
- License: This work is licensed under CC BY-NC-SA 4.0.
